post

Acidic Soil: What It Is, How You Can Change It

Finding the right soil pH is important for the health of your plants. A proper pH balance helps plants develop strong root systems and uptake vital nutrients. While many gardeners focus on adding organic matter to their soil, testing soil pH levels is equally important.

Once you find your soil’s pH level, you can add things like limestone or elemental sulfur to balance it out. Acidic soil can be a real problem for your plants. It can stunt their growth and prevent them from absorbing basic nutrients needed for healthy plant development.

In this article, we’ll explain all about the importance of pH levels in your soil and how you can adjust them to help keep the plants happy and thriving. Let;’s get started.

What is Acidic Soil?

Acidic soil is soil that has a pH level of less than 7.0. This means that the soil is more acidic than neutral and can challenge plants to grow. The most common causes of acidic soil are high levels of rainfall, pollutants, and chemical fertilizers. The soil pH scale ranges from 0 to 14 with 7 as neutral.


Image credit: https://blog.zoysiafarms.com/

Acidic soil can have a harmful effect on plant growth by inhibiting nutrient uptake, damaging root systems, and causing leaf discoloration. It can also be a haven for pests and diseases.

Evaluating Soil

Identify Your Soil Type

Before testing your soil or adding anything to it, it is important to know what type of soil you have. Understanding the ecology of your land will help you determine if acidic soil is a result of natural conditions or something that you can fix.

For instance, well-drained soil and loose soil will be easily altered, while compacted soil with lots of clay in it will be difficult to change.

Understand Your Soil pH

Soil pH is a measure of how acidic or alkaline your soil is. A pH of 7 is neutral, below 7 is acidic, and above 7 is alkaline. The lower the pH, the more acidic the soil. Soil pH value can be affected by many things such as rainfall, organic matter, minerals in the soil, and the types of plants growing there.

Consider What You’re Planting

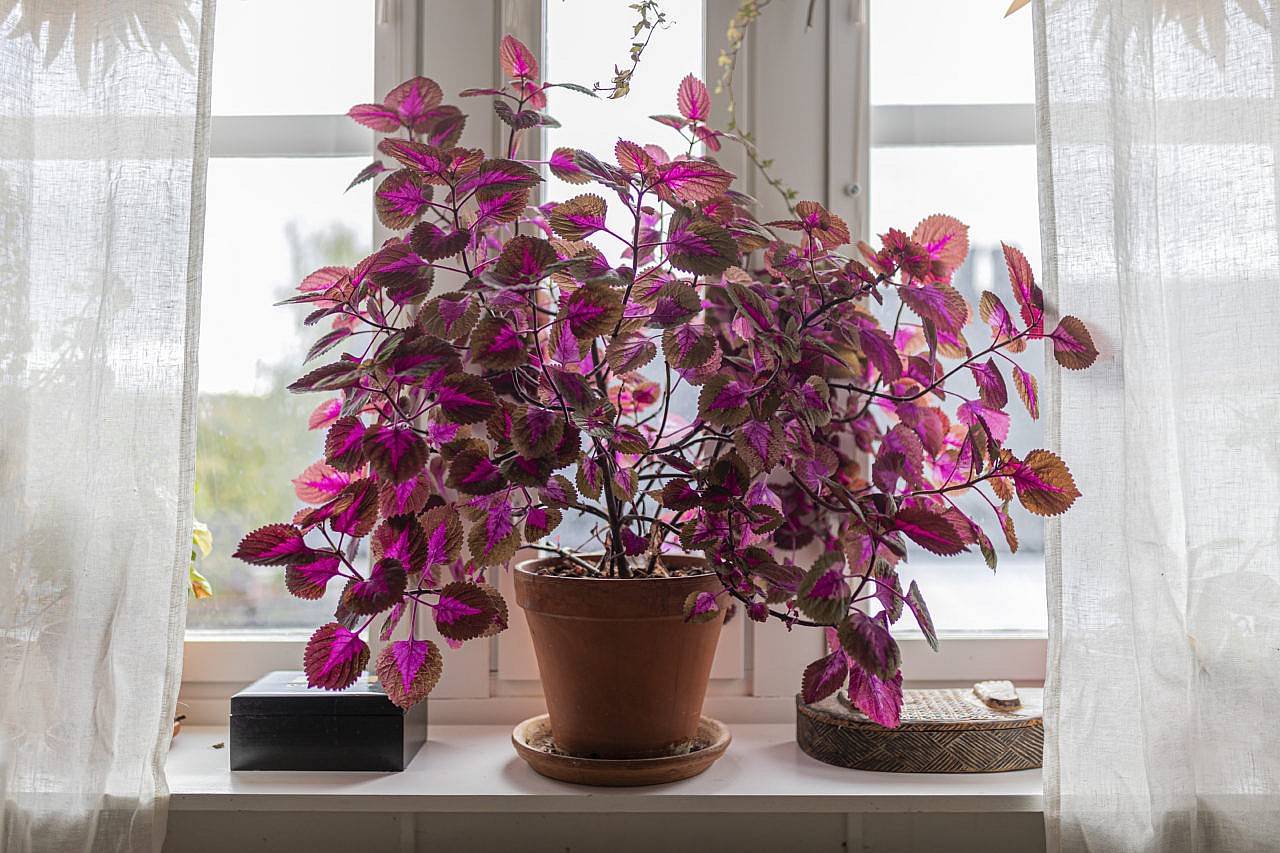
Some plants prefer more acidic soil than others. For example, blueberries and azaleas thrive in acidic soil, while rhododendrons and dogwoods prefer more alkaline soil. If you’re trying to grow a plant that prefers a different pH than your current soil, you’ll need to adjust the pH.

Test the soil’s pH

Testing the soil’s pH is as simple as buying a kit at your local nursery, or you can ask your county extension agent for a soil sample and testing instructions. Once you’ve tested the pH, make plans to raise or lower it depending on what kind of plants you want to grow and their preferred pH level. The good news is that there are simple DIY soil tests that you can do.

Have Your Water Tested

Your water supply might be what is affecting the soil’s pH level, so have a sample of your well or tap water tested to see what its pH is. If you don’t test the soil and the water, you’re not going to know whether your problem is with your soil or your water supply.

How to Change Soil pH

Make sure you check your soil’s pH every year by sending a soil sample to your local extension office to have them perform the test for you.


Increasing Soil pH

To make soils less acidic, the common practice is to apply a material that contains some form of lime. Ground agricultural limestone is also frequently used. Here are other ways of increasing the pH level of your soil:

Increasing Soil pH
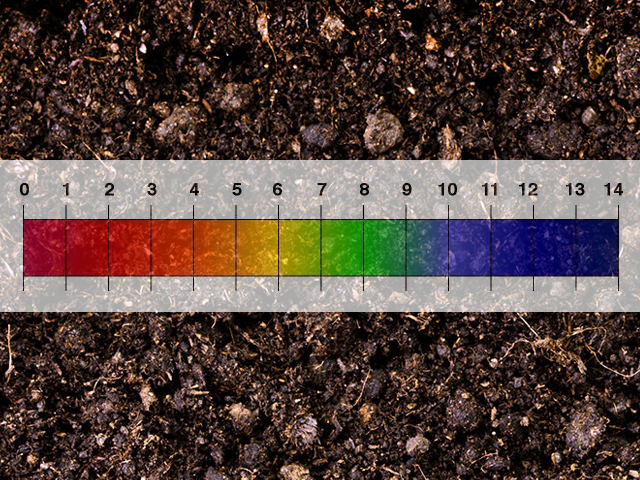
Image credit: https://deepgreenpermaculture.files.wordpress.com/

Pick a Liming Material

There are many liming materials on the market, and they come in different forms. These ground limestone products include pulverized, granular, pelletized, and hydrated. Depending on your soil type and the amount of moisture in the ground, one of these products might be a good option. 

Pulverized lime is finely ground and easily absorbed by the soil. However, it’s more difficult to spread because it can clog the applicator. Granular and pelletized lime is less likely to clog when spread with a fertilizer spread over turf areas.

However, it’s not as effective at altering the soil pH. Hydrated lime should be used with extremely acidic soils because it’s more water soluble and can quickly increase the soil’s pH. Some lime sources contain micronutrients like dolomite, a mixture of calcium and magnesium carbonates.

However, you should only use dolomite lime if your soil is magnesium deficient. Do not add more magnesium to soils that are already high in it.

Consider Adding Wood Ashes

Wood ashes can also be used to increase the pH of acidic soils. The potassium, calcium, phosphate, and boron in wood ashes help to make the soil more alkaline and provide some nutrients to plants. 

When using wood ashes, it’s important to take into consideration the amount of sodium present. However, wood ash is not as effective as lime, but it can dramatically increase a soil’s pH over time.

Due to this, you should closely monitor your soil as you apply wood ash. Keep the ash from contact with any plant roots or germinating seedlings because it may damage them.

pply the Liming Source

Once you’ve determined that your soil is acidic, the next step is to add a liming source. A liming source is an agent that helps raise the pH of acidic soils. There are many different liming sources available, but the most common are limestone and lime.

Water the Soil Regularly

Putting a liming source into your soil is not enough. You must water it to help it move through the soil to where you want it. Lime moves through the soil very slowly, so be patient; wait at least one growing season before testing your soil again.

Decreasing the Soil pH

Some types of fertilizers can also help acidify the soil and most of them are safe to apply. These acidifying fertilizers include monoammonium phosphate, ammonium sulfate, diammonium phosphate, urea, and ammonium nitrate. Make sure you read the label on the fertilizer bag to determine if it’s acidifying fertilizer.

Use Organic Materials

Over time, organic matter such as pine needles, compost, or composted manure can acidify the soil. If you have added organic mulches to your soil in the past, test your pH annually. Organic matter is also good in improving soil drainage and aeration.

Consider Applying Sulfur to Lower Soil pH

Sulfur can help adjust the soil’s pH to desired levels. It is especially helpful for high-pH soils. However, sulfur does not last as long as lime, so you may have to reapply every few years. You should use elemental sulfur rather than sulfate or sulfite forms of sulfur that can be harmful to plants.

An excellent way to lower the pH value of small beds or garden areas is the addition of sphagnum peat. Sphagnum peat is also a good source of organic matter. Granular sulfur is also the safest, least expensive, but the slowest acting product to use when lowering your soil pH. The addition of sphagnum peat to large areas would also be cost-effective.

pply Aluminum Sulfate if Soil pH Is too Low

If the soil pH value is too low, you can apply aluminum sulfate to increase the acidity. This compound makes the soil more acidic due to a chemical reaction involving aluminum. Be sure to read the product label to ensure that the aluminum sulfate you are using is specifically for agricultural use. Also, avoid applying aluminum sulfate if the soil is already too acidic.

Apply Aluminum Sulfate if Soil pH is too Low
Image credit: https://blog.lawneq.com/

Till the Materials into the Soil and Water Well

When applying lime, sulfur, or aluminum sulfate to the soil, be sure to till them into the soil and water well. This will help the materials to dissolve and move through the soil so that plants can absorb them. If you do not water your fertilizer well, plants may not receive all of its benefits.

Rinse Your Plant After Application

If you are applying any fertilizer to your plants, be sure to rinse them off with water after application. This will help to remove any residue that may remain on the foliage and prevent any damage from occurring. 

If sulfur or aluminum sulfate gets on the leaves of your plants, you’ll need to rinse it off with a hose. Failure to rinse them off can result in burns to the leaves and damage to your plants. Watering your plants will also help the compounds.

FAQs on Acidic Soil: What it is and How You Can Change it

What happens when the soil is acidic?

Soil acidity decreases the availability of plant nutrients such as phosphorus and molybdenum. It also increases the availability of some toxic levels, such as manganese and aluminum.

Is acidic soil good for plants?

No, it’s not. Acidity can stunt a plant’s growth and make it more susceptible to pests and disease. However, most plants thrive in slightly acidic soils because that pH affords them good access to all nutrients.

Why is it important to control the pH of the soil?

A soil’s pH is one of its most important characteristics because it influences the availability of essential nutrients for plants. By managing the pH, you can ensure your plants have what they need to thrive, increasing yields and decreasing inputs.

Final Thought on Acidic Soil: What it is and How to Change it

There you have. Taking your soil acidity into account is an important part of gardening, whether you’re trying to grow acid-loving plants or not. Luckily, it’s not difficult to manage the pH of your soil, and most soils can be brought into a desirable range with a little effort. 


The post Acidic Soil: What It Is, How You Can Change It appeared first on Kitchen Infinity.

Did you miss our previous article…
https://www.centrecountyfood.org/?p=904

post

How to Remove Gasoline Stains and Odors

Gasoline is one of the most difficult stains to remove from clothing or carpeting. The stain will not only be hard to remove, but it can also cause an unpleasant odor. Since gasoline evaporates quickly, you have a short time frame to clean up and treat the stain before it becomes permanent.

Luckily, there are several ways that you can go about removing gasoline stains and odors from your clothes and carpets. Below, we’ll cover some of the more popular removal methods.

Before You Begin

Before you start, make sure you test any detergents or cleaning solutions in an inconspicuous area to avoid damaging the fabric. Cleaning chemicals and the dryer’s high heat can interact with the gasoline, so it’s not safe to use a home dry cleaning kit for these stains.

If it’s dry clean only, immediately take the garment to a professional dry cleaner. Do not dry the clothes in a clothes dryer until the stain is entirely gone. This is because if gasoline is still present in the garment, it can ignite your dryer and cause a fire. 

Tools and Materials

Paper towelsSoaking basinWashing machineScrub brushBaking sodaWaterStain remover stick, spray, or gelAmmoniaVinegarOrange cleanerDish soap

Instructions

Remove Excess Gasoline

If the gasoline splashes on your clothing and has begun to soak into the fibers, you need to remove it as much as possible immediately. Place a couple of paper towels over the stained area’s top, press down, and then pat dry with another clean paper towel until no more gasoline transfers from the garment. 


Image credit: https://www.thespruce.com/

You can also use baking soda to absorb gasoline from a wet spot on your clothing. Make sure you prevent the flammable towels or cloths used for blotting from starting a fire by setting out the cloth or towel to air dry. Flammable gas fumes will dissipate in the open air.

Once your item is dry, find a sealable metal tin, put the towel or cloth in it, and wet the material until it’s damp. Seal the container and discard it with your trash. 

Pre Treat with Stain Remover

Before you treat the stain with a stain remover, test the product on an inconspicuous area of the garment to ensure that it does not cause any discoloration or damage to the fabric. Apply a liberal amount of the stain remover to the clothing.

Pre Treat with Stain Remover
Image credit: https://www.thespruce.com/

Stain removers can be found at most local grocery stores in either an aerosol can or a liquid form. Wash the clothing at the hottest setting appropriate for the fabric. Hot water is necessary to remove the gas fully from the clothing.

Use Liquid Dish Soap or Heavy-Duty Laundry Detergent

Dish soap has powerful enzymes that can help it break down oil and grease left behind by food, and it can work very well for other stains such as gasoline. You can also use enzyme-based heavy-duty liquid detergent.

Apply two tablespoons of dish soap or liquid detergent with a soft-bristled brush. Allow your clothing to sit for up to five minutes before soaking it in hot water for 30 minutes. Make sure you use the hottest water safe for the fabric type. Remember not to use DIY laundry detergent as it won’t be effective enough.

Treat with Baking Soda Paste

Another great way to remove gasoline stains and odors is to make a baking soda paste. Mix two parts baking soda to one part water in a bowl. Apply it to the stain, then use a scrub brush to rub it into the fabric. Leave your clothing out to air dry to absorb the paste, then brush off the excess baking soda.

If the stain and odor remain, repeat the step or soak the stained clothes overnight submerged in water with one cup of baking soda added. Wash, rinse, and check for odor. Repeat the baking soda paste application or baking soda soak until the odor is gone.

Soak Lingering Odors White Vinegar

If you still have a gasoline smell after trying baking soda, you can try using white vinegar. Pour white vinegar into a spray bottle and spritz the area where the gasoline odor is present. Let the vinegar sit for about 30 minutes, then blot it up with a cloth.

The vinegar smell will dissipate over time. If you want to get rid of the gas smell in your car, soak the gas with old towels or clean rags as quickly as possible. Then use a mixture of equal parts baking soda, white vinegar, and hot water to neutralize the odor. 

Rub and wipe it away with a clean rug. If the smell lingers, use a few sprays of Febreze to get rid of the smell.

Soak Heavily Soiled Items in Ammonia Solution

Another way to remove gas stains and odors is by using ammonia. Soak the clothing in the washer full of warm water and one cup of non-sudsing household ammonia. This will smell, so make sure you shut the lid. Let them soak for several hours overnight, then drain and wash as usual. 

The ammonia will neutralize the gasoline odor. Never use chlorine bleach or detergent containing chlorine with ammonia. This mixture can make a dangerous chlorine gas that produces toxic fumes.

Remove Gasoline Stain with Coca Cola

Another household remedy for gasoline odor and stains is Coke. Soak the stained clothing in a bucket of Coca-Cola and let sit overnight before washing as usual. This will also remove any grease, oil, or tar stains from items such as motor oil and grease stains on clothes, driveway spills, and grass trimmings stuck to your clothes after cutting the lawn.

You can also add two cans of Coke and one box of baking soda to a sink filled with cold water. The Coke will break down the stain while baking soda absorbs the odor.

Fast Orange Laundry Detergent

If you have a severe gasoline odor, Fast Orange is a laundry detergent that can help. This detergent is formulated to remove stains and odors on clothes caused by gasoline, oil, and other mechanical fluids. Add one cup to your washing machine and let it run through the entire cycle.

You can also use this detergent for hand washing by pouring a little of it into the water, stirring it up, and letting the fabric soak for about 30 minutes. Then rinse the clothing, and the gasoline stain and odor will be removed.

FAQs on How to Remove Gasoline Stains and Odors

Can you put gasoline-stained clothes in the dryer?

It’s not good to put gasoline stained clothes in the dryer because the heat will set the stain and make it harder to remove. The best way to dry clothing that has been stained with gasoline is to line dry or air dry the clothing outside. This will help to dissolve the fumes and reduce the risk of fire.

Can you use bleach on gasoline stains?

You should never use bleach on gasoline stains because it will make them worse. Gasoline stains are oil-based, and bleach will only set the stain, making it more difficult to remove.

Final Thought on How to Remove Gasoline Stains and Odors

Gasoline can be a tough stain to remove. But if you follow the above tips carefully, removing gasoline stains and odors won’t be a problem. Also, consider pre-heating the clothing with the right products to break down the stain and odor before washing to effectively remove these types of stains.


The post How to Remove Gasoline Stains and Odors appeared first on Kitchen Infinity.

Did you miss our previous article…
https://www.centrecountyfood.org/?p=900

post

10 Houseplants You Can Grow in Water

Growing plants in water is not a common practice. Houseplants that grow in water are beautiful and easy to care for. You don’t need any green thumb or special equipment to start growing these plants. All you need is a jar, fill it up halfway with clay pebbles at the bottom, add soil on top of the pebbles. You can then plant your seeds or seedlings and wait until they bloom.

The best part about houseplants that grow in water is that they will last forever without replacing them every year like other types of plants do. These are low maintenance indoor plants which means there’s no need for watering them very often or fertilizing them.  

What which ones are those plants? This article outlines 10 houseplants that grow in water and would be perfect for your home.

1. Spider Plant

This is a very decorative and popular houseplant with many small white flowers, perfect for decorating your home. Spider plant also makes one of the best plants for the bedroom, thanks to its beauty and air purification. It’s great because the leaves on the Spider Plant are so big and add contrast if you place them in a group with other smaller plants or flowers around them.

To grow this plant, take a few cuttings from the parent plant and place them in a glass jar or any container filled with water. You can leave them there or move them into a pot with soil after they root. If you plan on moving them to a pot, let the roots grow until they seem strong enough to support the plant.

2. Lucky Bamboo

Lucky bamboo is one of the easiest plants to grow in water without much sunlight or maintenance. It’s a popular type of houseplant because it’s believed to bring good luck and fortune to the owner. The hardy stalks of lucky bamboo can become a living centerpiece, no soil required. 

The indoor plants grow in water, and a narrow vase is a perfect fit for them. You can purchase these plants online, and their basic versions are inexpensive. The lucky bamboo tends to become top-heavy and will topple in smaller containers, so look for a container that’s sturdy enough.

Plant them in a wider container and surround them with colorful gravel or pebbles, which will add to the ornamental value and provide some support.

3. The Chinese Evergreen

The Chinese evergreen plant is also known as the claw or peace lily plant. The dark green leaves of this houseplant are shaped like claws, and they can grow to be four feet tall. This lush greenery is the perfect indoor plant for beginners because it’s hardy and doesn’t require too much attention.

Chinese evergreen plants are also carefree indoor plants tolerant of low light conditions and general neglect. These features make it a popular indoor plant for those looking for no-fuss greenery. This plant also makes an excellent office or dorm room plant. To grow it in water, clip six-inch-long stems, placing them in a bright room and indirect sunlight as too much light can cause algae growth.

4. Heartleaf Philodendron

Heart leaf philodendron is an easy-to-grow houseplant that thrives even in low light. To grow heartleaf philodendrons in water, cut off any stems hanging over the edge of a container and place them in indirect light until new leaves appear. These vining plants are harder to kill than to keep alive.


Image credit: https://www.thespruce.com/

It has glossy, heart-shaped leaves with stems that can cascade down four feet or more. If you want a more compact plant, occasional pinching back leggy stems will help maintain a bushy growth habit. To grow this tropical plant in water, take a four to eight-inch long stem cutting, remove the bottom leaves, and place them in water.

Keep the container in a site with bright light but away from direct sun. Also, avoid keeping the plant in a cold room as it grows best in temperatures above 70 degrees Fahrenheit. Feed philodendron plants occasionally by adding a drop of liquid organic fertilizer to the water.

5. Sweet Potato Vine

Although the sweet potato vine is a tender tropical, it can be grown in water indoors. Cuttings should be made from green stems and allowed to heal for at least 24 hours before planting them in containers filled with peat-based potting mix or a mixture of perlite or gravel and sand. This trailing plant can grow four to five feet long.

It has lime green, heart-shaped leaves, but many cultivars offer unique and eye-catching foliage. Leaf colors range from burgundy to purple to bronze, and foliage is also varied for layers of interest. You can clip pieces of the stems in autumn to grow indoors over winter, then take six to eight-inch long cuttings, clipping just below a leaf node.

6. Coleus

Coleus plants are easy to propagate and grow by rooting stem cuttings in water, allowing you to create a colony of handsome coleus houseplants. They make a lovely counterpiece in a mason jar filled with water. 

Coleus
Image credit: https://www.chatelaine.com/

To grow coleus, take a six-inch cutting and remove the leaves from the bottom four inches, then immerse it in a jar filled with water and watch it grow for several weeks. Adding a bit of compost tea to the water during monthly changes will help your coleus plants thrive. This plant also requires indirect sunlight, making it a great choice to grow indoors all year round.

7. Peace Lily

The peace lily is a lovely tropical plant with showy white flowers, which enjoys the humidity of the bathroom. It will grow in water as long as you provide it with indirect light and room to spread. In order for your peace lily plants to thrive, you should rinse them carefully before putting them into their jar of water. 

This will help remove any built-up fertilizer salts. If you buy peace lilies, examine their roots carefully for damage before planting them. Fill a container with distilled water and not chlorinated water, which will damage the plant. Cut a hole on the top of a plastic stopper and use this to keep the plant in place by placing it at the top of the container.

Insert your lilies in the container and ensure the roots are completely submerged. You can add a few drops of liquid fertilizers or a small quantity of water soluble fertilizer. However, be careful with a peace lily in the house as it’s among the plants that are toxic to pets

8. Wandering Jew

Wandering Jew is one of the easiest houseplants to grow using this method. The plant should be well watered before you place it in its container. You don’t have to worry about fertilizer because it has no nutritional needs. 

To grow a wandering Jew in water, submerge the cuttings from the mature wandering Jew plant in a jar of water, submerging only the stem and not the leaves as the latter submerged in water will rot the cutting. Leave in an area with plenty of sunlight and watch it root in just a few weeks.

9. Impatiens

The key to successfully growing impatiens in water is to select the right kind of stem cuttings. Take young, soft shoots that are just pink in color with no flowers or buds. Cut off about 1 inch of these shoots under running water.

Impatiens
Image credit: https://www.chatelaine.com/

Impatiens can also grow as marginal pond plants, and that’s how much they adore water. Snip off a few stems at the end of the growing season and overwinter them in a vase where they’ll root and grow as clones of the parent plant.

10. Pothos Plant

Pothos plants are some of the easiest houseplants to grow in water. Cut off a stem or two from an existing pothos plant and place them in a vase or jar of water. Plant the stems in the soil as soon as they root (usually within 2-3 weeks). Make sure the potting soil is damp but not wet.

Pothos Plant
Image credit: https://empire-s3-production.bobvila.com/

FAQs on Houseplants You Can Grow in Water

What are growing plants in water called?

The technique of growing plants in water without soil is called hydroponics.

What are the benefits of houseplants grown in water?

Houseplants grown in water generally have more vigorous growth and lush foliage than those grown in soil. They’re also easier to care for because you don’t have to worry about watering them regularly or fertilizing them.

Final Thought on Houseplants that You Can Grow in Water

Are you looking to add some green cover but lack space and time in your home? Well, with these house plants that need only water to grow, it’s easy to have some plants around that don’t require much attention. In addition, these indoor plants add life to an otherwise dull dorm or living room. So, what are you waiting for? Plant these house plants and enjoy the beauty they bring.


The post 10 Houseplants You Can Grow in Water appeared first on Kitchen Infinity.