post

Brown Patch Lawn Disease

Brown patch lawn disease is a common problem that affects many gardens.

Brown patches on your grass are not always caused by the same type of fungus or bacteria, so it’s important to have a professional identify the problem before you try to fix it yourself.

In this article,  we will discuss what brown patch lawn disease is, the signs of brown patch lawn disease, how to prevent and treat brown patch lawn disease, and where you can find more information about diagnosing and treating brown spot diseases in your yard. Keep reading to find out more. 

What Is Brown Patch Lawn Disease?

Brown patch lawn disease is a fungus that affects grasses. It can cause patches of your lawn to turn brown, and in severe cases, it can kill the grass. The fungus thrives in hot, humid weather, and so the best way to prevent brown patch lawn disease is to make sure your lawn is healthy and well-maintained.

Image Credit: http://scotts.com

By watering your lawn properly and mowing it regularly, you can help to keep the grass healthy and reduce the chances of brown patch lawn disease. If you do notice signs of brown patch lawn disease, it’s important to take action right away to prevent the fungus from spreading.

Alternatively, you can also treat brown patch lawn disease with fungicides. There are many different types of fungicides available, so it’s important to talk to a professional about which one is best for your situation.

Signs Of Brown Patch Lawn Disease

The most common sign of brown patch lawn disease is a large, circular patch of brown grass. The edges of the patch will be well-defined, and the centre will be relatively dry. In some cases, you may also see small patches of pink or purple fungus growing on the edge of the brown patch. If you see any of these signs, particularly if you live in an area where the fungus is common, it’s important to have your grass tested.

Another common sign of brown patch lawn disease is the appearance of lesions on the leaves of the grass. These lesions will be dark green or brown, and they will often have a yellow halo around them. If you see any lesions on your grass, it’s important to contact a professional right away.

How To Prevent And Treat Brown Patch Lawn Disease

Brown patch lawn disease is difficult to eliminate, but there are some things you can do to ensure that it doesn’t spread or get worse. The best way to prevent brown patches is to keep your grass healthy by regularly mowing, fertilizing, watering, and aerating it. If you have prolonged periods of hot weather every year, consider installing shade trees so that your yard is cooler. If possible, choose two different kinds of grasses for your yard so they don’t all die at once if one type gets sick.

Moreover, you can also treat brown patch lawn disease with fungicides. There are many different types of fungicides available, so it’s important to talk to a professional about which one is best for your situation.

If you do see signs of a brown patch, it’s important to take action right away to prevent the fungus from spreading. You can treat the fungus with fungicides, or you can try to remove the affected areas of grass and replace them with new sod. It’s important to remember that brown patch lawn disease can be difficult to get rid of, so you may need to take these steps more than once to get rid of the fungus completely. Speaking of fungus, here’show to get rid of mold

Finally, it’s important to remember that not all patches of brown grass are caused by brown patch lawn disease. Many other things can cause your grass to turn brown, such as drought, pests, and poor soil quality. If you’re not sure what’s causing the problem, it’s best to contact a professional so they can diagnose the issue and recommend a course of treatment.

Other Important Considerations

If you hire a company to diagnose and treat your lawn, make sure that they use environmentally-friendly fungicides. Some types of fungicide can be harmful to the environment and even pets and children. It’s also important to water your lawn after treating it with fungicide because too much moisture will encourage the fungus to grow again.

You should also remember that brown patch disease is more likely to attack the cool-season grasses in your yard. Tall fescue, Kentucky bluegrass, and ryegrass are all very susceptible to brown patch disease. This means that some parts of your yard may die while other parts thrive depending on what type of grass grows there naturally.

Bermuda grass is less susceptible to brown patches, so if you have this type of grass in your yard, you’re less likely to see signs of fungus.

In short, brown patch lawn disease is a difficult fungus to get rid of, but there are some things you can do to prevent it from spreading or getting worse. If you see any signs of the disease, contact a professional right away so they can recommend a course of treatment. 

Remember that not all patches of brown grass are caused by brown patches, so it’s important to diagnose the problem before taking any action.

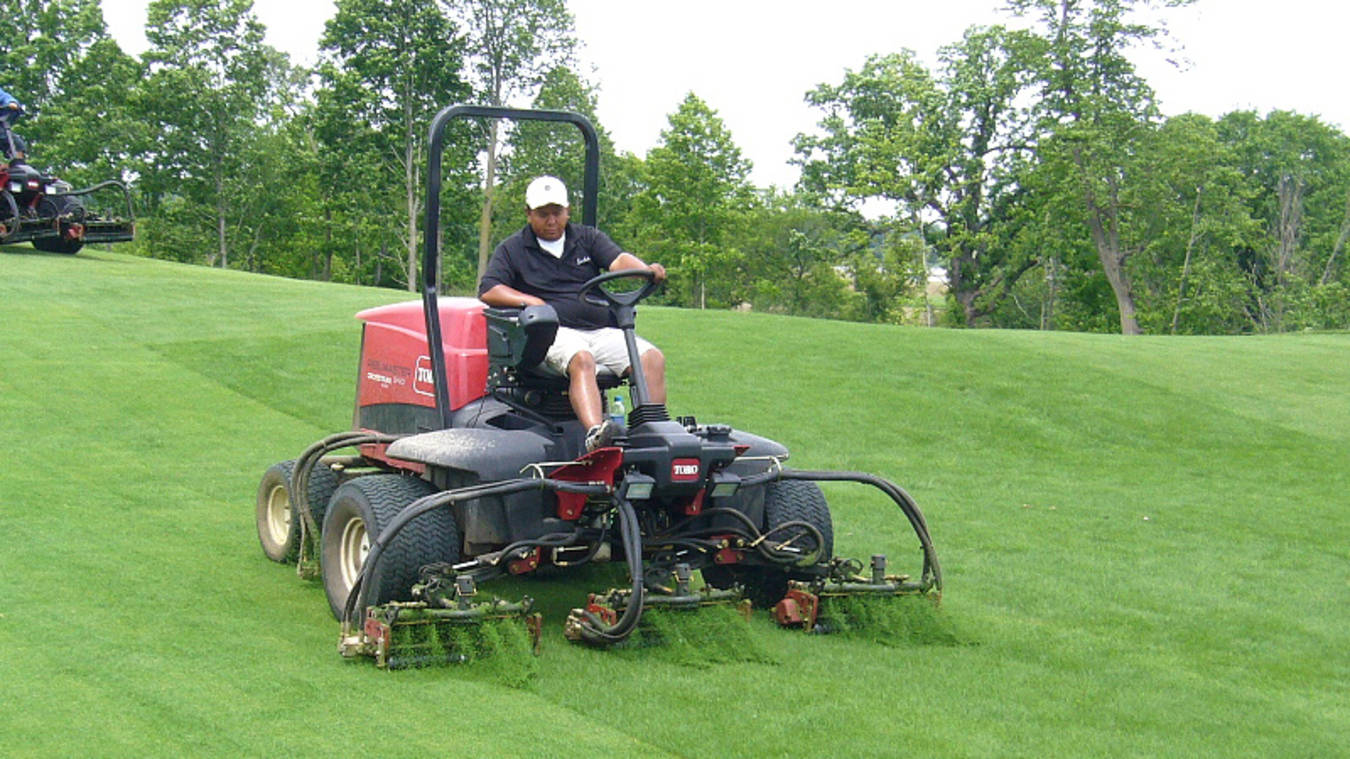
The weather conditions

Humid weather combined with cloddy soils can cause a fungal brown patch. The fungus that causes the disease proliferates in moist conditions. To prevent brown patch lawn disease, strive to keep your grass as dry as possible. Watergrass deeply and infrequently to encourage deep root growth.

How to Identify, Control and Prevent Brown Patch - Lawnstarter

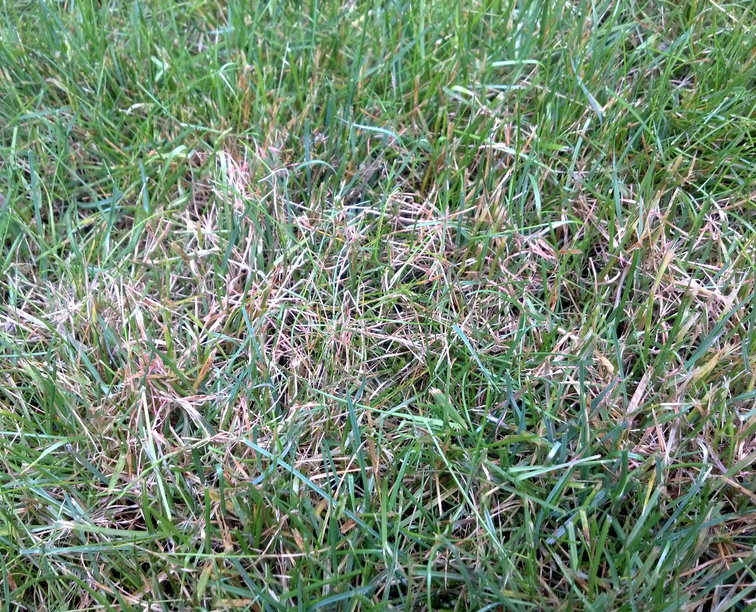
Image Credit: http://lawnstarter.com

Brown patch lawn disease – FAQ

When does brown patch lawn disease show up?

Brown patch lawn disease often appears in late summer or early fall.

What are the symptoms of brown patch lawn disease?

The most common symptoms of brown patch lawn disease are circular patches of dead, brown grass. These patches can often be several feet across and can spread rapidly.

What causes brown patch lawn disease?

Brown patch lawn disease is caused by a fungus that thrives in moist conditions. The fungus feeds on the grass’s leaves, causing them to die and turn brown.

How can I treat brown patch lawn disease?

There is no cure for brown patch lawn disease, but you can take steps to prevent it from spreading. You can start by mowing your lawn at the proper height and removing dead or dying patches of grass as soon as you notice them. 

Finally, try to keep your lawn as dry as possible; don’t let water stand on it for long periods, and make sure that you’re not over-watering your lawn.

What do dark rings around the patches mean?

If you see dark rings around the patches of brown grass, it means that the fungus is also attacking the roots of the grass. This can kill the grass and cause it to turn black.

What should I do if my lawn is severely affected by brown patch disease?

If your lawn is severely affected by brown patch disease, you may need to replace it with new grass. You can start by removing all of the dead or dying grass and then tilling the soil to loosen it up. Next, spread a layer of topsoil over the soil and then sow the new grass seeds. Finally, water the area well and keep it moist until the seeds germinate.

Final thoughts on brown patch lawn disease

In conclusion, brown patch lawn disease is a serious problem that can cause a lot of damage to your lawn. Early detection and treatment are essential for preventing any long-term damage. Be sure to keep an eye on your lawn and contact a professional if you suspect that your garden may have this disease.

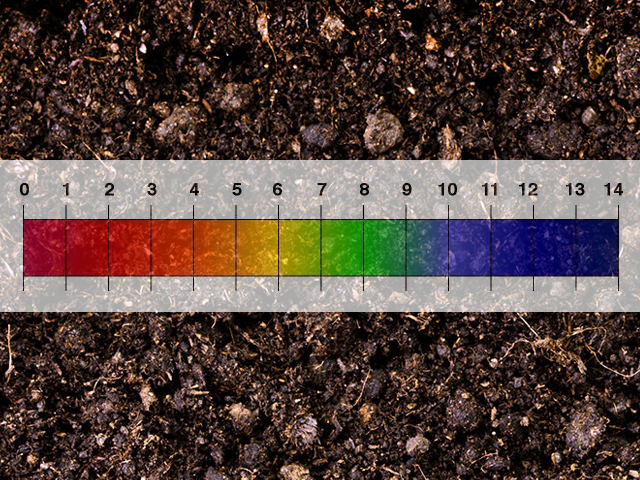
For further reading, check out this post onhow to test soil ph. This will ensure that your soil isn’t too acidic and won’t end up having trouble absorbing the right nutrients.

The post Brown Patch Lawn Disease appeared first on Kitchen Infinity.

Did you miss our previous article…
https://www.centrecountyfood.org/?p=954

post

DIY All-Purpose Vinegar Spray

Vinegar is a miracle cleaner and disinfectant. It can be used to clean many surfaces in the home, including kitchen counters and sinks, toilets, bathtubs and showers , windows and mirrors, as well as floors.

In this article, I’ll tell you how to easily make vinegar spray so you can start using it to clean your home. Let’s get right into it.

Making DIY All-Purpose Vinegar Spray

Making and using vinegar and water spray is so easy and cheap, you can almost do it with your eyes closed.

Image Credit: http://livesimply.me

All you need is:

A spray bottle (if it’s plastic go for the 1-litre size if it’s glass get one of 0.5 litres). The small 0.25 litre plastic bottles are also great because they are small enough for storage purposes yet large enough to use when cleaning larger areas.Vinegar. Plain, white distilled or apple cider vinegar will do fine here. You can also make your fruit-flavored vinegar by adding some juice from oranges, lemons, or apples to regular white distilled vinegar in a ratio of about 1 part fruit juice to 3 parts white wine vinegar. For each cup of fruit juice you use, add 1 tablespoon of sugar to the vinegar.

To make the spray:

Fill your spray bottle with white distilled or apple cider vinegar. If you’re using fruit-flavored vinegar, fill it halfway with that and halfway with white distilled vinegar.Fill the rest of the bottle with water.Shake well before each use.

That’s it. How easy was that? Now you’re ready to start cleaning your home with this powerful natural cleaner.

Important Tips To Keep In Mind

There are a few things to keep in mind when using your DIY all-purpose vinegar spray:

Using A Paper Towel 

Using a paper towel will help to avoid streaks on surfaces like mirrors and windows. Just spray the vinegar mixture on the surface, wait a few minutes for it to work its magic, then wipe off with a paper towel.

Safety First.

Vinegar is a powerful cleaner, so always take precautions when using it. Never mix it with other cleaners (such as bleach) or use it near an open flame. Keep it away from children and pets, and never drink it.

Do Not Use On Marble Surfaces 

Vinegar is very hard on marble surfaces so don’t use this cleaner if you have marble floors. This is especially true with marble kitchen countertops. Marble can be damaged by vinegar, so use this spray sparingly if you have marble surfaces in your home.

Using Lemon Juice In Place Of Vinegar

Lemon juice is a great replacement for vinegar in most cases when making DIY all-purpose cleaners. It has the same disinfecting properties as vinegar, but I find it’s less harsh on my hands and smells better too. 

A good way to get rid of bad odors is to mix some lemon juice (room temperature) with baking soda until it forms a paste-like substance, then spread it over the areas that smell bad (such as fridge shelves or garbage bins). Let sit for 15-30 minutes before wiping with paper towels. This will help to remove the bad odor and also disinfect the surface.

Don’t Spray It Directly On Your Skin

If you do happen to get a bit of vinegar spray on your hands or skin, make sure to wash it off quickly with water. If you have sensitive skin, you may want to wear gloves while cleaning with this spray.

Using Baking Soda Along With A Vinegar Spray

While there are manyincredible uses for white vinegar, one of my favorites is using it in combination with baking soda. These two ingredients, when used together, can form an amazing all-purpose cleaner that’s great for tackling tough messes. Here are a few ways you can use them together:

To clean your oven, mix 1/2 cup vinegar with 1/4 cup baking soda. Spray the mixture on all surfaces of the oven and let sit for 30 minutes before wiping off.To clean countertops and kitchen surfaces, mix 1/2 cup vinegar with 1/4 cup baking soda in a spray bottle. Shake well before each use and spray on the surface. Let sit for a few minutes before wiping off with a paper towel or sponge.To remove water stains and mineral deposits, spray some vinegar and baking soda mixture on the surface and let it sit for a few minutes.Cleaning your painted cabinets properly with baking soda is a great way to remove stubborn dirt and grime. Just mix equal parts of vinegar and baking soda in a bowl, dip your brush in, and start scrubbing. Rinse off the brush when you’re done and give it a good shake to get rid of any excess water.

Using Essential Oils In Your Diy All-Purpose Spray

If you like to use natural cleaning products that not only disinfect but also leave behind a lovely scent, adding 5-10 drops of lavender or tea tree oil is an easy way to do this. Adding the essential oils will help mask any unpleasant odours from the vinegar while also ensuring that your home smells fresh and clean. 

DIY Disinfecting Spray Cleaner - Clean Mama

Image Credit: http://helloglow.co

As I mentioned earlier, lemon juice is another great replacement for vinegar (in most cases) when making DIY all-purpose cleaners because of its disinfecting properties and pleasant citrus smell. But feel free to experiment with different essential oils to find the scent that you like best. Just make sure that the oil is labelled as “pure” or “undiluted” so that it doesn’t contain any harmful chemicals.

Final Thoughts On DIY All-Purpose Vinegar Spray

In conclusion, this DIY all-purpose vinegar spray is a huge money saver and works just as well as most off-the-shelf cleaners. It doesn’t matter if it’s vodka or vinegar, if you can clean something with vodka then you can do the same with vinegar since they both have antiseptic properties.

Vinegar and vodka contain about 80% water so unless you want to spend $30 on a bottle of stuff with 60% alcohol content, I’d go for good old-fashioned distilled white vinegar that costs around $3-4 per gallon.

The best part about this whole procedure is also that after doing it once you no longer need to buy any cleaning products anymore because you now have an endless supply at your disposal every day for a very cheap price.

The post DIY All-Purpose Vinegar Spray appeared first on Kitchen Infinity.

Did you miss our previous article…
https://www.centrecountyfood.org/?p=950

post

What is the KonMari Method?

Many people live in cluttered homes which end up complicating their life as well. It’s not that they don’t know how to declutter your room but the process itself is very complicated. 

Well, if you could focus on the things in your home that give you joy, then everything else would fall into place. Marie Kondo has developed a method that makes this easy and simple, so you can get rid of clutter fast without having to sort through every item in your house one by one. It’s called the KonMari Method because she says we should only keep items that spark joy.

Here’s everything you need to know about the KonMari method.

What is the Konmari Method?

KonMari, also known as KonMarie or Marie Kondo, is a tidying expert in Japan. She has written several bestselling books on the process she uses to transform individuals and families. Created by Marie Kondo, professional home organizer and author of the bestselling book, The Life-Changing Magic of Tidying Up, the Konmari method emphasizes removing clutter from your home and surrounding yourself with things that spark joy.


Image credit: https://tidycasa.com/

In other words, the konmari method is a simple but effective tidying method that ensures you’ll never relapse to clutter again. It uses unique selection criteria by choosing what sparks joy. Through this tidying process, you can reset your life and spend the rest of your life surrounded by the people and things you love most.

After the release of the Netflix TV show Tidying Up with Marie Kondo in 2019, many people globally have been using Marie Kondo’s tips to declutter their homes and stay organized.

How Does the KonMari Method Work?

KonMari has six basic rules that can help you declutter, get organized and create a home filled with items that make you happy. Here’s how the KonMari method rules work:

Commit Yourself to Tidy Up

The KonMari method is not a quick fix for a messy room. Instead, it’s a chance to reset your entire life, but only if you commit to following its principles. The first rule of tidying is setting your intention to seriously tidy up and resolving to put in the time and effort required. 

When approaching your tidying festival with a clear vision and a can-do attitude, you’ll find the energy and motivation you need to tidy all your belongings in one go. The effort will be worth it in the end, and you’ll not only experience the joy of living with objects that you love, but you’ll also be on the path of establishing your ideal lifestyle.

Marie Kondo’s theory is the more you can get rid of, the easier it will be to tidy up and remain organized. So, don’t get discouraged if the process takes longer than a day.

Imagine Your Ideal Lifestyle

Before you start, imagine your ideal lifestyle and identify the objects that make it a reality. If this is your first time tidying up, you might not be able to picture what your perfect life looks like. But it’s never too late to change and improve after all.

Marie Kondo’s tidying process isn’t about decluttering your house or making it look neat on the spur of the moment for visitors. It’s all about tidying up in a way that will spark joy in your life and change it forever. 

Consider what kind of a house you want to live in and how you want to live in it. Make sure you describe your ideal lifestyle. You can draw and sketch out what it looks like if you like. You can also describe in a notebook or cut out photos from magazines.

When you imagine your ideal lifestyle, you’re clarifying why you want to tidy and envision your best life. The tidying process represents a turning point, so make sure you consider the ideal lifestyle you inspire.

Finish Discarding First

Once you know what your ideal lifestyle is, you’ll be able to decide which items have value in your home and fill a purpose for that lifestyle. Considering each item and sorting them to keep and discard piles allows you to create more space for the organization and storage solutions that come later in the Konmari method.

Discarding items is not the point of the Konmari method, but it’s important because it provides the opportunity to determine the items that will help you live your life as you envision it as well as those items that no longer fit into your lifestyle. After you’ve discarded, you can turn your full energy and attention to what sparks joy.

Sort by Category, Not Location

The Konmari method advises sorting by category rather than the room. This allows you to work on one type of item at a time and ensures that each category is treated with equal importance. In other words, you’ll have a hard time getting motivated to finish if all of your clothes are in one room and the books are in another.

If you’re cleaning your home room by room, you’re most likely rearranging items and tossing out only a few things since it doesn’t feel like a ton of clutter for that room. Tidy by categories such as clothes, books, papers, miscellaneous items and sentimental items. 

This way, you’ll be on the right track to success. If you find yourself doing this, try to give each category its own dedicated space and do your best not to keep related items together. The Konmari method prefers that you spread out categories throughout your entire home.

Follow the Right Order of Tidy

This is probably the most important aspect of Konmari. You want to tidy up in the correct order to meet your tidying needs by starting with what’s most necessary first.

The right order for this method includes clothes, books, papers (all documents and manuals), miscellaneous items like small electronics and accessories, and mementoes.

sk Yourself if it Sparks Joy

Deciding if something sparks joy is the criteria for keeping and discarding items when decluttering. In the Konmari method, your feelings are the standard for decision making, especially knowing what sparks joy. To determine this when tidying, you need to pick up each object at a time and ask yourself quietly if it does spark joy.

Pay attention to how your body responds. Joy is personal, so that everyone will experience it differently. By selecting only those things that inspire joy, you can precisely identify what you love and what you need.

How to Use The Konmari Method at Home

Clothes

The first category you need to tackle for a tidy house is clothing. While you might be used to cleaning out clothes in your closet and then your drawers, the Konmari method suggests gathering clothes and accessories from all over your home, including your bedroom closets, coat closets, drawers and under the bed and put them all in one pile.

This will allow you how much you have and help you realize how much you don’t wear. If an item sparks joy, keep it and if not, give it to gratitude and donate your clothing. You can then learn how to iron the clothes remaining ones correctly and arrange them the right way.

Books

After clothes, the next category on the Konmari method checklist books, gather every book in your home and put them in a pile to decide which ones spark joy and which ones don’t. If your ideal lifestyle means that your space is filled with books, keep them.

Books
Image credit: https://www.shortform.com/

Papers

Every paper in your home, including documents, letters, bills and receipts, should be sorted using the Konmari method. Keep only what you need or use daily, plus one copy of everything else.

Miscellaneous Items

Any other items that don’t fit into the above categories should be put in a pile to determine what sparks joy and what doesn’t. Sort through everything carefully. Create groups like electronics, beauty supplies, home decor, canned goods and writing utensils.

Miscellaneous Items
Image credit: https://storage.googleapis.com/

It might be tempting to go room by room for an extensive category; make sure you gather items from all over your home and put them in one pile. That way, you’ll be able to store similar items together to easily find them and not have anything to spread out.

Sentimental Items

Sentimental items hold deep meaning and can be tough to part with. If you’ve ever seen the episode of ‘Hoarders’ where the woman won’t get rid of her deceased mother’s old suitcase, this method isn’t for you.

Sentimental Items
Image credit: https://justagirlandherblog.com/

Keep only those sentimental objects that truly bring you joy and store them in a designated area. That way, you’ll have them but won’t be reminded of them at every turn.

How to Store Items that Spark Joy

After deciding what to keep in your home, good storage solutions will help you keep everything organized. Here are some of the best Konmari organization and storage tips:

Try Konmari Folding

The Konmari folding method is perfect for organizing your clothes. Marie Kondo didn’t only create her method of decluttering and organizing, but she has also shared a unique folding technique for clothes and linens. The Konmari method of folding helps keep drawers, baskets and bins neat and tidy.

Use Boxes in Drawers

Don’t toss them out if you have gift boxes, shoe boxes, and jewelry boxes. These are great DIY home storage solutions for keeping small things like jewelry, beauty supplies, phone chargers and other miscellaneous things organized in drawers and cabinets.

Store Papers in File Organizers

The paper file organizer is perfect for storing mails, bills and other papers. It protects your documents from getting lost in the clutter of the drawer.

Invest in Wicker Baskets

Wicker baskets are great for keeping your cupboard free from clutter. Use them to store foodstuffs, dry fruits, snacks and other kitchen essentials.

FAQs on What is the KonMari Method

Is the Konmari method effective?

The Konmari method is a highly efficient and effective organizing strategy that has helped many people declutter their homes. The beauty of this method is that it doesn’t follow any specific order in tidying up – you can start from anywhere and go on to the next activity.

What are the benefits of the Konmari method?

The Konmari method advises people to get rid of useless, unnecessary belongings. If applied correctly, this will help you find more relaxation and peace in your life. It also teaches you not to keep hold of things that do not bring joy into your life.

Final Thought on What is the Konmari Method

Do you have items that spark joy that you can’t fit in your home? Well, get organized with these temporary storage solutions with extra space storage to keep items that fit your ideal lifestyle, even if you don’t have room for them now.


The post What is the KonMari Method? appeared first on Kitchen Infinity.

Did you miss our previous article…
https://www.centrecountyfood.org/?p=944

post

The Best Small Sleeper Sofas of 2021

Whether you’re living in a studio apartment or a four-bedroom house, if you like hosting overnight guests, then they’ll need a place to sleep. Without thinking too much or wasting money on buying another bed, think of a small sleeper sofa.

Sleeper sofas take up very little space, but they can be converted into a comfortable bed in seconds. They come in a wide variety of styles and shapes, so the style that’s best for you depends on which will fit best in your space and your personal preference.

Sure, there are plenty of sleeper sofas on the market, but which one is the best for you? Here are some of the most common types of sleeper sofas of 2021:

Frontgate Wendover Sleeper Sofa

This comfortable sleeper sofa is topped with layers of high-quality foam and memory foam mattresses. You can fold the sofa bed couch to create a queen bed that’s 76 inches long, making it ideal for overnight guests. The microfiber cover is easy to clean, unlike natural leather, but looks just as chic.


Image credit: https://i.pinimg.com/

It’s also made of a kiln-dried hardwood base to ensure that it’s sturdy and won’t warp, even with regular use. It is available in two upholstery options, including natural linen and dove gray that are available for quick ship.

West Elm Henry Sleeper Sofa

This comfortable sleeper sofa is perfect for small apartments or guest rooms. The Henry Sleeper Sofa is 84-1/2 inches long and can be folded out into a queen bed. It also includes two matching bolster pillows that can act as twins or king-sized pillows, depending on your needs.

West elm is also made of kiln-dried hardwood and comes with plush loose cushions for the back and side. When you need an extra sleep surface, the sofa pulls out into a queen-size bed and its mattress is made from a combination of high-density foam and gel-infused memory foam for maximum comfort. This shelter sofa is also available in a wide variety of upholstery materials, allowing you to find the ideal fabric to suit your style.

Wade Logan 85 Square Arm Reclining Sleeper

If you’re looking for the best leather sleeper sofa, the Wade Logan 85 Square Arm Reclining Sleeper is a great option. This sofa is made of top-grain leather, ensuring that it will last for years to come, and features a reclining design that makes it perfect for watching movies or taking a nap.

The button tufting and square arms will blend right in with your mid-century modern living room decor. When your guest arrives, just fold down the back and you have a twin size bed ready to go. Note that it will only sleep, one guest.

Catalina Reversible Chaise Sleeper Sofa

If you’re looking for the best chaise sleeper sofa, then you need to check out the Catalina Reversible Chaise Sleeper Sofa. This sleeper sofa has a classic design with clean lines and is made with top-grain leather, ensuring that it will last for years to come.

This chaise sleeper sofa comes in 61 different fabric colors, two leg finishes, and two queen mattress types, which can be a standard innerspring or 4.5-inch memory foam. You can also position the chaise lounge on either side of the couch to allow you to work around your space.

Wayfair Custom Upholstery Carli Recessed Arm Sofa Bed

With the Wayfair Custom Upholstery Carli Recessed Arm Sofa Bed, you can turn any room in your house into a guest room. This sofa bed features an easy-to-use pull-out queen size mattress that’s just as comfortable as it is practical. If your overnight guests are couples, then you don’t have to worry if you have this sleeper sofa.

Wayfair Custom Upholstery Carli Recessed Arm Sofa Bed
Image credit: https://www.thespruce.com/

It has a queen size innerspring mattress hidden inside and a foam back with double-picked blown fiber that helps to maintain its size. There are almost 500 upholstery options to choose from and you can upgrade to gel seat cushions for additional comfort.

Sarah Shakfin Sleeper Sofa Bed

This is one of the most popular sleeper sofas available on the market right now. Not only does it come with a generous upholstery allowance but you can also add pillows, throw pillows, and bolster pillows to personalize your look. It’s crafted from a mix of solid and manufactured wood.

Sarah Shakfin Sleeper Sofa Bed
Image credit: https://cdn.shopify.com/

It’s sturdy enough to support two sleepers on the queen size mattress. This sofa chair has a timeless, sophisticated look with piped detailing and neutral hues that make it a seamless addition to any7 aesthetic. You can make it your own by choosing from more than two dozen fabrics. So, if you’re looking for a sofa bed made from a mixture of solid and manufactured, then this is the right option.

Sectional Sleeper Sofa

This sleeper sofa will appeal to those who need just a little extra space in their living room or guest bedroom. At first glance, the piece looks like an average loveseat with two attached ottomans. But one of them can turn into another bed for overnight guests.

Sectional Sleeper Sofa
Image credit: http://cdn.home-designing.com/

If the regular sofa isn’t large enough for your needs, add in a sectional sleeper with a pull-out queen size mattress. This sectional sofa has a kiln dried hardwood frame and is covered in a light gray velvet upholstery that will match most decor styles.

It has a classic clean-lined silhouette and comes with three complimentary throw pillows. When you have overnight visitors, pull out the 5-inch thick, comfortable memory foam mattress.

Pottery Barn Buchanan Square Arm Upholstered Deluxe Sleeper Sofa

Pottery barn sofa will make your guests feel like they’re staying at a hotel, thanks to its extra-long plush mattress. This is a splurge-worthy mattress and its 79-inch frame is made of kiln dried hardwood for exceptional durability.

Sleeper Sofa
Image credit: https://assets.pbimgs.com/

Its back and seat cushions feature polyester-wrapped foam for a firmer feel and you have a wide selection of upholstery options to choose from, including family-friendly performance fabrics. Instead of a traditional pull-out mattress mechanism, this sofa features a Tiffany Convertible Mechanism without uncomfortable metal bars or springs.

It’s also 2 inches longer than a standard sleeper mattress. The plush mattress features premium high resiliency foam, ensuring a comfortable night’s sleep every time.

Wayfair Custom Upholstery Jennifer Leather Sofa Bed

This Wayfair Custom Upholstery Jennifer Leather Sofa Bed is perfect for small spaces. Made with a kiln-dried hardwood frame and Sinuous Springs construction, it’s sturdy and built to last. It features high resiliency foam in the seat and back cushions, as well as a comfortable mattress that’s made from genuine leather.

It’s 81 inches long and it has a classic design with rolled arms and short wooden legs. Besides its stately appearance, it’s incredibly versatile, featuring a queen size mattress inside its base. The pull out mechanism is easy to operate and the innerspring mattress is 6.5 inches thick, providing a more comfortable sleep surface for your guests.

Emily Futon Sofa Bed

If you’re looking for the best affordable sleeper sofa out there, the Emily Futon Sofa Bed is a great option. It’s one of the most comfortable sleeper sofas on the market. The Emily Futon Sofa Bed has a simple design with a microfiber fabric cover and a plush-down pillow top. It

It features a full-size mattress that’s comfortable and available in a variety of colors, so you can find the perfect one to match your decor. Other than offering great value, it is easy to transport and is also available as a convertible futon. There’s an armrest option for a more sofa-like appearance. This affordable sleeper sofa is also easy to set up and use.

Mia Klik Klak

Are you looking for a small sleeper sofa? The Mia Klik Klak is a good choice. It’s an efficient sleeper sofa that transforms from a modern reclining armchair into a bed in seconds. The seating has a stylish tufted look, and it features a push-button mechanism with slots on the bottom of the seat for easy conversion to a full-size bed.

This small sleeper sofa also includes an ottoman with storage space for keeping linen. The construction is solid, and the mattress provides a comfortable sleeping experience. Mia Klik Klak converts into a full-size bed.

Joybird Hopson Sleeper Sofa

The Joybird Hopson sleeper sofa is a great choice for small spaces. It’s an attractive, comfortable piece that can be used as both a sofa and a bed. The sofa is made of high-quality materials, including hardwood frame construction and metal frame for longevity and its cushions are filled with high-density polyurethane foam.

The inner mattress is made from layers of high-density foam and cushy memory foam and it’s as wide as a traditional queen size mattress, so it can comfortably accommodate two people.

Crate and Barrel Barret 3-Seat Queen Reversible Sleeper Sectional

This Crate and Barrel sleeper sectional is a great option for small spaces. It’s a three-seater that can be quickly and easily converted into a queen-sized bed. The sectional is made of high-quality materials, including a kiln-dried frame for longevity. It also features a bi-fold 5-1/2 inch innerspring mattress and a locking tilt-up headrest that’s ideal for reading and watching TV.

FAQs about the Best Small Sleeper Sofas of 2021

What should you look for when buying a sleeper sofa?

When buying furniture of this type, you should look for comfortability. A sleeper sofa should fit as a sofa and bed and you shouldn’t have to sacrifice one for the other. Also, consider the height of the armrest, the profile of the backrest, the depth of the seat, and the firmness of the cushions.

Do sofa beds break easily?

Not really because they come with sturdy mechanisms. The one thing you should be careful of is that the sofa bed doesn’t wobble or rock when you’re sleeping in it.

What if I don’t have a lot of space?

There are smaller sleeper sofas that might fit your needs. You can also look for a sectional sleeper sofa, which will give you more options as you can separate the sofa and sleeper as needed.

Spring-based sofa beds are the most common because they provide great support for when it functions as both a bed and couch.

Final Thought about the Best Small Sleeper Sofas of 2021

There you go! Sleeper sofas can be a great addition to your home, and they come in all shapes and sizes. Make sure you choose one that is the best fit for your budget, needs, and space.


The post The Best Small Sleeper Sofas of 2021 appeared first on Kitchen Infinity.

Did you miss our previous article…
https://www.centrecountyfood.org/?p=937

post

20 DIY Couch Cover Ideas

You have a couch that’s past its prime time, and you’re on a tight budget. There are plenty of ways to update your couch, but most of them require spending money or taking up too much time. When you turn to these DIY couch cover ideas, then you won’t have to buy new furniture for your house.

Whether you want a new couch and chair or you want to redo your bedroom, there’s always a slipcover for your headboard. These slipcovers are easy to do and will instantly transform your home. Plus, you can give your old couch and chair a new look by spending only a fraction of what it would cost to replace them. 

Here are DIY couch cover ideas for making your custom slipcovers in no time at all.

DIY Sofa Slipcover

This sofa slipcover is perfect for those who want to update their furniture on a budget. You’ll need some basic supplies, including a sewing machine and fabric. You’ll also have individual covers for the frame and cushions. This way, you won’t have to worry about constantly adjusting your cover every time someone sits on it.

DIY Drop Cloth Slipcovers

Repurpose old drop cloths to make your slipcovers. Depending on the look you want to achieve, you can make them patchwork-style or one solid piece. If you plan on painting your walls, this style is great because you can remove it at any time without damaging the underlying fabric.


Image credit: https://i.pinimg.com/

You can find drop cloths at almost any departmental or home improvement store at a relatively low cost. The covers will extend the life of your couch by a number of years and give your home a look you’ve always wanted.

Easy Sectional Cover

Do you have a sectional sofa but no cover for it? This easy DIY project is perfect for you. All you need is a piece of fabric that’s at least two feet wider and four feet longer than your sectionals. 

Easy Sectional Cover
Image credit: https://m.media-amazon.com/

This is a great way of covering your sectionals and ensuring you get the slipcover that fits perfectly. You can get a brand new look and create any pattern and design you like. These DIY slipcovers are very important.

Patio Furniture Covers

If you have patio furniture, it’s important to keep it covered when not in use. Not only will this protect the furniture from the elements, but it will also help to keep it looking new for years to come. 

Patio Furniture Covers
Image credit: https://www.patioproductions.com/

A simple patio furniture cover can be made out of a fabric that’s at least six feet wide and ten feet long. These DIY outdoor cushion covers can help transform your outdoor space.

No Sew Bench Cushion

If you have an old bench that could use a little bit of TLC, why not try this no-sew bench cushion? This project is easy and only takes a few supplies. You’ll need some batting, fabric, scissors, and a needle and thread but no sewing machine. Bench seats always make any area feel cozy and relaxing. So, you can DIY your bench cushion and customize it to your liking. 

Easy Sofa Slipcover

If your sofa looks a little worse for wear, don’t worry. With this easy DIY slipcover, you can easily give it a new lease on life. This project will take you just a few hours to complete and only requires a few supplies.

All you need is some fabric, scissors, and a sewing machine if you have sewing skills. This simple and quick fix is a great-looking temporary fix that will transform your couch from a drab to fab.

IKEA Couch Makeover

Don’t worry if you have an old IKEA couch that you’re not quite sure what to do with. With this easy DIY makeover, you can easily give it a new lease on life. This project will take you just a few hours to complete and only requires a few supplies.

All you need is some fabric, scissors, and a sewing machine. You’ll sew through the buttons and add extra stuffing to your couch cushions. This DIY slipcover is budget-friendly, and the results will look amazing.

Dyed Sofa Slipcover

This is a great way to renew your old furniture in your living room. All you’ll need for this project is fabric dye and rubber gloves. You can also use a stencil if you prefer the look of that instead. The results will not only look fantastic but will cost you next to nothing.

If you’re looking to give your living room a bold new look, you’re going to want to take a look at this project. Plus, dying your couch cover can help cover up any old stains and signs of wear.

DIY Outdoor Cushion Covers

If you’re like most people, you probably spend a lot of time on your deck or patio during the summer. One way to make these spaces even more comfortable is to add some new cushions. But, buying new cushions can be expensive. Instead, why not try making your own? 

This project is easy and can be completed in a few hours. Plus, the results will be fantastic. You’ll need cushion covers, Paint or fabric dye, Paintbrush or sponge, Masking tape, and Scissors.

DIY Tufted Cushions

Tufted cushions are chic, but they’re also very expensive. Luckily, you can make them yourself without spending too much money or time. For this project, you’ll need cushion covers, Scissors, Measuring tape or ruler, a Pencil or pen, and Thread. 

This easy-to-follow tutorial will allow you to transform a budget-friendly sofa into a stylish anchor piece for your living room. In just 20 minutes, you can transform this couch’s entire look.

DIY Slipcovers with Piping

Piping can add a nice touch to any home décor project, and these slipcovers are no exception. For this lovely design, you’ll need cushion covers (fabric or foam), Scissors, Pencil/Pen, Measuring tape or ruler, and a Piping foot if your sewing machine doesn’t come with one already.

Whether you make your piping or purchase it at the store, this DIY couch cover keeps costs low without compromising on looks.

DIY Armchair Slipcover

Why not include your favorite armchair for fun as you’re making over your living room or sitting area? Here, learn how to make a DIY slipcover for an armchair.

This project is a little more complicated than others, but it’s still doable for almost anyone with basic sewing skills. To make it even cheaper, use drop cloths because they’re cheap, but that doesn’t mean they’re uncomfortable.

Couch Pet Protector DIY

Simplicity is key when working with slipcovers, and this DIY couch cover follows that rule. Use an old blanket or even a foam cushion to create a removable accent for your sofa that looks great but provides the perfect place for pets to snuggle up too. 

These pets can cause havoc on couches, especially if they have sharp nails. They love to climb all over sofas, causing some serious damage. Thankfully, this DIY tutorial can provide you with a durable couch cover that will run along the back and arm of your sofa to protect it from pets.

Easy DIY Ruffled Sofa Slipcover

This easy DIY sofa slipcover doesn’t require much sewing, and it’s the perfect way to refresh your room without spending a lot of time or money. Plus, this is a great option for those who don’t have the necessary sewing skills to pull off something more complicated. 

This idea couldn’t be simpler: measure your couch and head to the fabric store to pick up some coordinating fabric. You’ll also need a few basic supplies, like a sewing machine, needle, thread, pins, and scissors. The ruffles give your sofa and chair a comfortable and welcoming look.

This makes it go along with your DIY farmhouse furniture. These are much easier to make than they look, and you can cover your entire living with ruffles in just a couple of days.

DIY Ottoman Slipcover

You can cover those ottomans and make them look new again. If you’re making slipcovers from your couch and chairs, why not make one for your ottomans, so your entire living room set looks new? This DIY slipcover is easy to make, and you don’t even have to sew it. 

You can also opt for one with pom-poms that can be easily removed so you can wash the DIY slipcover. If you don’t like poms, you can add a pleated skirt to your ottoman slipcover instead.

DIY Sheet Sofa Slipcover

You don’t have to buy expensive slipcovers from department stores to get that new furniture look. Instead, try to repurpose old sheets and make your DIY slipcover. 

DIY Sheet Sofa Slipcover
Image credit: https://photos.demandstudios.com/

You can buy inexpensive sheets if you don’t have a set that you can use, and they’ll look like a real thing. You can use them to cover the entire sofa, even the cushions. You can also remove and wash them regularly.

DIY Reclining Couch Slipcovers

Are you looking to give your old couch a new look? You can always use a slipcover to cover it. You have to buy the slipcovers that fit your reclining couches, and they should perfectly match your sofas’ size and shape.

After that, make modifications to your regular couch slipcover to make it fit over the reclining sections and cover those sections so that they stay put when the couch is reclined.

Striped Slipcover for Kid’s Sofa

If you have kids, they might want to have a couch of their own. You can surely buy them one, but it’s also possible to upcycle an old sofa into something that both adults and kids can use. Just remove the back cushions and cut out pockets for toy storage.

Striped Slipcover for Kid’s Sofa
Image credit: https://cdn.decoratorist.com/

Then you can remove the seat cushions and sew some thick fabric or batting onto the bottom to make it a bit more comfortable. Finally, add a striped slipcover for an extra touch of fun.

Slipcover for Sofas with Attached Cushions

If your couch has attached cushions, you can still add a slipcover by measuring the width of the couch and adding an inch or two for seam allowances. Cut out a piece of fabric that’s at least two inches longer than the width of the couch, and sew the edges together. 

Whether your cushions are attached to the back or the arms, you can customize a slipcover pattern to fit perfectly. Make sure your measurements are accurate and leave enough room to tuck the slipcover around your cushions when you put it on.

DIY Settee Slipcover

Measure the width and depth of your settee. Draw these measurements on paper, adding about two inches at each end for seam allowances. Cut out the pattern you’ve drawn and use it to cut a piece of fabric that’s wider than the settee but not so wide that it will hang over onto the floor. The settee tutorial will instantly brighten up any room, and it’s so simple to make.

FAQs about DIY Couch Cover Ideas

re slipcovers worth it?

Yes, they’re worth it because they can change up the look of your house in minutes. Plus, they’re easy to wash and can protect your furniture from spills and dirt.

Do I need a pattern?

No, you don’t need a pattern. You can measure the width and depth of your couch and then cut out a piece of fabric that’s the right size.

Final Thought about DIY Couch Cover Ideas

As you can see, these couch cover ideas are super easy to make. Just pick the one that you like best and get started. These DIY couch cover ideas can instantly change the look of your home.


The post 20 DIY Couch Cover Ideas appeared first on Kitchen Infinity.

post

How High Should Grass Be Cut?

Keeping your grass healthy and at the right height is important if you want to enjoy it. If you don’t know how high the grass should be cut, you will have difficulty keeping your landscape looking great. This can lead to many problems down the road that are very difficult to solve.

There are different factors that decide how high grass should be cut. So, you need to do some research before deciding how much of an adjustment needs to be made with regard to cutting the lawn.

Our guide below can help answer this question for you and teach you more about cutting lawns in general.

The Rule of Thumb

How high should you cut the grass when you mow? The general rule of thumb for determining how high the grass should be cut is only to cut off no more than one-third of the height of your lawn. Each mowing should only remove about the top third of the grass blade.

It’s recommended that you stick to this rule of thumb and a lesser degree in spring. If you can’t remember the measurements in summer, consider mowing at a greater height. It’s also a good idea to choose one of the higher settings of your lawnmower wheels when the weather is hot or dry and mow at that height until you approach the fall season and the weather starts to cool off a bit.

Factors to Consider on the Rule of Thumb

Types of Grass

The first thing that you will have to think about is the type of grass lawn you have. Some people don’t realize it, but there are different types of grass, and they all grow at different speeds and heights. Every grass type has its mowing height.

Keeping the Weeds Away

The next factor to think about is weed control. Weeds love growing in tall grass, and it’s important that you keep theirs under control. If you leave your grass too long, the weeds will take hold and ruin your lawn and use up a lot of water and nutrients from the soil.

Keep the Bugs Away

That’s not the only reason to keep your grass short. Bugs also like heat, and just like humans, they spend their time in shadier, cooler places. If you have a very tall lawn, it will grow over these areas and make them hotter because there won’t be any shade for the bugs to escape the heat.

In addition, too long grass is difficult to mow, and long grass clippings have to be removed and cannot be left on the lawn.

Laziness Doesn’t Pay

Keeping your grass cut short is also better for you. It’s far easier to maintain a shorter lawn because it requires less mowing, meaning that you can advance the cutting height more often. The mowing frequency depends on your grass type, its optimal height, and the grass growth speed, depending on the weather conditions.

For instance, cool grass such as Kentucky bluegrass and fine fescue grows faster during the cool spring and fall weather. While the exact heights vary depending on the grass type, the range of cool-season turf is between 1 and 5 inches.

Different Grasses Require Different Mowing Heights

All lawns are not the same. For instance, cut the grass too short, it becomes stressed, thin and you’ll be left with a shallower root system. Cutting the grass crowns will also make the turf vulnerable to weed pressure and require pesticide applications to prevent weeds and discourage pests.

Warm season grasses such as zoysia grass and Bermuda will tolerate a shorter, tighter cut, while cool season grasses like fescue and bluegrass need to be mowed taller to help shade the root system and keep heat stress away.

Mowing Too Low Damages Grass

Mowing your lawn too low will have a detrimental effect on your grass. When you cut the grass too low, it causes damage to the plant’s crown and results in a weaker root system, making your lawn more vulnerable to weeds, disease, and pests.

Mowing Too Low Damages Grass

Mowing too low reduces the density of the grass, making the lawn susceptible to invasive summer weed pressures. By mowing your grass too low, you may unknowingly be promoting crabgrass to grow because shade provided by higher cut grass blades shields the crabgrass seeds from much-needed sunlight.

Mowing too low also makes the turf vulnerable to summer heat. Without taller grass blades to shade the summer sun, low mowing can lead to stress damage quickly during long periods of summer drought.

How Short To Cut Grass in Spring?

At a minimum, it is best to cut turf no shorter than 3 inches during the early spring. If you have been postponing trimming your lawn because there was snow on the ground and cold weather, do not be tempted to mow just yet. Wait until grass blades begin hardening off on their own as summer approaches.

Mow cool season grass to a height of 3 inches tall and cut warm season grasses as low as half an inch up to 1.5 inches.

What Height Should Grass be Cut in Summer?

As temperature rises, your lawn height also goes up in summer. So, as the summer arrives, raise your mower height for cool season grasses and keep it closer to four inches. A taller plant shades the soil and keeps the root zone cooler during high heat periods. If you allow your lawn to grow too tall, it can result in broader leaf blades, lower plant density, and more susceptibility to turf diseases.

The Best Height to Cut Grass in the Fall

When inching into the fall, mid-length grass is the preference. Tall grass can get matted and become diseased in winter, but lawn roots can get exposed to extremely damagingly cold temperatures when you cut too short. So, focus on striking a balance in fall to prepare your lawn for winter.

Cut your cool season grass to about 2.5 inches before the first frost in winter and mow warm season grasses to two inches in fall.

How Often Should You Mow Your Grass?

Having a routine mowing schedule for your lawn is key. Grass will grow at different rates depending on fertilization, season, and weather conditions. Grass that is too long will not only make your lawn look shaggy, but it can also lead to problems with the health of your grass.


Image credit: https://www.arbor-nomics.com/

Long grass can prevent water, sunlight, and nutrients from getting to the soil, which can cause your grass to turn yellow or brown. It can also increase weed growth and create an environment where insects and diseases can thrive.

What is the One-Third Rule?

Regardless of your grass species, you shouldn’t remove more than one third of the grass height when mowing. This is important because the grass is a living plant, and they all undergo some stress when cut.

What is the One-Third Rule?
Image credit: https://res.cloudinary.com/

FAQs on How High Should Grass be Cut

Can you mow your lawn when it’s wet?

No, avoid mowing your lawn when it’s wet because other than jamming the lawn mower blades and clogging the discharge chute, wet grass can also leave clumps of grass on the lawn. Grass collecting on the mower blades also aids in tearing the grass much like a dull blade. Keeping your lawn mower blade sharp shouldn’t be overstated.

How often should the mower blade get sharpened?

Keep your mower blade sharpened as a cleaner cutting blade results in less stress on the turf. A dull mower blade rips and shreds the grass leaf, making the plant susceptible to disease. A good rule of thumb is to sharpen your blade every ten mower hours.

Final Thought on How High Should Grass be Cut

As you can see, keeping your lawn about two and a half inches tall and leaving the grass slightly taller about three inches in the shady areas will maintain a healthy lawn. It is also important to keep your mower blade sharpened and collect the grass clippings. Follow these tips, and you will be on your way to a lush, green lawn.


The post How High Should Grass Be Cut? appeared first on Kitchen Infinity.

Did you miss our previous article…
https://www.centrecountyfood.org/?p=926

post

29 Christmas Table Decorating Ideas

You want to add some Christmas spirit to your table, but you don’t know-how. The best way to get into the holiday mood is by adding a variety of colors and decorations that will make everyone feel merry and bright at dinner time.

Adding color can be as easy as changing up your tableware and adding seasonal patterns or textures. There are so many things you can change around on your table, from napkin rings, placemats, glassware, candles.

Having a colorful place setting with beautiful details will help set the tone for an enjoyable evening with friends and family. To help you out, we have put together this quick guide with everything you need to know about decorating your Christmas table.

1. Wreath Christmas Table Runner & Napkin Rings

For a simple yet elegant table setting, you can place a green wreath with red berries at the center of your plate. This is one of the easiest ways to incorporate festive details into your decor while combining textures and varying levels for an exciting tabletop.

The naturalness of the materials used makes this table runner very easy to match with most decor styles. Using mini wreaths as napkin rings is one of the best Christmas decorations you can bring to the table setting.

2. DIY Mason Jar Centerpiece

If looking for a festive centerpiece idea, look no further than the classic Mason jar. If you like this idea but are not really into DIY projects, we found some easy and affordable premade mason jars that we think are perfect for your holiday table.


Image credit: https://masonjarbreakfast.com/

3. Add Dimension and Height to Your Decor

Bring your Christmas table decor to life by adding dimension and height. This is very easy with flowers, garlands, and candles on your table. These items can be easily found at your local craft store or big-box retailer.

4. Bring Mercury Glass Candles

Create a Christmas tablescape design using mercury glass holders. The mercury-looking finish is a big trend right now, so you’ll be able to find this kind of table decor in different shapes and sizes. It will add an interesting detail that catches the eye.

Bring Mercury Glass Candles
Image credit: https://i.pinimg.com/

5. DIY Garland Runner

Keeping your Christmas tablescape nice and simple is a great way to uncomplicate holiday decorating. Incorporating a no-fuss garland runner with white candles combined with cinnamon sticks and a holly place setting is the perfect way to decorate your Christmas table without spending too much time or money.

DIY Garland Runner
Image credit: https://www.guidepatterns.com/

6. Farmhouse Style Christmas Table Decor

This is a perfect example of how to use rustic Christmas decor. Farmhouse style is all about shabby chic and handmade details, so your Christmas table will look warm and inviting in no time.

7. Vertical Garland Ideas for Christmas Tables

Vertical garlands are the new trend in Christmas decor, and this modern take on a traditional wreath is stunning. You can add it to any empty wall space in your home; the staircase, behind the front door, or above your mantelpiece, for example. The garland feels festive but not overly Christmassy, creating a conversation piece to anchor the holiday dining area that you won’t feel pressured to take down too soon. Use dramatic green and white garland hung on the wall behind the dinner table.

8. Woodsy Christmas Table Decorations

This chic rustic motif is all about keeping it real. These holiday centerpieces are made with natural elements that you probably already have on hand at home or can acquire easily enough. This is a great theme if you want to mix modern and traditional, using fresh flowers for height and fallen tree branches to display your lovely vintage ornaments.

Woodsy Christmas Table Decorations
Image credit: https://i.pinimg.com/

Details like forest green candles and napkins, a striped linen table runner, a vase full of white flowers and seasonal greenery, olive wood napkin holders, and chargers will add a homey look to your Christmas table.

9. Mint and Gold Holiday Table Decorations

A touch of mint gives this table a fresh feel, but the pure white flowers and soft gold cutlery decorations keep it from looking too cool and contemporary. The result is a pretty backdrop that feels romantic and elegant mixed without being stuffy or overbearing.

10. DIY Mini Cranberry Wreaths

These mini wreaths are quick and easy to whip up, but they pack a major visual punch. Make them in minutes with simple craft supplies like ribbon, twigs, berries, and glue. Decorating your Christmas table doesn’t have to be an elaborate affair to make a big impact.

DIY Mini Cranberry Wreaths
Image credit: https://ae01.alicdn.com/

Bring in cranberries, tree trimmings, and stamped brown Kraft paper name tags to create a festive Christmas brunch place setting that will make your guest feel welcome and special.

11. Mini Birch Branch Trees as Christmas Table Decoration

Add a rustic and natural element to your Christmas table setting with these simple yet elegant DIY mini trees. These easy Christmas centerpiece ideas can be finished in just minutes, and they add a natural touch of elegance to any holiday season.

Brighten up the season by mixing red, green, blue, and silver when decorating your Christmas table! A great way to do this is by using a favorite Christmas ornament as the centerpiece and filling your table with red, green, and silver plates, glasses, and chargers.

12. Cake Stand Centerpiece

Using a cake stand as the base of a table centerpiece is one of the ways of decorating your table while hosting a Christmas dinner. Bring group candles and sprigs of greenery atop a cake stand for an easy Christmas table.

Cake Stand Centerpiece
Image credit: https://ae01.alicdn.com/

13. Outdoor Christmas Table Decorations

Add a touch of whimsy to your holiday dinner table with these festive ideas for outdoor Christmas table decorations. Outdoor-friendly centerpieces, place settings, and more. You can mix vintage candlesticks, wood plates, and a natural centerpiece of leaves and flowers to create a non-traditional, laid-back festive vibe.

14. Chandelier Hanging Christmas Centerpiece

Think way outside the box with these unique Christmas table decorations. Hang a chandelier over your dining room table and attach candles to it for a sparkly gold atmosphere.

15. Table Runner

A table runner is another great idea for adding warmth to your Christmas decor. Pick one that features holly or bows, or go for a classic red-and-green color scheme. The table runner should be a few inches wider than your table to leave room for plates and other items.

16. Consider Royal Purple

Mixing a pale green and natural red centerpiece with unexpected royal purple accents can be an eye-catching and modern approach to your holiday dining table decor. Plus, the unexpected royal purple napkins can create unexpected twists on holiday table decorating.

17. Natural Gold

Try to play with pale golden wood tones in your modern dining room table by creating a gold and white Christmas brunch table with gold flatware, white and gold dishes, white napkins, faux snow, and a fuzzy white table runner. You can also line it up with gold and white vases filled with flocked greens.

18. Consider Candy Cane Centerpiece

Grab the mini candy canes that didn’t make it onto your Christmas tree and put them to use as Christmas centerpieces.

19. Consider Icy Blue

Blue and silver is a wintery color combination, which can be used to create an elegant feel on your festive table. Keep the rest of the decoration simple by adding white candles, silver cutlery, and white flowers. Bring in vases holding bright pinkish flowers to add a more traditional Christmas note.

20. Kitchen Island Ideas

If you love to cook, you can create a rustic atmosphere for your holiday table by adding pinecones, fresh cranberries and even tiny LED lights on the tablecloth. While some people prefer simple looks for their Christmas tables, you can use wooden spoons as decor. Set them on top of napkins folded like Christmas trees.

21. Pretty Peninsula

If you are looking for a more modern approach, visit glamorous homes on the web to find out how they decorate their Christmas tables. Decorate your table with all white flowers in elaborate vases. If you love trinkets, this is the best time of the year to bring them out. The kitchen peninsula can also stay up all season, making even small meals or coffee breaks feel festive, and the kitchen comes alive with holiday spirit.

22. Oranges, Cedar, and Walnuts

Another modern table runner is to light your table with candlesticks instead of vases. Set an orange on the center of each plate, and lay dried cedar springs or bay leaves all around it. Finish this arrangement by adding walnuts, apples, or napkin rings

23. Consider Starlight Season

The night is not only the best time to view stars but also a wonderful time to deck your table with them. You can hang small white lights from the bottom of tall silver vases and fill each one up with water. Next, add starlight garlands from these tall vases to the tabletop. Finish by placing votive candles around the table.

24. Create Extra Comfort by Using Ribbon Tied Chairs

Chair ties are always a great option for table decorating ideas. If you have chairs that do not feature these, use ribbon wrapped around them to create bows at the back or front of each chair.

25. Use Taupe

Use a chic and understated color palette of taupe, black and white to complement your decor while creating a holiday theme. Add some nicoly leaves and grasses from your garden to add a festive look and a subtle scent. Finish it off with a mix of votive candles and candlesticks for a candlelit glow.

Use Taupe
Image credit: https://loveincorporated.blob.core.windows.net/

26. Add Christmas Vibe with Stripes and Checks

Opt for stripes and check-in contrasting colors if you do not want to go with a solid and chic color like taupe. Match them with your tablecloth or runners to create a unified theme. Try red and green, black and white, or even blue and beige; the choice is yours.

27. Create Dazzling Christmas Centerpiece with Twisted Ribbon

Why not try a ribbon centerpiece if you want something striking and exceptional? It is easy to make too. Just take some colorful ribbons of different sizes and wrap them together in a loose twist before securing them around the base of your candlesticks or votive candle holders. You can add some pine cones for extra appeal.

28. White and Silver is Always in Style

Just bring in the metallic theme if you prefer a more glamorous look. White evokes crisp cleanliness, while silver gives an opulent appeal. Just add some pine cones or berries to break the monotony of the color scheme. This might seem too simple, but it can create a huge impact when you consider that minimal effort is needed to create this look.

29. Christmas Tree Table Decorating Ideas

If you want a more dramatic effect, go for a Christmas centerpiece. It can make a huge difference and be a conversation piece. Just get your artificial tree and dress it up with some colorful ornaments in silver or white colors. You can leave it as it is or add some pine cones or berries.

If you are into miniatures, this might be your thing for table decorating ideas. Of course, there’s a lot of preparation involved, so if you have the budget and time, go ahead and do this. Different themes are available, but you can choose your favorite or mix and match. You can either focus on the human-sized miniatures or go for the tiny trees.

FAQs on Christmas Table Decorating Ideas

Why is tableware important in table setup?

The right tableware helps to set the mood by complementing both the food’s visual aspects and the general theme of the dinner.

Final Thought on Decorating Christmas Table

There you have it. While decorating your Christmas table, you have to pick one or two that you like and then go ahead with it. This will help in making the dinner more memorable for years to come.


The post 29 Christmas Table Decorating Ideas appeared first on Kitchen Infinity.

Did you miss our previous article…
https://www.centrecountyfood.org/?p=917

post

Vinyl House Siding: Pros and Cons

Vinyl siding is a great material for anyone looking to improve the look of their home. This type of siding can be very durable and resistant to damage, making it a good choice if you have kids or pets who tend to destroy your property.

However, vinyl siding has some disadvantages that you should consider before installing this product in your home. For example, vinyl is not as energy efficient as other siding materials such as wood siding or fiber cement panels. Also, vinyl siding tends to fade over time due to exposure to sunlight and other weather conditions than fiber cement siding and wood siding.

In this article, we’re going to look at some of the pros and cons of vinyl house siding to help you make an informed choice. Read on.

What is Vinyl House Siding?

Vinyl siding is a durable form of plastic commonly used in residential and commercial buildings. Vinyl siding comes in a variety of styles, colors, and textures, even imitating the look of wood siding and other siding materials to suit your needs. You should know which one to choose when building your own house so you don’t end up with what you don’t like.


Image credit: https://www.kpvinylsiding.com/

Vinyl siding is also very easy to install, which is why it has become one of the most popular types of exterior siding in the United States. 

Pros of Vinyl Siding

Easy Installation

Vinyl siding is made to be easy to install, which means that you can get the job done in less than half a day. That’s why most homeowners choose to install it themselves. However, it’s always recommended to seek professional help and advice before tackling this project.

The installation process requires the help of a contractor for their expertise. Proper installation means less likelihood that the siding will expand or crack over time, leading to bigger and more expensive maintenance issues. Construction warranties may also be voided by faulty or improper installation, so make sure you do your research and seek professional help if needed.

Material Durability

The material used in vinyl siding is also very durable, meaning it will last for many years. Vinyl doesn’t warp, rot, crack, or peel with time, so you don’t have to worry about costly replacements down the road as a homeowner.

When installed properly, vinyl also won’t shrink, expand or contract over time. This is beneficial to the homeowner who wants a trouble-free product that requires minimal upkeep and maintenance. In case a rock flies from your lawnmower and pierces the siding, you can replace the plank fairly easily and cheaply.

Most manufacturers also boast a lifespan for the vinyl siding of up to 30 years. A properly installed and well-maintained vinyl siding does a good job of protecting a building’s exterior surfaces while keeping its interior well insulated.

Relatively Inexpensive Compared to Other Siding Materials

Like stone or brick, vinyl is an investment. For around $1 per square foot installed (the average cost for new home construction), you get long-lasting siding that will protect your home in many climates. It’s also relatively inexpensive compared to other popular materials such as wood clapboard siding, wood pulp, fiber cement siding, and aluminum.

Though the prices will vary depending on the manufacturer and the installation process, you can expect vinyl siding to cost between $3.50 and $7 per square foot. Fiber cement siding is double that price. So, if you want the most bang for your buck, you can never go wrong with vinyl flooring.

No Painting Required

One of the biggest benefits of vinyl siding is that it does not require painting. This is because the material, made from polyvinyl chloride (PVC), has a color built into it that makes it resistant to sun damage and ultraviolet rays. With no need for paint or maintenance, you will save yourself time and money.

Vinyl siding colors cannot be mechanically abraded, scratched off, or stripped. So, if you wish to restore or change the color of your vinyl siding via residential exterior painting, this siding material is highly receptive to paint. With vinyl siding, you can easily outfit your home or business with any color scheme of your choice as long as you know how to choose paint colors

Vinyl Siding is Low Maintenance

Although vinyl house siding does not require paint, it will wear down over time and need to be replaced. The occasional cobwebs, bugs, mud, and other debris can easily be sprayed down using a garden hose. Never use a power washer on your vinyl siding, as this could cause serious havoc if the water enters your home through cracks around the siding or exacerbate minor tears in the crevices.

Cons of Vinyl Siding

Despite all its benefits, vinyl siding has its setbacks. Here are the cons of vinyl siding:

Moisture Problems

Vinyl houses siding does not absorb moisture; rather, it creates a waterproof barrier between your home and the outside elements. Vinyl siding is installed over a styrene insulation board which can cause water vapor to become trapped in the wall cavity without an escape route.

Vinyl siding
Image credit: http://blog.newhomesource.com/

Thus, if water seeps into small cracks and holes in the vinyl, this can cause major damage to the wood foundation or create conditions that attract mold, mildew, rot, and termite infestation.

Vinyl Siding is Less Eco-Friendly

Vinyl siding is plastic and is made of polyvinyl chloride, which isn’t eco-friendly. The manufacturing process produces greenhouse gasses such as nitrogen oxide and carcinogens, including dioxin. Another by-product of vinyl siding manufacture is sulfur dioxide which causes acid rain and smog.

This process also requires a vast amount of electricity. These gasses and chemicals can contribute to climate change and pollute the air. That’s why most recycling plants do not accept PVC products because they’re both challenging and expensive to recycle.

Vinyl Siding May Lower Your Home’s Value

Although it is cost-effective, vinyl siding still requires a large initial investment. If you’re looking to sell your home soon, this may be a deterrent for potential buyers who might not want the inconvenience of dealing with maintenance and replacement costs on their own.

Vinyl siding may decrease your home’s value since many homebuyers tend to view it as inferior to real wood, masonry, or other materials. It could potentially result in lower offers if and when you decide to move to your home later.

Maintenance Issues

Even though vinyl siding can withstand harsh conditions such as strong winds and heavy rainfall, it can have some maintenance issues. Vinyl siding is sensitive to extreme heat and cold. If you live in an area with harsh winters or summers, your vinyl siding may warp because of the temperature changes.

Besides irregular coloring, warping can also affect how tightly your panels lock together, leading to water damage if it’s not fixed immediately. Siding planks often split or break due to the expansion and contraction caused by temperature changes. If a lawnmower sends a rock flying at your house, it may pierce the siding. Vinyl siding cannot be patched, so the entire plank must be replaced.

Installation is Simple But Not Full Proof

Although vinyl siding is easy to install, it can be expensive to have a professional do the job for you. Vinyl will not bend around corners, so if your house has rounded corners, you’ll need someone with experience installing vinyl siding to do this part of the job. And if your siding is nailed too tightly, it will expand, crack, bulge or warp.

Construction warranties often last only one year, and the product warranty may be voided by faulty installation. Not every contractor has invested in proper training and certification, which is loosely regulated and expensive. Whether you’re investing in a brand new vinyl siding or seeking a siding replacement, you must do your homework well while hiring contractors for this project.

Color Fading

Many vinyl siding brands have been tested to resist color fading when exposed to UV light from the sun. Inferior materials may fade in just a few months, causing homeowners lots of headaches and expenses. In fact, some contractors refuse to use certain products because they don’t hold up well over time.

While there are many vinyl siding manufacturers, not all of them are equal in quality. Indeed, some vinyl house siding brands require homeowners to use specific cleaners and paints. Using the wrong products can destroy your beautiful new siding over time.

FAQS on Vinyl House Siding

What happens if water gets behind vinyl siding?

Rainwater leaking from your gutter ends up behind the siding and causes a wall to rot. However, vinyl is a rare siding product that remains completely unaffected by the water behind it.

What do you put under vinyl siding?

You can install vinyl siding over common wood sheathings such as plywood, oriented strand board, or other materials.

Final Thought on Vinyl House Siding

Whether the pros of vinyl siding outweigh the cons or vice versa, there are many reasons to select vinyl as your siding material or consider other options. But whatever the case, make sure you hire a siding specialist that can install, repair, and replace your property’s siding.


The post Vinyl House Siding: Pros and Cons appeared first on Kitchen Infinity.

Did you miss our previous article…
https://www.centrecountyfood.org/?p=913

post

Bissell Proheat 2x Revolution Pet Pro Carpet Cleaner Review

If you have pets and your house is carpeted, you know better than anybody that these two can be hard to maintain. But not if you have the Bissel proheat 2x revolution pet pro carpet cleaner. According to those who’ve tried this carpet cleaner, pet hair, pee, and other pet stains are no match for it.

But does it really live up to its name? Is this carpet cleaner worth the price? Well, in this review, we’ll look at the key features, pros and cons, and value of this carpet cleaner. Read on to see if it’s worth your penny.

What Is Bissell Proheat 2x Revolution Pet Pro Carpet Cleaner?

Bissell proheat is the latest high-tech carpet cleaner from Bissell, a company widely known for its quality cleaners. In the age of digital everything, this cleaner is not just your usual machine that sprays water onto your carpets and sucks it back up again with a dirty waste tank also filled with water after being filtered. This cleaner uses hot tap water to clean your carpets and then recycles the water into the tank with little to no wastage.


Image credit: https://www.bissell.com/

This little machine may be small, but it packs a punch. Not only does it offer the perfect carpet cleaning solution, but with its built-in stain remover, it can also remove most pet stains and odors without you having to scrub at them yourself.

Bissell Proheat 2x Revolution Pet Pro Carpet Cleaner Features

This is the best Bissell carpet cleaning machine for pet owners, but what has made it so popular? Here’s a quick overview of this machine’s key features:

Express Clean Mode

The Bissell proheat 2x revolution pet pro carpet cleaner has a one-touch mode specifically for pet stains. Just press the button, and the machine does all the work for you, including heating the water to the perfect temperature. This feature is indeed a time saver for all homeowners who don’t have much time at their disposal. It also has a deep cleaning mode that you can switch to remove stubborn stains.

Heatwave Technology

This Bissell cleaner also comes with Heatwave technology, which helps maintain the cleaning temperature. With this, your carpets are always being cleaned at the right temperature, no matter how long the job takes. You don’t have to worry about always adjusting the temperatures, which can be time-consuming.

Dual DirtLifter PowerBrushes

These PowerBrushes help you dig deep down into the fibers of your carpets and extract all the dirt, dust, and pet hair. The brushes loosen all the dirt before actually removing them and leaving your carpet as clean as new. Not only will this leave your carpets cleaner, but it will also extend their lifespan. This feature comes in handy for anyone who wants to deep clean a carpet

ntibacterial Cleaning

If pet odor takes over your carpet, no need to worry if you have this machine. With its built-in antibacterial cleaning, this machine will eliminate the stench that comes with pet stains and odors. The technology controls all the bacterial that could be hiding in your carpet, living it clean and fresh.

2-in-1 Upholstery Tool

Another thing you’ll love about this machine is the 2-in-1 upholstery tool. This tool lets you clean furniture, stairs, and other delicate surfaces easily. The narrow width of the tool means that you can get into tight spaces and remove all the dirt, dust, and pet hair with little effort.

Comes Complete

If you buy this pet carpet cleaner, you won’t need to buy anything else separately as it comes fully equipped for the job. The machine comes with an 8-ounce bottle of Bissell’s professional Deep Cleaning formula, a trial size of their SpotBot Pet stain remover, a crevice tool, and a dirty water tank to collect dirty water that comes from carpet cleaning. In addition, the machine features a generous 3-year warranty.

Comes Complete
Image credit: https://www.thespruce.com/

Bissell Proheat 2x Revolution Pet Pro Carpet Cleaner Pros and Cons

Pros:

Here are some things that you’ll love about Bissell proheat 2x revolution pet pro carpet cleaner:

Hot tap water is used to clean your carpets: This means less wastage, so you’re being eco-friendly when using this machine. It saves time and effort by having a pre-programmed one-button mode for pet stains.Made specifically for pet owners: If you have pets, this machine comes as a huge relief as it has tons of features that are perfect for pet owners. These include the Express Clean Mode, Heatwave technology, and antibacterial cleaning. It also comes with a 2-in-1 upholstery tool for delicate surfaces.3-year warranty: This machine is built to last, and in case anything does go wrong, you’re covered with a generous 3-year warranty.Easy to Use: The machine also comes with a user guide, making it easy for you to set up and start using it.It offers powerful cleaning: The Dual DirtLifter PowerBrushes help to dig deep into the fibers of your carpets and extract all the dirt, dust, and pet hair. This leaves your carpet as clean as new.Easy to clean: This carpet may be bulky, but it’s one of the easiest to use even for those learning how to clean a carpet. You have to plug it in, wait till the Ready indicator light turns on, and press the Express Clean button.Comes complete: All you need to get started is included when you buy the Bissell carpet cleaner. This includes a 32 oz bottle of their professional deep cleaning formula, a trial size of their SpotBot Pet stain remover, a crevice tool, and a dirty water tank at no additional cost.

Cons:

Here are some things you might not like about Bissell proheat 2x revolution pet pro carpet cleaner:

Heavy and bulky: The machine is heavy and bulky, making it difficult to move around when cleaning. The cord is also short compared to other machines.Makes noise: The machine makes quite a bit of noise when used, which might be a problem for some people.Only cleans carpets: If you’re looking for a machine that can also clean your furniture and stairs, then this is not the one for you.Not easy to set up: The machine is not as easy to set up as some other machines on the market. However, it comes with a detailed instruction manual that you need to keep nearby.

Bissell Proheat 2x Revolution Pet Pro Carpet Cleaner Performance Comparison

The Bissell proheat 2x revolution pet pro carpet cleaner is a clear winner when it comes to performance comparison with many other carpet cleaners. It has many perfect features for pet owners, such as the Express Clean Mode, deep clean mode, Heatwave technology, and antibacterial cleaning. In addition, it comes with a 2-in-1 upholstery tool for delicate surfaces. The machine also offers powerful cleaning with the Dual DirtLifter PowerBrushes.

So, if you’re looking for a powerful and efficient pet carpet cleaner, the Bissell proheat 2x revolution pet pro is a perfect choice. It comes with a generous 3-year warranty and is easy to use. Plus, it’s perfect for removing pet stains and hair from your carpets.

Should You Buy Bissell Proheat 2x Revolution Pet Pro Carpet Cleaner?

So, are you asking if this carpet cleaner is really worth it? Well, you have the answer in the review above. But to be sure, we can guarantee that the carpet cleaner is worth the money considering all the features and the advantages. Bissell proheat 2x revolution pet pro carpet cleaner is a perfect choice for pet owners who need to deep clean their carpets. And if you’re looking for a machine that’s easy to use, this is just what you need.

Not to mention that it’s not as expensive as other carpet cleaners out there. So, if you’re looking for a powerful and efficient pet carpet cleaner, the Bissell proheat 2x revolution pet pro is a perfect choice. It comes with a generous 3-year warranty and is easy to use. Plus, it’s perfect for removing pet stains and hair from your carpets.

Well, we won’t fail to mention the downsides, which are, as we have already said, the weight and noise. Plus, it’s not easy to set up and not suitable for cleaning stairs and furniture.

To sum it all up, this is a good buy if you’re looking for a carpet cleaner that can solve your pet hair problems. So, if you have the money, go ahead and buy it.

What Users are Saying About Bissell Proheat

Bissell proheat rates well online as most users give it a 4 to 5-star rating. Most positive reviews praise the carpet cleaner for its powerful cleaning performance. However, some negative comments say that it’s heavy and bulky, just as we’ve stated.

One reviewer said they love the carpet cleaner because it gets rid of pet stains in just minutes. They also mentioned that their pets love to drink from a certain area of their home, which has resulted in tough stains over time. Overall, most users love this carpet cleaner and won’t hesitate to refer others.

Our Verdict on Bissell Proheat 2x Revolution Pet Pro Carpet Cleaner

We think you won’t find a better carpet cleaner for pet owners than Bissell proheat. The reasons are obvious. First, the rug doctor has a unique design that makes cleaning easy and efficient. Second, the Dual DirtLifter PowerBrushes make deep cleaning a breeze. Plus, it comes with a generous 3-year warranty and lets you clean carpets as well as furniture and stairs.

So, if you’re looking for a powerful carpet cleaner that’s perfect for pet owners, Bissell proheat 2x revolution pet pro is the one you need. It’s easy to use and efficient, making it a great choice for busy pet owners. You can’t go wrong with this carpet cleaner if you want to always have a clean carpet.


The post Bissell Proheat 2x Revolution Pet Pro Carpet Cleaner Review appeared first on Kitchen Infinity.

Did you miss our previous article…
https://www.centrecountyfood.org/?p=909

post

Acidic Soil: What It Is, How You Can Change It

Finding the right soil pH is important for the health of your plants. A proper pH balance helps plants develop strong root systems and uptake vital nutrients. While many gardeners focus on adding organic matter to their soil, testing soil pH levels is equally important.

Once you find your soil’s pH level, you can add things like limestone or elemental sulfur to balance it out. Acidic soil can be a real problem for your plants. It can stunt their growth and prevent them from absorbing basic nutrients needed for healthy plant development.

In this article, we’ll explain all about the importance of pH levels in your soil and how you can adjust them to help keep the plants happy and thriving. Let;’s get started.

What is Acidic Soil?

Acidic soil is soil that has a pH level of less than 7.0. This means that the soil is more acidic than neutral and can challenge plants to grow. The most common causes of acidic soil are high levels of rainfall, pollutants, and chemical fertilizers. The soil pH scale ranges from 0 to 14 with 7 as neutral.


Image credit: https://blog.zoysiafarms.com/

Acidic soil can have a harmful effect on plant growth by inhibiting nutrient uptake, damaging root systems, and causing leaf discoloration. It can also be a haven for pests and diseases.

Evaluating Soil

Identify Your Soil Type

Before testing your soil or adding anything to it, it is important to know what type of soil you have. Understanding the ecology of your land will help you determine if acidic soil is a result of natural conditions or something that you can fix.

For instance, well-drained soil and loose soil will be easily altered, while compacted soil with lots of clay in it will be difficult to change.

Understand Your Soil pH

Soil pH is a measure of how acidic or alkaline your soil is. A pH of 7 is neutral, below 7 is acidic, and above 7 is alkaline. The lower the pH, the more acidic the soil. Soil pH value can be affected by many things such as rainfall, organic matter, minerals in the soil, and the types of plants growing there.

Consider What You’re Planting

Some plants prefer more acidic soil than others. For example, blueberries and azaleas thrive in acidic soil, while rhododendrons and dogwoods prefer more alkaline soil. If you’re trying to grow a plant that prefers a different pH than your current soil, you’ll need to adjust the pH.

Test the soil’s pH

Testing the soil’s pH is as simple as buying a kit at your local nursery, or you can ask your county extension agent for a soil sample and testing instructions. Once you’ve tested the pH, make plans to raise or lower it depending on what kind of plants you want to grow and their preferred pH level. The good news is that there are simple DIY soil tests that you can do.

Have Your Water Tested

Your water supply might be what is affecting the soil’s pH level, so have a sample of your well or tap water tested to see what its pH is. If you don’t test the soil and the water, you’re not going to know whether your problem is with your soil or your water supply.

How to Change Soil pH

Make sure you check your soil’s pH every year by sending a soil sample to your local extension office to have them perform the test for you.


Increasing Soil pH

To make soils less acidic, the common practice is to apply a material that contains some form of lime. Ground agricultural limestone is also frequently used. Here are other ways of increasing the pH level of your soil:

Increasing Soil pH
Image credit: https://deepgreenpermaculture.files.wordpress.com/

Pick a Liming Material

There are many liming materials on the market, and they come in different forms. These ground limestone products include pulverized, granular, pelletized, and hydrated. Depending on your soil type and the amount of moisture in the ground, one of these products might be a good option. 

Pulverized lime is finely ground and easily absorbed by the soil. However, it’s more difficult to spread because it can clog the applicator. Granular and pelletized lime is less likely to clog when spread with a fertilizer spread over turf areas.

However, it’s not as effective at altering the soil pH. Hydrated lime should be used with extremely acidic soils because it’s more water soluble and can quickly increase the soil’s pH. Some lime sources contain micronutrients like dolomite, a mixture of calcium and magnesium carbonates.

However, you should only use dolomite lime if your soil is magnesium deficient. Do not add more magnesium to soils that are already high in it.

Consider Adding Wood Ashes

Wood ashes can also be used to increase the pH of acidic soils. The potassium, calcium, phosphate, and boron in wood ashes help to make the soil more alkaline and provide some nutrients to plants. 

When using wood ashes, it’s important to take into consideration the amount of sodium present. However, wood ash is not as effective as lime, but it can dramatically increase a soil’s pH over time.

Due to this, you should closely monitor your soil as you apply wood ash. Keep the ash from contact with any plant roots or germinating seedlings because it may damage them.

pply the Liming Source

Once you’ve determined that your soil is acidic, the next step is to add a liming source. A liming source is an agent that helps raise the pH of acidic soils. There are many different liming sources available, but the most common are limestone and lime.

Water the Soil Regularly

Putting a liming source into your soil is not enough. You must water it to help it move through the soil to where you want it. Lime moves through the soil very slowly, so be patient; wait at least one growing season before testing your soil again.

Decreasing the Soil pH

Some types of fertilizers can also help acidify the soil and most of them are safe to apply. These acidifying fertilizers include monoammonium phosphate, ammonium sulfate, diammonium phosphate, urea, and ammonium nitrate. Make sure you read the label on the fertilizer bag to determine if it’s acidifying fertilizer.

Use Organic Materials

Over time, organic matter such as pine needles, compost, or composted manure can acidify the soil. If you have added organic mulches to your soil in the past, test your pH annually. Organic matter is also good in improving soil drainage and aeration.

Consider Applying Sulfur to Lower Soil pH

Sulfur can help adjust the soil’s pH to desired levels. It is especially helpful for high-pH soils. However, sulfur does not last as long as lime, so you may have to reapply every few years. You should use elemental sulfur rather than sulfate or sulfite forms of sulfur that can be harmful to plants.

An excellent way to lower the pH value of small beds or garden areas is the addition of sphagnum peat. Sphagnum peat is also a good source of organic matter. Granular sulfur is also the safest, least expensive, but the slowest acting product to use when lowering your soil pH. The addition of sphagnum peat to large areas would also be cost-effective.

pply Aluminum Sulfate if Soil pH Is too Low

If the soil pH value is too low, you can apply aluminum sulfate to increase the acidity. This compound makes the soil more acidic due to a chemical reaction involving aluminum. Be sure to read the product label to ensure that the aluminum sulfate you are using is specifically for agricultural use. Also, avoid applying aluminum sulfate if the soil is already too acidic.

Apply Aluminum Sulfate if Soil pH is too Low
Image credit: https://blog.lawneq.com/

Till the Materials into the Soil and Water Well

When applying lime, sulfur, or aluminum sulfate to the soil, be sure to till them into the soil and water well. This will help the materials to dissolve and move through the soil so that plants can absorb them. If you do not water your fertilizer well, plants may not receive all of its benefits.

Rinse Your Plant After Application

If you are applying any fertilizer to your plants, be sure to rinse them off with water after application. This will help to remove any residue that may remain on the foliage and prevent any damage from occurring. 

If sulfur or aluminum sulfate gets on the leaves of your plants, you’ll need to rinse it off with a hose. Failure to rinse them off can result in burns to the leaves and damage to your plants. Watering your plants will also help the compounds.

FAQs on Acidic Soil: What it is and How You Can Change it

What happens when the soil is acidic?

Soil acidity decreases the availability of plant nutrients such as phosphorus and molybdenum. It also increases the availability of some toxic levels, such as manganese and aluminum.

Is acidic soil good for plants?

No, it’s not. Acidity can stunt a plant’s growth and make it more susceptible to pests and disease. However, most plants thrive in slightly acidic soils because that pH affords them good access to all nutrients.

Why is it important to control the pH of the soil?

A soil’s pH is one of its most important characteristics because it influences the availability of essential nutrients for plants. By managing the pH, you can ensure your plants have what they need to thrive, increasing yields and decreasing inputs.

Final Thought on Acidic Soil: What it is and How to Change it

There you have. Taking your soil acidity into account is an important part of gardening, whether you’re trying to grow acid-loving plants or not. Luckily, it’s not difficult to manage the pH of your soil, and most soils can be brought into a desirable range with a little effort. 


The post Acidic Soil: What It Is, How You Can Change It appeared first on Kitchen Infinity.

Did you miss our previous article…
https://www.centrecountyfood.org/?p=904