post

Sanded vs. Unsanded Tile Grout: Basics, Pros, and Cons

When updating or building your own house, it’s important to opt for a great flooring option for your project. And that’s where tile grout comes in. Tile grout is the material that fills the space between tiles and helps to keep them in place.

It’s available in both sanded and unsanded varieties, and each has its own set of pros and cons. So, which type should you choose for your project? 

Let’s take a look at some of the most common types of sanded and unsanded tile grouts out there, plus their pros and cons. This will help you can make an informed decision about which one will work best for your needs.

What is Grout?

Grout is a thin mortar used to fill the joints between tiles. It is a mixture of cement, sand, and water applied with a grout float. In addition, grout is a dense, thick fluid made of water, cement, and sand. It also has other uses apart from sealing joints between tiles.


Image credit: https://networx.global.ssl.fastly.net/

Grout is also used as a reinforcement for existing structures and walls, used to fill voids. It’s also used to embed rebar masonry and even connect sections of concrete.

Factors to Consider Before Buying Grout Tile

Project Size

The size of the project will dictate the amount of grout you need to buy. If you are grouting a shower, you may only need a few pounds of grout because the space is small. Larger projects will require more grout. This is because grout comes in many forms and sized containers. You can get grout premade as a powder and in industrial-sized bags for extra-large projects.

Vertical or Horizontal Installations

Grout for vertical applications is often one color, while grout for horizontal installations is usually different colors. Vertical installation grouts are usually sanded or unsanded based on the application you will be using them for. You can also buy adhesive-backed backsplashes with integrated grout to make the process easier and cleaner.

In vertical applications, you’ll need a grout that can handle the tug and pull from the gravity, while in horizontal or floor grout, your grout doesn’t need to be thick or strong.

Tile Type and Size

Grout should also match the type of tile that you are using. For instance, you don’t want to use a soft, unsanded grout with large tiles as the grout will deteriorate over time and become prone to cracking.

Besides being larger than 1/8″, ceramic or porcelain tile is denser than glass, stone, or metal tiles. Even though they’re harder and denser than glass, stone and metal tiles still require sanded grout.

Colors of Grout

Sanded grout is also available in a variety of colors, whereas unsanded grout can only be white or beige. If you’re looking for a custom color, sanded grout is the way to go. Note that the most common grout color is gray. Grout also comes in many colors, including white, black, green, and even orange.

Some brands will also offer dyed grout where you can pick exact colors to match your decor or tiles.

pplication and Drying Time

Sanded grout is much thicker than unsanded, and as such, it takes longer to dry. While unsanded grout dries within four hours, sanded grout takes anywhere between 24 and 48 hours to fully cure or dry out.

This slow drying time means that sanded grout can be a hassle for contractors who need to get the job done and over with, but it also means that sanded grout is extremely durable. As such, sanded grout is more frequently used in commercial settings where durability is a must.

The Cost

Grout is not expensive, but you need to purchase large amounts of it based on the size of your project. The cost includes everything, ranging from the mixing pail, bucket or tray, coloring or special needs, and the application trowels, clean-up tools, equipment, and other items.

Grout Widths

Sanded grout is best for grout lines ranging from 1/8 inch to 1/2 inch. Grout lines of more than 1/2 are impractical and will crack and become unstable. And because unsanded can also be used for 1/8 inch lines, it’s recommended that you use sanded grout and not unsanded.

Unsanded grout is best for grout lines as wide as 1/8 inch and down to 1/6 inch. The unsanded grout is used in this application because the sanded grout won’t properly compact into thinner grout lines. On the other hand, unsanded grout will slump, crack, and not provide the proper fill.

Tile Surface Recommendations

Sanded grout is used for tile surfaces where scratching from the sand content in the tile grout won’t be a problem. If you’re looking regrout and lack much skills, then sanded grout is the way to go.However, unsanded grout is recommended for tile that is easily scratched such as natural stone, glass, certain porcelains and ceramics. The sand content in sanded tile may damage these surfaces. Abrasion from sanded tile is also not enough to scratch the tile surfaces.

Sanded vs. Unsanded Grout

Image credit:

These two types of grout may seem the same, but they are not. Unsanded grout is perfect for smaller projects or areas where less durability is needed. It is a blend of Portland cement, water, and sand that can be easily applied with a rubber grout float by pressing it into the joints.

On the other hand, sanded grout is a blend of Portland cement, water, sand, and lime. This type of grout is recommended for larger projects or areas that need more durability. The sand in the mixture helps to give it more strength and prevents it from cracking over time.

Sanded Grout

As mentioned earlier, sanded grout is a Portland cement-based grout with silica sand, inorganic aggregates, and chemicals. Sanded grout is best for creating wider grout lines.

Sanded Grout
Image credit: https://empire-s3-production.bobvila.com/

This makes it the best choice to consider for tiling applications because sand particles have the ability to lock with each other to form a sturdy joint. Sanded grout is also less expensive than unsanded grout as sand is a cheaper filler than polymers in unsanded grout. These fine particles increase grout stability, reduce shrinkage and offer better resistance to severe cracking of the grout.

Pros of Sanded Grout

It’s thicker than unsanded grout and is more durableLower cost compared to unsanded groutPresence of denser jointsAvailable in more color choicesPrevents shrinkage and cracking

Cons of Sanded Grout

Difficult to force into thin seamsMust be sealed with a pH-neutral, water-based, and penetrating sealerIt can damage smooth tilesIt cannot be used in joints less than 1/8 inch

Unsanded Grout

Also known as non sanded grout, unsanded grout is best for very thin grout lines from 1/8 down to 1/6 inch. Non sanded grout is easier to work with than sanded grout on vertical surfaces such as tile shower walls. The lack of silica aggregate in this grout works well with delicate tile surfaces such as ceramic tile and glass tile.

Unsanded Grout
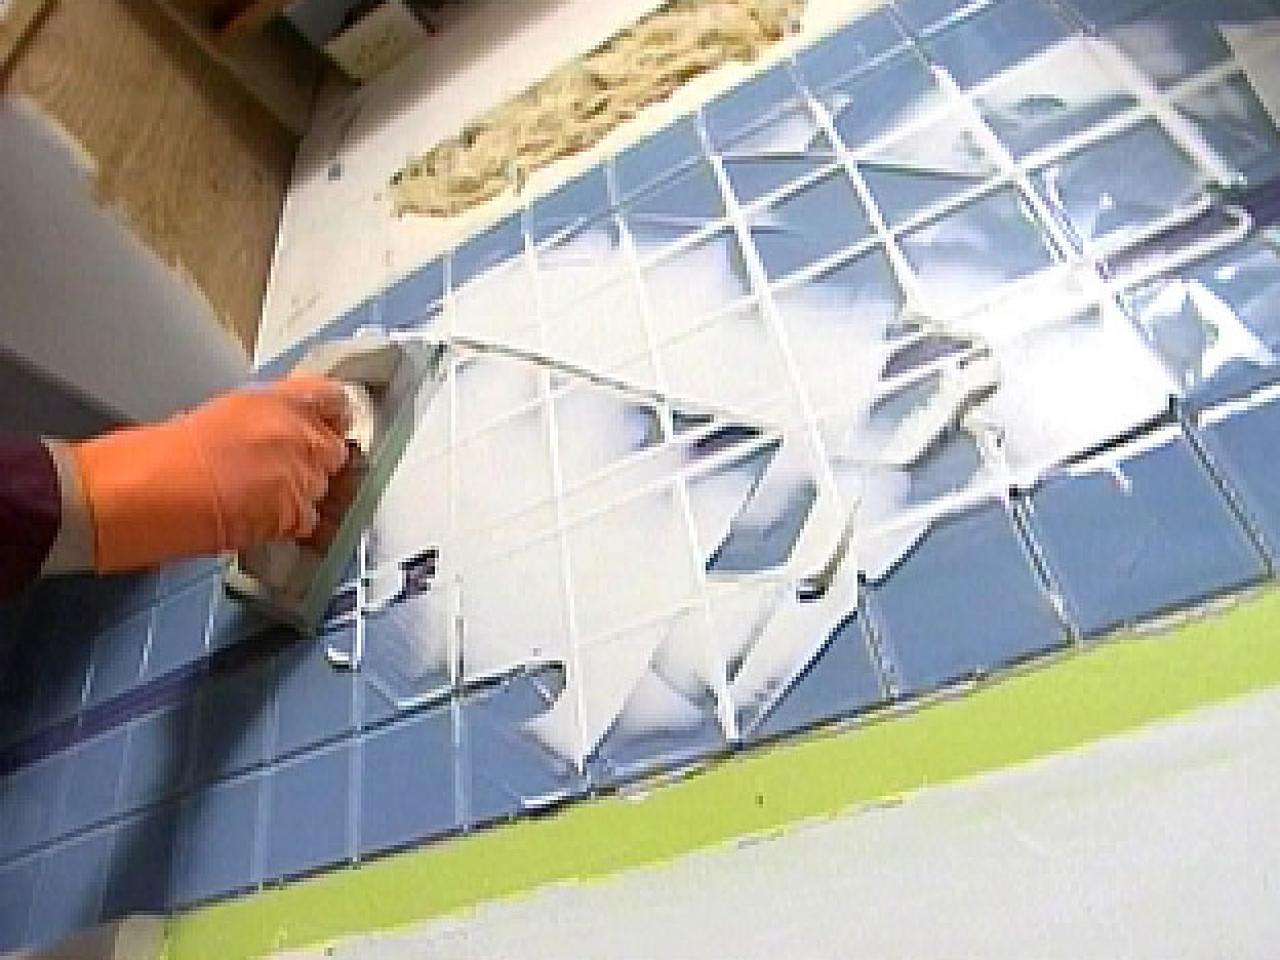
Image credit: https://diy.sndimg.com/

Non sanded grout is not ideal for large grout lines because it will slump, crack and not fill properly in width more than 1/8 inch. The grout is smooth textured and best for highly polished stone like marble and vertical lines such as bathroom and shower walls.

Pros of Unsanded Grout

Suitable for vertical installation and clings well to vertical surfacesGrout sealing may not be required in some applicationsPreserves sensitive tile surfacesBest for small spaces less than 1/8 inch

Cons of Unsanded Grout

More costly than sanded groutSlumps when applied to wide seamsLess color choices than sanded grout

FAQs on Sanded vs. Unsanded Grout Tile

Why is sanded grout cheaper than unsanded grout?

Sanded grout is cheaper because it doesn’t need to be as dense as unsanded. In addition, the tiny spaces between tiles are usually filled with a material other than grout, such as epoxy or mortar mix.

Which one is best between traditional grout and epoxy grout?

Epoxy grout is used in areas that are continuously exposed to water. Traditional grout can be stained, while epoxy grouts feature a non-porous surface.

Final Thought on Sanded vs. Unsanded Tile Grout

When applying grout on your walls, floors, and even mosaics, you’ll need to grout. The type of grout you need, whether sanded or unsanded, will depend on the product and joint spacing you have. You need to ensure that you get the right grout for your application to hold the tiles and prevent issues like cracking. You should also learn how to regrout tile because you’ll need to do this later on.


The post Sanded vs. Unsanded Tile Grout: Basics, Pros, and Cons appeared first on Kitchen Infinity.

Did you miss our previous article…
https://www.centrecountyfood.org/?p=662

post

How To Control Aphids On Indoor House Plants

Growing flowers and shrubs indoors has a lot of benefits, ranging from fresh air to improved home decor. However, the benefits can dwindle quickly when these houseplants are under attack by pests such as aphids. Aphids are small, sap-sucking insects that can cause a great deal of damage to plants.

They typically congregate on the undersides of leaves, feeding on plant sap. This can lead to reduced growth, wilting, and even leaf drop. Fortunately, there are several ways of controlling aphids on indoor plants. Keep reading.

What are Aphids?

These are small, soft-bodied insects that feed by sucking juices from plants. They are usually green or black and can be found on the undersides of leaves. Aphids can cause a great deal of damage to plants, leading to stunted growth and leaf drop. However, these insects move rather slowly, making indoor plants relatively easy aphid control.


Image credit: https://bdn-ss-hh.s3.amazonaws.com/

Identifying Aphids

Aphids are tiny insects that are nearly invisible to the naked eye. For instance, adult aphids are under ¼ inch and can be about any color from brown, red, and blue. Most aphid species can appear white, black, brown, grey, yellow, light green, and even pink.

Some may have a waxy or woolly coating. Adults are also wingless, but most species develop a winged form when populations become crowded to allow them to travel to other plants when food quality suffers.

What Do Aphids Do to Plants

Like most indoor plant pests, aphids feed on a houseplant by sucking the leaves, buds, and flowers sap. They like to cluster and feed on a plant’s new growth and flower buds, which can cause stunted growth, deformed leaves or flowers, yellow leaves, and leaf or bud drops. As aphids feed, they release a sticky substance, so you may notice the area around your plant is sticky before you even see tiny bugs on your plants.

What Do Aphids Do to Plants
Image credit: https://plantdoctor.co.nz/

phids Life Cycle

The life cycle of aphids is a bit different depending on the species. Some females give birth to live nymphs while others lay eggs. They multiply quickly, and the full life cycle can be as short as one week. The aphid eggs are super small, so you’ll never see them. 

Outside, their eggs survive the winter by attaching to woody growth. And in the spring, the eggs hatch into females. The females then give birth to a nymph without mating. Males are born in the fall and begin to mate with females to produce eggs in preparation for the long winter. 

There’s no winter indoors which can slow their reproduction, and female aphids can continue producing nymphs all year round without stopping. Thus, making the aphid population get out of hand in indoor plants.

Methods of Control

Tools and Materials

Small spray bottleSticky trapsCotton swabInsecticidal soapScissors or small pruning shearsNeem oilRubbing alcoholDish detergent and waterHomemade insect spray

Get Rid of Aphids With Insecticidal Soap

Insecticidal soaps can be bought at most garden centers. It comes in a concentrate, and you will need to mix it with water according to the directions on the bottle. It is important to follow the directions as too much soap can harm your plants.

Spray the plant leaves with the soap mixture, ensuring good coverage. Pay special attention to the undersides of the leaves where aphids like to hide. Do not spray plants in direct sunlight, as the soap can cause the leaves to burn. This method also works well on outdoor plants and helps get rid of aphids on tomato plants.

Alternatively, you can get rid of aphids on succulents and other houseplants using horticultural oil instead of dish soap. No matter the method you choose, make sure you combine the ingredients in a large bottle and shake until blended. If you know how to clean household leaves, this will be much easier.

Get Rid of Aphids With Neem Oil

Neem oil is a natural pesticide made from the seeds of neem trees. It has been used for centuries to control insects and viruses. Neem oil can be sprayed on plants as a natural remedy to kill aphids.

Get Rid of Aphids With Neem Oil
Image credit: https://finegardentips.com/

The one thing you should keep in mind is that it will also kill beneficial insects such as ladybugs and praying mantis, which may make your aphid problem worse if not used properly. Fill a spray bottle with one gallon of water and add two tablespoons of pure castile soap. Shake until blended. 

Then add one tablespoon of neem oil and shake again until blended. Spray on the infested plants every few days, making sure to coat the entire plant, especially the undersides of leaves.

Try Rubbing Alcohol

Aphids are attracted to the color yellow to use this to your advantage. Fill a spray bottle with one cup of rubbing alcohol and add two tablespoons of liquid dish soap. Spray infested plants every few days until the problem is solved. You will need to reapply after rain or watering plants because it washes away easily. 

This is a natural remedy for killing aphids in houseplants. Use a cotton swab and dab the rubbing alcohol directly onto the bugs. Before spraying the entire plant, be sure to test the solution on one leaf of the plant first to ensure it won’t damage your plant.

Eliminate Aphid Problem With Cayenne Pepper

If you’re not keen on using harsh chemicals or you want a more organic approach to getting rid of aphids, cayenne pepper may be the solution for you. Cayenne pepper contains a substance called capsaicin which is lethal to aphids.

Grind up one tablespoon of cayenne pepper using a mortar and pestle or a spice grinder to use this method. Then sprinkle the pepper on your plant, ensuring to get it under the leaves. Don’t worry if you don’t have this pepper. 

Instead, use a hot and chile hot pepper. All you need to do is add the pepper to the water in a small bowl or spray bottle, then soak the plant’s leaves with the base to keep out your indoor garden intruders for good.

Try Baking Soda and Canola Oil to Battle Plant Pests

Baking soda is a great way to kill any pests that like to suck the juice off your plants. To use, mix two tablespoons of baking soda with one tablespoon of canola oil. Put this mixture into a spray bottle and soak your plant’s leaves for five minutes. 

The oil covers the insects and breaks down their exoskeletons, leaving them exposed and more susceptible to toxins. On the other hand, the abrasive nature of baking soda wears down the bug’s outer shell, making it easy to remove from plants. 

There are also a number of other home remedies that you can use to get rid of aphids, such as using soapy water or horticultural oils. However, before using any of these methods, test them on a small area of the plant to make sure they are not harmful.

Use Houseplant Sticky Stakes for Flying Aphids

Another way to eliminate aphids is to use sticky stakes. These are small wooden stakes with a sticky material on the top that will trap the aphids when they land. You can buy them from most garden stores or online. Insert the stake into the soil next to the plant, and wait for the aphids to land.

If you see winged aphids on your houseplant, don’t fret. Instead, get some sticky houseplant traps and put a few around nearby houseplants to capture any winged aphid that might be flying around. Sticky traps can also catch fungus gnats, so don’t panic when you see lots of bugs in the trap; they might be fungus gnats. 

Many people have found that this is the most effective way to get rid of aphids on houseplants since it is simple and easy to use, plus you can catch a lot of aphids in one setting.

Cut Away Infested Areas

If the infestation is bad, you may find that it’s best to cut away any infested parts of your indoor houseplant. This way, you can kill off the aphids without them spreading. Be careful when cutting so you don’t damage or hurt nearby leaves and branches.

You might want to wear some gardening gloves while doing this. Moving the entire plant may also prove necessary when the whole plant is infested with aphids. Place infected plants in an isolated area such as a balcony or a room away from other plants.

Check for Other Household Pests

It’s also a good idea to check your other household plants for pests like spider mites, whiteflies, and scale insects. These pests can often travel from one plant to another, so it’s important to get rid of them before they take over. Aphids release a sweet, sticky substance known as honeydew, attracting other pests.

This watery substance looks like a little sooty mold on the leaves and is a huge draw for other insects, especially ants. So, it’s important to take care of any aphid infestation as soon as possible to prevent other pests from taking over. Also, learn how to get rid of ants because they can also be a danger to your plants.

FAQs on How to Control Aphids on Indoor Houseplants

How do indoor plants get aphids?

Aphids are easily brought indoors on infested plants. They also come attached to the clothing and through an open window by the wind.

Why do aphids keep coming back?

Aphids are attracted to plants with soft new growth. Thus, overwatering and over-fertilizing your plants may make them more enticing to aphid populations which may cause negative connotations to your plants.

Final Thought on How to Control Aphids on Indoor Houseplants

As you can see, there are numerous natural and commercial products from which to choose in your battle against aphids. Make sure you understand what attracts pests to your indoor garden, and you’ll easily be able to decide how to control aphids on indoor houseplants.


The post How To Control Aphids On Indoor House Plants appeared first on Kitchen Infinity.

Did you miss our previous article…
https://www.centrecountyfood.org/?p=658

post

13 Finished Basement Design Ideas

A finished basement is one of the best home features that you can have. However, it’s also important to make sure that your basement has the right design so that you can enjoy it fully. A lot of people have finished basements but don’t know how to use them.

Most people turn their basement into a playroom for the kids or an extra bedroom for guests. Some create home offices or even gyms in their unfinished space. Instead of settling on one idea, why not combine all these ideas with our finished basement design?

Here are some of the modern basement ideas to get you started:

1. Consider Studio Apartment

If you don’t need a lot of extra living space, consider turning your basement into a studio apartment. This can be great for guests or older kids who want their own space. You can add a Murphy bed or sofa bed to the design so that you can use the space as both a bedroom and family room. 


Image credit: https://a0.muscache.com/

A finished basement has many potential, so don’t be hindered by only leaving it unused. From a bedroom to a studio apartment to a coveted man cave, finishing your basement not only adds value to your home but also has a lot of square footage for your entire family.

2. Design a Modern Basement Bar

The sky’s the limit when finishing your basement when it comes to design. Why not consider a modern basement bar? This can be a great place to entertain guests or relax after a long day. You can add a bar area with stools, as well as a small refrigerator and sink.

Design a Modern Basement Bar
Image credit: https://metrobuildingandremodeling.com/

If you have the space, consider adding a small wet bar. If you’re looking for an even more adult design, perhaps consider adding a pool table, dartboard, or television. Another fun idea is to add pinball machines and other arcade games that can be played with your family and friends.

You could also create an intimate area by having sofas and armchairs in your design. Whether you’re just hoping to entertain or building an ultimate man cave, adding a home bar is a great addition to any basement.

3. Create Another Living Room in Your Basement Space

Why have one family room when you can have two? Adding another living area in your basement is a great way to expand if you have the space. This can be done by adding furniture for lounging or designated sitting areas. This design will be perfect if your family spends time watching television together or playing games.

Create Another Living Room in Your Basement Space
Image credit: https://capablegroupinc.ca/

A basement living room is also the perfect place to get together with the family, watch movies and unwind. Creating a cozy basement living room is a great way of creating a fun space at home without sacrificing much.

4. Sweat it Out in a Home Gym

If you are one of those people who love to engage in your favorite outdoor activities during the weekend, the chances are that you build up a lot of sweat. After an exhilarating workout, a home gym might be just what you need to relax. Many homeowners choose to convert part of their basements into home gyms.

You can also create a home office in your basement. This is a great idea if you need a home office but don’t want to take up too much space in your house. A basement home office can also be great for people who work from home.

5. Increase Natural Light

One of the most important basement ideas you can incorporate in your basement early is to welcome more natural light. You can do this by either keeping the basement windowless or including large, well-placed windows. If you have a finished basement, adding a few windows can drastically improve the look and feel of the space. 

Not only will it make the space feel brighter and more open, but it will also help to improve air circulation. Choosing light paint colors can also help to brighten up the space.

6. Enjoy a Theater Experience at Basement

What is the better feature to include in your basement than adding a home theater? Basements often have little to no windows, making this dark space ideal for a movie theater vibe. Raise the floor to at least the standard eight-foot ceiling height for comfort.

Enjoy a Theater Experience at Basement
Image credit: https://optic.nordarchitecture.com/

If you have enough space, go higher to provide better viewing angles for your guests and family members. Invest in recessed fixtures with soft lightning; you can dim and swap your TV set with a projector and screen.

7. Customize Your Staircase

Your stairs are what your guest will see when they walk down into your finished basement. Give your guests something to talk about by adding a unique and interesting staircase. Create suspended steps, light-up steps, and glass side panels to add style to your basement stairs.

There are many unique staircase designs to choose from that can fit any style. If you want something sleek and modern, go for a metal or glass staircase. Try a wooden staircase with intricate carvings if you want something more traditional.

8. Consider Your Kids Playroom

Modern basement ideas don’t just have to be for adults. Consider doing something fun for your little ones by turning the basement into a playroom. What better place for kids to play than in their very own space? You can turn this room into anything that you want. It’s your basement, after all. 

Consider Your Kids Playroom
Image credit: https://juicy-bits.typepad.com/

Have fun with paint and toy storage options by painting one of the walls with chalkboard paint. This way, your kids can use it as a blackboard as well. You can also install a foosball table or a pinball machine to make it all the more entertaining in the same area. Consider some of the best kids’ playroom ideas for some inspiration.

Keep in mind that if you decide to do this, your children’s game room must be properly ventilated and have proper lighting at all times. Having exposed wires hanging from the ceiling and light fixtures that don’t work will only cause accidents and injuries. Besides, it isn’t safe to play in a room with poor lighting, among other things.

9. Turn Your Basement Space into a Bedroom

You can easily turn it into a bedroom if you have extra basement space by adding in a few basic amenities. For instance, you will need a bed, dresser, nightstands, and lamps. You might also want to consider adding in a television or gaming console if that is something you think you or your partner would enjoy.

Also, if you have a teen that’s tired of sharing a bedroom with a younger sibling, create a basement bedroom to give your teen the space, privacy, and comfort they need for a good night’s rest. If you want that spare sleeping area but don’t have the space, you can create an alcove with a built-in bed and shelves for your smaller basement. Make sure your design ideas also include enough space for bathroom renovations.

10. Get Creative with Flooring

Flooring should be at the top of your basement renovation list. This unfinished basement idea will only look decent if the chosen flooring is attractive. Concrete floors are a popular basement choice because they’re durable and easy to maintain, but this doesn’t mean you have to settle for a boring concrete floor. 

You can cover unattractive concrete floors with inexpensive rugs or add a carpet in your favorite color or pattern. Laminate, hardwood, and tile are all attractive flooring choices that are easy to maintain. Create a cozy basement space with wall-to-wall carpeting to make your basement look stylish. There are many good carpets for basement flooring to consider for this project, you just have to be creative enough.

11. Opt for Drop Ceilings

Unfinished basements often look unfinished. An easy way to add color and style to your basement is by installing a drywall ceiling. A drop ceiling with tiles in your preferred color will add visual interest and style to any basement room.

Opt for Drop Ceilings
Image credit: https://www.yourownarchitect.com/

Drop ceilings not only help keep your basement at a comfortable temperature, but they’re also good for soundproofing the space. Also, if you plan to build a spare bathroom and a home theater in your basement, drop ceilings will help to hide the unsightly plumbing pipes and wires.

12. Give Laundry a Designated Area in Your Basement

If you’re like most people, your laundry room is one of the most cluttered and busiest spaces in your home. Why not create a designated area for your laundry in your basement? This will help to keep the space clean and organized. You can either install a washer and dryer in your basement or use a nearby closet to act as storage for your laundry supplies.

If you choose to install a washer and dryer in your basement, be sure to select an Energy Star rated model. This will help you save money on your energy bills. Add tall storage cabinets to store your ironing boards and detergents.

13. Brighten Up the Basement

Take advantage of this basement remodel idea that will make it a light and airy part of your home. The goal is to maximize ventilation, natural light, and a sense of connection with the outdoors. Cut back the floor above by introducing light through the house. You can also install a glass ceiling to borrow light from the windows above. 

However, don’t worry if your basement design lacks these strategies or your budget doesn’t stretch. Instead, opt for decor that will make it feel bright and open. On home decor, you can choose a bright white finish for the walls while exposing the ceiling joints and lumber and finish with matte black to increase the feeling of the height.

FAQs about Finished Basement Design Ideas

Is finishing the basement worth it?

You’ll find that you can save money if you finish the basement yourself instead of hiring professionals. While the basement doesn’t add the overall square footage of the house, it can function as a family space, office, home classroom space, and guest room. Remodeling the basement into a modern style also improves the resale value of your home.

Final Thought about Finished Basement Design Ideas

When it comes to designing a finished basement, there are endless possibilities. You can create a space that’s perfect for your needs and lifestyle, whether you use it as a living room, office, home classroom space, or guest room. Remodeling the basement into a modern style also improves the resale value of your home. 

With so many different design options to choose from, there’s sure to be one that’s perfect for your needs and budget. So don’t wait any longer; start planning your dream basement today.


The post 13 Finished Basement Design Ideas appeared first on Kitchen Infinity.

Did you miss our previous article…
https://www.centrecountyfood.org/?p=652

post

Sewer Cleanout Where To Find It

Sewer cleanouts are an important part of your property’s plumbing system. Without them, you would have to constantly deal with problems that crop up in the sewer pipes such as clogs and cracks. The good news is that sewer cleanouts are easy to find.

In this article, we’re going to show you what your sewer clean-out is and how to find it. We’ll also speak about how to check if it’s blocked and in such cases, how to clear the blockages. Let’s dive deep into this topic.

What is a sewer clean-out?

A sewer clean-out is a pipe that goes from your house to the city sewer system. It’s usually located in the basement, but it could be anywhere on your property. You can find a clean-out by looking for a water meter or inspection cover near the street.

Image Credit: http://mrrooter.com

If you don’t know where to find one, call a plumber and they’ll help you locate it.

Once you’ve found it, use a garden hose with an attachment to clear any blockages inside. This will fix most of the problems caused by tree roots growing into pipes or cracks in joints or seals.

If the blockage is too severe, you might need to call in a professional plumber to clear it for you. If it’s not too serious, you can also do a cleanup yourself. Let’s discuss how to do this.

How do I clear a blockage?

To deal with tree roots growing into pipes or cracks in joints or seals, use a garden hose with an attachment to clear any blockages inside the sewer clean-out. Here are some tips for clearing the blockage:

1) Connect the hose to your septic or city mainline at least 2 – 3 feet from the street

2) Place one end of the hose as far as possible inside your clean-out

3) Slowly turn on the water supply until you see that all debris has been cleared away

4) For stubborn blockages, turn the hose end to end as you try to clear it out

5) Once your clean-out is free of any debris, disconnect the hose and cap the end. Do not use harsh chemicals because they can damage your house’s plumbing system. 

Let’s now move on and look at what causes these sewer cleanout problems in the first place.

What causes a blockage?

Tree roots: When tree roots grow into pipes or cracks in joints or seals, they cause blockages that lead to trouble such as clogged sewers and water seepage. To avoid this type of problem, take care of your trees and keep them trimmed.

Clogs: Hair, grease and other debris can clog up your sewer pipes over time, which will cause a blockage. To avoid this, install a mesh drain cover to catch any large pieces of debris before they enter the sewer pipes.

Sumps: If your house is located on a sloping property, there is a danger that rainwater might accumulate in your septic tank or sewer line and cause a blockage. You can prevent this by installing proper drainage around your house.

Dented or broken pipes: When a pipe is damaged, it can cause a blockage as well. If you suspect that a pipe is damaged, call a plumber to have it repaired.

Remember to take care of your trees, keep your drains clear and install proper drainage around your house to avoid any current and future problems.

Other factors to consider

Remember that your sewer clean-out is just one part of your plumbing system. If you have any other problems such as clogged drains, call a plumber for help. They will be able to clear the blockage and fix the problem.

Also, remember to keep an eye on your water bills. If they start to increase unexpectedly, it might mean that you have a plumbing leak somewhere in your house. Get a plumber to check it out and fix the problem before it gets worse.

Municipal sewer lines are sometimes the cause of a blockage. If you find out that your problem is caused by the city sewer, contact your city council and they will send someone to fix it.

Also, don’t automatically assume that your house’s plumbing system is at fault if you have problems such as an overflowing toilet or low water pressure. Sometimes the problem may be due to another section of the city’s sewage lines instead. Here, it’s also best to get in touch with your local authority for further information about your specific case.

Next, ensure that your waste disposal system is working properly. If it grinds poorly, your drains may get clogged up more easily because there will be a build-up of food waste in them.

Keep an eye on your water meter when you have plumbing problems such as a blocked sewer cleanout. This helps find leaks and pin down any problems to specific times or areas of the house.

Finally, consider having a pipe wrench on hand to loosen any tight fittings that you may come across while clearing a blockage. Being handy will save you the time and money that you would have spent on finding a plumber.

Sewer Clean Out Where To Find It – FAQ

Where is the sewer clean-out located on my property?

The sewer clean-out is typically located in the yard near the house, close to where the sewer line leaves your property. It is a vertical pipe that sticks up out of the ground and has a cover or cap on top. You may also see a small metal box (called a manhole) near the clean-out.

How do I know if my sewer clean-out is clogged?

If water starts backing up into your drains or toilet when you are flushing or running water, then there is likely a blockage somewhere in the sewer line. The easiest way to tell if the blockage is at the clean-out is to pour a bucket of water into it. If it backs up into your sewer drain or toilet, then you have a problem.

The line may be clogged because there is too much water pressure coming into the house or perhaps someone mistakenly dropped something down into the drain that shouldn’t have been there. Dogs are also known to dig holes by the clean-out and cause blockages.

Unclogging your toilet can be done at home with the right tools, but you should really get a professional to look at your sewer cleanout if it is not working properly.

What do I do if my sewer line is blocked?

If you know there is something stuck in your line, use a plunger to try and dislodge it. The best tool for this job, however, is a plumbing snake, which can rid your lines of most clogs with relative ease. 

You will need to insert the cable into the clean-out, then feed it down through your line until you feel it drop into the main drain. Then crank the handle to send the cable further down. When it gets near where you know there’s a clog, turn the handle clockwise again to back up any debris that is loose in your line. You should be able to pull out some nasty stuff this way.

What are Sewer Cleanouts and How to Locate Them? - Auger Pros Plumbing and  Drain

Image Credit: http://augerpros.com

Why does my kitchen sink smell like sewage?

If yourkitchen sink smells like sewage, you may have some sewage stuck in there. In those cases, find your clean-out and remove the plug. Then you can try using an air compressor to push air into it while someone flushes the toilet to rid the sink of its terrible smell.

Final thoughts on sewer cleanout where to find it

While the inconvenience of having a blocked sewer clean-out is an ordeal, it’s better than getting your entire plumbing system damaged by water leaking through clogged pipes. 

Remember to keep trees at bay, keep your drain clear and install proper drainage around your house to avoid problems in the future. If there are any other problems with your plumbing system (such as pipe breaks) never attempt to fix them on your own.

By doing so, you may end up causing more damage to your home and spending much more than you would have if you called the professionals in the first place.

The post Sewer Cleanout Where To Find It appeared first on Kitchen Infinity.

Did you miss our previous article…
https://www.centrecountyfood.org/?p=645

post

How Types Of Air Conditioning Systems Work

What kind of AC unit should you get? What are your options, and how do they work?

With so many types of air conditioners on the market, it can be hard to decide which one is right for you.

This article will tell you everything about them so that you can decide which one is best for your needs. We’ll also give tips on how to maintain it efficiently and maximize its lifespan.

Keep reading to find out more. 

Types of Air Conditioners

Choosing a type of air conditioning system can be daunting because there are so many options. Here is a list of the four major types and their advantages and disadvantages. 

Window units

These units have an exterior compressor unit that mounts on the outside wall, with an interior split component that sits in the window opening.

dvantages

They are the least expensive type of AC unit and they can cool a single room very well.

Disadvantages

They don’t work well when the temperature outside is over 100 degrees and they can be quite loud.

Central air conditioning

Central AC units are installed in the attic or basement of your home and distribute cooled air through the air ducts you already have.

dvantages

They are very effective at cooling your entire home, so if you live in a large house or have multiple rooms that need AC, this is the way to go.

Disadvantages

Central AC units are the most expensive type of unit and require professional installation. Also, they can be a nuisance to install and may require additional ductwork.

Ductless mini-split

Mini-split systems consist of an outdoor compressor, a remote inside unit placed where you need it, and a series of small tubes that distribute the cooled air throughout your home.

dvantages

They don’t take up any floor space in your home, they are very efficient, and they cool individual rooms very well.

Disadvantages

They can be more expensive than other types of AC units, and they require professional installation.

Portable air conditioners

Portable AC units have an exterior compressor unit that sits on the ground outside your home and a hose that leads inside to the unit that sits on the floor.

dvantages

They are very affordable, they can be moved from room to room, and they are very efficient.

Disadvantages

They can be quite noisy, they require regular drainage, and they only cool a single room at a time.

How AC Units Work

Choosing thebest air conditioners is easier when you understand how they work. Air conditioners use a refrigerant to cool the air and a compressor to circulate it. The refrigerant is a fluid that changes state from liquid to gas as it absorbs heat. This change of state allows the refrigerant to absorb heat from the surrounding air and then release it outside, cooling the air in your home in the process.

Image Credit: http://servicechampions.net

The compressor is a pump that circulates the refrigerant through the system. It pressurizes the refrigerant and causes it to change state from gas to liquid, which allows it to absorb more heat. The compressor then sends the refrigerant to the condenser, which is a coil of metal tubing that releases the heat outside.

From the condenser, the refrigerant goes to the evaporator which absorbs the heat from the surrounding air and changes the refrigerant back to a liquid. This liquid is then circulated back to the compressor, where it starts the cycle all over again.

This process continues until the unit reaches the temperature you set on the thermostat. At that point, it turns off until the temperature rises or falls again, at which point it kicks back on and repeats the process.

How to Maintain Your AC Unit

Like any otherhome appliance, your AC unit needs regular maintenance to keep it running smoothly. Here are a few tips to keep your AC unit in good condition:

Clean the filters regularly.

This will help keep the air flowing freely and prevent the unit from overworking. Your filters should be cleaned every 1-3 months, depending on the type you have. Washing them with soap and water or vacuuming them is usually enough to keep them clean.

If you’re using electronic filters, it’s important to check them at least once a month to see if they need replacing. If your filter stops working properly, the unit will overwork itself trying to circulate air through the clogged filter.

This can cause major problems that require an expensive repair bill, so be sure to check your filters regularly.

Keep vegetation away from the outdoor unit.

The evaporator coils inside your AC unit are very sensitive and often freeze up when exposed to excess humidity in the air. This can lead to costly repairs or even system failure if the coils are damaged.

To avoid this, be sure to keep all vegetation, debris, and other obstructions away from the outdoor unit. A few feet of clearance is usually enough, but check your owner’s manual for specific instructions.

Have the unit serviced at least once a year.

A professional technician can clean and lubricate the parts of your AC unit to help it run more efficiently. They can also troubleshoot any problems you may be having and suggest solutions.

It’s important to have your AC unit serviced at least once a year to keep it running smoothly and prevent expensive repairs down the road. Contact your local HVAC technician for more information.

Make sure the compressor is free of debris and dirt.

The compressor is the most important part of your AC unit, so it’s important to keep it in good condition.

If you see any debris or dirt build-up on the compressor, be sure to clean it off using a soft brush or vacuum cleaner. Do not use water or any other liquids, as this can damage the unit.

Check the refrigerant level regularly.

If the level is too low, the unit won’t be able to cool effectively. This can cause expensive problems down the road as the parts wear out faster.

If you remove your AC unit’s access panel, you should be able to see a copper or silver cylinder near the compressor. This is usually marked with a red line or dot that indicates when it needs to be recharged. Keep in mind that this may vary depending on your unit, so check your manual for specific instructions.

Have an approved repair company make any repairs necessary.

Hiring an AC repair company is the best way to maintain your AC unit and avoid extensive repairs in the future. Any licensed HVAC technician will have plenty of experience with cooling systems and will know exactly what they’re doing when it comes to fixing them.

5 Different Types of Air Conditioning Units

Image Credit: http://ductworksmn.com

An experienced technician will know how to keep your system running properly and what type of maintenance is needed to keep it in top shape. They’ll also be able to troubleshoot any problems you might have, which can prevent major repairs down the road.

How Types Of Air Conditioning Systems Work – FAQ

What are the most common types of air conditioning systems?

The most common types of air conditioning systems are the following:

1) Central air conditioning

2) Room air conditioning

3) Portable air conditioning

How do central air conditioning systems work?

Central air conditioning systems work by cooling and dehumidifying the air in a single room or an entire house. They do this by drawing in warm, moist air from outside, cooling it down, and then releasing it back into the environment. Central air conditioners also have filters that remove dust and other particles from the air, which helps to improve indoor air quality.

Final Thoughts On How Types Of Air Conditioning Systems Work

In conclusion, we can see that there are several different types of air conditioning systems, and each has its unique properties.

Understanding the various properties of each type is important to choose the right system for your home, and this article should help you make that decision.

Once you have an air conditing system in place, taking the time to do proper maintenance is important to ensure that your system is running at its best.

The post How Types Of Air Conditioning Systems Work appeared first on Kitchen Infinity.

Did you miss our previous article…
https://www.centrecountyfood.org/?p=641

post

The Easiest Fastest Way To Paint A House

Beautiful, fresh paint is the quickest way to make your house look new. But before you can enjoy that feeling of satisfaction, there are some steps you must take first.

In this article, we will discuss the easiest and fastest way to paint your house.

Get all the supplies you need

When learninghow to paint a house, one of the most important things to remember is to gather all of the supplies you will need before beginning. This includes items like primer, paint, a roller, a brush, and painter’s tape.

By having all of your supplies ready to go, you can minimize the time spent running back and forth between your house and the store.

Cover furniture and other items

If you have any furniture or other items in the way, be sure to cover them up with newspapers, tarps, or old sheets. This will protect them from paint splatters and drips.

Furthermore, it’s a good idea to cover your floors with either drop cloths, tarps, or old sheets as well. This will help keep your floors clean and protected from paint drips.

Image Credit: http://houselogic.com

pply primer

Before painting your house, it’s important to apply a primer to the surface. Primer helps the paint stick to the surface of the house better and it also helps to prevent the paint from chipping and peeling over time.

Make sure to read the instructions on the primer canister carefully so that you know how to apply it correctly.

Use painter’s tape

If there are any areas of your house that you don’t want to be painted, use painter’s tape to mask them off. This will help prevent paint from getting on those areas.

Be sure to use plenty of painter’s tape and make sure that it is securely attached to the surface.

Paint one section at a time

When painting your house, it’s important to paint one section at a time and then let it dry for at least 24 hours before moving on to the next section. This will help ensure that the paint dries properly and doesn’t chip or peel.

If you try to paint too many sections at once, the paint might not have ample time to dry and this could lead to it chipping or peeling more easily.

Remove the tape carefully

After you’re finished painting, be sure to remove all of the painter’s tape as carefully as possible so as not to damage any of the paint underneath.

The last thing you want is for your paint job to look worse than before. By taking your time and removing the tape slowly, you can make sure that this doesn’t happen.

If there are areas of paint that got damaged by the tape, use a small brush and some extra paint to touch them up. Touching up areas like these will help ensure that your whole house looks great after painting it. With these steps in mind, you should be well on your way to painting your house.

Choosing your paint color

Wonderinghow to choose your paint color? The truth is that when it comes to choosing a paint color, there’s no one-size-fits-all answer. It all depends on your personal preference and the look you’re going for.

That being said, some tips can help make the process a little bit easier. The steps will help you narrow down the options and make a decision that you’ll be happy with.

1. Choose a light or dark color

When it comes to painting colors, one of the easiest ways to decide is to choose between light or dark shades. Light colors will make a room feel brighter and more spacious, while dark colors can give a room a more cozy and intimate feeling.

2. Consider your surroundings

Another thing to consider when choosing a paint color is your surroundings. If your walls are already colored a certain way, you’ll want to choose a complementary color so that they don’t clash.

3. Think about the mood you want to create

Think about the mood you want to create in the room. Do you want it to be calming and relaxing, or more energetic and fun? This can help you decide on the right paint color.

4. Decide between cool or warm colors

Cool colors are blues, greens, and purples, while warm colors are reds, oranges, and yellows. Cool colors are often seen as more calming, while warm colors can give a room a more energizing feeling.

5. Experiment with different shades

Once you’ve narrowed down your options, it’s always a good idea to experiment with different shades of the color you’ve chosen. This will help you find the perfect one for your space.

By following these simple steps, you’ll be able to choose the perfect paint color for your home.

Painting an exterior or interior house

Painting your house can make it look better and increase its value. However, choosing the right paint color is only half the battle. The other half is obviously the painting of the house.

If you’re painting your exterior house, there are a few things to keep in mind. First, you’ll need to make sure that the surface is clean and dry before you start painting. You’ll also need to use a primer to help the paint stick to the surface better.

7 Ways to Paint a House Fast | Ricciardi Brothers

Image Credit: http://ricciardibrothers.com

Once you’ve done that, it’s time to start painting. Be sure to use long, even strokes and avoid painting over the same area more than once. This will help prevent paint from dripping and create a smooth, even finish.

Once you’re finished, allow the paint to dry for at least 48 hours before moving on to the next section.

If you’re painting your interior house, the process is a bit simpler. You’ll still need to make sure that the surface is clean and dry before you start painting, but you won’t need to use a primer.

Painting your interior house is a lot like painting your exterior house – you’ll want to use long, even strokes and avoid painting over the same area more than once.

Easiest Fastest Way To Paint A House – FAQ

What is the easiest way to paint a house?

The quickest and easiest way to paint a house is by using a sprayer. A sprayer will allow you to quickly and evenly cover the surface with paint.

Which is better, painting by brush or spraying?

Painting by brush will give you a more even finish than spraying; however, it will be much slower. Spraying will give you a less even finish than brushing, but it will be much faster.

Do I need any special equipment to use a sprayer?

No special equipment is needed to use a sprayer. You will, however, need to purchase a sprayer that is compatible with the type of paint you are using.

Can I use a sprayer to paint the inside of my house?

Yes, you can use a sprayer to paint the inside of your house. However, you will need to take precautions to avoid getting paint on surfaces that you do not want to be painted. For example, you will need to cover furniture and floors with plastic sheeting.

How long will it take me to paint my house using a sprayer?

It will usually take between two and four days to paint a house using a sprayer. The time required will vary depending on the size of the house and the type of paint being used.

Can I use a sprayer to paint trim or cabinets?

Yes, you can use a sprayer to paint trim or cabinets. However, you will need to take precautions to avoid getting paint on surfaces that you do not want to be painted. For example, you will need to cover furniture and floors with plastic sheeting.

What are the dangers of using a sprayer?

The main danger of using a sprayer is the possibility of getting paint in your eyes. You should always wear safety goggles when using a sprayer. You should also make sure to keep the area where you are spraying clear of people and pets.

Final Thoughts On The Easiest Fastest Way To Paint A House

In conclusion, there are a few things to keep in mind when painting your house. First, using a professional painter can save you time and hassle. Second, choosing the right paint color can make your house look great. Finally, using the right tools and techniques can make the job easier and faster. By following these tips, you can pain your house quickly and easily.

The post The Easiest Fastest Way To Paint A House appeared first on Kitchen Infinity.

Did you miss our previous article…
https://www.centrecountyfood.org/?p=637

post

9 Best Air Conditioners of 2021

Keeping your living space cool during the summer months is very important. You need to enjoy all summer without worrying about the extremely high temperatures. That’s where the air conditioner comes in.

The air conditioning unit is your best friend in the summer months, making it one of the first things to buy for a new house. You can get through hot summer days or nights with your conditioner beside you. Air conditioning units help keep you cool and comfortable all summer long. They’re great for your home or office.

If you’re looking for the best air conditioner that will last you through 2021, then check out the list below.

1. LG Star Rated Window Air Conditioner

When it comes to air conditioners, LG is a top brand. If you’re looking for an Energy Star-rated window air conditioner, then the LG star-rated 6,000 BTU is your best bet. This LG air conditioner window unit is the perfect solution for those who want to keep their power use down, both for the environment and their wallet and their home’s temperature down.


Image credit: https://www.ubuy.ke/

You can control the three fan speeds and settings using the remote control or on top of the unit itself. It’s energy certified and automatically turns off once the temperature is cool enough. While it doesn’t have a lot of fancy features, it can keep the room cool and keep the power bill low.

Pros

It’s energy-efficientRemote control featurePresence of adjustable louvers

Cons

Boxy design

2. LG Electronics 14,000 BTU Window Air Conditioner

If you’re looking to keep medium to large rooms cool, then the LG Electronics model will be a good choice for you. It’s capable of cooling rooms up to 800 square feet. It has multiple attractive features, including being energy star certified, and has an excellent CEER rating of 14.7.

It has a dual inverter that offers quiet but powerful performance, and with its LG’s quiet LoDecibel feature, this unit operates as quietly as 44 decibels in sleep mode. After easy installation, it’s an excellent choice for cooling down a medium-sized room quickly and efficiently.

This window air conditioner also includes adjustable settings like four cooling speeds, a 24-hour timer, and four-way air deflection. You can also control the air conditioner using a smartphone or with Amazon Alexa and Google Home, thanks to its LG ThinQ Smart compatibility features.

Pros

Smart device compatibilityQuiet, sleep mode operation runs at 44 decibelsHigh-efficiency with 14.7 combined energy efficiency rating

Cons

98 pounds makes it a bit tough to install

3. Midea 5,000 BTU Window Air Conditioner

This window air conditioner is perfect for small to medium-sized rooms, with 5,000 BTUs of cooling power. It also features a fan-only mode when you need to circulate the air in a room without cooling it down. The Midea air conditioner suits a room up to 150 square feet, making it ideal for keeping a small bedroom and office cool.

Its mini size makes it easy to install, while mounting hardware is also included. There are very minimal modifications required to the window frame, making it a great choice for renters. It has two different fan speeds and a 1 to 7 cooling scale that are all adjustable. The adjustable side panels allow this window unit to work with a variety of windows, making it easy to install.

It also has a reusable, washable filter, which means minimal maintenance cost, saving additional costs.

Pros

Easy to installBudget-friendlyIdeal for small rooms and windowsThe reusable and washable filter cuts down on additional cost

Cons

Only suitable for small rooms of up to 150 square feet

4. Midea U Inverter Window Air Conditioner

This window unit offers unrivalled performance in the market. It has a balanced airflow for complete cooling and warming of spaces up to 550 square feet. The sleep mode, fan-only function, and self-evaporation system contribute to this AC’s purposeful design.

Midea U Inverter Window Air Conditioner
Image credit: https://www.gadgetreview.com/

It boasts of many of the features of a window AC unit without some of the major drawbacks. The Combined energy efficient rating of 15 and energy star certification means that this AC unit is also an efficient pick. The clever U-shaped design allows you to open your window for fresh air even when an AC unit is installed, making it more flexible than other window AC units.

Most of its units sit outside, cutting back on noise and allowing the unit to run as quietly as 42 decibels. This window air conditioner is smart home enabled and controlled using the Midea Air app, Google Home and Amazon Alexa, making it a top contender for the best window air conditioner.

Pros

Smart home compatibilityQuiet operation at 42 decibelsU-shaped design allows the window to open, even after installation

Cons

It can only be installed in hung windows

5. Serene Life Portable Air Conditioner and Heater

The Serene Life Portable Air Conditioner and Heater is a powerful all-in-one device. It has 12,000 BTUs of cooling power and 10,000 BTUs of heating power. It can easily cool or heat small spaces to 400 square feet. This portable air conditioner from serene life can cool, warm, and dehumidify.

It is fairly large and takes up space, but you can mount it on a window if you plan to use it in the same room for a while. It’s easy to move from room to room using the rolling wheelbase. It has three fan speeds, a digital touch control panel, and remote control. This makes it easy to get your room exactly how you want it.

Pros

It’s portableHigh cooling capacityRemote controlDigital controls

Cons

Large Ac unit

6. Black and Decker Portable Air Conditioner Review

Black and Decker are one of the best brands in the industry, making reliable appliances since 1910. This model is compact for a window air conditioner and easy to install. It has an energy saver switch that allows you to cut down on your electricity bill without sacrificing power.

This portable air conditioner from Black and Decker features a fan and dehumidifying mode to get you through the stifling summers and chilly winters. The 10,000 BTU unit makes it ideal for rooms up to 450 square feet. With cooling temperatures as low as 61 degrees Fahrenheit and heating temperatures up to 88 degrees, this portable air conditioner is ideal for keeping bedrooms, offices, and living rooms comfortable.

Pros

Cools in summer and heats in winterWide temperature range from 61 to 88 degrees FahrenheitCompact, wheeled unit is easy to move from room to room

Cons

The low energy efficiency ratio, making it low energy efficiency than other models

7. Whynter Portable Air Conditioner with Heater

The Whynter Portable Air Conditioner with Heater is a 14,000 BTU unit that can cool or heat a room to 500 square feet. It features three operating modes: cool, fan, and dehumidifies to keep indoor air comfortable.

It has a dual-hose design that allows separate intake and exhaust hose, increasing airflow and efficiency to provide quick cooling. Other convenience features include a simple setup, a 24-hour programmable timer, and a pre-filter and activated carbon filter system.

Maintaining this AC unit is very easy. Auto draining technology helps drain condensation automatically, and a washable pre-filter is easy to clean to keep the air fresh. Running at around 56 decibels, this portable air conditioner is reasonably quiet for a portable unit.

Pros

The wheeled design makes it easy to move from room to roomPresence of three operating modelsDual-hose design

Cons

It’s quite heavy

8. Keystone Through the Wall Air Conditioner

This AC unit is an extremely powerful one. It has a cooling capacity of 14,000 BTUs and can dehumidify up to 1.6 gallons per hour. This makes it suitable for rooms that are around 700 square feet in size. This wall unit is a great option if you’re looking for a more permanent solution than the window and portable air conditioner.

Keystone Through the Wall Air Conditioner
Image credit: https://mobileimages.lowes.com/

Both the unit and included remote control feature temperature sensors for climate monitoring, making it easy to monitor and control the temperature even from the other side of the room. Sensors trigger the AC to turn the compressor off when it reaches the set temperature in energy saver mode.

It also comes with other energy-saving features such as a sleep mode and a programmable 24-hour timer. A front access filter also keeps this unit easy to maintain.

Pros

Sleep mode and energy-saving mode help conserve powerThe front access filter allows for simple cleaning and maintenanceTemperature sensing remote control for easy control and monitoring

Cons

Requires a special 230-volt/20 amp electrical outlet

9. Whirlpool Window Air Conditioner

The Whirlpool is an energy-efficient window AC unit that will keep you cool and comfortable all the time. Large rooms can be difficult to cool without a central air conditioning system. So, if you plan to cool an extra-large room and open a floor plan, consider this 24,000 BTU air conditioner from Whirlpool.

It’s simple to install, providing cooling to large spaces without the need for a pricey permanent installation. Despite its robust cooling capability, this unit is energy-star certified and has an energy efficiency rating of 10.4. This allows you to cool big spaces without the big energy bill.

Features such as sleep mode, Eco mode, 24-hour timer, and washable air filter help lower maintenance costs and bills. Eight-way air louvers also direct the air where you need it for effective cooling. This unit requires a 230v outlet and won’t operate on a standard 115v household outlet to power its cooling system.

Pros

Energy-star certifiedCools rooms up to 1,500 square feet

Cons

A 230v outlet is required

FAQs about Best Air Conditioners of 2021

How do air conditioners work?

Air Conditioners work by cooling the air with a refrigerant system that absorbs heat from the room and transfers it outside. Air conditioners also remove humidity to help with comfort during hot weather.

What are BTUs, and why are they important?

The amount of heat an air conditioner can remove from a room is measured in British Thermal Units, also known as BTUs.

Final Thought on the Best Air Conditioners of 2021

As you can see, there are many great air conditioners on the market. These are all high-quality products that will keep you comfortable during hot temperatures. Pick one that’s right for your needs and budget.


The post 9 Best Air Conditioners of 2021 appeared first on Kitchen Infinity.

Did you miss our previous article…
https://www.centrecountyfood.org/?p=632

post

What is the Difference Between Cacti and Succulents?

Succulents and cacti are popular houseplants, but it can be hard to know their differences as they almost look the same. Unfortunately, most people use the terms interchangeably when talking about these two types of plants. This can be confusing to those new to both of these plants.

Even though cacti and succulents may appear similar, they are actually different. While cacti fall in the category of succulents, there are many succulents that are not cacti. To help clear some confusion regarding cactus vs. succulents, we’ve put together a list of their top differences below. Keep reading!

What Are Succulents?

Succulents are a variety of plants that store water in their roots, leaves, and stems. This characteristic leads to increased drought tolerance. Succulent plants are very popular in home gardening because they require very low maintenance compared to other houseplants. 


Image credit: https://succulentplantcare.com/

Succulents are available in more than 60 varieties. Some succulent varieties include aloe, haworthia, sedum, sempervivum, and cacti. So, as you can see, most succulents don’t belong to the same plant family. They differ in their visual, genetic, and geographical features.

Characteristics of Succulents

They have an evolved leaf texture surface that quickly prevents the plant from losing water. Succulent plants exhibit growth patterns consistent with water preservation. They have slow and compact growth consistency with energy preservation, spherical and columnar growth with limited surface area to avoid exposure and evaporation.They have ribs and grooves that allow them to shrink during droughts and swell with water when there’s precipitation.The plant also has Crassulacean acid metabolism photosynthesis, which allows it to open its pores at night to reduce moisture loss and take in carbon dioxide needed for photosynthesis during the day. In some succulents, photosynthesis is conducted by their green stems.They have a shallow root system to allow the plant to absorb moisture at the surface of the soil during drought periods.Some succulents such as the leaves of purslane are edible and can be used in salads and the juice of aloe vera plants, which has several health benefits.The agave plant is also another non-cactus succulent that is edible and is used to make agave syrup and tequila. Other non-cactus succulents include the moss rose, purple ice plant, Angelina stonecrop, Flaming Katy, and Chocolate Drop stonecrop.Another feature distinguishing cacti and succulents is that non-cactus succulents are native to multiple regions of the world, while most cacti are native arid climates.Succulents enjoy the warmth and bright light, but you shouldn’t leave them in prolonged direct sun exposure and excess warmth. Despite their drought tolerance, they can get leaf burn from too much sun exposure.Overwatering a succulent is also a sure-fire way of seeing your plant die because of root rot. But that doesn’t mean that you should never water them. They need water but in excess as this will hurt the plant.

What Are Cacti?

Cacti display the same characteristics as succulents, such as water storage, shallow roots, fleshy stems, and waxy leaves. If you want rock garden plants that can survive all the hardship, try cacti. But there’s always something that sets them apart from other succulents. Maybe it can be their spines or something else.

What Are Cacti?
Image credit: https://cdn.britannica.com/

Features of Cactus

The big difference is that they don’t have leaves and branches but are full of spines. You can also find some cacti without spines. Spines are some of their important adaptation features to survive in arid deserts.Another distinguishing feature is the areoles. An areole is a small bump on the surface of a cactus. It can be light or dark and serves as the site where flowers, spines, and hair grow out. An areole is the most defining feature of the cactus. Therefore, if the plant has spines but no areoles, that’s not a cactus.They don’t have leaves and branches but a succulent stem that photosynthesizes and stores water. Some cacti stem look like pads and flattened segments. They include prickly pears and Christmas cacti. Their large, colorful flowers produce fruit.They also have a water preservation feature, including a shallow root system, grooved stems, slow-growth, and column-like or spherical columns. Most cacti are native to the arid desert, but a few varieties like prickly pear cactus have better tolerance to cold.

Major Differences Between Cacti and Succulents

Cactus Spines

Most cactus varieties produce spines that may be needle-like, bristly, hairy, and woolly. These spines perform several functions. They protect the water-rich flesh of cactus from thirsting animals. They also disrupt the airflow around the cactus stems to prevent excessive water loss, especially in drying desert winds. Each spine also provides a small shade for the plant.

Cactus Spines
Image credit: https://www.gardeningknowhow.com/

Cactus Areoles

Cactus areoles are the small, raised areas of a cactus’ skin from which spines and sometimes hairs grow. These areoles also produce new buds, flowers, and fruits. The arrangement of the areoles on a cactus helps to identify different species. Areole is the defining feature of cacti, which is not found in succulents.

Cactus Flowers

Cactus and succulents all bloom. However, cactus flowers are far larger, showy, and more complex than succulents. Cactus flowers resemble other flowers and are normally pink, yellow, orange, blue, or red. They may be produced singly or in clusters.

Cactus Flowers
Image credit: https://knpr.org/

Cactus Fruits

Even though both cactus and succulents flower, only cactus produce fruits. Cactus fruit is typically hard and dry or fleshy and juicy. Prickly pear fruit and dragon fruit are the most known fleshy cactus fruits edible to humans.

Cactus Flutes, Ribs, and Pleats

Cactus stems are usually cylindrical or spherical but may be flattened. The ribs of cacti provide an efficient means of water storage and help reduce the plant’s weight. Cactus stems contain many pleats that expand and contract easily as they absorb or release water.

Cacti and Succulent Similarities

Although people often use the terms succulents and cacti interchangeably, these houseplants have a slight similarity. All cacti are succulents, but not all succulents are cacti. You need to look into these similarities to understand how these plants are related. 

They both have spine presence and cylindrical shape. For example, some succulents also produce spiky thorns like euphorbia, a genus of succulents that is often confused with cactus due to these many thorns. Both plants can survive in both arid and semi-arid areas, thanks to their drought-tolerant features.

FAQs about the Difference Between Cacti and Succulents

Why do you need to differentiate between cactus and succulents?

Knowing how to identify a cactus vs. succulent can help you in keeping these plants’ requirements. Also, it’s good to know what you’re getting to avoid being tricked into buying something that’s not worth it. The blooming should also be a matter of concern.

Can you plant cacti and succulents together?

Yes, whether you want to plant a giant cactus or a small succulent, the way they’re potted means difference in failure and success. They’re both native to dry, low moisture environments.

They both require bright light, well-drained garden sites, and container potting soils. If you decide to plant them together, note that cacti need to be watered less often than other succulents.

Final Thought about the Difference Between Cacti and Succulents

There you have it! Apart from the differences in tolerance of direct sunlight and water requirements, keeping requirements for cacti and succulents are the same. Be sure to learn more about each of them before you get started. Make sure you familiarize yourself with the requirements specification of your variety to ensure you meet their requirements.


The post What is the Difference Between Cacti and Succulents? appeared first on Kitchen Infinity.

Did you miss our previous article…
https://www.centrecountyfood.org/?p=627

post

6 Best Dumpster Rental Companies

You know that a clean home is the key to happiness. However, you also know that cleaning your home can be quite difficult as there are so many things to do. It doesn’t matter if you have just moved into a new apartment or are looking forward to hosting a party in your house, it’s always good and important to keep everything nice and clean.

There are also times that a standard trash removal routine can’t leave your compound sparkling clean. This is where dumpster rental services come in. Dumpster rental services provide waste containers for rent in different sizes and shapes. You only need to identify the size of the dumpster that can accommodate the volume of waste you have and contact a dumpster rental company. So, what are the best dumpster rental companies? Keep reading!

Factors to Consider When Looking for a Dumpster Rental Company

When looking for the best dumpster rental service, it is important to factor in certain things. Here are some of them:

Consider the cost of service: Different companies charge differently depending on factors like location and duration of renting their services among other things so do not be afraid to compare prices before selecting one provider over another one.The level of expertise that a company has in waste management: This is an important consideration because you want to make sure that the waste you produce is disposed of in the most environmentally responsible way possible. Some companies are better equipped than others to handle this kind of responsibility so it is important to ask about their capabilities before signing on.

Here are some of the best dumpster rental companies to consider.

1. Waste Management

Waste Management is the overall best dumpster rental founded in 1968 Texas. It operates hundreds of waste transfer stations, recycling plants, landfills and offers residential waste and recycling pickups to many homes in the United States. For its roll-off dumpster rentals, bin sizes range from 20 to 40 yards long.


Image credit: https://live.staticflickr.com/

In addition to residential trash and recycling pickup, Waste Management customers can rent dumpsters for construction debris, trash, furniture, and flooring. The cost of these rentals depends on location, dumpster size, waste type, and the length of the rental. Their prospective customers can use the WM website to quote and reserve a rental.

In addition to dumpsters, Waste Management also offers Bagster bags for projects that are too big for normal trash pickup but don’t warrant a dumpster. The company is also committed to handling waste responsibly by using only certified waste disposal facilities and getting several awards for its environmental responsibility. This makes the customers rest easy from their booking time to the time the trash is hauled away.

Pros of Waste Management

Offers roll off residential construction and commercial dumpstersOffers 24/7 online management to customersBagster bags offer a more manageable solution to small projects

Cons of Waste Management

They’re a bit expensive than their counterparts

2. Republic Services

As of 1981, Republic Services is the second-largest waste management company in the world. As one of the best dumpster rental companies, they have a large selection of dumpsters for all types of construction projects as well as customized solutions to meet specific customer needs. They serve both business and residential customers.

Republic Services
Image credit: http://giecdn.azureedge.net/

For dumpster rentals, Republic offers immediate, transparent pricing by using three factors to determine the cost of the job. These factors include the size of the dumpster, the weight of the material you plan to dispose of, and the distance between the dumpster location and the nearest waste disposal facility. They offer customers full-service yard debris haul-away services to further simplify your next landscaping project.

The prices vary based on location, dumpster size, and materials. So, before booking ensure the bin size is right for your project. As of May 2021, the rental cost of a 10  or 20-yard dumpster in Orlando starts at about $588 and goes up to roughly $592 for a 30-yard dumpster. The quotes include up to nine business days.

Customers also pay around $9 per additional day and $58 per additional tone five tons. Apart from renting Republic’s dumpsters for yard waste, you can also hire its team to haul away grass clippings, leaves, tree branches, and other yard debris after a storm. The company also offers sharps disposal, appliance recycling, household hazardous waste, and electronic recycling.

Pros of Republic Services

Quotes and reservations can be made onlineTheir pricing is transparent and rental periods can be customizedThey also offer yard debris haul-away services

Cons of Republic Services

The available dumpster sizes may vary in location

3. Junk King

Junk King offers a range of junk removal and dumpster rental services. The company works with non-hazardous items, such as household items, furniture, and appliances, but does not take hazardous waste or demolition materials. Similar to Waste Management, Junk King offers several container sizes that can be customized depending on your needs.

While many of the companies listed here offer residential services, Junk King stands out because of the company’s 12-yard MINI dumpsters. Rentals are available for three, five, and seven-day periods and Junk King picks up the dumpster when the rental cycle is complete.

Additional days start at a price of roughly $30 per day for three days. Renters may also encounter extra fees if they exceed 2,000 pounds. That’s if the bedload exceeds four cubic yards and if they dispose of items such as tires and mattresses. Apart from offering convenience and transparent pricing to its clients, Junk removal is also known for its sustainable practices.

Pros of Junk King

Customers only pay for the space they use and not the entire dumpsterOffers junk hauling services, including furniture removal and e-waste recyclingIts eco-friendly mission is dedicated to increasing recycling and reducing waste

Cons of Junk King

Only offers one dumpster size that may be small for large projects

4. Dumpsters. Com

If you’re looking for a cost-effective dumpster rental service, then Dumpsters.com may be a good option for you. The company offers small to large dumpster sizes that come in different dimensions as well as affordability to suit your budget needs.

Operating across the entire US, the company provides its clients with transparent pricing and no hidden fees. In addition, it also has an online calculator which makes it easy to estimate the cost of your rental. Dumpsters.com connects individuals and business owners with dumpster rentals.

In addition to assisting customers with standard residential and commercial dumpster rentals, the company also specializes in waste management for events. They can accommodate all event sizes, including single events, multiple events, and recurring events.

It also offers permanent dumpster rentals for businesses and organizations planning to hold multiple events in the same location. Customers can get the best price range through the Dumpsters.Com website, though you’ll have to call for a quote that’s tailored to your needs.

Pros of Dumpsters.com

Permanent dumpster rentals available for recurring eventsOffers rentals for a single event, bi-monthly and weekly eventsTheir website provides insights into the size dumpster you’ll need for various events

Cons of Dumpsters.com

Only local prices ranges are available online

5. Bin There Dump That

Bin There Dump That offers dumpster rentals to residential customers and businesses in the United States. It boasts of having dumpsters that are available the same day, though additional fees will apply for this service. Costs differ based on your location.

While it’s a national chain, each outlet is locally owned and operated. It’s more committed to homes than businesses which allow it to focus on respecting the needs of neighbors and homeowners associations. Bin There Dump That also builds speed into its business model.

It carries extra inventory specifically for last-minute orders, so once you request a dumpster, it can be delivered within 24 hours. And if you’re not sure of the size, you can request a call and the experts will walk you through booking the right service according to your needs.

If you’re looking for a hassle-free dumpster rental experience that won’t break the bank, Bin There Dump That is a great option. With its focus on customer service and quick turnaround times, you can be sure your project will be off to a smooth start. Plus, with a wide range of dumpster sizes to choose from, you’re sure to find the perfect option for your needs.

Pros of Bin There Dump That

Offers local, national, and international servicesAble to provide same-day dumpster rental servicesConsidered one of the most affordable dumpster rental companies

Cons of Bin There Dump That

Only offers a limited number of dumpster sizes

6. Redbox+

As the only dumpster rental with a built-in toilet, this dumpster stands out for construction and demolition projects. It specializes in combining portable toilets and dumpster roll-off containers. Securing this dumpster combination is as easy as a phone call.

All you need to do is to tell its team the size you’re looking for, when you need the dumpster delivered and where to drop it off. It will offer a quote immediately and the delivery was done within 24 hours. The company can also service your restroom and dumpster separately as needed, especially if you require their facilities for a long duration.

Redbox+ also consolidates two common needs on many construction sites, making it a great choice for home builders, contractors, and anyone looking to take on a major project.

Pros of Redbox+

Offers standard dumpsters and combination portable toilets and roll-off dumpsters10-yard mini dumpsters are perfect for smaller residential projectsWorks for residential waste, construction and demolition debris, roofing materials, yard waste, and commercial waste

Cons of Redbox+

Limited location, unlike other providers

FAQs about Best Dumpster Rental Companies

What is a dumpster rental company?

This is a company offering temporary waste disposal containers, usually in the form of a dumpster, for rent.

What is the average cost of a dumpster rental?

Prices vary depending on the size and type of container you require, as well as the length of time you need it for.

Who should use a rental dumpster?

Any homeowner carrying out home remodeling projects, cleaning large areas such as the garage and basement, and engaging in large-scale tree trimming and landscaping work should rent a dumpster.

Final Thought about best Dumpster Rental Companies

With many dumpster rentals available, it can be hard to narrow your choice and choose one. But, whatever you do you should do with a clear conscience, knowing the dumpster rental company has taken care of your trash responsibly and has taken all necessary safety measures when handling it. After all, it’s not just garbage-it’s someone else’s livelihood.


The post 6 Best Dumpster Rental Companies appeared first on Kitchen Infinity.

Did you miss our previous article…
https://www.centrecountyfood.org/?p=623

post

How to Whiten Yellowed Clothes

White clothing has always been a symbol of purity and cleanliness; however, it becomes dirty quickly due to various reasons such as sweat stains or food spills on the fabric. This makes it look dull and unattractive. You might want to throw away these tainted garments thinking there’s no hope for their recovery but wait.

A few simple tricks can bring back the shine in your favorite whites without much effort from your end. Here are a few home remedies to make your white clothes look bright and new. 

Use Oxygen Bleach

The gentlest method to whiten white clothes is to mix warm water with oxygen-based bleach. Make sure to follow the package recommendations when it comes to the amount of oxygen bleach to use. Add the bleach to the water and submerge the white clothes in the mixture. Let them soak for at least eight hours or overnight.


Image credit: https://i5.walmartimages.com/

Patience is very important. After that, launder as usual using the hottest water recommended for the fabric, then add half a cup of distilled white vinegar to the rinse water. This method is safe for polyester clothes, synthetic fabrics, and natural fibers like cotton and linen.

Use Bluing Liquid

If the yellowed clothes are white, you can use a bluing agent to help restore their color. Add 1/2 cup of the bluing liquid to the rinse cycle and let it run its course. This is an old-fashioned laundry product that can be added to the wash cycle to make white clothes appear brighter.

Use Bluing Liquid
Image credit: https://www.thespruce.com/

All you need to do is mix your bluing agent with cold water, following the instructions on the bottle. You’ll only need a 1/4 to 1/8 teaspoon, depending on what type of wash cycle you’re using. This liquid adds the slightest hint of blue, offsetting that yellowish hue that t-shirts, socks, and sheets can take on.

Use Baking Soda

Sodium bicarbonate or baking soda is an excellent cleaning product that you’ll find in every kitchen. To make your t-shirts whiter, make a baking soda paste with water and some salt. Apply the paste on the stains before tossing it into the washing machine. The t-shirt will come out clean and white as snow. 

There are two methods of whitening your clothes with baking soda. Add 1/2 a cup of baking soda along with your regular liquid laundry detergent at the start of the laundry cycle. You can also create a baking soda soak for your clothes to soak in before washing. If you choose to soak your clothes, allow them to soak for at least an hour and then wash as normal.

If you’re using powder detergent, add sodium bicarbonate during the rinse cycle. Baking soda is chemically similar to washing soda. It’s also a mild antiseptic so that it will protect your washing machine and clothes from bacterial growth.

Wash Your Yellowed Clothes Using White Vinegar

White vinegar is an excellent choice for cleaning clothes naturally because it’s a mild acid which makes it great for cutting through dirt and grease. There are two methods you can use to whiten your clothes with using white vinegar. The first method involves adding one cup of vinegar and your regular laundry detergent at the start of the wash cycle.

Wash Your Yellowed Clothes Using White Vinegar
Image credit: https://img.wonderhowto.com/

Distilled white vinegar is an excellent fabric softener and deodorizer that not only whitens clothes but can be used in stinky laundry. Add 1 cup of the washer’s last rinse cycle to also eliminate soap residue. For extra brightening, mix it with a ¼ cup of lemon juice.

Give Your Clothes a Citrus Soak

Another way to whiten clothes is by giving them a citrus soak. Fill a basin or sink with hot water and add lemon juice to give your white clothes a new glow. Soak the clothes for about 30 minutes, then rinse and wash as usual.

Give Your Clothes a Citrus Soak
Image credit: https://wl-brightside.cf.tsp.li/

The citric acid in the lemon, lime, or orange juice helps break down the yellowing and lighten the fabric. You can also use orange peels as a natural bleach. Wet the peels and rub them on the stained areas of your clothes. Let the juice sit for about an hour before rinsing and washing as usual. 

Lemon juice can also be used to remove stains from your clothing. Apply lemon juice on the rust stain and sprinkle some cream of tartar over the juice. Rub the solution over the stain and let it sit for about 30 minutes. The stain should go away. Wash normally after this if you know how to do laundry

Use Natural Laundry Detergents

Using laundry detergents that aren’t made with chemicals can help you maintain your clothes’ vibrancy. These natural detergents are made up of plant-based enzymes and natural minerals that can clean effectively like their synthetic counterparts.

These detergents are not as harsh on fabric as synthetic detergents, making them suitable for prolonging the life of your favorite clothes. They’re also biodegradable and non-polluting, unlike normal detergents. You can also learn how to make DIY laundry detergent if you want a much safer solution.

Use Bleach

Most bleaches such as chlorine, oxygen, and hydrogen peroxide break up stains through a chemical reaction called oxidation. Detergents remove stains while bleaches turn stains colorless by chemically altering their molecules. When using bleach, only go for whites and bleachable colors.

Check items for non-bleach only before using. To use bleach, start your washer, add 3/4 cup chlorine bleach to the wash water with your regular detergent, and add your laundry load. Note that chlorine bleach can produce dangerous fumes combined with vinegar, ammonia products, and other household chemicals. So, never combine them, as the combination can be hazardous to your respiratory system.

Non chlorine bleaches such as oxygen bleach and hydrogen peroxide are good in whitening. So, if you have any of these around, substitute them for the chlorine bleach in the recipe. They’re gentler and less toxic than chlorine bleach, making them safe for most fabrics and dyes. Hydrogen peroxide brightens whites and removes stains without harsh chemicals. Add 1 cup of hydrogen peroxide or oxygen bleach to your regular detergent when washing whites.

Use Sunshine as a Whitener

Wash your cotton, linen clothes, tablecloths, and other white laundry items. After that, allow them to dry in direct sunlight. Hang them on a clothesline or lay them on the lawn to let the sunshine whiten them. The sun’s UV rays can leave you with whitening whites in just a few hours.

Consider Sodium Borate

Borax is a naturally occurring mineral that helps remove stains. It also deodorizes and brightens clothes. Borax also breaks down the minerals in the water that can yellow clothes over time. Add 1/2 cup of Borax to your regular detergent when washing dingy whites.

Use Sodium Carbonate

Also known as washing soda, sodium carbonate has a higher alkaline level, making it a powerful cleaning agent. Add 1/2 cup to your laundry as a detergent booster. This cleaning can cause skin irritation, so rinse the area thoroughly if your skin comes in contact.

Baking Soda and Peroxide

Combine equal parts of baking soda, peroxide, and water in a small container, then using a toothbrush, rub the paste on the clothing that needs to be bleached. Allow it to sit for several minutes before rinsing with cool water.

FAQs about Whitening Yellowed Clothes

Why do white clothes become yellowed?

White clothes become yellowed for a number of reasons. These include:

When they’re exposed to a chemical and react with a substance in their environment, for example, the sweat stains the white fabricCooking with greasy oils frequently can also cause yellowing in clothes.Clothes will also yellow in storage because they react with substances in the storage container, especially wooden shelves, and cardboard boxes.Nicotine from cigarette smoke can also cause whites to be yellow

Final Thought on How to Whiten Yellowed Clothes

As you can see, there are so many methods of whitening yellowed clothes. It all depends on what is causing the yellowing and how severe it is. In general, the harsher the whitening method, the more likely it is to cause damage to the clothes.

So always test a small hidden area of the fabric before applying any bleaching agents to the entire garment. With these simple tips, you can now learn to whiten yellowed clothes.


The post How to Whiten Yellowed Clothes appeared first on Kitchen Infinity.

Did you miss our previous article…
https://www.centrecountyfood.org/?p=617