post

How to Propose: Marriage Proposal Dos and Donts

If you’re like most people, the thought of proposing marriage to your partner can be pretty scary. Will they say yes? What if I mess up? How do I even propose? The truth is that wedding proposals can be one of the most exciting things in life and one of the scariest. There are a few things you’ll have to avoid to make it work.

If you’ve been thinking about popping the question, make sure you follow these dos and don’ts for a special proposal experience. This guide covers everything from what kind of ring to buy, where you should go on a proposal trip, and how much money you should spend on an engagement ring. Let’s get started!

Dos of Marriage Proposal

Make Sure You’re on the Same Page

Before you pop the question, make sure you and your partner are on the same page about getting married. Marriage is a big commitment, and it’s important to be sure that both of you are ready for it. Talk to your partner about the future and let them know that you’d like to get married one day and ask if they see marriage in the future.

If you feel nervous about making this conversation look like a proposal, try to keep [it broad by discussing your best friend’s recent engagement. Yes, it’s a hard discussion, but hopefully, you’ll come out of it with an idea of what your partner will say when you open the ring box.

Buy the Bauble

There is no need to go overboard when picking out an engagement ring. Keep in mind your partner’s taste and stick with a style that you know they’ll love. Diamonds are always a safe bet, but if your partner isn’t into bling, there are plenty of other gems to choose from.


Image credit: https://static01.nyt.com/

The engagement ring is a piece of jewelry that your fiancé to be will wear every day for the rest of their lives. So, snap photos of the jewelry they wear daily. You can take a peek at their Pinterest Boards, ask a family friend or a family member to help you narrow it down.

After that, find the ring size and if possible, go ahead and ask. If you’re going the surprise route, make sure you check your partner’s jewelry.

Store Your Engagement Ring

Nothing ruins spontaneity faster than your partner seeing the bulge of a ring box from your pocket. In that case, keep the ring box safe and concealed up until the big moment by choosing pants and jackets with deep pockets with no holes.

Engagement Ring
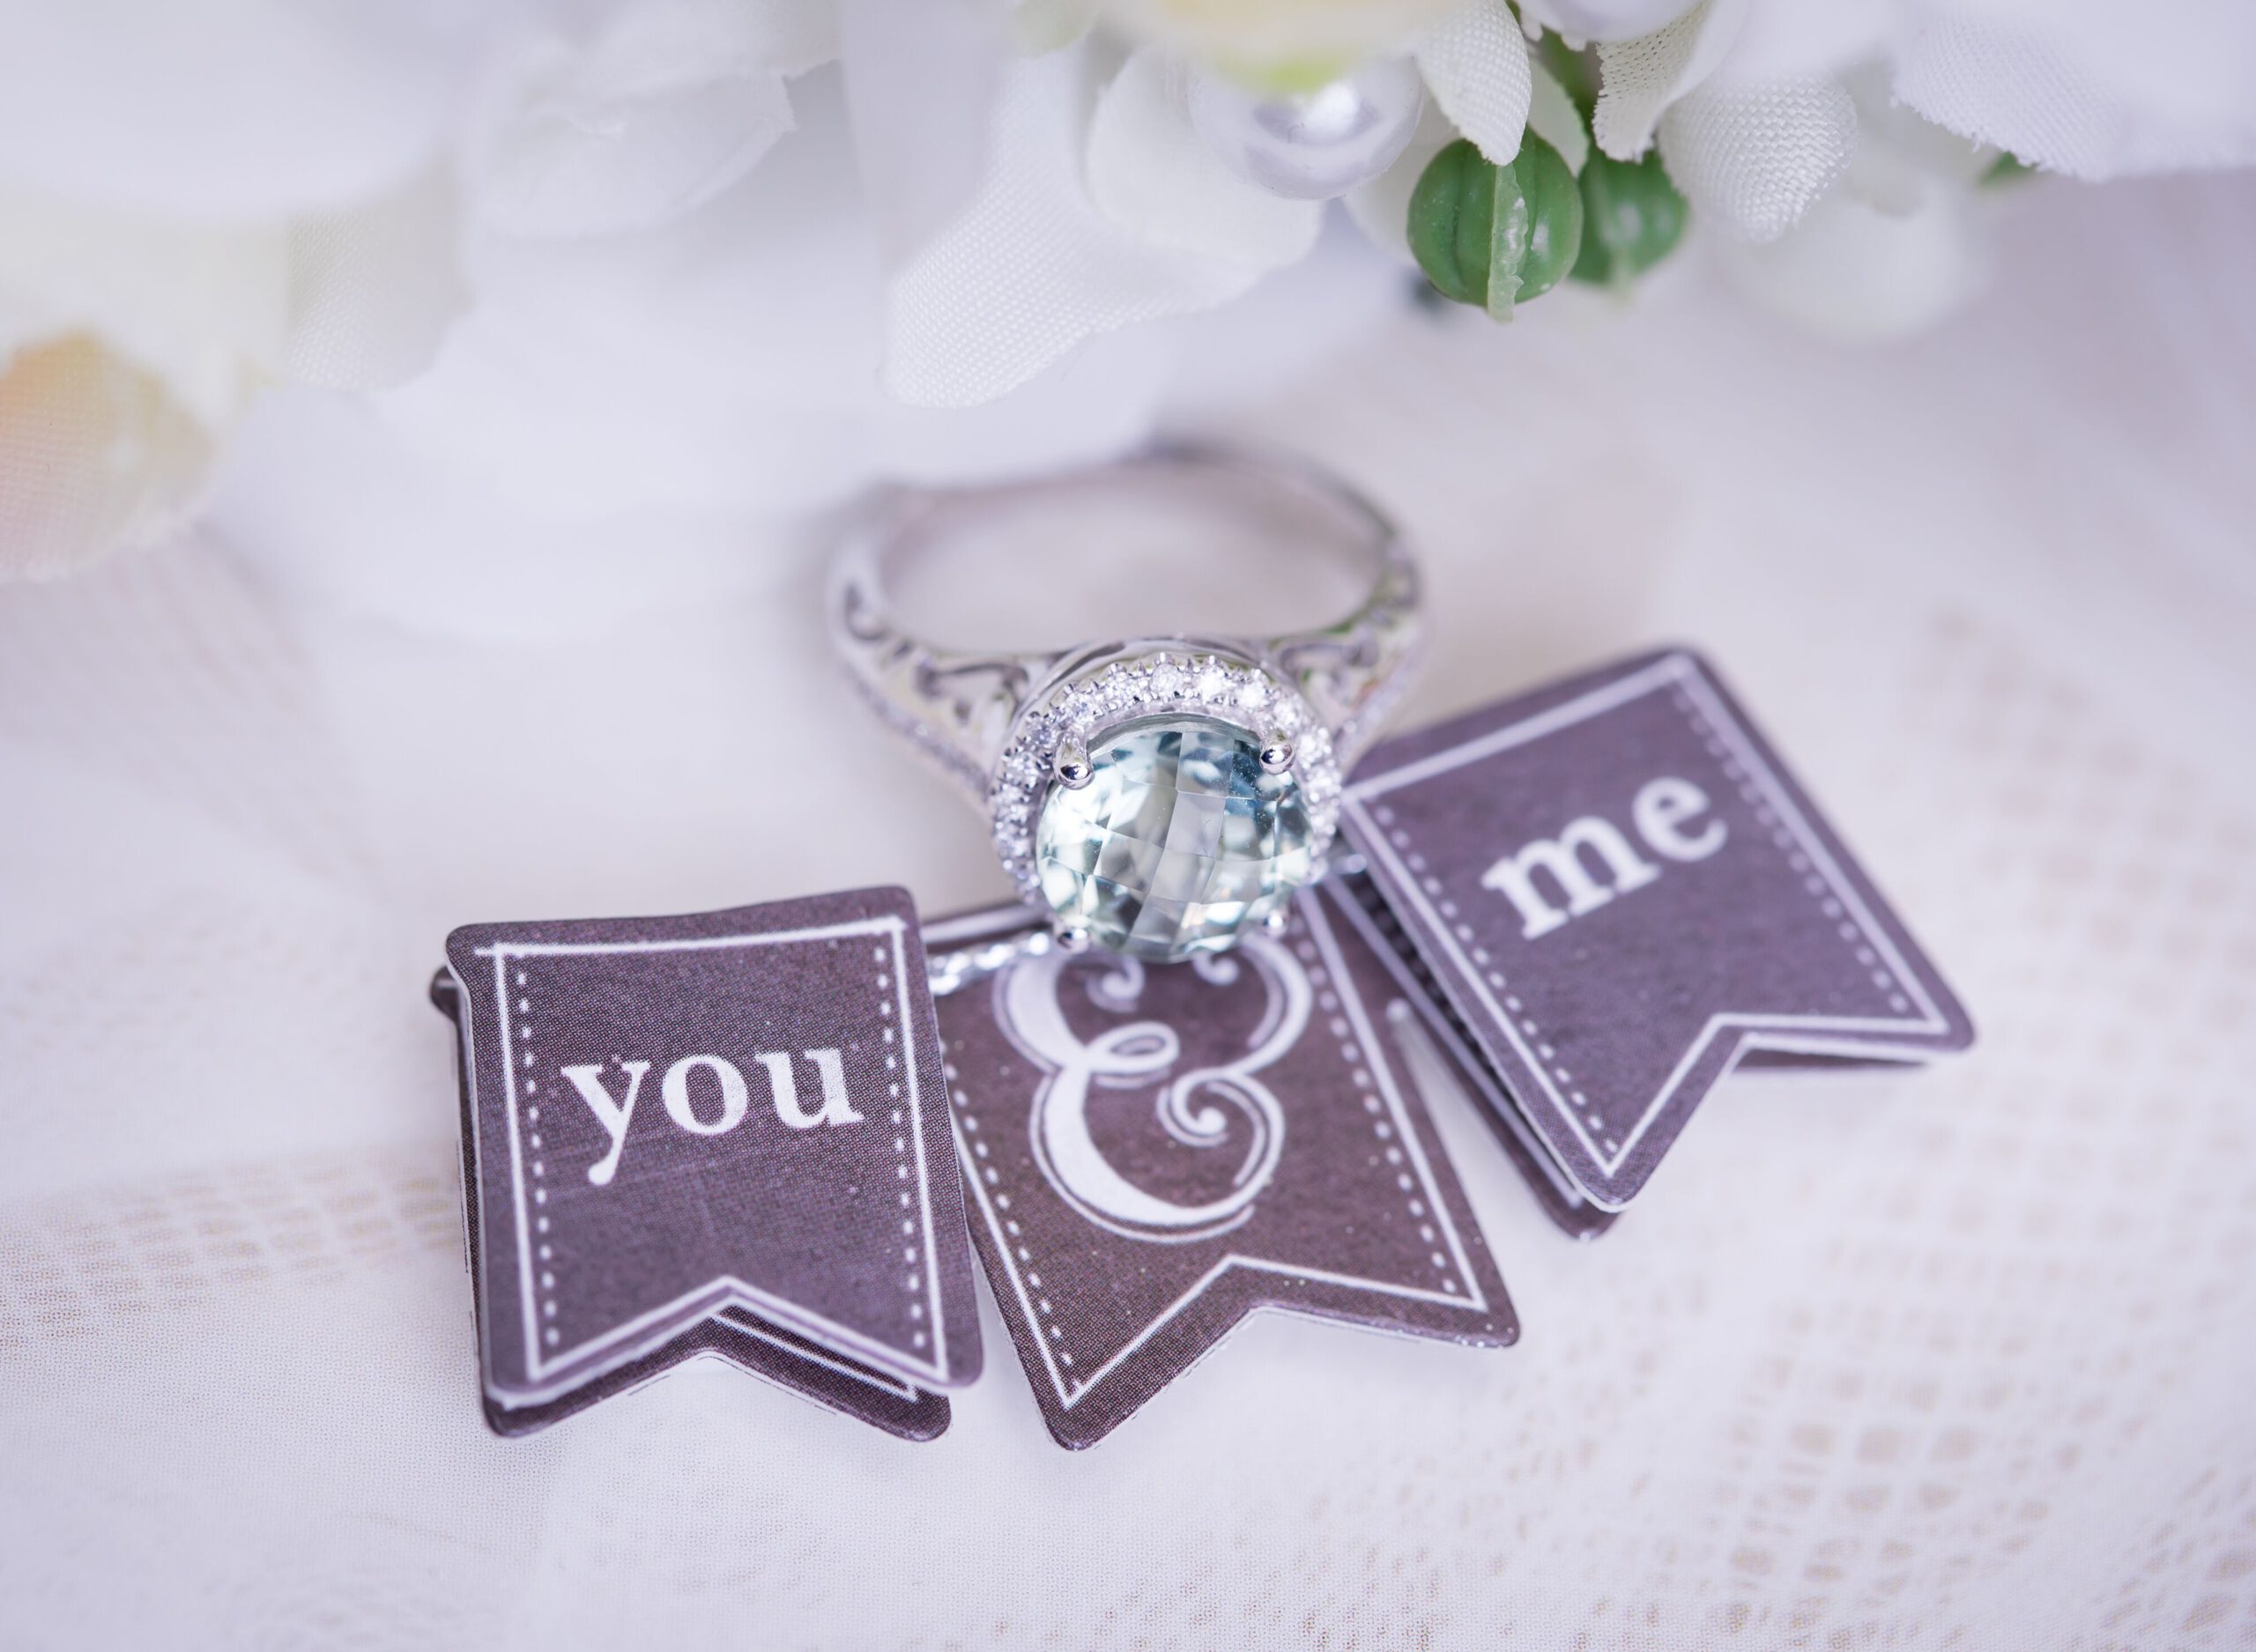
Image credit: https://www.diamondwish.com/

Propose for Your Partner and Not to Him or Her

The traditional phrase is to propose to your significant other. However, if you think of it more as proposing for them, you’re more likely to plan a true dream proposal. Think of your love’s favorite and incorporate those in your proposal.

Plan for a Celebration

No matter how your partner says yes, you’re going to want to celebrate. Whether that means booking a table at your favorite restaurant or planning a weekend away, make sure you have something special lined up to mark the occasion. You don’t need to plan a full-on engagement party but ensure the two of you will celebrate the best moment.

Plan for a Celebration
Image credit: https://upload.wikimedia.org/

Get Personal

Now that you have a ring plan for the proposal. Think about the type of proposal your partner will love, whether it’s a grand gesture, an intimate moment, or a surprise surrounded by family and friends. Make sure you find a cool place that will easily glamorize the set mood. If it’s your cozy living room, deck it out with tons of candles to change the feel of the space. Learn how to decorate a room as you prepare for the big moment.

Chat with Their Parents

If your partner’s parents are still alive, notify them of your intentions before popping the question. You don’t need their approval, but it’s a respectful thing to do and can make for an even more special moment when they’re present to witness the marriage proposal.

Have a Backup Plan

If your partner says no, you don’t want the evening to be a total bust. Have a plan B ready to go that will still make for an unforgettable night. As you brainstorm for your backup plan, choose a few indoor spaces like her favorite museum or the place where you had your first date and in your back pocket should Mother Nature prove uncooperative. In addition, know what to do in case of traffic or if she arrives later or earlier than expected.

Do Make it Meaningful

This is the time you need to get sentimental. Think about the noteworthy moments in your relationship. Take your sweetheart to where you first met, kissed, and said I love you. You can share your favorite restaurant, view, stroll, book, and movie. Be creative with these details to make a special day even more so.

Donts of Marriage Proposal

Don’t Propose When Your Partner is Preoccupied

Proposing marriage is a big deal and should not be done when your partner is preoccupied with something else. If she’s in the middle of a work crisis, for example, propose after the situation has been resolved. Even if you’re eager to get down on one knee, you can’t do it if your partner isn’t in high spirits.

Don’t Tell Everyone

It’s okay to tell your family and friends but not everyone, but it shouldn’t be announced on social media. Avoid giving away the surprise by telling everyone you are planning a big day out with her. Your wedding proposal should remain a surprise. Hold off on sharing the news with absolutely everyone.

Don’t Do Without a Ring

You don’t have to spend a fortune on an engagement ring, but it should be something special. A wedding proposal without an engagement is a huge no. It might seem silly, but without a ring, the engagement might not feel real.

Don’t Rush

Make sure you’re ready to get married before you propose, or there will be regrets later on. You don’t want to regret taking that step, either because her answer wasn’t what you hoped for or it was too fast, and you weren’t ready yet. If you’re not ready and still on the fence, wait a little longer before getting down on one knee.

Don’t Propose in Front of an Audience

A private proposal is better unless she’s someone who doesn’t mind being the center of attention. If you’re planning on getting down on one knee in front of her family or friends, make sure everyone is invited.

Don't Propose in Front of an Audience
Image credit: https://thetempest.co/

Don’t be a Copycat

You can make your long-awaited run as smoothly as possible, but that doesn’t mean you have to copy your proposal planner, that’s not the best idea. Try to personalize your marriage proposal and plan it with your partner in mind. Don’t model to match someone else’s great idea.

Don’t Be Too Much of a Daredevil

Don’t do anything that might put you or the person you are proposing to in harm’s way. Proposals at a baseball game or theme park are cute ideas but take into account where you’ll be and what could happen if things go wrong. When choosing a place for your marriage proposal, stick to dry land and try not to do it on a blustery day, so your bling stays firmly in its box.

Don’t Wing it

While you don’t have to know exactly what you’ll say when you pop the question, make sure you have a plan. Do a little drafting to make sure you’re confident when the time comes. This will make you deliver a romantic speech.

Final Thought about Marriage Proposal Dos and Donts

There you go, marriage proposals dos and don’ts. Make yours memorable by doing something you know your partner will love. Don’t do anything too extravagant or unconventional, but make it yours and not a carbon copy of any other proposal she’s ever seen. The most important thing is to take a deep breath and go for it.


The post How to Propose: Marriage Proposal Dos and Donts appeared first on Kitchen Infinity.

Did you miss our previous article…
https://www.centrecountyfood.org/?p=612

post

DIY Washer Repair Guide

You are doing laundry, and suddenly your washing machine starts leaking water. Washing machines are a necessity, but when they break down, it can be incredibly frustrating. They can cause a huge mess and damage to other appliances around them.

The cost of repairs for your washing machine can be expensive and time-consuming. If you have the skills to repair washers yourself, you could save money on the cost of repairs. You can fix this problem in no time at all with some simple tools that you probably already have lying around the house.

Here are seven tips on how to fix your washing machine with common household items that most people already own. These DIY tips can help you save the expenses of a repair call and eliminate some issues, so the problem is easier for the technician to solve. Read on!

Washer Won’t Spin

The lid switch detects the position of the lid and prevents the washer from spinning into the lid. A broken lid will keep the washer from spinning even if the lid is closed. Before you call in the repairman, check to see if the belt is your problem. Your plugs can get bumped loose by animals and fallen objects. 

You can do this by removing the broken lid switch. But first, use a continuity tester to test the switch and if you suspect that it’s broken, replace it with a new switch before spending money on professional help.

Check the Breaker Box

Once you’ve properly plugged your washer into the electrical outlet and still won’t run, check your central home electrical box to see if your fuse has blown and the circuit breaker has tripped. Replace the fuse and turn the breaker back on. If the problem persists, call an electrician immediately.


Image credit: https://howtofixit.net/

If the washer is plugged in, the breakers are okay, but it’s still not working; you may need a lid switch to engage for the washer to work. Today’s washer, both front, and top load models require this lid switch to work. 

These switches can break and need to be replaced. They also get gunked up with lint and detergent residue. Use a cotton swab and a little bit of rubbing alcohol to clean the contact areas.

No Fill or Slow Fill

With front load washers, it will fill up to the water level you choose. The fill valve could be restricted over time because of lint and debris, so turn off the unit, unplug it and remove the hoses. After establishing electrical power, the next thing you’ll need is water.

If there’s no water entering the washing machine, ensure the water valves are open. Make sure you have two valves, a hot and a cold. They should be marked by a red and blue knob or switch. Even if you wash in cold water, some washers won’t operate unless you open both valves.

And if your machine is getting, but it fills very slowly, you may need to open the valve more. If the water valves are open and still the washer won’t fill, you may have a clog in the filter screen. In this case, unplug the machine and turn off the water valves. Use a bucket to catch the remaining water in the hoses.

There are many things that can go wrong with your washer hoses both inside and outside the cabinet. And transferring a small wire clip from the old switch to the new switch can be a real challenge.  Use a screwdriver to unscrew the hose from your machine and check if there’s a clog in the filter. Clean the hoses of any water mineral build-up to reduce clogs and improve washer performance. 

You can also remove the back panel of your washer to access the additional water lines inside the washer that lead to and from the pump and the drain. Use vinegar and hot water for cleaning your washer and clear your clogged and dirty hoses. Any clogs you run into along the way, apply vinegar and hot water and watch the build-up melt away. Make sure you switch the water back on when you’re done with hoses.

Level the Washer to Prevent Noises

Terrible noises happen when you incorrectly load your washer or even your laundry has shifted during the cycle. For standard top load washers, never load clothing on one side of the central agitator; make sure you distribute it evenly around the washer’s tub. 

Level the Washer to Prevent Noises
Image credit: https://www.thespruce.com/

For high-efficiency top load washers without a central agitator, the problem could be overloading while in front load models, the noise can come if your machine is underloaded. If the thumping occurs during a cycle, stop the machine and redistribute the wet clothing.

For weird noises such as humming, clicking, and gurgling, the noise can be caught by objects caught in the washer’s drum and internal mechanism. Clicking and gurgling signals an object caught in the water pump and drain line. Make sure you check the pockets before loading clothes.

If your washer is making screeching and squealing noises, then it’s mechanically challenged and requires a service call. For uneven legs, use a bubble level and a wrench to twist the feet to retract and extend them until the washer is level on top.

Washer Leaks

If you are experiencing water leaks, the first step is to determine if it’s a supply hose leak or a water valve leak. Check your washer’s hose connections to the hot and cold water valves. You can use a dry hand and a paper towel to run down the length of each hose.

Washer Leaks
Image credit: https://applianceexpresstx.com/

If you find any dampness, tighten immediately and if the hose has small splits, replace it immediately. A burst water hose is a huge mess and damages the walls and floors. Make sure you check and replace your washers regularly to prevent this mess.

Pay close attention to where the puddle is located, whether in front of the washer or at the back of the washer. The location will tell you what to do next. If you have a front loading machine, make sure you’re using a high-efficiency detergent to remove soapy puddles on the floor. 

High-efficiency detergent is formulated to be low-sudsing and to be used in the lower levels of water in a front-loading washer. Front-loading machines have a small overflow system on the back of the machine, and if you have too many suds, then they’re escaping from there.

Clothes are Too Wet After Final Cycle

If you perfectly know how to do laundry but your clothes still come out of the washing machine still wet, it might be because the washer is not draining correctly. To test this, pour a cup of water into the washer and start a cycle. If the water doesn’t drain out, then you’ll need to clear the drain.

Your water pump may be clogged with lint or a small object. If the pump isn’t allowed to work freely and properly, it drains out too slowly, leaving your clothes wet. You can remedy this by simple cleaning.

If that’s not the case, your drain hose could be clogged with lint and hair. You can easily clean this with a thin, long-handled brush. You’ll get the brushes at pet shops to clean the aquarium tubes if you can’t find one at a hardware store.

Go Through the Manual

If you have no clue what’s wrong with your washer, your first stop should be the washer’s manual. It will provide you with diagrams and troubleshooting tips. And if you don’t have the manual, visit the manufacturer’s website or download a manual from one of these sites. This will be time-consuming but much less expensive than a repair call.

FAQs about DIY Washer Repairs

Is it worth fixing an old washer?

Yes, especially if the repair cost doesn’t exceed 50% of the cost of a new washer.

Do washers have fuses?

Yes, they have fuses that protect them from power surges. Washing machines require a lot of power to run.

Final Thought about DIY Washer Repairs

lIf you love to fix things DIY, then appliance repair at home is a great option. Don’t be scared of appliance repair with the help of this article, and go ahead and fix your washing machine without any professional help. But if you think the problem may be beyond your knowledge, don’t hesitate to call a professional.


The post DIY Washer Repair Guide appeared first on Kitchen Infinity.

Did you miss our previous article…
https://www.centrecountyfood.org/?p=607

post

Bed Comforter Sizes and Dimensions

Buying the wrong size bed comforter can be a nightmare. Matching a comforter to your queen size bed can be tricky because some bedding manufacturers view double and queen comforters as being interchangeable while others don’t. 

You know that buying an oversized or undersized comforter is not what you want for yourself or your kids. Getting the right comforter is also difficult because the specifications offered by mattress and bedding manufacturers may not match up what you’re looking for.

This guide will help you figure out what is the best bedding that fits your bedroom and budget. We also provide information on how to measure so that you can get an accurate measurement of your bed and its dimensions. Before that, let’s try to differentiate a bed comforter from a duvet and a bed cover.

What is a Bed Comforter?

A bed comforter is a thick, quilted blanket usually filled with synthetic filler to keep you warm. It’s quite similar to a duvet. The quilted element helps to prevent the fill from collecting to one side. Getting the right quality and size will also help you get perfect bedding for decorating your bedroom. Before purchasing a comforter, consider some ways to ensure you get the right-sized comforter for your bed.


Image credit: https://www.thespruce.com/

What is a Duvet?

Many people use the word duvet and comforter interchangeably, but these two items are different. A comforter is made to be used with other bedding, while a duvet is meant to replace your top sheet and blanket. This is why duvets are thicker than an average comforter.

What is a Duvet?
Image credit: https://media1.popsugar-assets.com/

What is a Bed Cover?

A duvet cover and a comforter cover acts like a pillowcase. You slip it over the comforter for protection. Some duvet covers have a zipper, while others have a series of buttons.

What is a Bed Cover?
Image credit: https://contentgrid.homedepot-static.com/

How to Know the Right Comforter Size

Check the Label

Manufacturers print comforter sizes on the labels. The length and width will be given in inches. Check the labels attached to the bedding and mattress size. The queen comforter size will range from 86 to 88 inches in width and 96 to 100 inches in width. 

The twin bed size will range from 66 to 68 inches and 86 to 88 inches in length, while the twin XL ranges from 68 inches in width to 90 inches in length. California king bed size ranges from 107 inches to 110 inches in width and 96 to 98 inches in length.

On the other hand, the king size comforter or Easter king ranges from 102 inches in width and 86 to 88 inches in length. Full comforter ranges from 81 to 84 inches in width and 86 to 88 inches in length. As you can see, each label brand of bed comforter has its specific dimensions that are followed.

dd Width and Thickness

You can know the right width of your comforter by adding the thickness on each side. Opt for a king-size mattress that is 80 inches and 11 inches thick. You should buy a comforter that is 80 inches +11 inches, a total of 102 inches wide, for it to be a perfect size. The length can be similar to the length of the mattress because the comforter doesn’t cover the whole bed.

Check the Stuffing

For a perfect stuffed comforter that will stay in place, check the number of ounces or grams it has. For example, down comforters are soft and tend to fluff up once placed on the bed. Some comforters are labeled as oversized, meaning that they are bigger than the average comforter size. Go for oversized comforters because they’re typically wider and will allow you to cover mattresses with pillow tops.

Make Sure the Bed Size is Similar to that of Your Comforter

The size of the comforter should be similar to your bed size. If you have a king-size mattress, purchase a king-size duvet comforter for it to fit perfectly. Whether you have twin, full, or queen beds, make sure you buy those that fit your bed when shopping for your duvet comforters.

King bed comforter sizes are between 86 to 88 inches and 102 inches wide, while California king comforters are 96 to 98 inches long and 107 to 110 inches wide. California king mattresses are long and narrow compared to a standard king mattress. 

Twin XL comforter sizes will be longer twin mattresses since twin XL mattresses are 5 inches shorter than twin XL mattresses. Therefore, you cannot use twin XL comforters with twin beds.

Measure Your Mattress

Before you go out to shop for your comforter, you need to measure your mattress. Be sure to buy a comforter that will fit your bed with proper coverage on all sides and at the top and bottom of the mattress. To ensure this, always buy oversized comforters rather than undersized ones. Mattress depth will help you determine how wide your comforter should be. 

Comforters come in a variety of sizes, so it is important to know the dimensions of your bed before you purchase one. A standard king-size comforter is 76 inches wide and 80 inches long. A California king comforter is 72 inches wide and 84 inches Some brands may list the maximum mattress thickness a comforter will fit. So, check the label and the specifications if you’re shopping online.

Get an Oversized Comforter

Some manufacturers are offering oversized queen and oversized king comforter sizes in addition to the standard sizes, thanks to the popularity of deeper pillow-top mattresses. These comforters offer more width for their length. For example, queen comforters are about 98 inches wide, while king comforters are 115 inches wide.

This can be a good option if you’re looking for a wide comforter but do not want to jump up to the next standard size. It’s okay for the comforter to be slightly oversized, so it hangs below the bottom of the mattress. You can cover the space between the bottom of the mattress and the floor with a bed skirt or ruffle. This will make it more pleasing for the comforter to overlap the bed skirt to fall short.

Consider Bed Frame Height

When selecting a comforter size, also consider the height of your bed frame. If you have a low-profile bed frame or platform bed, you may want to choose a comforter that is one size smaller than what you would typically select. This will help to avoid the comforter from appearing too bulky and overwhelming on the bed.

If you have a very tall or short-bed frame, make sure you consider this while measuring your mattress and choosing the right comforter size. Extra-high beds require wider comforters, or they may fall too short on the sides. If you have shorter frames, you may find your comforter is far too long and drops onto the floor.

Drape Length

Your comforter might be the right size, but if it hangs too low onto the floor, it will look like an old-fashioned bedspread. Therefore, make sure you consider how much drape you want when shopping for your new comforter. Most people prefer to have their comforters fall between six to nine inches above the floor.

FAQs about Bed Comfort Sizes and Dimensions

re full and queen comforters the same?

Many manufacturers put full and queen sizes together as one size of two. However, this shouldn’t be the case because a full or queen-sized comforter may be too small for a queen-size mattress and too big for a full bed. Opt for a comforter that’s labeled queen size or full size to achieve a better fit.

Is an oversized comforter better?

Yes, it’s better because it can fit any bed. Oversized comforters are not just a great comfort option; they’re also a great and stylish way of keeping the area under your bed out of sight.

Final Thought about Bed Comforter Sizes and Dimensions

Perfect-sized bedding will make your bed look more pleasing and comfortable for you. Make sure you do your research and purchase a comforter that fits your bed so you can enjoy getting into your bed each day. And, as the best comforter will last a long time, you should pay attention not only to the price but also to quality and durability if you want it to stand up well over the years. Also, learn how to wash a comforter so it serves you better and longer.


The post Bed Comforter Sizes and Dimensions appeared first on Kitchen Infinity.

Did you miss our previous article…
https://www.centrecountyfood.org/?p=602

post

Is Cypress Mulch Good or Bad?

When you’re shopping for mulch, there are a lot of options you’ll come across. Some mulches are made from wood chips, some recycled paper, and others from ground-up corn cobs or pine needles. You may have heard that cypress is one of the best kinds of mulch to use in your garden because it’s free of chemicals and will help improve the soil over time. But other people say that using cypress mulch can be bad for your plants and may even affect the quality of your soil. 

This article will lay out all sides to this debate so you can make an informed choice about whether or not you want to use this type of mulch in your yard. Read on!.

What is Cypress Mulch?

Cypress mulch is made from the shredded wood of the cypress trees, bald cypress trees, and pond cypress trees. Home improvement stores and garden centers sell either 100 percent cypress mulch or a cypress mulch blend containing other types of woods. 


Image credit: https://www.pahls.com/

Cypress mulch comes mainly from Central Florida and Louisiana, where it was a by-product of lumbering. The increasing demand for cypress mulch has put it under attack by the cypress mulch industry. All cypress mulch 

Cypress mulch is often cheaper than hardwood mulch, but it’s not environmentally and sustainable mulch. So, consider the pros and cons of using cypress mulch in your garden before you start using it.

Benefits of Cypress Mulch

Deterrents

Cypress mulch shares other benefits of cypress wood mulch. It prevents weed growth because weed seeds need light to germinate, and mulch keeps them in the dark. This mulch is an organic material used in landscaping and gardening and is a great mulch in deterring weeds. All organic mulches help the soil retain moisture, keep the soil cool and insulate plant roots during freezing temperatures. This mulch doesn’t only deter weeds, it also deters insects and reptiles.

Deterrents
Image credit: https://www.thespruce.com/

Chips and Shredded

This mulch is made from pond cypress trees and bald cypress trees. Both the back and wood of the tree are ground up to make cypress mulch, and the mulch is available in either chips or shredded cypress. The shredded is the better choice than chips because it stays in place longer and composts faster. Shredded cypress mulch is also cost-effective, making the cypress mulch less expensive than other organic mulches.

Nutrients and Microbes

Cypress mulch decomposes to add nutrients to the soil, while some mulches such as shredded newspaper do not. Most plants benefit from these added nutrients from cypress mulch. Some organic mulches such as pine needles and pine bark change the soil pH as they decompose, thus adding acid to the soil and lowering the soil’s pH. On the other hand, cypress mulch is neutral and doesn’t change the soil’s pH as it decomposes.

ppearance

Cypress mulch is an attractive ground cover than other wood mulches such as pine bark, cedar bark, and shredded hardwood mulch. It also has a fresh, pleasant smell when it’s fresh. Cypress mulch weathers to a soft, gray color, a property that is often considered a valuable attribute. While other mulches might blow away, cypress mulch, especially pine bark mulch, tends to float away after heavy rains. Therefore, it will not need to be reapplied, unlike other mulches.

Why Cypress Mulch is Bad

While cypress mulch has a lot of benefits, it’s also a bad choice of mulching material due to the environmental impact of harvesting cypress trees and the detrimental effect this mulch can have in your yard.

Why Cypress Mulch is Bad
Image credit: https://www.gardeningknowhow.com/

Unsustainable

The demand for this cypress has caused these trees to be harvested faster than they can grow. The continued harvesting of cypress trees for mulch is unsustainable and may decimate old-growth cypress forests.

Properties

One of the purposes of mulch is to help the ground retain moisture. This relieves you from watering your garden bed and protects the plants from the effects of drought. However, cypress isn’t a good conveyor of water and moisture because it’s very fibrous.

The mulch has a high capacity for holding water, preventing the available water from seeping below the mulch. When the cypress becomes dry, it repels water instead of absorbing it. This prevents water from reaching the ground below the mulch and the roots of the plants.

Stability

Cypress mulch tends to wash away more easily than other mulches. This makes it a bad choice in areas subject to heavy and frequent rains. When it’s also saturated with water, it becomes heavy and does a better job staying in a place, making you replace it more frequently than other mulches.

esthetics and Acidity

Cypress mulch is also known for its unpleasant odor. Some people find it offensive, and others say it smells like rotting flesh. Cypress mulch is also very acidic. This can harm or even kill plants that are sensitive to acidity.

lternatives to Cypress Mulch

There are several sustainable alternatives to cypress mulch. If you’re looking for a long-lasting mulch, opt for a tree-based mulch such as pine trees, mixed hardwood mulch, and eucalyptus mulch. Like cypress mulch, these alternatives come from trees in the south and central Florida.

Alternatives to Cypress Mulch
Image credit: https://www.truevalue.com/

Eucalyptus is grown specifically for mulch, and the trees grow much quicker than other cypresses. Fortunately, the best mulch for your garden will depend on various factors, such as the needs of your green space, your visual preferences, and how much work you want to have in maintaining it.

FAQs about Cypress Mulch

Is cypress mulch better than regular mulch?

Cypress mulch is better because it’s less expensive than many other organic mulches, and it adds a lot of benefits to the soil. Also, all old-growth cypress groves have been clear cut and what is left is under attack by the cypress mulch industry.

Final Thought about Cypress Mulch

As you can see, cypress mulch isn’t always better. It’s sometimes worse, but it is what some gardeners prefer. If you are looking to care for your plants by protecting them from certain insects or weed growth, cypress mulch may be the way to go, but if you want something more sustainable, look for other types. 


The post Is Cypress Mulch Good or Bad? appeared first on Kitchen Infinity.

Did you miss our previous article…
https://www.centrecountyfood.org/?p=597

post

What To Do When Your Water Heater Is Making Noises?

You may notice your water heater making strange noises. This is a problem because you don’t know what’s causing the sounds or danger to you or your home. 

Not all of these sounds mean something wrong with your water heater, but it’s always good to understand the reasons behind them and learn how to fix them. Here are water heater noises to look out for and how to diagnose them:

Sizzling, Hissing, and Crackling

These are typical noises coming from an electric water heater. They are attributed to sediment build up and mineral deposits at the bottom of your water heater. There is nothing to fix this yourself, but it’s not a cause for concern either. Plumbers will sometimes use chemical agents to get rid of the sediment buildup and prevent such sounds from occurring in the future.


Image credit: https://www.easyflow.co.uk/

Irritating noises are not the only symptom of this problem. Expect your heating bills to go up as the water heater struggles to heat the same amount of water with a greatly reduced ability to produce heat from the lower heating element.

A gas powered water heater can also make sizzling sounds, even though the problem isn’t the same. Sizzling noise in a gas water heater is caused by internal condensation, which makes a sizzling sound when dripping down into the burner. If you notice condensation in the tank, there could be a leak, so call a plumbing professional to deal with it.

A crackling sound may also mean that there’s condensation in the water heater burner. A water heater won’t create condensation if the temperature remains consistent, but condensation can form when the tank is full. Make sure the plumber checks the crackling sounds immediately. Also, use a wire brush for clean up and if the sediment blocks the drain valve, it might be impossible to remove the water in the storage tank, so buy a new water heater.

Tankless Water Heater Noise Problems

Apart from regular heaters, other heater models can make annoying noises. For example, an electric tankless water heater has its sound. You should know the normal sounds if you know how a tankless water heater works. A tankless gas water heater can also have the same issue. If you hear a clicking sound from the water heater, it means that the flow switches come on and off. 

Tankless Water Heater Noise Problems
Image credit: https://soundproofcentral.com/

And if you hear more noise, check for debris from the hard water area or if there’s build-up within the unit. You can fix this problem by practicing regular maintenance to help you keep on top of any unusual sound.

Popping Sound

Some sounds that you hear may seem irregular or irritating, but these are normal for this type of heater. The first sound you will probably notice is the popping sound. Popping noises occur when the temperature inside the unit rises to 140 degrees Fahrenheit (60 degrees Celsius). 

Popping Sound
Image credit: https://www.fenwickhomeservices.com/

However, this doesn’t indicate a dangerous problem. Popping noise is also caused by limescale and sediment build-up within the tank. The sound is created when steam bubbles form under the sediment, then burst as the water heats up. You can quickly diagnose this problem by using a descaling product to help break down the limescale and minerals.

Ensure you flush and drain the tank to remove any sediment. Popping noises can also be caused if an aluminum anode rod within the tank is exposed to high levels of alkalinity. Professional plumbing can solve this problem by replacing the aluminum anode rod with a magnesium anode rod.

Loose Water Heater Element can Cause a Humming Sound

Some water heaters make humming noises. For example, electric water heaters don’t have gas burners. Instead, they have at least one electrically powered heating element associated with a thermostat. If the water falls below the set temperature, the electricity heats up the element, and the water flowing around it heats up. 

The heated water then circulates, warming the rest of the water. When the electric heater makes a humming noise, the heating element is loose due to wear and tear or poor installation. 

The loose element acts as a tuning fork, vibrating from the push of water cycling around it, creating a humming noise. You can easily correct these humming sounds by making the heating element tighter.

Screeching Sounds can Signal Restricted Water Flow

A screeching noise may indicate the water is too hot. As the heated water comes out of the tank, it can bump into air bubbles in the piping, which creates the sound of metal on metal screeching or scratching.

 Screeching noises also show that water flow is restricted either at the valve letting water into the heater or at a valve connected to water in your home. When the relief valve isn’t open all the way, water moves through a narrow space at a higher pressure, creating a high-pitched sound. 

The inlet control valve is often to blame for this, and you can easily address it by turning the valve to fully open it to lower the water pressure. And if adjusting the inlet valve doesn’t stop the noise, you may need to replace them.

Ticking Noises

If you can also hear a soft ticking noise, this indicates changes in water pressure. The heat trap can sometimes be the reason for ticking noises. You can easily remedy this problem as long as the changes in water pressure aren’t dramatic and frequent, like rapidly opening and closing the main building control valve.

 These tapping sounds are normal, but if tapping sound from a valve is concerning, swap the heat straps with dielectric nipples, smaller fittings that perform the same function. Boosting heat strap nipples can also improve the functionality of the water heater.

Make sure to tighten and replace the pipes if they become loose. This will stop the ticking sound and prevent the pipes from shifting. Lowering the heat by a few degrees may also reduce the expansion of water lines and stop any ticking sounds.

Hammering and Knocking Noises

A hammering noise, also known as water hammering, occurs when pipes aren’t securely anchored. They move and hit against each other and the interior of the wall. Any abrupt change in the water flow can lead to the sound because the pipes move as water does. 

Hammering and Knocking Noises
Image credit: https://cdn-apifl.nitrocdn.com/

This can happen when you flush the toilet, run a dishwasher, or a pump with a holding tank is running. Water hammering is not an immediate problem, but it can cause damage to pipes and the surroundings over time. You can diagnose this problem by securing pipes with insulation or installing a water hammer arrestor to stop the knocking.

Rumbling Sound

A few things can cause rumbling pipes. Sediment build-up and mineral deposits are common reasons. Sediment build-up occurs when minerals are suspended in the water flow and accumulate over time. This sediment can also cause damage to the inside of your pipes, but it usually creates a rumbling sound when you turn on hot water faucets. 

You can flush and drain that hot water tank with a long hose to remove the sediment or use a descaling solution to break down limescale within the tank. You should take your time to learn how to drain a water heater before doing anything. And if you aren’t experienced with plumbing, have a professional plumber flush the tank once a year.

FAQs about What to Do When Your Water is Making Noises

Is it bad if your water heater is making noise?

The noise might be annoying, but it doesn’t mean that your heater is malfunctioning.

Can a water heater explode?

If there’s steam build up in the heater and there’s no outlet, the increased pressure could cause the hot water tank to explode.

Final Thought about What to Do When Your Water Heater is Making Noises

As you can see, a water heater noise shouldn’t bother you that much. But if you suspect a fault, don’t hesitate to contact a water repair to rectify the situation before it worsens.


The post What To Do When Your Water Heater Is Making Noises? appeared first on Kitchen Infinity.

Did you miss our previous article…
https://www.centrecountyfood.org/?p=591

post

The Best Carpet for Basement

Carpet is the most popular choice among homeowners who want to make their basement space more appealing by adding a soft touch to it. If you’re just learning how to buy a carpet that will be best for your basement, there are a lot of options out there.

It is very important that you choose the right one so that it will be comfortable and safe for your family. Basements are hotspots for mold, mildew, and other unpleasantness due to increased exposure to moisture.

This guide will help you to find out the best-suited carpet depending on your needs and budget. Read on!

Synthetic Carpet for Basements

Basement flooring made of synthetic material is highly recommended for basements because it’s moisture resistant unlike natural materials like cotton or wool. It also has a stain protection feature, so it makes cleaning easy.

Synthetic carpet is good for the basement because the materials tend to retain less moisture than natural fibers. They’re also more stain-resistant than natural carpets.

Nylon Basement Carpet

If you’re looking for the best carpet for the basement, look no further than nylon carpet. It’s durable and able to withstand moisture. Unlike other synthetic carpets that are made of polypropylene or acrylic, nylon is made from natural materials that feel soft when touched.


Image credit: https://previews.123rf.com/

Pros of Nylon Carpet

Great stain resistanceEasy to maintainMore durable

Cons of Nylon Carpet

It’s expensiveIt’s not soft like other materialsGenerates a lot of static electricity

Polyester Carpet

There are several types of polyester carpets like Berber and loop, but other than that these materials are really the same. Polyester is the ideal choice for basements, especially if you’re looking for an all-around, versatile carpet. This synthetic material is resistant to spills, accidents, and moisture.

Polyester Carpet
Image credit: https://cache.hedgeapple.com/

Pros of Polyester Carpet

Less expensive than other carpet optionsIt’s a green carpeting material made of recycled bottle caps and tiresEasy to cleanIt’s durable and reliable

Cons

Not the best option in high traffic areasNeeds more tender care and love than other carpets

Olefin Synthetic Fiber

Choosing the right carpet for basements will ensure that they are protected from excess moisture. Olefin fiber is recommended for the basement to protect their carpeting. Olefin is a polypropylene material that’s made from plastic pellets and recycled materials.

Olefin Synthetic Fiber
Image credit: https://www.thespruce.com/

It looks and feels like wool and is waterproof, mold, and stain-resistant. It’s known within the carpeting industry as a material that is tough, reliable, and comfortable to boot. Its woven nature helps prevent clumping and debris from becoming too ingrained into your flooring.

Pros of Olefin

Can be used both indoors and outdoors

Cons

It’s not resilient as other carpetsWears quickly in high traffic areasThe wool-like carpet fibers catch and tear easily on furniture when moved around the room

Triexta Carpeting

Triexta carpet fiber is made from three natural fibers: wool, nylon, and polyester. The soft blend gives it a distinct look and feels that will stay plush for many years to come.

Triexta Carpeting
Image credit: http://www.tedsabbeyblog.com/

Cons of Triexta Carpeting

The fibers electrostatically attract dirt, making it hard to vacuum

Berber Carpet for Basements

Berber carpet, also known as loop pile, is easy to install, affordable and durable compared to other styles. Examples include nylon and olefin. Nylon is the most popular choice for Berber carpets because it’s known to resist stains and holds up under heavy foot traffic.

On the other hand, olefin tends to soil and stain more easily than nylon, making it a great choice for low-traffic places.

Low Pile Basement Carpet

Low pile carpet is a good choice for basement areas because the cut pile fibers keep dirt and moisture from becoming trapped in the pile. Low Pile carpeting makes basements look less like home entertainment rooms and more like cozy family spaces.

It gives you plenty of softness to sink into, but not too much for you and your guests to trip on. The style is soft and low maintenance, making it the perfect choice for most homes. If you opt for a low pile, go for a low pile style like a plush carpet.

Low pile carpets dry out quickly than high pile carpets when they become damp and wet. If your home is frequented by pets, kids, and heavy foot traffic, then a low pile carpet is the right choice. Look for a synthetic carpet with short fibers that are level and dense like thick grass when mowed.

Carpet Tiles

Carpet tiles are an exciting trend in carpets. Carpet tile can be installed on any type of flooring, but it is especially ideal for concrete subfloors. It comes in a range of shapes and sizes, including squares. The squares are easy to install since they do not need seam allowances.

Carpet Tiles
Image credit: https://www.flooringinc.com/

Installing carpet tile is very easy since you only need to peel and stick the tiles on your concrete subfloor. Since these tiles are made of vinyl and rubber, they can easily be cut into fairly small pieces for use as borders or other decorative floors indoors and outdoors.

They’re perfect for the basement because it is easy to clean these carpets without needing any professional help after a spill. Although carpet tiles are easy to lay, homeowners may need help with the big stuff. Bigger jobs can be handled by professionals who will install these tiles for you.

Sectioned Carpet

This is another low risk option for moisture-prone basements. Whether you’ve divided your basement into multiple rooms and renovated into an open living area, you’ll only use a carpet in only a portion of the space. And if you have water damage, you won’t replace the entire basement floor.

What to Look for in a Quality Basement Carpet

Many homeowners prefer carpet over other flooring options such as vinyl, engineered hardwood and laminate because of many reasons. These include the qualities of a carpet such as soft to walk on, insulation and it’s a forgiving material that works well on subfloor that is in less than good condition.

Factors to consider when choosing a carpet include:

The Pile of a Carpet

Low pile carpets are the best bet when it comes to basement carpeting. This is because the low pile carpet dries quickly compared to the high pile and that’s what the basement floor needs. Less time to dry compared to living room and bedroom which needs high pile carpets. Most homeowners opt for Berber carpet which has a closed loop, giving it a flat, textured appearance.

Carpet Padding

One way of controlling moisture from your concrete floors is to install an impermeable rubber pad. However, some carpet experts are against this idea and are recommending pad-less carpet that allows the basement floor to breathe. You should consider such factors for when you go for free carpet installation

Nonetheless, carpet padding is important because it provides extra insulation, protects the carpeting from dampness and provides cushioning which you’ll need when you have a concrete subfloor. Go for the best breathable carpet pads that are made of open-cell synthetic foam or from synthetic fibers to increase the longevity of your basement’s carpet.

Waterproof Carpets for Basement

If your basement is vulnerable to flooding and water damage, you’ll have a material that can handle such a situation. Some of the waterproof materials that you need to go for include synthetic carpet. Opt for the less expensive ones like olefin carpeting and polyester.

Durability and Comfort

Comfort and durability are the two features that people look for in basement carpeting. There are some materials today, such as 100-percent nylon, which is more resistant to dust and mites than other materials. Nylon is also great for homes with small children because it doesn’t stain easily.

If your basement is for relaxing and watching TV, go for comfort instead of wearability, in which the best flooring options would be olefin and triexta.

Sectioned Carpeting vs. Wall-to-Wall Carpeting

You want your basement to look bigger, so it’s a better idea to have divided carpeted flooring. In this way you can create different rooms in the basement for specific purposes. Wall to wall carpeting is not the best idea in the basement because if any part of it sustains water damage, you’ll need to replace the entire carpet.

The Type of Material

Synthetic carpets are the best bet for basements. They’re easy to maintain and they offer a long life if you take proper care of them. Basement carpeting should be moisture resistant and stain resistant at the same time. So, for this purpose, synthetic carpets do better than woolen carpets.

Pros and Cons of Basement Carpet

Pros

Better insulation from the cold concrete than vinyl, laminate and epoxy flooringDIY-friendly installation, especially if you choose carpet tilesCarpet has a breathability factor greater than other types and even light moisture can be mitigated by dehumidifiers.Large water leaks can be dried out quickly before mold and mildew develop

Cons

Prone to mold in damp conditionsWorst option in the event of flooding

FAQs about the Best Carpet for the Basement

What is the best carpet padding for concrete?

Frothed foam padding is a great choice to use in concrete floors because it responds well in heavy-traffic areas. It’s densely packed and will adhere well to the concrete floor and carpet backing.

Final Thought about the Best Carpet for the Basement

As you can see, choosing the best carpet for your basement isn’t going for a carpet that looks pretty in your local store. It requires a different approach. Consider what you’ll be using the basement for, and pick a carpet based on your intended use.


The post The Best Carpet for Basement appeared first on Kitchen Infinity.

Did you miss our previous article…
https://www.centrecountyfood.org/?p=584

post

How to Identify Dangerous Asbestos Installation

Asbestos is a naturally occurring mineral mined and used in building materials for more than 100 years. It was widely used because of its heat resistance, water repellent nature, and affordability. Chances are that you are also considering using it for building your own house. However, it has been discovered that asbestos can cause serious health risks.

The most common disease caused by asbestos fibers is lung cancer called Mesothelioma, which affects the lungs or abdomen lining. Although there are many countries where it is banned from use completely, you may find some buildings with this material installed even today.

That’s why we have compiled an exclusive guide on identifying dangerous asbestos installations so that you remain safe at all times if your house happens to be built with these harmful chemicals. Let’s get started!

Why Asbestos Insulation is Dangerous

Yes, prolonged exposure to asbestos fibers can lead to serious respiratory illness and cancer called Mesothelioma. When disturbed, tiny abrasive asbestos fibers can be inhaled. In homes built before 1975, asbestos is most commonly found as thermal insulation on basement boilers and pipes.

When is Asbestos in a Home Dangerous?

The material in good condition will not release asbestos fibers, but when disturbed, it may create a health hazard where none existed before. Asbestos becomes dangerous if it has been damaged over time. The ones that crumble easily if handled can release asbestos fibers and create a health hazard.

Types of Asbestos Insulation

Loose Fill Insulation

Loose fill insulation is made of asbestos. The particles may be very small and do not feel gritty to the touch. This type of insulation was found in older homes before the 1980s. Loose-fill insulation comes in various materials and is easy to identify, thanks to its loose, lumpy form and fluffy or granular texture.

It doesn’t have paper or other types of backing like batt, and blanket insulation does. After determining if your attic insulation or the wall has loose insulation, you also need to determine which type of material it is because some types may contain asbestos.

Vermiculite Insulation

This type of loose-fill material was often used in attics and walls of older homes before the 1980s. When you contact a professional for an asbestos inspection, they’ll check for this type of insulation by looking at your home’s construction records or telling you what got installed in your home when it was built.


Image credit: https://s3.amazonaws.com/

Vermiculite loose-fill insulation is one of the most common household materials that contain asbestos. It has a pebble-like appearance and typically is a grayish-brown and silvery-gold color. It’s made from a natural mineral material that can release tiny fibers when processed and handled.

In the United States, most vermiculite insulation containing asbestos was sourced from a mine near Libby, Montana which was active until 1990. And because the LIbby mine closed in 1990, houses built before that date might have asbestos containing insulation.

Cellulose Insulation

If you have a loose-fill insulation that is gray, soft, and without a shine, then it’s cellulose insulation. Cellulose insulation contains a high percentage of recycled paper and doesn’t contain minerals. It looks like shredded gray paper. It’s a perfectly safe type of insulation that is commonly blown into attics. It also comes in batt and blanket forms.

Cellulose Insulation
Image credit: https://buildpass.co.uk/

Loose-Fill Fiberglass Insulation

Fiberglass fill is a popular choice for homes. It’s also one of the safest types of insulation to get installed in your home. The main problem with fiberglass insulation is that it can irritate skin and cause respiratory problems if it isn’t installed correctly or if there are loose fibers from the previous installation that have been left at the site of the installation.

Loose-Fill Fiberglass Insulation
Image credit: https://diy.sndimg.com/

And because it’s a glass product, fiberglass has a slight shine when subjected to bright light. It’s very soft, almost like cotton candy, and is composed of very fine fibers.

Rock Wool Insulation

Also known as mineral wool, rock wool is another popular insulation product. It also comes in two different forms, either as loose fill or batts. The materials are similar to fiberglass, except that rock wool fibers are much larger and therefore more difficult for the body to breathe into it. It has a fibrous, soft, cottony texture.

Rock wool is usually gray, white, off-white, and brownish white. It’s a manufactured product made by melting basaltic rock. The raw materials get exposed to temperatures up to 2750 degrees Fahrenheit, making them melt, then fibers are spun from the molten material.

Blanket Insulation

Blanket insulation is manufactured from rock, slag, or cinders. It’s lightweight and fibrous. It’s either in the form of batts or large rolls and looks like a big, cotton-like blanket. It’s flexible and is often used on attics and walls.

Inhalation of rock wool or blanket insulation material may result in a variety of health problems, including lung disease, cancer, and asbestosis. Therefore, it is important to install these materials using proper protective gear and methods.

Block Insulation

These are rigid panels manufactured from the same material that is used to make concrete. It can be found in either pre-formed or bagged blocks and comes in a variety of thicknesses. The most common type of block insulation is cement fiber. It’s lightweight, easy to cut, and looks like a grayish-white sponge.

It is not amenable to cutting with a rotary saw, so it has to be ground down before it can be installed into the wall cavities or floor of your home.

How to Identify Asbestos Insulation

According to research, there’s no safe level for asbestos exposure. Therefore, if you discover insulation in your home that may contain toxic material, don’t remove or inspect it yourself. If you suspect the area is contaminated with asbestos, call a professional. If you find asbestos in your ceiling, floor tiles, and anywhere else in your home, get the sample tested by a professional lab.

Call for an Inspection First

Before you call an asbestos abatement contractor, you should contact an industrial hygiene firm to inspect the affected area. A proper assessment should include a complete visual examination and careful collection and analysis of samples.

If there’s asbestos, the inspector should provide a written evaluation describing its location and extent of damage and provide recommendations for correction and prevention.

Contact an Asbestos Abatement Contractor

Before the work begins, get a written contract specifying the work plan, procedures, and time frames. The agreement should also specify what happens if the work is delayed, who will pay for future inspections.

And whether you will be charged for other services such as cleanup, applicable federal and local regulations, which the contractor must follow. You can contact your state, local agency responsible for asbestos regulations, Environmental Protection Agency, and Occupational Safety and Health Administration’s regional office.

Removal of Asbestos

If you decide to remove the asbestos or asbestos repair, ensure that the contractor gets written assurance that you are getting exactly what is on the label. There should be a label specifying the type of asbestos, where it’s located, and how much has been removed.

Repairing Asbestos

Sealing 

Sealing treats the material with a sealant that binds the asbestos fibers and coats the material, so fibers are not released. You can repair a pipe, furnace, and boiler insulation this way. 

Covering

Covering involves placing a protective wrap and jacket around the material to prevent burning and wear. Covering is used for asbestos-cement pipe insulation, ceiling tiles, floor tiles, and other materials that aren’t damaged if left in place. Only a professional trained to handle asbestos safely should undertake these repairs.

FAQs about How to Identify Dangerous Asbestos Installation

How do you test for the presence of asbestos?

Use asbestos testing kits which work in a two-step process. After purchasing a low-cost kit at a home improvement center, you obtain suspected asbestos from an area of your home. After that, mail your findings to the laboratory, and the results will be sent to you after a few days.

Final Thought on How to Identify Dangerous Asbestos Installation

As you can see, dealing with asbestos requires the use of a special kit. Asbestos testing kits are available through home improvement centers and other outlets, or you can contact an asbestos abatement professional. If handled correctly, you can prevent asbestos from causing a problem in your home.


The post How to Identify Dangerous Asbestos Installation appeared first on Kitchen Infinity.

Did you miss our previous article…
https://www.centrecountyfood.org/?p=580