post

10 Best Topiary Plants to Grow

Topiary plants are easier to grow than any other ornamental tree or shrub. The best topiaries among trees, herbs, and shrubs bear small leaves. They also grow quickly and have a dense branching pattern.

If you want to add interesting shapes and forms into your garden without having to spend too much effort on them, topiaries are something worth considering. Here’s a list of several popular choices that we’ve picked out so you can decide which ones would work best for your gardening needs.

1. Boxwood (Buxus sempervirens)

Buxus spp, or box, is a versatile plant for topiary projects since it can tolerate almost any type of soil and exposure. This makes it ideal for growing indoors as well as outdoors. It’s an old-time favorite to craft a refined look by using its natural features.


Image credit: https://i5.walmartimages.com/

The only problem is the high maintenance requirements when you try a complex design. They can be shaped however you like because they provide a dense style with insignificant flowers. You can use boxwood topiaries to balance your entryway and other simple applications like creating a basic hedge.

For its optimal growth, it requires consistent moisture and proper mulching. It’s also important to provide it with well-drained soil, and it prefers full sun to partial shade.

2. Yew Bush

Yews are conifers that require very minimal care effort. They have a needle structure and dense leaves. Yews are considered an evergreen shrub but don’t need a lot of sunlight. It’s suggested you place them under partial shade. However, it’s important to provide them with well-draining soil and water during the blooming season. 

Taxus bushes are available in many different varieties. Some of them can be used as foundation plants, while others can be used for landscaping needs. If you have a cylindrical topiary in mind, then go for Anglo-Japanese yew. They are the common yew because they grow in a cylindrical shape.

Yew Bush
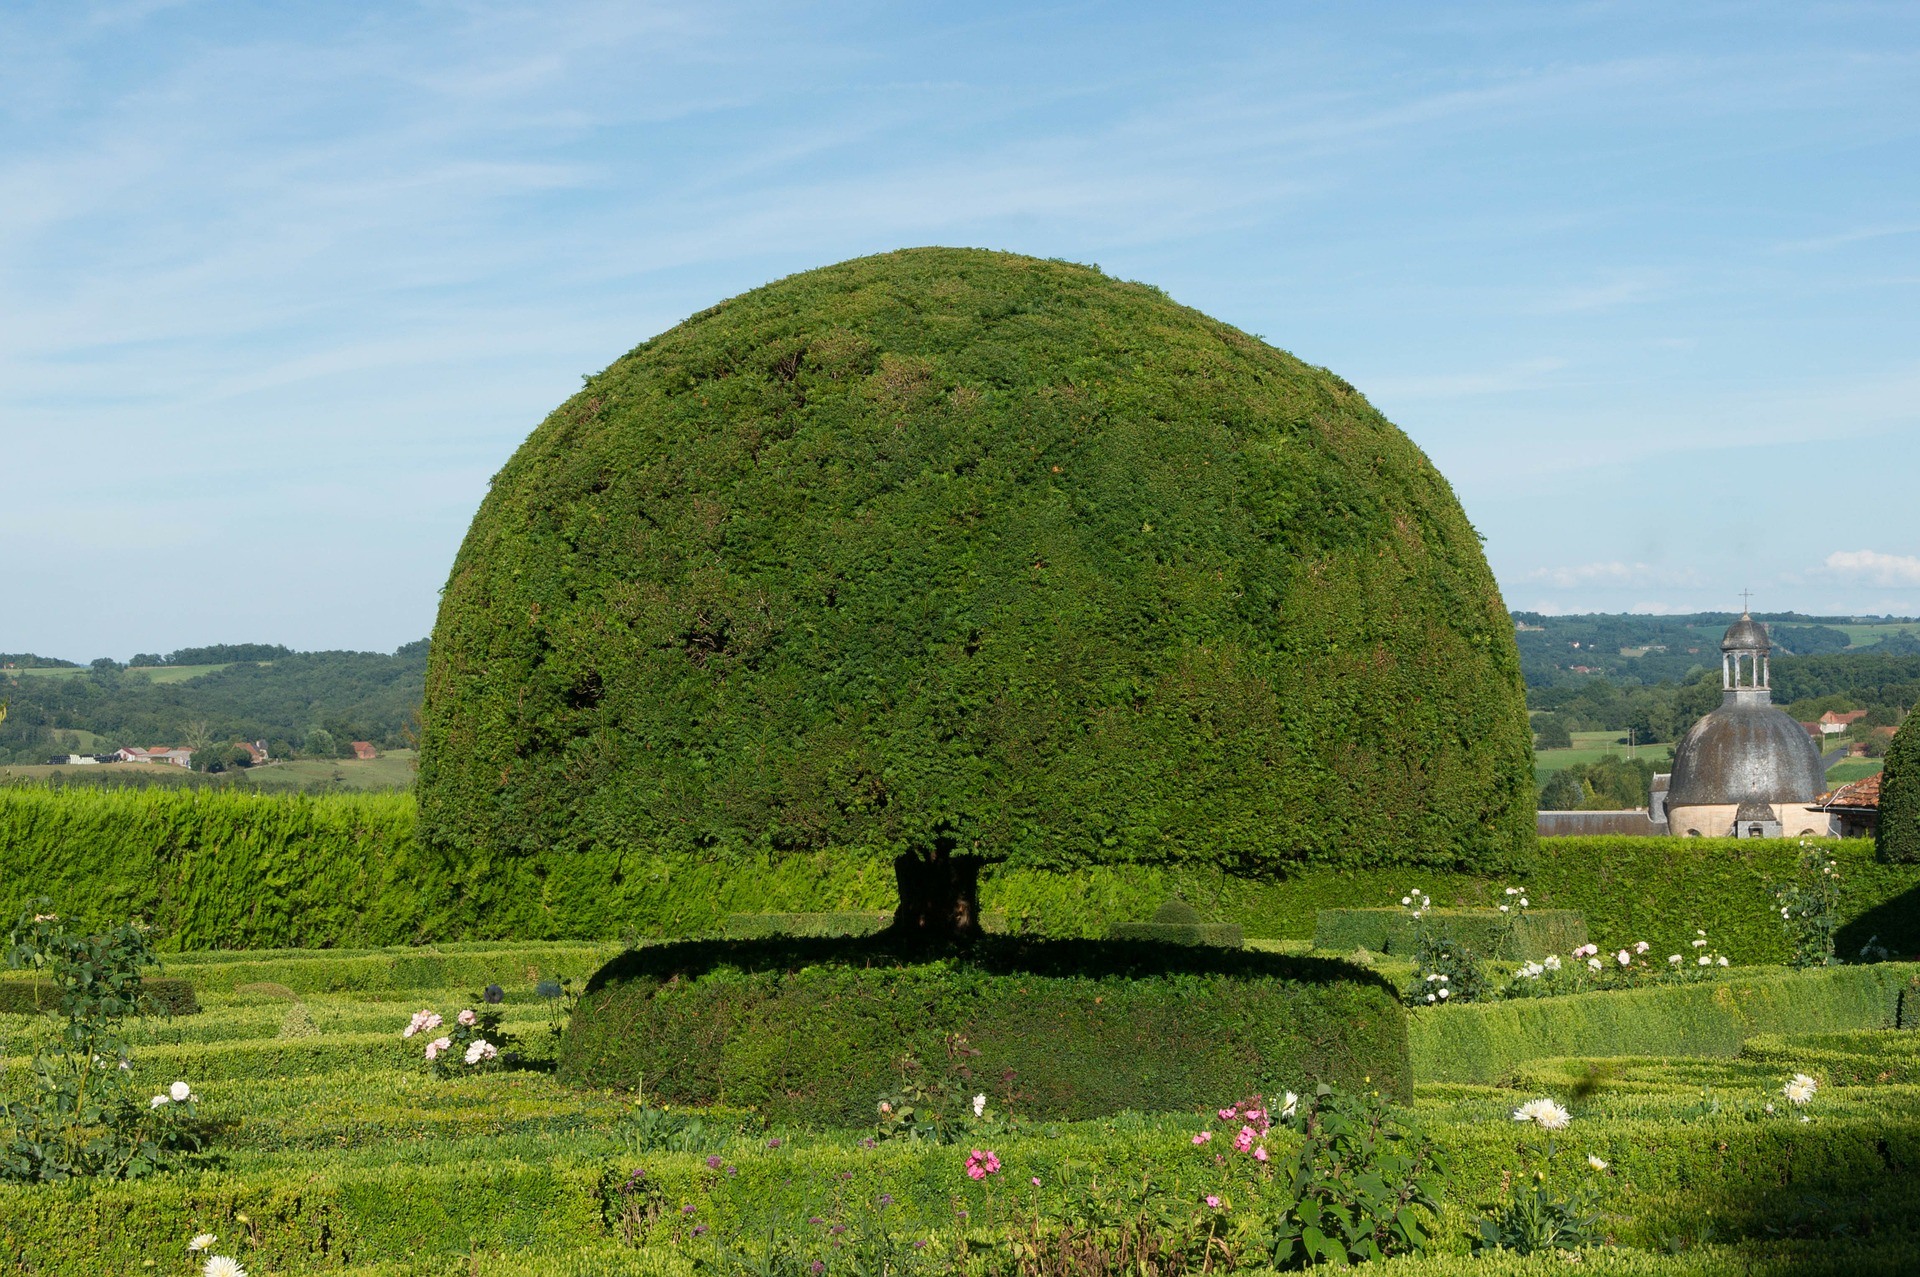
Image credit: https://www.igardenplanting.com/

The only drawback is that they’re toxic to animals and humans, so avoid growing them where dogs roam, or kids play. If you want to achieve the topiary shape, then Taxus baccata is the most popular choice.

3. Privet Shrubs

Some hedge plants can double as excellent choices for topiaries, and Ligustrum spp is one of them. Its timeless aesthetic makes it perfect for privacy. This topiary plant grows and requires less effort to shape than other topiaries. You’ll also appreciate its superior tolerance to salt and urban pollution.

When it comes to growing conditions, this plant is very versatile. It’s hardy within USDA zones 5 through 9. It’s also resistant to drought, disease, and pests. Once planted, the shrubs need an acidic soil with pH levels of 6.2 to 7.0 so you must test the soil pH to ensure it’s the correct one for your plants.

They grow well in full sun to partial shade conditions with at least six hours of sunlight daily. However, too much sun can cause some bleaching on leaves, so keep that in mind. It produces large leaves and has dense foliage. The larger leaves make it suitable for large-scale topiary.

4. Japanese Holly Shrub

The name of this plant comes from the evergreen leaves. The leaves are a dark, solid green color with a toothed edge. They have an attractive appearance and grow in clusters. They’re 2 to four inches long and 1 ½ to three inches wide, making them ideal for topiary projects.

Its rounded form makes this shrub ideal for topiary projects that involve geometrical shapes. The ilex spp is an evergreen with broad leaves instead of needles. It has dense foliage and a bushy appearance with many glossy leaves. Hollies with traditional holly leaves can be trimmed to the shape that you desire.

It grows upright at a moderate rate and requires occasional pruning to prevent it from growing large. It’s appreciated by landscape designers, thanks to its remarkable qualities of blossoms. Growing hardy USDA zones of Ilex crenata are 5 to 8, full sun and part shade.

5. Rosemary Herb

Who doesn’t know this excellent herb? Rosemary, with the Latin name of Rosmarinus spp, is an evergreen with needle-like leaves. It can grow up to 3 feet tall and 15 inches wide at full-grown, but it needs little pruning to be used for topiary projects. It’s also known for its white flowers and pleasant scent. 

Rosemary has a strong and fragrant scent and is tolerant to heat and drought. Rosemary can also be used in herbal tea, meats, and fish. Thrives best in USDA growing zones 8 to 10, full sun exposure.

6. Lavender

Lavandula angustifolia or lavender for short can be used as a topiary if not for its beautiful and fragrant flowers. It has a greyish hue and is drought tolerant, thriving in USDA zones 4 to 9, full sun exposure. Lavender can be used in soaps and lotions, but this plant is also known as an insect repellent.

A good choice of companion plant since lavender can protect other plants from insects. Other benefits of Lavandula spp include the ability to draw butterflies and repel deer. You can also take advantage of its evergreen leaves if you’re living in a warmer climate. Lavender can also be grown as a small topiary plant.

7. Thyme

When it comes to small-scale topiaries, herbs like thymus spp or thyme should be your choice. Thyme isn’t only a culinary favorite, but it’s also a suitable plant for topiaries because of its compact nature and tidy appearance.

It has small green leaves and can grow between 6 inches (15 cm) and 2 feet (60 cm). Thyme has deep purple, white flowers, and an earthy scent. This makes it a great choice for a fragrant topiary that can also add color to your garden.

8. Vines

Ivies or Hedera spp are great for this purpose, although some are considered invasive. Therefore, choose non-invasive varieties like Lady Frances, Gold Child, or Duckfoot. It is not very difficult, and it is fun making one in your garden or yard.

Vines
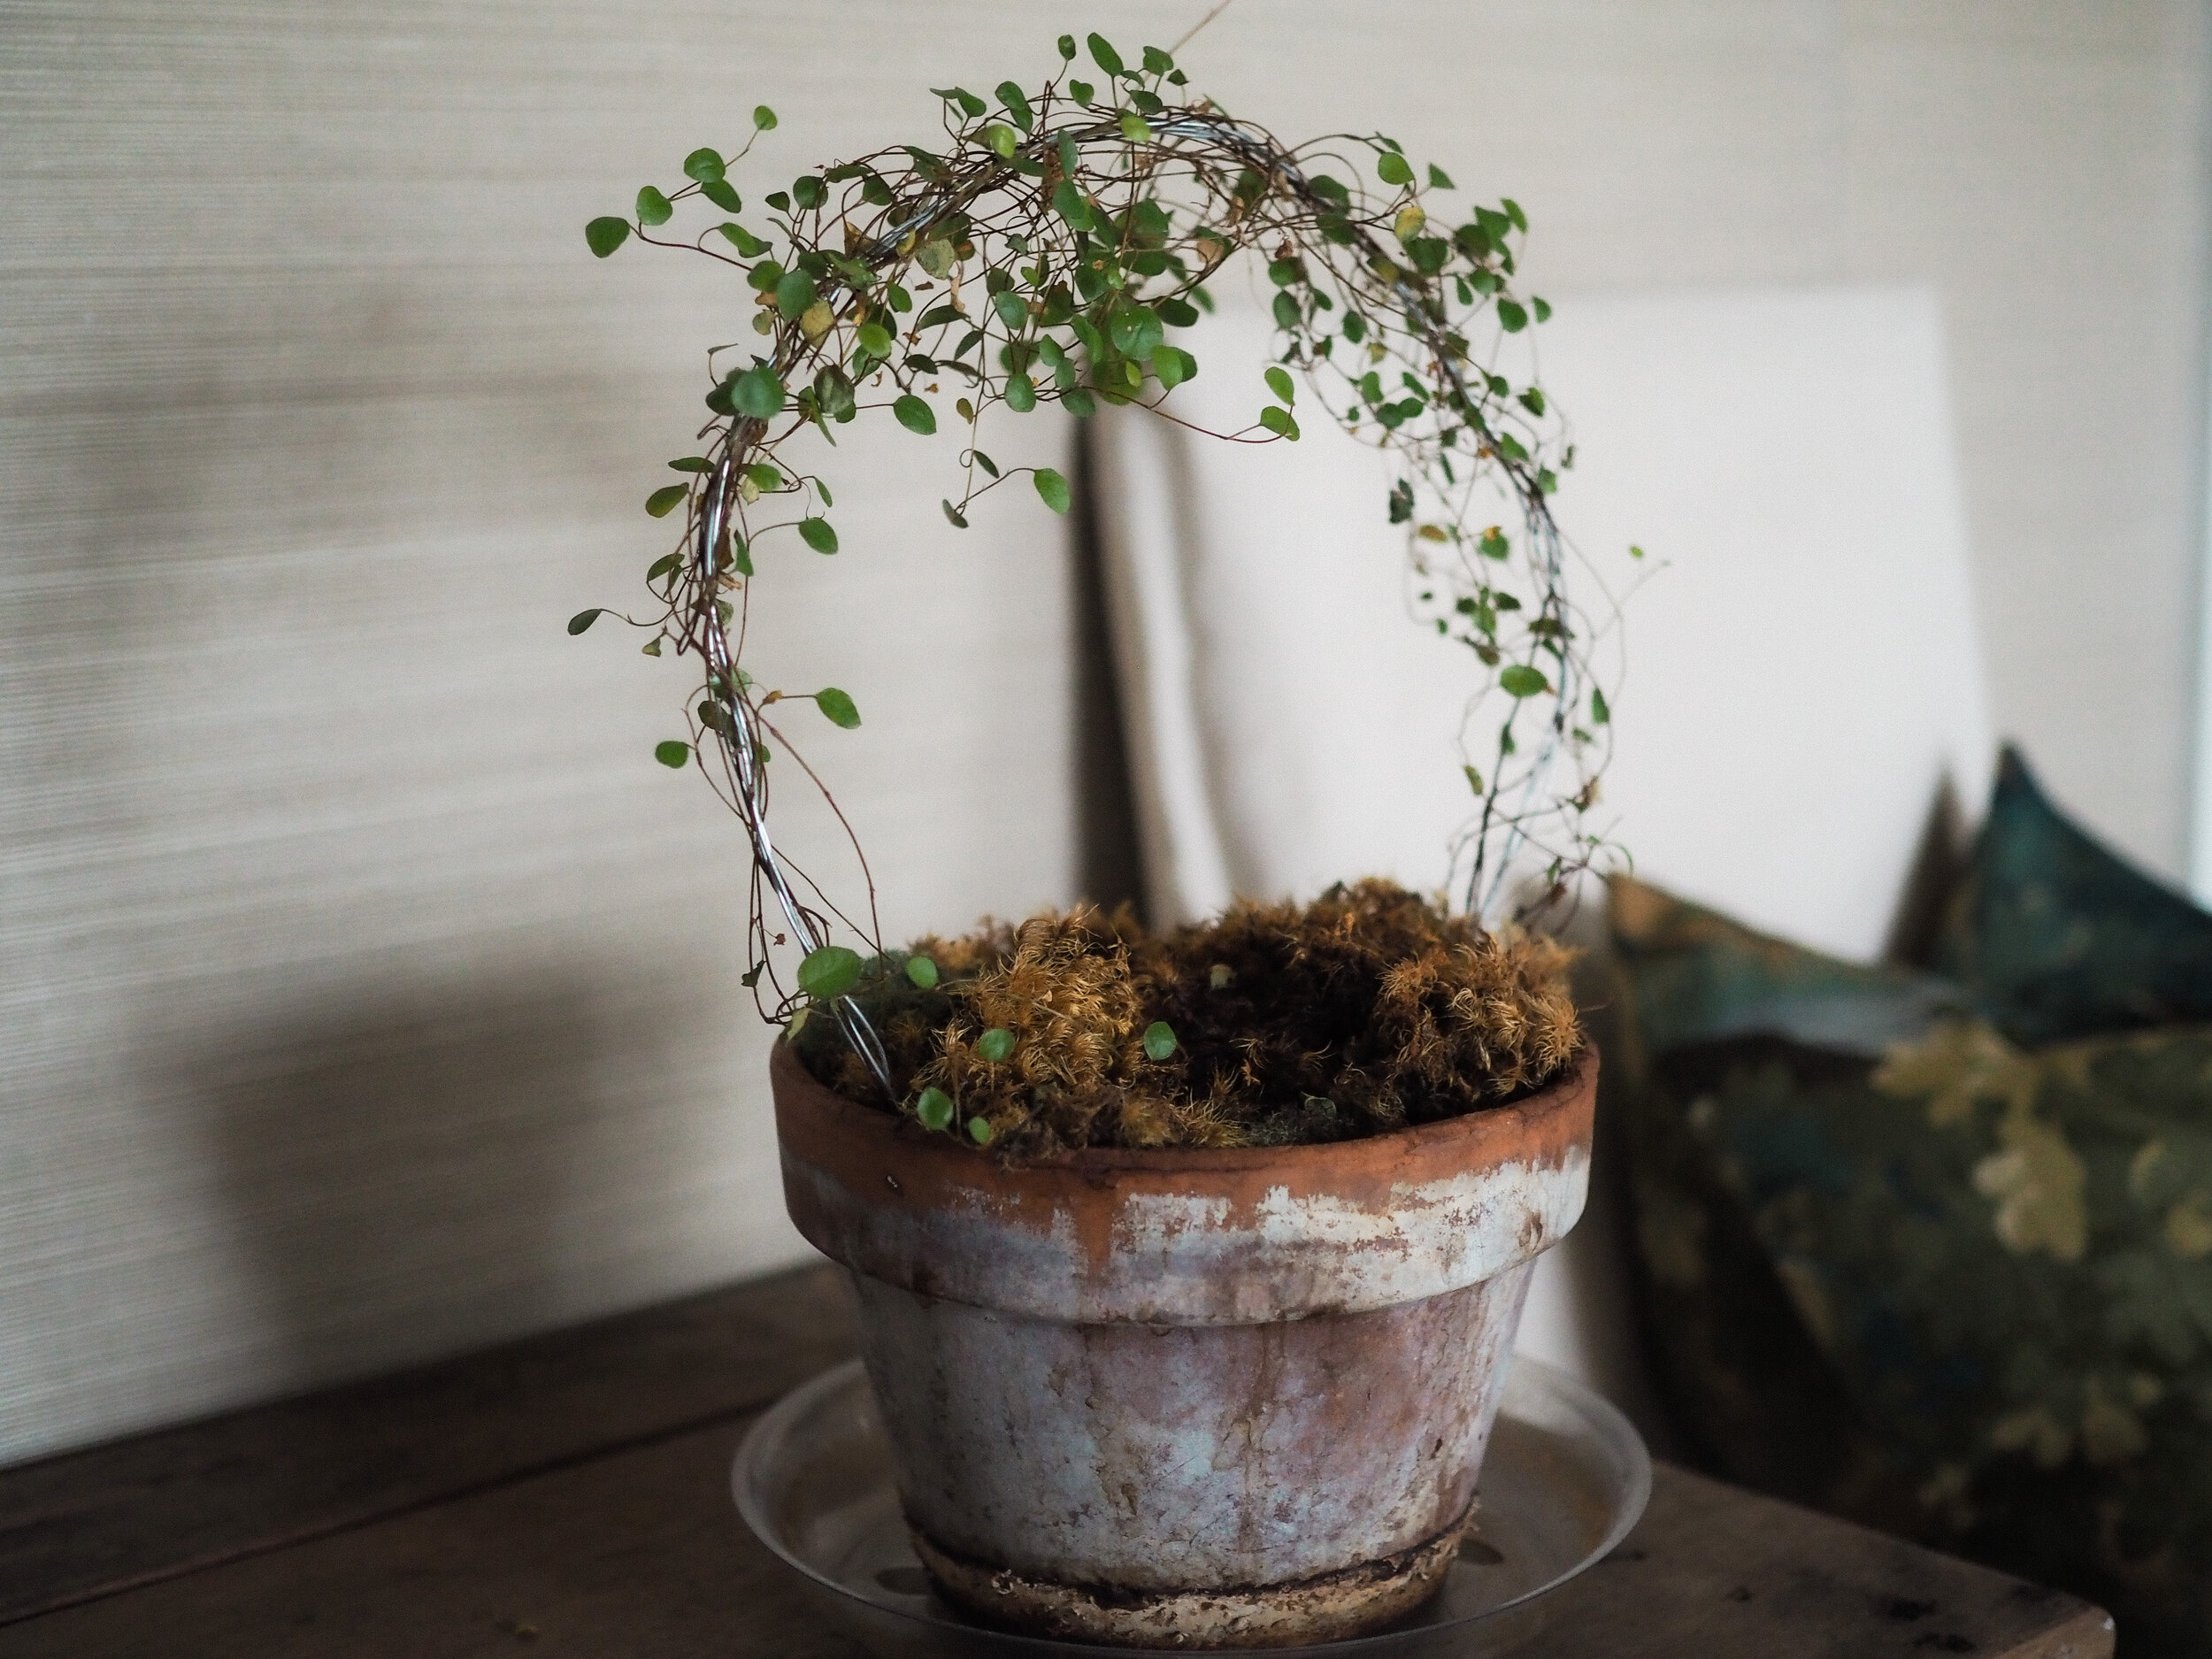
Image credit: https://images.squarespace-cdn.com/

You can grow any variety in a container, but make sure that the plant is not invasive. Dwarf forms of English ivy (Hedera helix “Hahn’s”) can be grown in a pot because they are non-invasive. The same thing can be said about creeping fig (Ficus pumila) and Persian ivy (Ternstroemia gymnanthera).

As for the plants that you might want to avoid, think about English ivy varieties like Pagoda, Imperial Gold, or Queen Emmarentia because these are the ones that might invade other parts of your garden. Working with ivy is incredibly easy and provides flexibility for any topiary artist.

9. Sphagnum Moss

Sphagnum moss is a small flowerless plant that grows in dense green clumps. It’s mostly found in shady and damp locations. When you want to make this topiary plant, you need to find a proper frame then fill it with moss. Once it’s full, it can stand alone and you can use it as a base to plant trailing vines, herbs, and flowers.

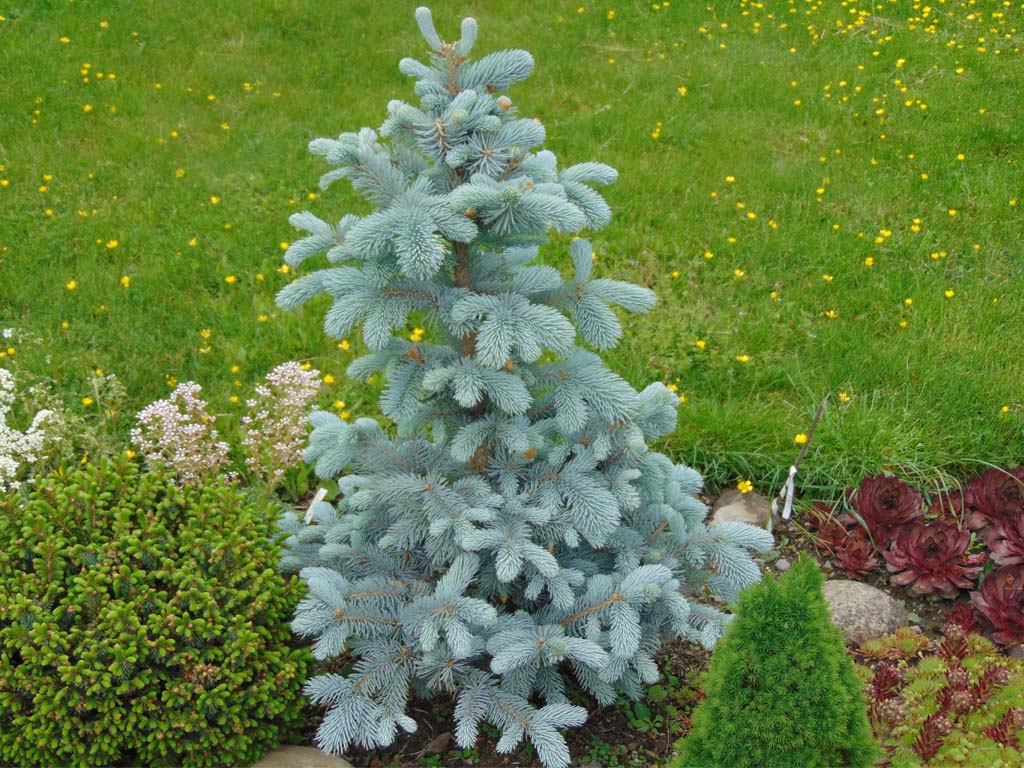
10. Dwarf Alberta Spruce Trees

This is another slow grower plant, but it6 makes up for it with dense and fragrant foliage. This dwarf tree is very important if you’re looking for a topiary with pyramidal and conical shapes.

FAQs on Best Topiary Plants to Grow

Which plants make the best topiaries?

Such plants as holly, laurel, boxwood, and privet are excellent choices for topiary. But boxwood, especially morris dwarf, is the best topiary plant choice because of its compact shape, even if it’s trimmed.

Which Buxus is best for topiary?

The best buxus for topiary include English box, Dutch box, and Japanese box.

Final Thought on Best Topiary Plants to Grow

As you can see, there are so many topiary plants to grow and so many different types of topiary styles. Even though there are so many choices, you can always find something that will work for your landscaping project.


The post 10 Best Topiary Plants to Grow appeared first on Kitchen Infinity.

post

How to Grow Colorado Blue Spruce

The Colorado blue spruce is a beautiful tree from North American native selection. It’s very slow growing but has an excellent pyramidal shape. As a landscape plant, it reaches 15-20 feet maturity in ten years. They were first discovered in 1862, growing in the Rocky Mountains.

But nowadays, they’re widely planted landscape trees. If you live in the right climate and have good soil, this tree will thrive, but only if you plant it the right way.

This guide tells you everything about how to grow blue spruce trees, from seedlings to mature specimens suitable for your yard or garden. You’ll learn what type of soil they need and how much sunlight they require. You’ll also learn tips on pruning them and other maintenance tasks that are necessary for their survival. Let’s get started!

Propagating and Planting Blue Spruce

Grafting is the most successful propagation method as it allows you to get earlier crops than cuttings do, but the downside is that this method requires more knowledge and experience. You can use either whip or cleft grafts with scions taken from the upper part of mature trees or use root cuttings. Colorado blue spruce grows very slowly, so, you have to be patient for seedlings to fully grow.


Image credit: https://forestnation.com/

To plant colorado blue spruce, dig a deep hole of two to three times as wide as the root ball of the tree. Then, place the tree in the hole so that the root ball is even with the surrounding soil. If your soil is poor, add water to the soil to remove air pockets. 

Other special features that come with this plant include bird-friendly, dramatic foliage color, easy-care, North American Native Selection, Tolerates Road Salt, and year-round interest. And the companion plants include spirea, Butterfly Bush and Blanket Flower, Weigela, and Stonecrop.

Colorado Blue Spruce Tree Care

Other common names of Colorado blue spruce include green spruce, white spruce, and Colorado spruce. The main requirement for these trees is an adequate water supply during dry periods. Colorado blue spruce tree requires the following maintenance to keep it healthy and vigorous:

Position

It is essential to plant blue spruce trees in moist soil locations with full sun and light shade. However, blue spruce Picea Punjeb is also drought-tolerant, but growing it in heavily polluted areas can affect the blue color coating of the needle.

Soil

It is not fussy about the soil type as long as it is well-drained. Colorado blue spruce trees require moist soil to grow healthy and well. Spruce prefers acidic, boggy soils which are sandy or loamy with low levels of organic material. 

Soil
Image credit: https://worldofgardenplants.com/

On soil pH, Colorado spruce requires a range of 6.0 to 7.5, even though they can tolerate extremely acidic and alkaline soils. Make sure you test the soil pH just to be sure.

Light

Plant Colorado blue spruce trees in full sun and ensure they get at least six hours of unfiltered sun per day. The Colorado blue spruce thrives in full to partial sun. It also tolerates partial shade but does better in spots with plenty of sunshine.

Water

Blue Spruce Picea punjens require an ample supply of water and also good drainage. Although blue spruce tolerates drought, it does best when watered consistently throughout the entire year. Water your blue spruce about once every two weeks if rainfall is less than 1 inch per week during the first growing season to keep the soil moist.

Once it’s established, water it only during dry spells and avoid water logging or creating muddy soil. The Colorado blue spruce can tolerate dry soil as long as the plant is watered regularly during its first growing season. At that point, it develops a deep root system and requires less frequent watering.

Fertilizer

Blue spruce does not require frequent fertilization to thrive. If you want to fertilize your Colorado blue spruce, do so in early spring or late summer using a balanced 10-10-10 formula. This will give the tree an added nutrition boost. It will increase the length of the needles and improve the needle color. 

The fertilizers will also give full nutrients and help the plant to grow vigorously with a nice look and denser foliage. Better yet, you can consider using green manure for your plants. Learn how to make a composter to make this even better.

Pruning

The Colorado blue spruce should be pruned to remove dead needles and any diseased branches in its first winter. After the tree has gone through one growing season, it should no longer require any pruning. But a good thumb requires you not to prune them because they do best when their branches are allowed to grow to the ground.

Pruning them will also promote denser foliage. So, apply two to three inches of garden mulch around the plant’s base in a wide circle to keep the soil from splashing during rainy weather.

Temperature and Humidity

The Colorado blue spruce will prefer cool conditions, but they’ll tolerate full sun more readily than other evergreens. Give your tree some protection from the hot afternoon sun. It would prefer cold winters and moderate summers, with an annual minimum of about -20 degrees Fahrenheit.

The Colorado blue spruce is also tolerant of cold weather, but it will not thrive in extremely hot and humid weather conditions.

Pests and Diseases

Aphids, scale insects, and spider mites are all pests that bother picea punjens. An infestation of whiteflies can cause leaves to have a dusty appearance and also cause root rot. If you see any symptoms of pest damage on your Colorado blue spruce, it’s important to take care of the problem immediately before it becomes an irreversible situation.

Use a magnifying glass to examine your tree. Look for any eggs that may be about to hatch, and remove them by hand if they’re spotted early enough in the process. If you find a fully grown pest, spray it with a strong stream of water from a hose or use an insecticidal soap that can be applied with a garden sprayer.

Failure to treat those fuzzy black spots can make your spruce needles turn purple to brown and eventually fall. However, fungus won’t kill your tree, but these blue spruce trees are also susceptible to white pine weevils.

Potting and Repotting Blue Spruce Tree

Since these trees are used for Christmas decorating, you can add them as potted landscaping plants when the holiday is over. The blue spruce tree can also be added to the Rocky Mountains or any area with good drainage and full sun exposure. Once the season is over, dig a hole and keep the dirt loose to provide enough air for the roots.

Potting and Repotting Blue Spruce Tree
Image credit: https://worldofgardenplants.com/

The Colorado Blue Spruce Landscape Uses

This plant makes an exceptional accent tree. You cannot also go wrong with this tree if you’re looking for a windbreak or privacy screen. And if you’re living in areas with a large wildlife population, these ornamental trees resist deer, thanks to their strong smell and prickly texture. This also makes it a perfect habitat for local rabbits and birds.

FAQs on How to Grow Colorado White Spruce

Can you grow Colorado blue spruce indoors?

No, blue spruce trees are too large to be grown indoors. They can be grown outdoors where they can get natural sunlight.

How can you make blue spruce grow faster?

Make sure your blue spruce tree is planted in a location with lots of sunlight for at least half a day. You can also fertilize the soil around the plant with triple phosphate and potassium to help it grow faster.

Final Thought on How to Grow Colorado Blue Spruce

As you can see, growing these Christmas trees is not that difficult. As long as your location has full sun and is well-drained, you can grow this plant and enjoy its Christmas beauty. Even if you do not use it as a Christmas tree, the blue spruce will still look good around your home. It can also help you separate tall multistory buildings.


The post How to Grow Colorado Blue Spruce appeared first on Kitchen Infinity.

Did you miss our previous article…
https://www.centrecountyfood.org/?p=161

post

13 Best Microfiber Cloths

Most microfiber cloths are eco-friendly and come in several sizes to help them pick up small dust and bacteria particles. Larger clothes are suitable for heavier, messier cleanups, while smaller and fine fibers are suitable for computer screens and glass tables.

But not all microfiber cloths can get the work done the way you want it done. So, what are the best microfiber cloths? This article outlines some of the best microfiber cloths based on their quality, affordability, and durability. Let’s get started!

1. AIDEA Cleaning Cloths

AIDEA Cleaning Cloths are highly durable and have been processed to be extra soft so that you can get a safe and reliable clean for your laptop, cell phone, or other electronic devices. The specially crafted fiber is 100% polyester blended with a mixture of micro-polyester and polyamide, allowing the cloth to pick up dust particles much more efficiently than ordinary fabrics. You can use AIDEA cleaning cloths on your laptop, cell phone, and clean electronics without fear of scratching their surfaces.


Image credit: https://m.media-amazon.com/

AIDEA Cleaning Cloth’s durability has been tested in a laboratory to ensure that they will hold up against repeated washing. 

The AIDEA cleaning cloths have also been UV-treated which means they can be used in direct sunlight and will not damage the screen of your electronic device. They contain antibacterial properties, allowing you to clean surfaces throughout your house without worrying about building up bacteria or mold. 

2. Polyte Microfiber Cleaning Towel

Don’t let go of this microfiber cloth when you lay your hands on it. It comes with quick-drying cloths of natural bamboo fiber and a special quality microfiber. It ensures that your device will be clean and free from bacteria. You can wash it in a washing machine and can be reused up to 300 times, making it very cost-effective in the long term. It’s suitable for both household and automotive use.

3. E-Cloth Microfiber Home Cleaning

This type of microfiber cloth is designed for deep cleaning. The brand boasts of eliminating 99% of surface bacteria, mold, and pollen. It does this by locking contaminants inside the dense fibers until they are washed thoroughly in the machine. This cloth is made in Korea and comes in nine different purposes: dusting, polishing, drying, wet polishing, and much more.

It covers a wide range of home cleaning needs such as kitchen cloth with scrubbing pocket, a range, and a stovetop cloth. It also covers two glass polishing cloths, a bathroom cloth, a window cloth, a dusting cloth, and a stainless steel cloth. Each of these cloths comes with a different pattern and color to shine any room and appliance in your home.

4. MagicFiber Microfiber Cleaning Cloths Review

The microfiber cleaning cloths are great; they take out all the dust and dirt even from the hardest-to-reach places. It is a must-have for everyone who likes an extremely clean home. This set of IXL Korean extra-thick 9-piece Microfiber Cleaning Cloth Set is as useful as it is beautiful as it is durable. 

You can use it either wet or dry, for any job in the home you may have. This set includes one multipurpose cloth, two glass polishing cloths, a stovetop cloth, a bathroom cloth, a window cloth, and a dusting cloth in addition to the stainless steel cloth.

You can also use it as an eyeglass cleaner. MagicFiber cloths are good for most delicate surfaces, especially computers and smartphones. Each pack of MagicFiber comes with a protective bag, making it stay clean and ready for use. You should thoroughly clean microfiber cloths and follow the care instructions carefully. These finely woven cloths should be washed gently without harsh chemicals.

5. Kirkland Signature Ultra High Pile Premium Microfiber Towels

These microfiber towels are great for cleaning cars and trucks because of their high fiber density and affordable price. With their thick and plush weave, they can absorb liquids such as oils quickly and completely. You can also use them with or without water for a gentle, deep clean. It’s also the best microfiber cloth for glass.

The company claims that its fibers can get rid of up to 99% of surface bacteria. You can reuse them even a hundred times, and their care is quite easy- you just machine wash in cold water and tumble dry on low. It’s also designed for automotive use and the set of 36 will also protect other delicate surfaces such as car panels and interiors.

6. CleanGreen Microfiber Cleaning and Dusting Gloves

Do your cleaning with microfiber by using a pair of gloves made of this super soft material. They are perfect for dusting TV and computer screens, blinds, photo frames, and other small surfaces. These microfiber cloths are reusable up to 500 times, so you can forget about buying paper towels, window cleaner, or any other cleaning product.

CleanGreen Microfiber Cleaning and Dusting Gloves
Image credit: https://www.jennsblahblahblog.com/

7. AmazonBasics Microfiber Cleaning Cloth

These microfiber cleaning cloths are Amazon’s best-selling cleaning cloths. They contain 90% polyester and 10% polyamide, making them super absorbent. They are great for a gentle clean and are also affordable and eco-friendly solutions for your cleaning.

They have also accumulated more than 9300 positive reviews on Amazon. So, what are you waiting for? Get yourself this cleaning microfiber cloth and save a little cash plus the environment.

8. Meguiar’s Water Magnet Microfiber Drying Towel

These microfiber towels are super absorbent, well made, and great for drying your car. It has a special weave to soak up water quickly and easily. They are also quite affordable compared to other microfiber cloths in the market because they offer you 16 different sizes to choose from, making them ideal for any use.

They are super absorbent, meaning that you can use them too quickly to clean off a car without any soap and water and without leaving back any streaks. It’s capable of absorbing up to twice as many traditional terry cloth towels. Apart from detailing cars, you can also use these microfiber towels to clean other areas in your home.

9. Microfiber Wholesale Microfiber Glass Cleaning Cloths

These are some of the best microfiber cloths in the market today. They are made from high-quality materials, making them soft and durable at the same time. They are great when it comes to cleaning glass and polishing.

The eight-piece set comes with a total of four 16-inch microfiber cloths and four 12-inch microfiber cloths. You can use them to clean windows, mirrors, lights, and many other surfaces in the house. They are also great for removing stains and marks from wallpaper without leaving any scratches behind.

They are made from a blend of polyester and nylon. They have a very high absorption rate, making them great for cleaning surfaces without leaving streaks behind. The towels also have a plush microfiber pile that traps dust and other particles to make the cloth more effective when polishing surfaces. These microfibers cloths are also reusable and can be machine washed.

Microfiber Wholesale Glass Cleaning Cloths come in four different colors: blue, yellow, red, and green. This is because different colors work best for specific purposes. For example, the blue microfiber towel is excellent for polishing chrome surfaces such as your car’s headlights or trim pieces since it has a very high luster. The green cloth is best to help you clean windows and mirrors since it produces a high level of transparency, allowing the glass to sparkle when dry.

10. SimpleHouseware Microfiber Cleaning Cloth

This is another small microfiber cloth. With their small and mighty towels, they can hold up eight times their weight but still dry quickly. They’re smaller than human hair. These microfiber cleaning cloths are made up of 85 percent polyester and 15 percent nylon for a soft, non-abrasive material that can clean your surfaces at home.

These highly adaptable cloths come in packs of 5, 10, 15, 20, and even 150. But it’s up to you to decide on what number seems good to you. It’s always difficult to know how many microfiber cloths you’ll need in a pack, but for a long-term supply, this microfiber cloth will give you more than enough.

The set includes 50 packs, each measuring 12 by 16. Other than sheer quantity, this microfiber cloth is good for larger cleanups around your home electronic cloth that might fail to clean. The set comes in four assorted colors, including green, yellow, orange, and blue.

11. Mr. Siga Microfiber Cleaning Cloth

This is also the best choice if you’re looking for something colorful. The cloth measures 12 x 16 inches which are just enough to fit into your hand and cover larger spaces. It’s made with 80% polyamide and 20% polyester material, which are safe, especially around electronic devices. 

This microfiber cleaner can be used for dusting and cleaning. This is the best choice if you need a cloth that can remove tough stains because it has greater absorption capabilities.

If you’re looking for an affordable cleaning cloth that can work on shower tiles, car windows, and anything in between, then a multi-use towel is the right choice. It can absorb five times more liquid than traditional towels, and it dries faster than a regular towel. This microfiber towel is made from 100% microfiber material, making it safe to use on electronic devices such as smartphones, cameras, and other valuables.

They’re absorbent and are scratch-free microfiber with high-quality stitching and reinforced edges to ensure they will not fray after repeated use.

12. Buff Microfiber Cleaning Cloth

Buff microfiber cleaning towels are made of 50/50 polyester and microfiber blends to help with deep cleaning. This durable material is designed to continue working, even after 500 washes. Each set comes with 12 pieces of clothing, so you don’t need to replace them any time soon. They are also easy to wring out and dry quickly after use. They’re so perfect for heavy-duty cleaning.

13. Unger 18-Inch Microfiber Cloths

The Unger microfiber cloths are perfect for windows, bathrooms, or anywhere that needs a deep cleaning. They are quite big so that you can use them on large surfaces easily. The material of the cloth is very absorbent, making it useful for drying wet floors as well.

They are highly flexible and adaptable to keep your home’s hard surface clean. Whether you’re cleaning your kitchen surfaces, bathroom, floor, glass window, and hardwood floors, this cloth stands out to get the job done.

The cloths themselves are made with a unique weave of tiny, strong microfiber strands that hold effectiveness when used with conventional cleaning fluids. Even without chemical cleaners, it’s eco-friendly and inexpensive to use. Designed for wet and dry use, you can keep this three-pack set around your home for natural, chemical-free cleanups when necessary.

FAQs on Best Microfiber Cloths

re some microfiber cloths better than others?

Microfiber technology is a relatively new cleaning product, which was not always available for purchase. Today, countless companies sell microfiber products, and competition has driven many of these companies to create innovative and high-quality products. 

Microfiber goes through several steps in the process before it becomes a cloth. So, you should look for a company that takes the time to produce high-quality products.

How often should I wash my microfiber cloth?

It is best not to wash your microfiber cloth too frequently, as this causes wear and tear on the fibers.

Final Thought on Best Microfiber Cloths

There you go! There are so many amazing microfiber cloths on the market. So, take your time to choose the right microfiber cloth for your needs. There are so many brands available in the market at an affordable price. Also, make sure you keep them clean to serve you for many years to come. Do not use fabric softeners if you want them to last for long.


The post 13 Best Microfiber Cloths appeared first on Kitchen Infinity.

post

Guide to Standard Drywall Sizes and Thicknesses

When building your own house or making repairs, you’ll need to decide what type of wall and ceiling surfaces you want. Drywall is widely used for interior walls and ceilings because it’s very economical and easy to install. The flat white and clean appearance makes it ideal for ceiling finishes and residential construction.

But choosing the right sizes and thicknesses for drywall isn’t an easy thing, but you definitely won’t need professional help. This guide shows different types of drywall sheets in various sizes and thicknesses. So, you can easily compare them by size, making it easier for you to choose which ones would work best for your project. Let’s get started!

Drywall Thickness

Drywall comes in 3/8″, 1/2″ and 5/8″ thicknesses or in metric 6, 9.5, or 12.7mm. Standard US drywall is 1/2″ (12.7mm) thick, while the other two are called “non-standard.” Building codes also have some requirements when it comes to standard thickness. The building code dictates the thickness of each application.

1/4 Inch-Thick Drywall

This is not very common, and it’s used as a skimming material for placing over an existing surface. You can also use these thin drywall sheets to install drywall on the slightly curved surface. If the drywall is not meeting the curve, you need to add a layer of mesh tape and compound before applying another thin sheet.


Image credit: https://diy.sndimg.com/

1/2 Inch Drywall

This is the most common type of drywall used in construction, and it can be found in all building and construction material stores and outlets. Thanks to their standard thickness, the regular 1/2″ (12.7mm) sheets are suitable for interior walls. 

They’re very easy to carry and hang. It’s the most versatile board and common thickness for the 16-inch on-center interior walls. It provides a great balance between strength and weight.

5/8-Inch drywall

If your ceilings or walls require a prescribed fire-resistant rating, then this is the right drywall thickness for you. It’s a heavier product that can resist sagging in your ceilings and 24-inch wall. It’s also the thickness standard for fire-resistant or fire-code drywall, mostly found in garages. This added thickness also improves soundproofing.

Due to its excellent soundproofing qualities, 5 8 works well in bedrooms and living areas. However, you’ll have to pay more for this type of drywall than 1 2 inches thick and smaller.

3/8-Inch drywall

When you’re looking to fix drywall patches or if your drywall is damaged and worn out, this is a great drywall thickness you need to consider. It’s the best option for home remodeling projects. Note that it doesn’t offer the strength of 1/2-inch panels.

Drywall Sizes

The length and width of drywall sheets usually come in 4x. The most common ones include 4-foot by 8-foot, 4-foot by 12-foot, and 4-foot by 16-foot sheets. The building codes don’t dictate the requirements for drywall sizes. The sizes are determined by the needs of the architect, builder, and client. 

4-Foot by 8-Foot drywall

This is the most common size of drywall. It’s commonly used because it’s easy to carry. Working and installing this type of drywall is very easy. However, it’s not the best option for remodeling jobs because its small size is limiting. You can’t use this type of drywall in rooms more than 8-feet wide and 12-feet long.

A drywall board size with these dimensions together with the thickness of 1 2 makes it manageable. It’s the biggest sheet ideal for a DIY project because you can easily carry and lift it into place. It allows for both vertical and horizontal installation. 

4-Foot by 12-Foot drywall

For long and tall drywall, you can find drywall in lengths of 12 or 16 feet. So, if you have long and tall walls, go for this size of drywall. If you also want an unbroken line from floor to ceiling and prefer a smooth surface when working with a long and high wall, this is the best solution.

These longer sheets also produce fewer butt joints than 8-foot-long sheets. However, they are heavy to carry by a single person, so if you’re going to install them at your home, make sure you have people around to help you. 

2-Foot by 2-Foot drywall

This type of drywall size is best when you have small spaces. When you also need to do some patchwork around your stairs, alcove, and nooks, opt for this drywall size. It’s not the standard size of drywall, but you’ll find it at local hardware stores and home improvement stores.

lternatives to Drywall Sizes

When your wall panels come in lengths and widths instead of four feet multiples, then those are not drywall panels. They are cement board or drywall alternatives such as DRIcor Smartwall. 4-1/2-foot wide drywall sheets are not very common in the consumer market, but you can get them with special orders. They are rarely available in home improvement centers and are only used by professionals.

Types of Drywall

While standard drywall works well for bedrooms and living areas, there are other types of drywall for special purposes. Here are the types of drywall that you should consider on your next home project. They are excellent in humid areas such as bathrooms, kitchens, and laundry rooms.

Types of Drywall
Image caption: https://www.homestratosphere.com/

Fire-Resistant Drywall

Fire-resistant drywall contains glass fibers and other materials, enabling them to endure flames more than any other type of drywall. You can use it in the laundry room, near furnaces, stairwells, and garage ceilings. It will help reduce flames from spreading in case of fire break out.

In addition, they enable the walls to generate less smoke and are also good for sound control. When renovating your home, the building codes will request you to use a fireboard with fiberglass in areas where you have rooms with wood studs. You’ll also be required to install this type x drywall if you have furnaces, garages, and utility rooms.

buse-Resistant Drywall

This is the type of drywall that can withstand any abuse. It has a polystyrene layer that bonds well to the non-decorative gypsum board.

Mold and Moisture-Resistant Drywall

Both mold and moisture-resistant drywall panels are paperless panels with a special coating that blocks moisture and helps prevent mold growth. So, if you’re wondering how to get rid of mold from your home, installing this drywall will be your first solution. This combination is an excellent choice for bathrooms, kitchens, and laundry rooms. As it reduces mold, it extends the appearance and lifespan of surfaces.

Cement Board Drywall

Cement board drywall is durable drywall that’s designed to be installed on plywood or studs. It is available in 1/2-inch and 5/8-inch thicknesses. The cement board is made by sandwiching a cement core between two layers of fiberglass mat. You can use this type of drywall behind ceramic tile and marble for high moisture areas. It’s the hardest material to cut.

It’s also known as a backer board and can also be used under floors and counters. Its moisture-resistant quality makes it ideal for high-moisture areas.

Standard Sheet Drywall

This is the common type of drywall. It is ideal for residential remodeling and basements. It doesn’t have any interesting features and can be used for ceilings and residential interior walls.

Square-Edged Drywall

This type of drywall is most common, and it’s fitted into standard studs 16 inches apart. If you’re looking to plaster your ceiling or wall, here is the drywall solution for you.

Fire Code Drywall

Fire code drywall is thicker than half-inch material. It has a special gypsum core that resists heat and provides fire protection. Despite having a heavier core, it’s still easy to cut.

Tapered-Edge Sheets

This type of drywall sheet is great for finishing walls. The tapered ends allow the compound fillers between gaps.

Foil-Backed Drywall

They don’t offer much moisture resistance like moisture-resistant boards. But, it’s suitable for areas with less moisture but more for colder temperatures.

FAQS on Guide to Standard Drywall Sizes and Thicknesses

What is the best thickness of standard drywall?

Most drywall measures 1/2-inch thickness, which is the most common for interior walls. This is because they are easy to carry and hang, unlike other types of thickness.

What sizes does drywall come with?

The standard size of drywall includes 8, 9, 10, 12, 14, and 16 feet. However, 8, 12, and 16 work well for residential construction, so you’ll find it in most retail hardware stores.

Is it better to hang drywall vertically or horizontally?

Fire codes require seams to fall on the length of the framing, especially on commercial jobs, so ensure you hang your drywall horizontally. If your walls are 9 feet higher or shorter, hanging your drywall horizontally will leave you with more benefits.

Final Thought on the Guide to Standard Drywall Sizes and Thicknesses

As you can see, it’s very important to be careful when choosing drywall because choosing the wrong size and thickness can break your project. You don’t want to spend a lot of money and time on your home improvement project only to end up with losses.


The post Guide to Standard Drywall Sizes and Thicknesses appeared first on Kitchen Infinity.

Did you miss our previous article…
https://www.centrecountyfood.org/?p=133

post

How to Clean Silver with Frugal Silver Cleaner

How to Clean Silver with Frugal Silver Cleaner

Cleaning your antique and silver jewelry is very simple and easy. But only if you use the right products. The best way to ensure your pieces’ longevity is to use a frugal recipe for cleaning silver.

Instead of using harsh chemicals that might damage the finish or cause it to darken, this frugal silver cleaner uses common household ingredients like baking soda and vinegar.  This method of cleaning sterling silver is simple, cheap, and doesn’t use any heavy chemicals.

But how do you do it? This article will teach you how to clean sterling silver with a simple method that’s easy on your hands, as well as saving you money.

What You’ll Need

Aluminum foilGlass baking panBaking sodaSoft, clean white ragHot waterTwo tablespoon saltTea kettle or coffee pot for boiling water

Instructions

Line the Baking Pan with the Aluminum Foil in the Washtub

Lay down a layer of aluminum foil in the bottom of a large wash-tub for easy cleanup later. Fill your container with hot water, especially the boiling water from a coffee pot or any other container from which you can pour it safely. After that, place your jewelry on top of the aluminum foil.

Don’t worry if you don’t have aluminum foil, instead, use a clean aluminum lasagna-style baking dish. Make sure you throw away your dish after using it to clean the silver.

Cover Baking Pan with Boiling Water

Pour some boiling water into the baking pan that’s large enough to hold your silverware, until it’s more than halfway full. You will need more water if you’re cleaning heavily tarnished silver. This will help restore the shine to your silver, and it will also help the boiling water dissolve the grime.

dd Salt and Baking Soda

Sprinkle in two tablespoons of salt and two tablespoons of baking soda. After sprinkling baking soda, pour some boiling water to cover the jewelry in the pan and allow it to sit for a few minutes. 


Image credit: https://i.ytimg.com/

Your solution will bubble and smell. The chemical reaction will cause a sulfur smell, but will not be too strong as it will go away quickly once it’s done. You can also achieve a great silver polish by adding washing soda to hot water.

dd the Silver

Place your silver into the water and ensure they are touching the aluminum foil. However, the silver pieces should not touch each other. Add the dishwashing soap and let the silver set for about 12 hours. Use wooden or plastic utensils to turn over your solver pieces.

Do not use metal and avoid using your fingers in hot water to allow as many surfaces of the item to touch the aluminum foil. The chemical reaction taking place in the container should be able to eliminate dirt and stains.

Soak the Silver

Allow your silver to soak for about two to three minutes on each side. For lightly tarnished silver, you’ll require several minutes for it to be restored. But for heavily tarnished silver, you may require a few treatments. So, soak heavily tarnished items for as long as five minutes and if the water cools down, don’t hesitate to add more hot water, plus salt and baking soda.

Remove the Silver

Take your silver items out of the water. The tarnish should have already started to peel off, which means it’s time to clean the item with a gentle brush or towel. You can use a soft cloth or paper towel for this task in case you prefer not to use your hands in hot water. 

Once your silver is clean, remove it from the pan then rinse it with clean water. Let it air dry before storing away. Never use gloves when you’re cleaning silver as this may cause the items to become scratched. 

Tips for Keeping Your Silver Clean for Long

Shine and Polish

You need to keep your silver jewelry shiny all the time with a quick and routine washing using warm water and mild dishwashing soap. Swish your jewelry around in the water for some minutes, rinse, and then buff dry.

Shine and Polish
Image credit: https://cdn.shopify.com/

void Bleach and Harsh Chemicals

You must not use your silver jewelry with cleaning detergent and bleach that can ruin their surface. Some jewelers suggest using vinegar and baking soda for brightening the silver’s finish when cleaned at home. Vinegar is also safe for all metals, including sterling silver, but if you do not feel comfortable using it, commercial silver cleaners are also good.

Store Your Silver Jewelry in a Dry Location

Never expose your jewelry to direct sunlight or heat because it can cause tarnishing when the metal reacts with sulfur and other chemicals in the air. Store your items in a dry location if you are not wearing them regularly to stop tarnishing too. 

Also, do not put your silver pieces away when they are still damp. Moisture causes silver to tarnish faster, so make sure your pieces are completely dry before storing them.

Soak the Naturally in Sea Salt

Leave the metal pieces in sea salt overnight, especially if you have already tried all-purpose cleaning products and have not noticed any improvements. Seawater is known for its high volume of natural salts that can help remove tarnish very easily. This helps clean silver naturally without damaging it.

Salt and baking soda are great cleaning products to use when you want to make your own silver polish. Combine one part salt with two parts baking soda, put them on a cloth or paper towel, and apply the mixture directly onto tarnished silver pieces. 

Rub the piece gently to remove any signs of tarnishing, rinse off all the mixture, and dry the piece with a clean cloth. This homemade silver cleaner will remove tarnish without harming your silver plating.

Use Toothpaste

Toothpaste also can be used in a pinch when a silver cleaner is not available. Apply a small amount of toothpaste onto a dry cloth or paper towel and apply it directly to the piece that you would like to clean. Gently rub the silver in a circular motion, rinse with water, and dry with a clean cloth. This method will remove tarnish from the silver piece without scratching it.

After you are finished cleaning your silver, make sure to properly store them so they do not tarnish again. Keep the pieces in air-tight containers and place a piece of tissue paper on top of the container before sealing it. This will help absorb any moisture that may seep into the container and cause tarnish.

Use Your Silver Jewelry

It’s recommended to use silver jewelry and silverware more often as this will prevent them from tarnishing. Be sure to wipe each piece before you put it away and seal it properly in a container. If your silver is already tarnished, it may be too late for simple cleaning.  If this is the case, consider taking a trip to see a professional who can remove the tarnish from your silver effectively.

FAQs on How to Clean Silver with Frugal Silver Cleaner

Can you use silver cleaner on sterling silver?

 Yes, you can use silver cleaner on sterling silver. This silver cleaner quickly removes tarnish and restores shine and brilliance to your silverware.

How often do you clean your silverware?

You should be cleaning your silverware at least once per week in order to prevent tarnish. This is not only for aesthetic reasons, but because the chemicals used in most silverware can actually eat away at your skin and cause reactions that will be costly to treat.

Final Thought on How to Clean Silver with Frugal Silver Cleaner

Improper cleaning of your antique silver plate and good-quality silver jewelry can make it lose value. Therefore, it’s important to know how to clean silver and the correct way of cleaning it. If you’re in doubt about how to clean your valuable silver, it may be best to call in professional help.


The post How to Clean Silver with Frugal Silver Cleaner appeared first on Kitchen Infinity.

post

How To Refinish The Tub

A bathtub is one of the most important fixtures in your bathroom. It’s where you relax and unwind at the end of a long day, so it’s natural that you want to keep your tub looking its best. Unfortunately, a bathtub can become chipped and scratched or even corroded by hard water stains over time. This can make it look old and unattractive.

Refinishing your tub is an easy way to restore it to its original condition without having to spend thousands on replacing it with a new one. The process can be done relatively quickly depending on how large your tub is and won’t cost too much either. Most importantly, when you’re finished refinishing, your tub will look new again. 

There are several ways to refinish an old or damaged tub, including painting the surface with acrylic paint or applying the vinyl film directly over the existing surface. Here we go!

Tools and Materials

Painter’s tapePutty knifeRoller traySpongeTack clothDrop clothBreathing protectionAbrasive padRubber glovesBleachChemical caulk removerTub and tile caulkPaint rollersPaintbrushesEpoxy puttyPaper towelsAbrasive cleanersBathtub refinishing kitSafety goggles

Remove Old Caulk and Tub’s Hardware

Use a putty knife to remove old caulk and tub hardware. Remove anything that may block your work. Cover the faucets with paper towels and mask them off using painter’s tape. Scrape off soap scum with a razor blade and make sure you clean any dirt from your bathtub openings.

Clean Your Tub Thoroughly with Diluted Bleach and Water

Pour a pail of diluted bleach and warm water into your bathtub and let it sit for 10 minutes. Then, scrub the inner and outer surfaces with a sponge or an old rag to remove dirt and stains. Rinse the tub thoroughly afterward using clean water. Allow it to dry completely before you continue with your work.

Sanding

Use a coarse 36-grit paper to sand the bathtub—sand in the direction of the grain to avoid gouging or scratching your bathtub surface. Use a vacuum cleaner to remove dust particles as you sand. After that, fill any marks in the dried fiberglass with putty and sand it. 


Image caption: https://www.topkote.com/

Mask off the areas around your bathtub with paper or plastic before you proceed to the next step. You can rough up sanding by brushing the tub’s surface with a stainless steel brush. Make sure you neutralize the acid before applying the paint.

Wipe and Prime

Wipe the surface with a tack cloth and prime it with an acrylic urethane enamel primer. Give it enough time to dry before you apply your top coat. Follow the instructions on the can as to how much drying time is needed after priming. After wiping with a tack cloth, clean it with a rag to enable your acrylic urethane enamel to adhere to the surface of the porcelain.

Depending on room temperature and humidity conditions, you can apply several coats per day. Make sure you apply a bonding agent over the tub’s surface to ensure your new finish won’t peel off the old porcelain.

Mask off the Tub and any Remaining Fixtures

You’ll want to mask off the remaining fixtures, including the drain stopper and any faucets. Mask off floors and walls using drop cloths and painter’s tape. Remember that epoxy paint will be hard to remove, so make sure to guard your tub against drops and spills. Protect the tile at tub level and any fixture or faucet hardware with painter’s tape or paper.

Ventilate Your Working Space

The whole project of etching, sanding, and coating will create dust and fumes. In addition to the epoxy paint fumes, sanding can create fiberglass dust that can irritate your lungs and sinuses. Always work in a well-ventilated space, preferably outside or near an open window. Also, wear breathing protection or any respiratory equipment as recommended by the manufacturer.

Then, prep your paint included in the refinishing kit according to the manufacturer’s instructions. Many DIY refinishing kits use a two-part epoxy paint that needs to be mixed before use, so read the label carefully. 

Mixing faces is very important, so don’t play fast and loose with the directions. Then, transfer half of that mixture to a second container to save the second coat and cover it to keep it from drying out.

Etch the Tub Surfaces

If the refinishing kit includes etching powder, apply it to your tub’s surface with water and scrub the surface with an abrasive pad. The etching will help the refinishing sealer adhere to the surface, which will prolong the life of your newly refinished tub. Then, rinse the tub thoroughly with clear water.

Etch the Tub Surfaces
Image caption: https://bathrenovationhq.com/

Sand and Wipe Down the Bathtub

Skip this step if you’re refinishing an acrylic or fiberglass tub with no substantial grout lines. But you can learn how to clean fiberglass showers here and keep the material in good shape. An older bathtub with built-up gunk is likely to have crevices and ridges that need to be sanded down to provide a smooth surface for the sealer. Use a power sander if it’s available. Ensure you roughen up the corners and edges of your tub.

Sanding is very important because it ensures the epoxy coating adheres to the surface area properly without showing any crack or peel. After that, wipe the tub with paper towels to ensure it’s completely dry. Then, remove any excess dust or paper residue using a tack cloth.

Mix the Epoxy Coating

The key to success is in how you mix your epoxy coating. Make sure it’s well blended before applying it to your tub. You’ll have 30 minutes to work with the product, so following the manufacturer’s instructions is important. 

Paint the Tub

If you know how to paint bathrooms and other surfaces like tile and drywall, then you’ll have no problem with this step. The epoxy forms an ultra-thick, high gloss finish that’s completely waterproof. Finish the edges as required with the sponge brush, then apply a second coat of coatings as directed by the manufacturer. Before applying the second coating, you may recoat immediately or wait for one to two hours of drying time.

Paint the Tub
Image caption: https://www.sunrisespecialty.com/

Let the Coating Dry Completely

This could take 3 to 6 hours depending on climate conditions – warmer climates mean shorter drying times. You can speed up the process by using an exhaust fan. Let the tub dry and cure as indicated on the label. Make sure your working site is well ventilated to prevent inhalation of vapors.

pply the Second Coat

Sponge on another coat as required by the manufacturer’s instructions. You can do this after 3 to 6 hours, depending on climate conditions. If you wait too long, it could affect adhesion, so consider the drying time before applying your second coating. Let this dry completely and apply a third coating if required by the label.

Caulk and Reinstall the Hardware

Seal your tub’s joints with fresh silicone caulk and let it cure overnight. Then, reinstall your faucet hardware. Your refinished tub is now ready to use, so run yourself a nice, warm bath.

After bathtub refinishing, it’s best to avoid abrasive cleaners to protect your surface. Instead, go for non-abrasive and bleach-free cleaners such as cast iron and porcelain cleaners. 

Call Professional Bathtub Refinishing Company

If you want to avoid the trouble of doing this job yourself, consider professional refinishing since their years of experience in bathtub reglazing can help get your old tub looking new. Professional tub refinishers market their process as reglazing. Their standard will look similar to DIY refinishing kits, but they’ll spend more time and money repairing chips and cracks.

FAQs on How to Refinish the Tub

How long does bathtub reglazing take?

Professional refinishers will complete the job within a day and can seal your tub before you head to bed.

When is the best time to reglaze your bathtub?

You can reglaze your bathtub anytime, but if you’re looking for the least messy option, do it on or before the winter months because it’s usually cold outside, and tile grout dries quickly.

Final Thought on How to Refinish the Tub

As you can see, refinishing the tub is a great option for anyone looking to update their bathroom’s refurbishing. Just ensure that you are aware of the steps involved, so you have enough time to prepare for it.

The post How To Refinish The Tub appeared first on Kitchen Infinity.

Did you miss our previous article…
https://www.centrecountyfood.org/?p=55

post

How To Replace Toilet Fill Valve

If your toilet is losing water or making a loud noise when you flush it, this probably means that it’s time for a new fill valve.

Replacing a fill valve can be done in under an hour and will save you money on your monthly water bill. You’ll also avoid the hassle of having to call a plumber every time something goes wrong with your toilet. It’s easy to do, and we’re here to show you how. 

A fill valve opens and closes every time you flush your toilet, exposing it to wear and tear. Therefore, you need to replace it. Also, if you have an old fill valve model with a float ball, you have to consider that new model and replace the dependable fill valve with its integrated float cup. 

Here are step-by-step instructions on how to replace your fill valve so that you can get back up and running as quickly as possible without breaking the bank.

What You’ll Need

Sponge and bucketNew fill valveTape measureAdjustable wrench

Turn Off the Water Supply

First, turn off the water supply for the toilet fill valve at the wall tank by turning the shutoff valve clockwise with a wrench. Make sure you turn off the water from outside of your toilet before doing any repair. The valve should be below your tank, and it should be located where the water pipes enter the tank from the wall.

Make sure you turn off the shutoff valve until it stops moving. After that, move around your home and turn on all the fixtures to confirm if they’re off. This will also drain off the residual water pressure from your home’s plumbing system. This will help you avoid water damage due to floods.

Drain Your Toilet Tank

Once you’ve turned off the water, drain your tank before disconnecting the toilet fill valve. Begin by flushing your toilet by holding the flushing handle down to remove as much water as possible from your tank. After that,  use a bucket to remove the rest of the water in your tank. You can use an old towel or sponge to remove the excess water. Once you’ve drained all the water, unhook the old flapper. Then, buy a new flapper of the same type.


Image caption: https://viphomelink.com/

The flapper is simply a rubber valve that fills with water when you flush the toilet, blocking the overflow tube for your tank. After you have the new flapper in hand, place it on top of the fill valve’s overflow pipe to see if it fits over without any issues.

Check the Fill Valve for a Leak

Flush your valve, then look for a valve leak. Lift your toilet float arm to let all the water out of your tank. Check under the rim for any water that has leaked from the tank after it is empty. Use a wrench to adjust the toilet float arm so that the tank stops filling when the water level is half-inch to one inch below the top of the overflow pipe. If your valve still leaks, then you need to replace it.

Remove the Old Fill Valve

Turn off your water supply, then flush the toilet and sponge the remaining water from your tank. Disconnect the water supply line, unscrew your fill valve lock nut and remove the old fill valve. Try to remove the lock nut with your bare hand before using the adjustable wrench; if you can’t, then use your wrench to hold the nut and turn it one-quarter turn at a time.

Remove the Old Fill Valve
Image caption; https://diy.sndimg.com/

Disconnect the refill tube from your overflow tube, then lift off the fill valve. You can also take this moment to clean the inside of your tank, especially if the flush valve is leaking. You can also learn how to replace the flush valve of your toilet.

Prepare Your New Valve

Make sure you buy a new flapper of the same type as the one you removed from your local store. Slide the rubber washer included in your kit onto the bottom flange on the fill valve tailpiece. The washer is very important as it provides a watertight seal. You can also adjust the height of the fill valve if necessary.

Different fill valves have different methods of adjusting the height. But it’s simple as you only need to screw the stem piece shorter or longer to accommodate the height you want. In most cases, the top of your fill valve should be slightly taller than the height of your overflow pipe but not so tall to prevent the tank lid from closing.

Installing the New Fill Valve

Remove your new fill valve from the packaging and read the directions it comes with. Don’t forget to clip your new refill tube to the overflow tube. Take the threaded nut in your kit and screw it onto the bottom flange on the fill valve tailpiece, but do not tighten it yet. Take out measuring tape and measure the distance between the top cap of the valve and the top of the overflow tube.

Remove your fill valve and adjust the height. Hold the valve body using one hand and using the other hand to tighten the nut. If using a clawfoot model, tighten at least two inches beyond the overflow tube. If your fill valve is at its maximum height, but the overflow pipe is still higher than the critical level mark, you will need to install a new overflow tube.

If the shutoff valve is higher than necessary, use a wrench to carefully loosen the nut on top of the fill valve and raise or lower it so that it meets the height requirement. Tighten all nuts and fittings with your wrench. Turn the water back on through the wall stop.

When you’ve properly adjusted the height, pull your fill valve back in position and screw in the lock nut from underneath your toilet tank to hold your new fill valve firmly. Make sure you tighten the mounting nut, so it’s hand tight. 

After that, connect the water supply line back to the new valve and hand tighten it to secure it to the valve. Do not overtighten it, or you might risk cracking your fixture’s tank. Turn on the water again and check for leaks.

Connect the Fill Tube to the Fill Valve

The fill tube that’s attached to your new toilet is fairly long. You’ll need to connect it to the fill valve at the bottom of the tank. The end that fits into the valve should be cut squarely, so you get an easy fit. If this isn’t done, you get leaks or other problems, so make sure you check this before moving on to the next step. 

Attach one end of your new valve to the fill valve nipple and the other to the enclosed angle adapter. Clip your angle adapter onto the overflow pipe, then finish your installation by attaching your flapper chain to the overflow pipe.

Reconnect the Water Lines

Open the shut-off valve and let the water fill your toilet tank. Check if your new fill valve is filling your tank faster, quieter and the water level is below half-inch below the overflow tube. Confirm if no water is running from the tank to the toilet bowl. Flush the toilet a couple of times to double-check if your new valve is performing optimally. If everything is working correctly, but the toilet tank lid back and enjoy your toilet. You can also consider learning how to stop a toilet from running as these are plumbing skills you might need more often than you think.

FAQS on How to Replace Toilet Fill Valve

How do you know a bad fill valve?

You can identify a bad fill valve if you see the bottom of the washer deteriorating and causing a leak. If you see your fill valve not filling, then you may need to replace your valve.

Why do toilet valves fail?

Fill valves provide water to the toilet bowl, and when they break, the water stops flowing. Such is why you need to replace them with new ones.

re toilet valves universal?

Most toilet fill valves are interchangeable and can fit standard tank openings in any toilet. But it’s important to consider the sizes, especially the length of the valve stem.

Final Thought on How to Replace Toilet Fill Valve

As you can see, replacing your toilet fill valve is quite simple and easy. With a few tools and materials, you can replace your valve fill within a few minutes, and you’re done. And if your toilet is still running after replacing the fill valve, consider looking at the toilet flapper or another cause of a running toilet.


The post How To Replace Toilet Fill Valve appeared first on Kitchen Infinity.

Always check our latest articles at…
https://www.centrecountyfood.org//category/kitchen-services

post

Remodeling Your Kitchen – How to Remodel the Floor and Appliances

kitchen remodel

A big kitchen remodels usually means a large kitchen remodel. This would mean that either your entire kitchen needs to be gutted, re-done and that you’re completely replacing the cabinets in your kitchen, or you’re simply repurposing most of the things in your kitchen. Regardless, of what it looks like, however, a kitchen remodel is one of the most difficult projects in the kitchen renovation process.


Before you get started on any kitchen remodel, you need to start by thinking about what your kitchen design should look like, and what appliances will fit into that layout. For instance, if you want to do some cabinet re-facing but not much else, then you’ll probably have to make do with the existing cabinetry. You also won’t want to go too modern in this case, since it will be difficult to match your appliances to your cabinetry.


If you really want to do a major kitchen remodel, however, you need to start planning that far in advance. The most important factor for any kitchen remodeling project is the layout, and this includes everything from your floor plan to the placement of your major appliances. This, however, can be a very stressful exercise in the event that you don’t know what you’re doing. This is why it’s helpful to know a little bit about the average cost for major kitchen remodeling jobs, as well as some of the more minor kitchen remodeling options.


One option that can save you a lot of money on any kitchen remodel is the use of construction dust collectors. Construction dust collectors are typically made out of galvanized steel frames that have a metal roof. They collect and store construction dust from your cabinets and your stove, which can keep them clean and free of harmful elements that could tarnish their surfaces. Construction dust collectors can be purchased relatively inexpensively, and they are an excellent way to get started with any kitchen remodeling project since they’re so simple to operate. However, it’s very important that they’re properly installed in order to ensure that they don’t break down and become ineffective during your renovation.


Another option for a kitchen remodel job is the replacement of your existing flooring. Whether you choose to go with tile, wood, or carpet in your kitchen remodel, replacing your flooring can be one of the most expensive parts of the process, due both to the expense of the material and the time required for installation. In addition, if you choose tile or wood, you might need to install a subfloor so that the new subfloor will sit on. While this may seem like an unnecessary step, it will provide the flooring with the same amount of strength as the original flooring and will help protect it from water damage. Many people even choose to install their countertops first, since installing the cabinets and appliances before the counters is an essential step towards a finished remodel.


The most important part of any kitchen remodel is choosing the right cabinets. Choosing the right cabinet layout can make a huge difference in how your kitchen looks, since a bad choice can make it look smaller than it really is. The average American has 3.5 cooking spaces in their home (meaning that each family member cooks at least one meal a day). To this end, a kitchen should have a healthy balance of eating space, so that families are not spending hours standing around waiting for the dishwasher to finish loading. A national average of Americans have one dishwasher per household, so it is more important to pick a cabinet layout that allows each family member easy access to the dishwasher, rather than be stuck standing around waiting.


If you find that the countertop that you would like has too many curves for your taste, it may be possible to contact a home depot associate who will be able to modify the cabinet layout to suit your needs. Most home depots offer a wide range of kitchen remodeling services, so it shouldn’t be hard to find someone who can help you with this task. When you find an associate, however, it is important that you discuss your kitchen remodel budget with them, so that they can estimate a realistic cost for the job, and a realistic cost for the materials and labor involved in completing the job.


Installing new flooring can be another component of kitchen remodel, especially if you want to avoid having to replace the worn out countertops or old cabinets. There are many homeowners who decide to replace the flooring because they can either get really good prices, or because they want to add value to their home. New flooring can improve the overall appearance of your kitchen and can be easier to clean than many previously owned flooring options. The easiest way to get new flooring is to visit your local home depot, since they will be able to help you measure your room properly, and help you choose the right kind of new flooring. If you prefer not to replace the flooring, there are many ways that a new stove or oven can improve the appearance of your kitchen, without replacing your flooring completely.