One of the best things about mid century modern bedrooms is that there are many different options to choose from. Whether you want your room to be simple and elegant or bold and in-your-face, there’s something out there for everyone. The trick is finding it.
In this article, we will discuss some of the most popular mid century modern bedroom designs that people use when they want to make their bedrooms look stylish and luxurious without breaking the bank.
dd a Mid Century Modern Nightstand
One of the easiest ways to add a touch of mid century modern style to your bedroom is by adding a nightstand. Nightstands are a great way to add extra storage space to your bedroom, and they can also be used to add extra visual interest to the room.
If you’re looking for a simple, elegant nightstand that will help you create a midcentury design, then try this one-piece mid century modern furniture to give your bedroom a shot of style. Nightstands are easy to find, and many of them are inexpensive.
Splash of Boho with Midcentury Modern Bedding
If you’d like to add a touch of bohemian style but don’t have the budget for new bedding, you can always choose to change out your duvet cover. This will help transform your room’s look while also being an economical option that doesn’t require extra money on accessories or furniture.
Incorporate Mid Century Modern Lighting
One of the easiest and most effective ways to add a touch of mid century modern style to your bedroom is by incorporating some mid century modern lighting into the design. Pendant light, for example, is a perfect way to introduce this look and can be found in a variety of price points.
If you’re looking for a sophisticated bedroom, then mid century modern decor pendant lights in matching finishes and some classic molded plastic chairs would be ideal.
Use Natural Materials
Instead of using modern materials, opt for natural wood and natural finishes. This will reduce the coldness found in many mid century modern designs. When using natural materials, consider combining wooden furniture as this will combine lots of sunlight and some plants to round out the colors.

Image credit: https://blog.modsy.com/
Focus on Earth Tones and Colors
For a classic mid century modern style, you’ll want to focus on color palettes such as neutrals and earth tones. Try to play with different shades of brown, rust, mustard, yellow, and green with a touch of gray and white. If you’re using a dark wall color, make sure you have enough natural light coming in so your room doesn’t look too gloomy. You can also learn other ways to brighten a dark room and make it livelier.
Skip the Classic Color Scheme
If you’re looking for something a little more unique, then you can try playing with different color schemes. If you also love clean lines, geometric shapes, and the overall clean feel of the mid century modern style but you’re not thrilled about the muted tones, then keep the style and ditch the colors.
Look for Tapered Legs
The mid century modern style is typically associated with furniture pieces with tapered legs, which gives the table, the dresser, and a bed frame a distinct look. If you choose between two otherwise identical tables, one of them has tapered legs, and the other doesn’t go for the more interesting design. Their sleek, round frames make for a roomier and more spacious look.
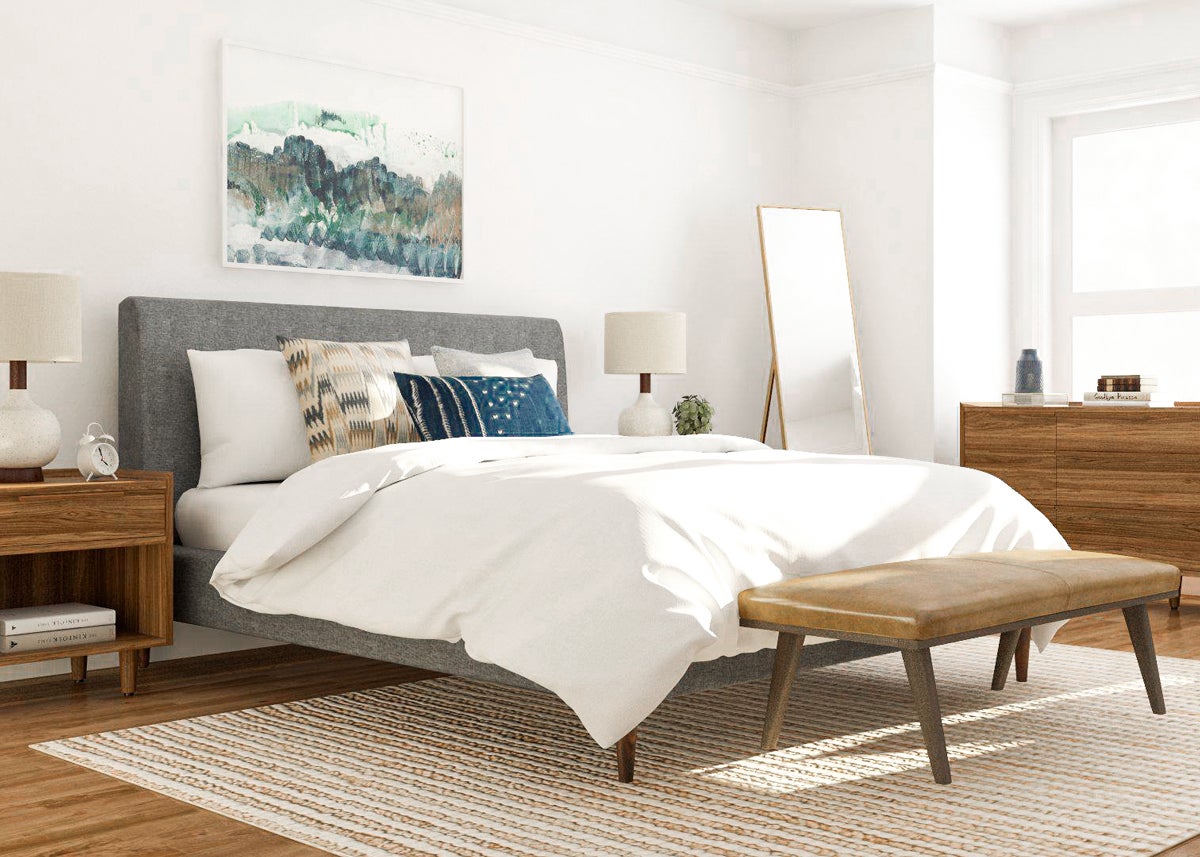
Image credit: https://blog.modsy.com/
Consider Bold Accent Wall
Do you want to give a simple mid century modern bedroom a powerful shot of style? Well, create a boldly patterned accent wall. A busy wallpaper with a strong geometric pattern or a solid color in a deep hue can make a big impact. It will also draw the eye and create a focal point in the room.

Image credit: https://cdn.shopify.com/
Keep it Neutral
When decorating a mid century modern bedroom, you’ll want to stick to neutral colors as much as possible. That doesn’t mean you have to go for a beige or gray overall color palette, though. Use a soft white in the walls, with off-white trim and accessories. For dark brown furniture, consider painting it a lighter shade of tan instead.
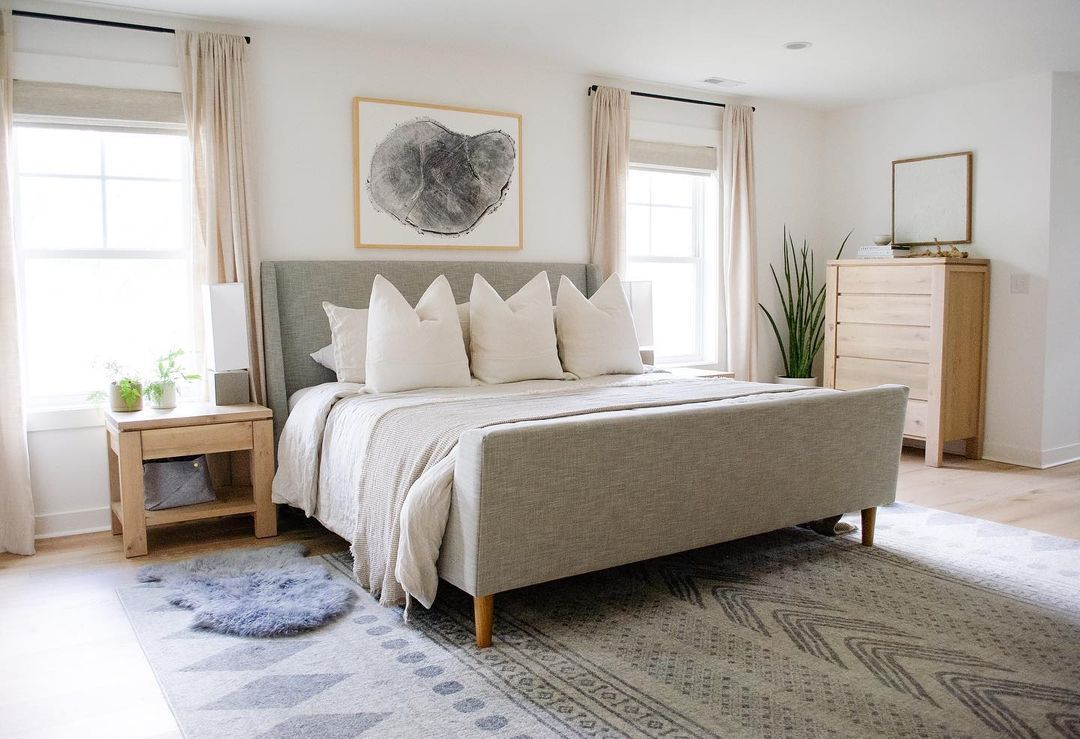
Image credit: https://www.mydomaine.com/
Go With Eames Chair
When it comes to furniture, the key is simplicity and functionality. A great way to achieve this look is with an Eames chair. These iconic chairs come in a variety of colors and styles so that you can find the perfect one for your room. Plus, they’re comfortable and stylish, making them perfect for mid century modern design.
Look for Natural Wood Furniture
Mid century rooms are all about natural materials, so feel free to go a little more rustic with your furniture choices. Look for pieces made from natural wood, such as maple, walnut, or oak. Also, consider clean lines and muted tones to bring mid century modern into your bedroom. These woods will add a warm and cozy feeling to your room while keeping with the mid century modern aesthetic.
Change Things Up with a Platform Bed
Don’t hesitate to change your bed frame for a more glamorous platform bed. The straight lines of a platform bed work well with mid century decor. So, opt for a nice platform bed, and then stack it with books and throw pillows to give your room extra personality.
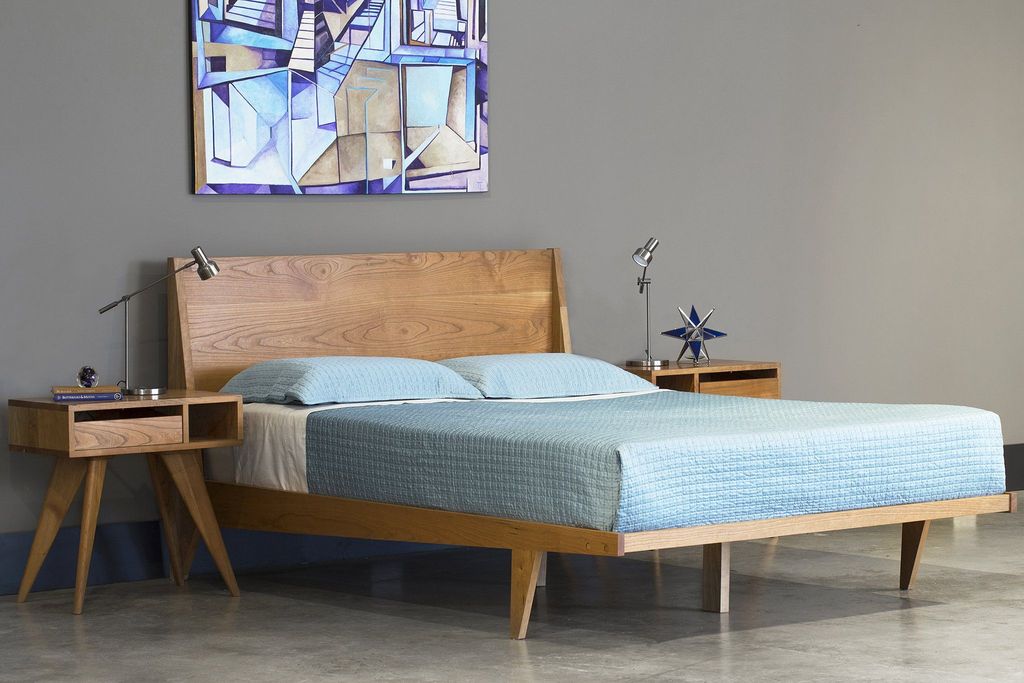
Image credit: https://cdn.shopify.com/
Create a Gallery Wall to Act as a Focal Point
A gallery wall is a great idea for a mid century modern bedroom because it can be a focal point for the room. Choose a few of your favorite pieces of art and hang them up on one wall. This will add some interest to the room and help pull the design together.
Use Geometric Patterns
Geometric patterns are a huge part of mid century modern bedrooms, so use them in your room. Bring in a nightstand, a dresser, organic shapes of lamps, and clean, straight lines of furniture in the room. Choose clean and modern patterns to work well with your decor.
Incorporate Colorful, Fun Mid Century Modern Bedroom Furniture
One great way to add some fun to your bedroom is incorporating colorful furniture. This can be done with a bed frame, dresser, or even just with accent pieces. Add a pop of color with a bright pillow or blanket, and you’ll have a stylish and fun mid century modern bedroom.
Bright Accents in the Mid Century Modern Bedroom
If you prefer to keep your bedroom decor simple, then the use of bright colors is a great way to liven your space. You can incorporate these with wall art, patterned textiles, or even just with small pieces of decor placed on top of furniture. Adding a few shots of accent color will help liven up neutral bedroom space.
Glamorous Mid Century Modern Style
If you are looking to add a touch of glamor to your mid century modern bedroom, there are a few things you can do. You can start by adding metallic finishes to your furniture or accessories. You can also add plush fabrics such as velvet, faux fur, or silk since they also make the best ideas for those looking for how to decorate the bedroom
This will give the room a more luxurious feel. As demonstrated beautifully in this bedroom by an interior designer, the use of bold abstract paintings, luxurious fur throw, mustard armchair, and elegant furniture adds to a sophisticated and glamorous bedroom.
Built-In Bookcases in the Mid Century Modern Bedroom
If you are looking to build-in storage into your mid century modern bedroom, the best option is to install built-in bookshelves. This gives the room a more polished feel, but at the same time, it is functional. Shelves do not clutter up space and can be decorated with ornamental bookends or vases of flowers.
White Mid Century Modern Bedroom
A room with a white tone is always modern and chic. This bedroom oozes elegance and luxury through white silk curtains and plush white carpeting. The bed follows the line of symmetry and leaves plenty of space for the window. The bedside lamps give a warm glow that sets the mood for romance.
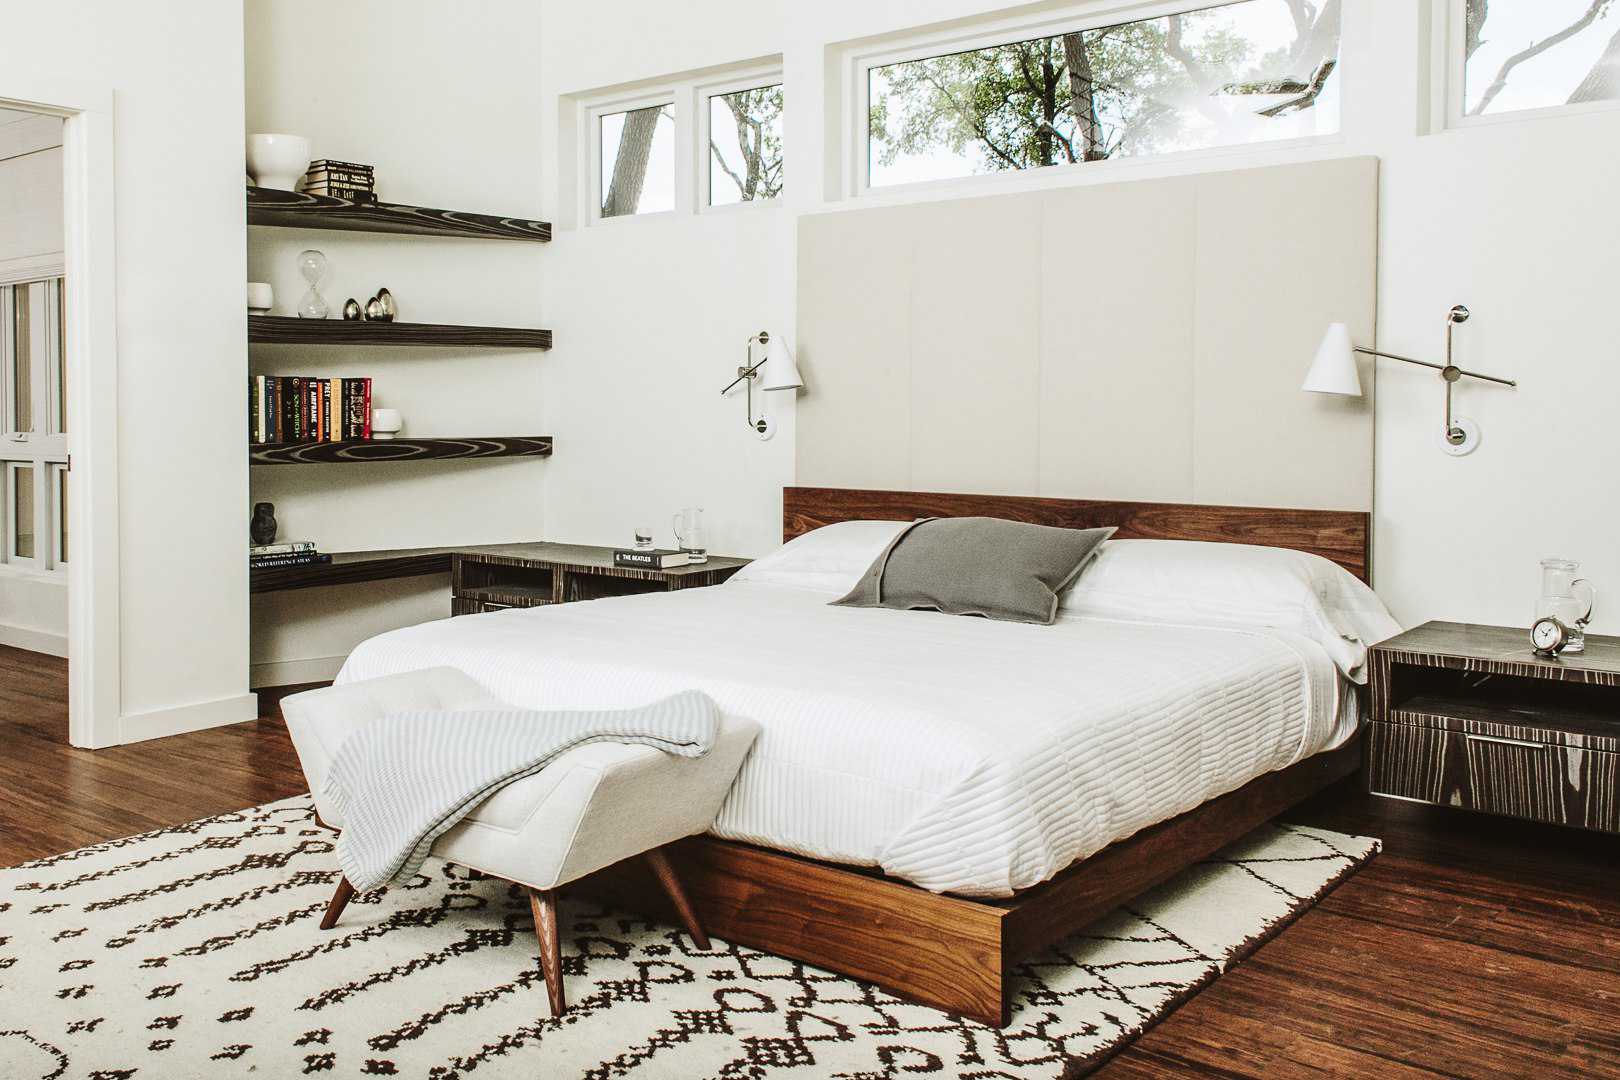
Image credit: https://www.thespruce.com/
FAQs on Mid Century Modern Bedroom Ideas
What is a mid-century bedroom?
Mid-century modern refers to the decorating style that rose to popularity in the 1950s and 1960s.
What are modern bedrooms?
Today, a modern bedroom is typically one that is minimalist in design, with clean lines and little ornamentation.
What is the difference between mid-century and contemporary?
Mid-century refers to the period around the 1950s, while contemporary usually means designs from the past 10 to 15 years.
Final Thought on Mid Century Modern Bedroom Ideas
Well, there you have it. You don’t have to be overwhelmed by all these modern bedroom ideas. Start with one thing at a time and move on from there while keeping in mind the key elements of mid-century design, including functionality, simplicity, and modernity.
The post Midcentury Modern Bedroom Ideas appeared first on Kitchen Infinity.
Did you miss our previous article…
https://www.centrecountyfood.org/?p=869