post

What To Do When Your Water Heater Is Making Noises?

You may notice your water heater making strange noises. This is a problem because you don’t know what’s causing the sounds or danger to you or your home. 

Not all of these sounds mean something wrong with your water heater, but it’s always good to understand the reasons behind them and learn how to fix them. Here are water heater noises to look out for and how to diagnose them:

Sizzling, Hissing, and Crackling

These are typical noises coming from an electric water heater. They are attributed to sediment build up and mineral deposits at the bottom of your water heater. There is nothing to fix this yourself, but it’s not a cause for concern either. Plumbers will sometimes use chemical agents to get rid of the sediment buildup and prevent such sounds from occurring in the future.


Image credit: https://www.easyflow.co.uk/

Irritating noises are not the only symptom of this problem. Expect your heating bills to go up as the water heater struggles to heat the same amount of water with a greatly reduced ability to produce heat from the lower heating element.

A gas powered water heater can also make sizzling sounds, even though the problem isn’t the same. Sizzling noise in a gas water heater is caused by internal condensation, which makes a sizzling sound when dripping down into the burner. If you notice condensation in the tank, there could be a leak, so call a plumbing professional to deal with it.

A crackling sound may also mean that there’s condensation in the water heater burner. A water heater won’t create condensation if the temperature remains consistent, but condensation can form when the tank is full. Make sure the plumber checks the crackling sounds immediately. Also, use a wire brush for clean up and if the sediment blocks the drain valve, it might be impossible to remove the water in the storage tank, so buy a new water heater.

Tankless Water Heater Noise Problems

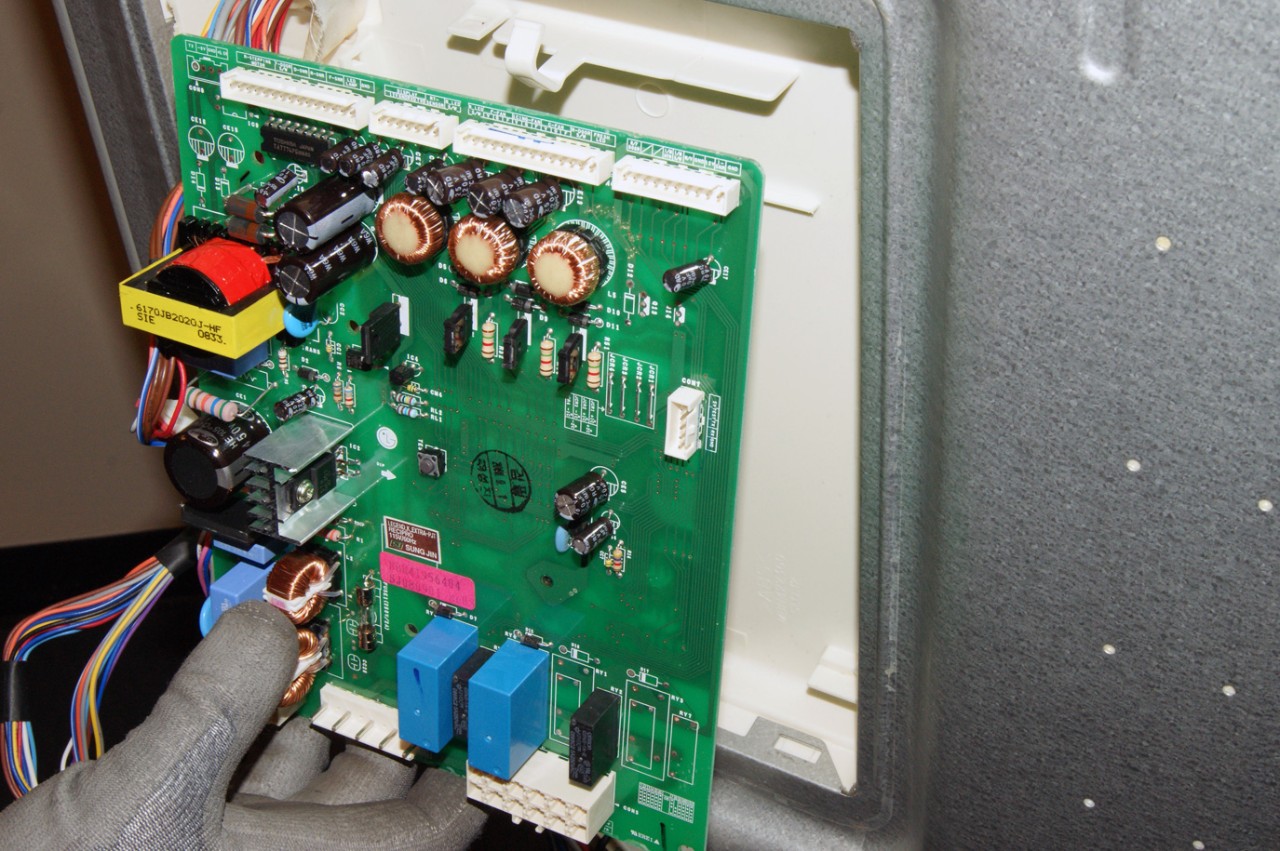
Apart from regular heaters, other heater models can make annoying noises. For example, an electric tankless water heater has its sound. You should know the normal sounds if you know how a tankless water heater works. A tankless gas water heater can also have the same issue. If you hear a clicking sound from the water heater, it means that the flow switches come on and off. 

Tankless Water Heater Noise Problems
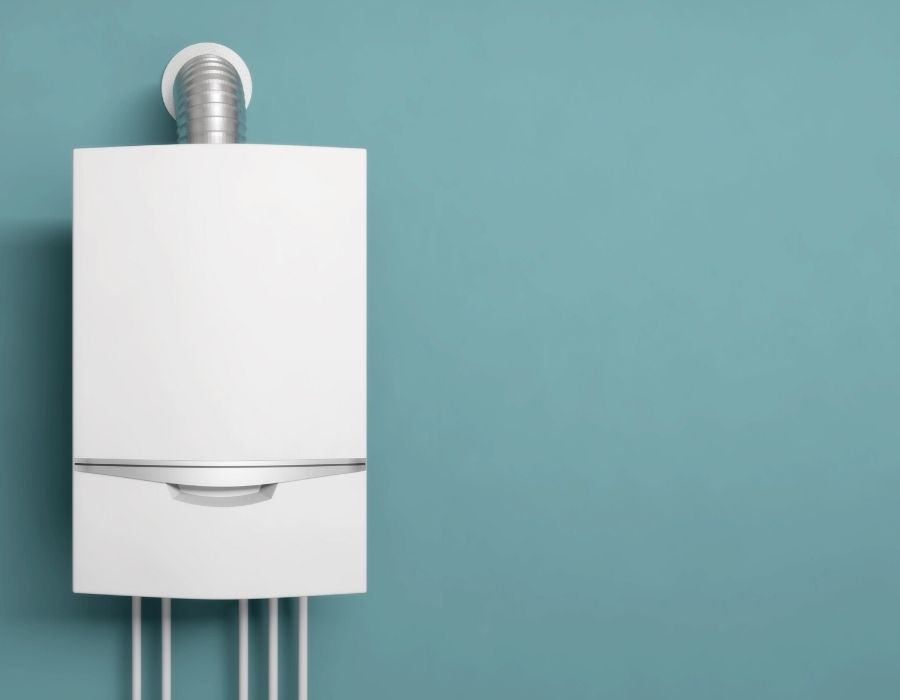
Image credit: https://soundproofcentral.com/

And if you hear more noise, check for debris from the hard water area or if there’s build-up within the unit. You can fix this problem by practicing regular maintenance to help you keep on top of any unusual sound.
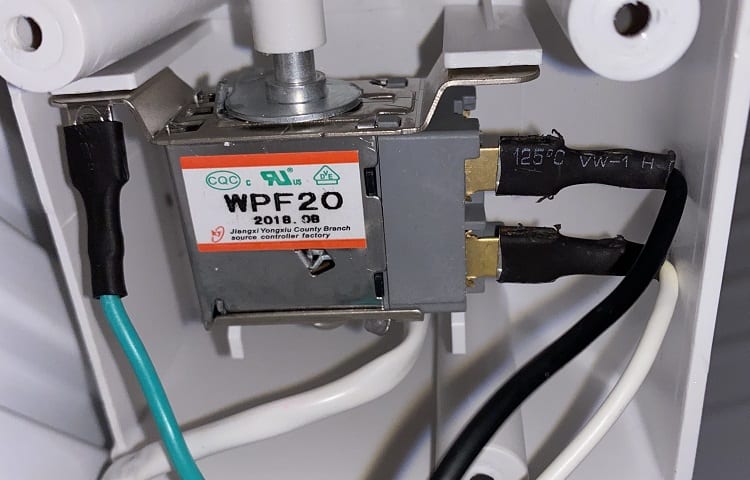
Popping Sound

Some sounds that you hear may seem irregular or irritating, but these are normal for this type of heater. The first sound you will probably notice is the popping sound. Popping noises occur when the temperature inside the unit rises to 140 degrees Fahrenheit (60 degrees Celsius). 

Popping Sound
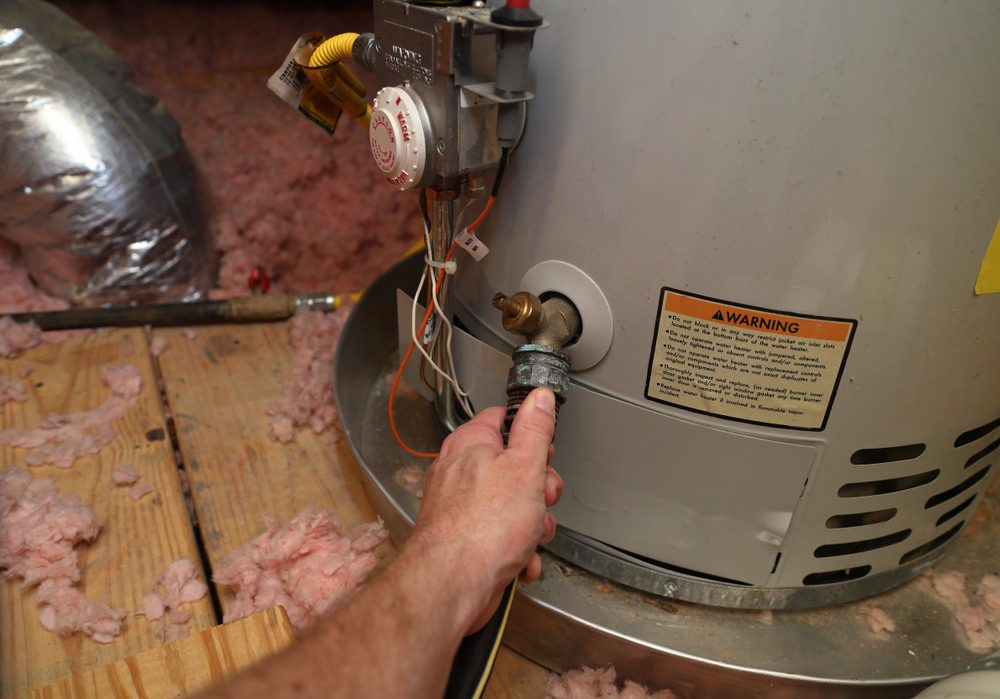
Image credit: https://www.fenwickhomeservices.com/

However, this doesn’t indicate a dangerous problem. Popping noise is also caused by limescale and sediment build-up within the tank. The sound is created when steam bubbles form under the sediment, then burst as the water heats up. You can quickly diagnose this problem by using a descaling product to help break down the limescale and minerals.

Ensure you flush and drain the tank to remove any sediment. Popping noises can also be caused if an aluminum anode rod within the tank is exposed to high levels of alkalinity. Professional plumbing can solve this problem by replacing the aluminum anode rod with a magnesium anode rod.

Loose Water Heater Element can Cause a Humming Sound

Some water heaters make humming noises. For example, electric water heaters don’t have gas burners. Instead, they have at least one electrically powered heating element associated with a thermostat. If the water falls below the set temperature, the electricity heats up the element, and the water flowing around it heats up. 

The heated water then circulates, warming the rest of the water. When the electric heater makes a humming noise, the heating element is loose due to wear and tear or poor installation. 

The loose element acts as a tuning fork, vibrating from the push of water cycling around it, creating a humming noise. You can easily correct these humming sounds by making the heating element tighter.

Screeching Sounds can Signal Restricted Water Flow

A screeching noise may indicate the water is too hot. As the heated water comes out of the tank, it can bump into air bubbles in the piping, which creates the sound of metal on metal screeching or scratching.

 Screeching noises also show that water flow is restricted either at the valve letting water into the heater or at a valve connected to water in your home. When the relief valve isn’t open all the way, water moves through a narrow space at a higher pressure, creating a high-pitched sound. 

The inlet control valve is often to blame for this, and you can easily address it by turning the valve to fully open it to lower the water pressure. And if adjusting the inlet valve doesn’t stop the noise, you may need to replace them.

Ticking Noises

If you can also hear a soft ticking noise, this indicates changes in water pressure. The heat trap can sometimes be the reason for ticking noises. You can easily remedy this problem as long as the changes in water pressure aren’t dramatic and frequent, like rapidly opening and closing the main building control valve.

 These tapping sounds are normal, but if tapping sound from a valve is concerning, swap the heat straps with dielectric nipples, smaller fittings that perform the same function. Boosting heat strap nipples can also improve the functionality of the water heater.

Make sure to tighten and replace the pipes if they become loose. This will stop the ticking sound and prevent the pipes from shifting. Lowering the heat by a few degrees may also reduce the expansion of water lines and stop any ticking sounds.

Hammering and Knocking Noises

A hammering noise, also known as water hammering, occurs when pipes aren’t securely anchored. They move and hit against each other and the interior of the wall. Any abrupt change in the water flow can lead to the sound because the pipes move as water does. 

Hammering and Knocking Noises
Image credit: https://cdn-apifl.nitrocdn.com/

This can happen when you flush the toilet, run a dishwasher, or a pump with a holding tank is running. Water hammering is not an immediate problem, but it can cause damage to pipes and the surroundings over time. You can diagnose this problem by securing pipes with insulation or installing a water hammer arrestor to stop the knocking.

Rumbling Sound

A few things can cause rumbling pipes. Sediment build-up and mineral deposits are common reasons. Sediment build-up occurs when minerals are suspended in the water flow and accumulate over time. This sediment can also cause damage to the inside of your pipes, but it usually creates a rumbling sound when you turn on hot water faucets. 

You can flush and drain that hot water tank with a long hose to remove the sediment or use a descaling solution to break down limescale within the tank. You should take your time to learn how to drain a water heater before doing anything. And if you aren’t experienced with plumbing, have a professional plumber flush the tank once a year.

FAQs about What to Do When Your Water is Making Noises

Is it bad if your water heater is making noise?

The noise might be annoying, but it doesn’t mean that your heater is malfunctioning.

Can a water heater explode?

If there’s steam build up in the heater and there’s no outlet, the increased pressure could cause the hot water tank to explode.

Final Thought about What to Do When Your Water Heater is Making Noises

As you can see, a water heater noise shouldn’t bother you that much. But if you suspect a fault, don’t hesitate to contact a water repair to rectify the situation before it worsens.


The post What To Do When Your Water Heater Is Making Noises? appeared first on Kitchen Infinity.

Did you miss our previous article…
https://www.centrecountyfood.org/?p=591

post

How to Identify Dangerous Asbestos Installation

Asbestos is a naturally occurring mineral mined and used in building materials for more than 100 years. It was widely used because of its heat resistance, water repellent nature, and affordability. Chances are that you are also considering using it for building your own house. However, it has been discovered that asbestos can cause serious health risks.

The most common disease caused by asbestos fibers is lung cancer called Mesothelioma, which affects the lungs or abdomen lining. Although there are many countries where it is banned from use completely, you may find some buildings with this material installed even today.

That’s why we have compiled an exclusive guide on identifying dangerous asbestos installations so that you remain safe at all times if your house happens to be built with these harmful chemicals. Let’s get started!

Why Asbestos Insulation is Dangerous

Yes, prolonged exposure to asbestos fibers can lead to serious respiratory illness and cancer called Mesothelioma. When disturbed, tiny abrasive asbestos fibers can be inhaled. In homes built before 1975, asbestos is most commonly found as thermal insulation on basement boilers and pipes.

When is Asbestos in a Home Dangerous?

The material in good condition will not release asbestos fibers, but when disturbed, it may create a health hazard where none existed before. Asbestos becomes dangerous if it has been damaged over time. The ones that crumble easily if handled can release asbestos fibers and create a health hazard.

Types of Asbestos Insulation

Loose Fill Insulation

Loose fill insulation is made of asbestos. The particles may be very small and do not feel gritty to the touch. This type of insulation was found in older homes before the 1980s. Loose-fill insulation comes in various materials and is easy to identify, thanks to its loose, lumpy form and fluffy or granular texture.

It doesn’t have paper or other types of backing like batt, and blanket insulation does. After determining if your attic insulation or the wall has loose insulation, you also need to determine which type of material it is because some types may contain asbestos.

Vermiculite Insulation

This type of loose-fill material was often used in attics and walls of older homes before the 1980s. When you contact a professional for an asbestos inspection, they’ll check for this type of insulation by looking at your home’s construction records or telling you what got installed in your home when it was built.


Image credit: https://s3.amazonaws.com/

Vermiculite loose-fill insulation is one of the most common household materials that contain asbestos. It has a pebble-like appearance and typically is a grayish-brown and silvery-gold color. It’s made from a natural mineral material that can release tiny fibers when processed and handled.

In the United States, most vermiculite insulation containing asbestos was sourced from a mine near Libby, Montana which was active until 1990. And because the LIbby mine closed in 1990, houses built before that date might have asbestos containing insulation.

Cellulose Insulation

If you have a loose-fill insulation that is gray, soft, and without a shine, then it’s cellulose insulation. Cellulose insulation contains a high percentage of recycled paper and doesn’t contain minerals. It looks like shredded gray paper. It’s a perfectly safe type of insulation that is commonly blown into attics. It also comes in batt and blanket forms.

Cellulose Insulation
Image credit: https://buildpass.co.uk/

Loose-Fill Fiberglass Insulation

Fiberglass fill is a popular choice for homes. It’s also one of the safest types of insulation to get installed in your home. The main problem with fiberglass insulation is that it can irritate skin and cause respiratory problems if it isn’t installed correctly or if there are loose fibers from the previous installation that have been left at the site of the installation.

Loose-Fill Fiberglass Insulation
Image credit: https://diy.sndimg.com/

And because it’s a glass product, fiberglass has a slight shine when subjected to bright light. It’s very soft, almost like cotton candy, and is composed of very fine fibers.

Rock Wool Insulation

Also known as mineral wool, rock wool is another popular insulation product. It also comes in two different forms, either as loose fill or batts. The materials are similar to fiberglass, except that rock wool fibers are much larger and therefore more difficult for the body to breathe into it. It has a fibrous, soft, cottony texture.

Rock wool is usually gray, white, off-white, and brownish white. It’s a manufactured product made by melting basaltic rock. The raw materials get exposed to temperatures up to 2750 degrees Fahrenheit, making them melt, then fibers are spun from the molten material.

Blanket Insulation

Blanket insulation is manufactured from rock, slag, or cinders. It’s lightweight and fibrous. It’s either in the form of batts or large rolls and looks like a big, cotton-like blanket. It’s flexible and is often used on attics and walls.

Inhalation of rock wool or blanket insulation material may result in a variety of health problems, including lung disease, cancer, and asbestosis. Therefore, it is important to install these materials using proper protective gear and methods.

Block Insulation

These are rigid panels manufactured from the same material that is used to make concrete. It can be found in either pre-formed or bagged blocks and comes in a variety of thicknesses. The most common type of block insulation is cement fiber. It’s lightweight, easy to cut, and looks like a grayish-white sponge.

It is not amenable to cutting with a rotary saw, so it has to be ground down before it can be installed into the wall cavities or floor of your home.

How to Identify Asbestos Insulation

According to research, there’s no safe level for asbestos exposure. Therefore, if you discover insulation in your home that may contain toxic material, don’t remove or inspect it yourself. If you suspect the area is contaminated with asbestos, call a professional. If you find asbestos in your ceiling, floor tiles, and anywhere else in your home, get the sample tested by a professional lab.

Call for an Inspection First

Before you call an asbestos abatement contractor, you should contact an industrial hygiene firm to inspect the affected area. A proper assessment should include a complete visual examination and careful collection and analysis of samples.

If there’s asbestos, the inspector should provide a written evaluation describing its location and extent of damage and provide recommendations for correction and prevention.

Contact an Asbestos Abatement Contractor

Before the work begins, get a written contract specifying the work plan, procedures, and time frames. The agreement should also specify what happens if the work is delayed, who will pay for future inspections.

And whether you will be charged for other services such as cleanup, applicable federal and local regulations, which the contractor must follow. You can contact your state, local agency responsible for asbestos regulations, Environmental Protection Agency, and Occupational Safety and Health Administration’s regional office.

Removal of Asbestos

If you decide to remove the asbestos or asbestos repair, ensure that the contractor gets written assurance that you are getting exactly what is on the label. There should be a label specifying the type of asbestos, where it’s located, and how much has been removed.

Repairing Asbestos

Sealing 

Sealing treats the material with a sealant that binds the asbestos fibers and coats the material, so fibers are not released. You can repair a pipe, furnace, and boiler insulation this way. 

Covering

Covering involves placing a protective wrap and jacket around the material to prevent burning and wear. Covering is used for asbestos-cement pipe insulation, ceiling tiles, floor tiles, and other materials that aren’t damaged if left in place. Only a professional trained to handle asbestos safely should undertake these repairs.

FAQs about How to Identify Dangerous Asbestos Installation

How do you test for the presence of asbestos?

Use asbestos testing kits which work in a two-step process. After purchasing a low-cost kit at a home improvement center, you obtain suspected asbestos from an area of your home. After that, mail your findings to the laboratory, and the results will be sent to you after a few days.

Final Thought on How to Identify Dangerous Asbestos Installation

As you can see, dealing with asbestos requires the use of a special kit. Asbestos testing kits are available through home improvement centers and other outlets, or you can contact an asbestos abatement professional. If handled correctly, you can prevent asbestos from causing a problem in your home.


The post How to Identify Dangerous Asbestos Installation appeared first on Kitchen Infinity.

Did you miss our previous article…
https://www.centrecountyfood.org/?p=580

post

10 Best Flowering Trees for Your Landscape

Flowering trees are a great way to add color and beauty to your yard. They also provide shade in the summer months, which is much appreciated when it’s hot outside. However, choosing the right tree can be a difficult task.

Choosing the best flowering tree for your landscaping needs is not an easy task because of all the options out there. When deciding which type of flowering you should plant in your yards, such as sunlight exposure, longevity, or flower color, there are several factors to consider. We’ve gone through all those factors and chose the best flowering trees that will do well for your gardening project.

Here are varieties of flowering trees that will add color to your yard:

1. Flowering Dogwood or Cornus Florida

The flowering dogwood is one of the most popular flowering trees for good reason. The white flowers in spring are very attractive, especially when they contrast with the deep green leaves. These trees are relatively small at about 25-30 feet, making them perfect for any yard. 


Image credit: https://upload.wikimedia.org/

They’re also disease-resistant. They offer landscape interest in fall and winter as their glossy green leaves turn attractive shades of red and berries appear. Dogwood is best suited to hardiness zones 5 through 9. 

They’re easy to care for and prefer moist, rich soil and partial shade during warmer months. Spring is the most popular plant, but you can also plant it in late fall when trees become dormant. The soil needs for dogwood include medium moisture and well-drained soil.

2. Japanese Tree Lilac

Japanese Tree Lilac is a deciduous, fast-growing tree resistant to cold temperatures and has beautiful lacy leaves. It can reach up to 15 feet in height, but it usually stays smaller at about 7-10 feet tall. This makes it ideal for small yards or garden areas because you won’t have to prune it. 

Japanese Tree Lilac
Image credit: https://communityenvironment.unl.edu/

It flowers in springtime with beautiful bunches of fragrant white blossoms. After the blooms are gone, the leaves change colors to yellow, purple, or red before falling off for winter. The Lilac Tree is best suited to hardiness zones 3 through 8 and prefers moist, well-drained soil with lots of sun, but the Japanese Tree Lilac will still grow in shade or partial sun.

3. Cherry Trees

If you’re thinking of adding a cherry tree to your yard, there are many varieties to choose from. Flowering cherry trees are a central part of worship in Japan. These flowering plants have a lot to offer as landscape trees. The two popular varieties are Kwanzan and Yoshino prunus x yedoensis.

Cherry Trees
Image credit: https://www.bowerandbranch.com/

Kwanzan grows to about 30 feet with beautiful pink blooms while Yoshino cherry grows a bit bigger, up to 40 feet tall. There’s also prunus subhirtella which grows 20 to 30 feet tall.  Depending on the species you choose, these trees do well between zones 4 through 5, while kwanzan and Yoshino cherries grow in zones 5 through 8. 

These trees can be a bit fragile against strong winds, so plant them in a sheltered spot. Early fall is their best planting time, but you can plant them in the fall or after the last spring frost if you’re planting in a container. Cherry trees need to be kept moist, especially in drought conditions. They are typically planted individually as specimen trees and in small groups.

4. Southern Magnolia

Also known as the magnolia, Magnolia Grandiflora is the evergreen tree known for its fragrant blooms. It grows best in zones 6 through 8 and can reach 40 feet tall with an equal spread. Choose the southern magnolia if you’re looking for a beautiful ornamental tree to grow indoors or outdoors in your landscape.

Southern Magnolia
Image credit: https://static.onecms.io/

Do not overwater this tree since it does not do well in moist soil. Container-grown trees need watering only once every two weeks during the summer season. This is not a fast-growing tree, so you can expect it to take about ten years for this plant to reach its full potential. 

5. Star Magnolia

This is one of the first plants to bloom in the spring with white star shaped flowers that appear in March and April before the leaves appear. This is a large shrub that can grow from 15 to 20 feet but it can be trained as a tree by pruning to retain a single stem to serve as the trunk. It can be used as a specimen tree and in woodland borders.

6. Saucer Magnolia

If you’re looking for a flowering tree that will catch the eye of everyone in your neighborhood, consider the saucer magnolia. These medium-sized trees will grow to be 30 feet in zones 5 through 8 and have pink flowers, describing their saucer shaped flowers.

Saucer Magnolia
Image credit: http://extension.msstate.edu/

Magnolias like part shade and well-drained soil. To ensure it blooms each year, you need to protect it from a late frost if newly emerged buds are in danger of freezing. These are best planted when dormant in late fall, winter in warm climates, and early spring in cold climates.

Magnolia trees possess fragrant flowers that bloom during spring to early summer. These large, white flowers are especially showy on the southern magnolia trees. They are hardy and attractive trees with dark green leaves that grow up to 60 feet tall. The fall foliage also turns red, orange, or yellow, depending on the variety of trees you choose.

7. Golden Chain Tree

The golden chain tree is another flowering tree that will draw attention because of its stunning flowers. They are one of the earliest blooming trees in the spring, with white flowers that drip to resemble a chain. Golden chain trees can grow 30 feet high in zones 5 through 8 and like full sun.

If you’re looking for a flowering tree without white or pink blooms found in most spring-flowering trees, this is your best bet. This tree will typically have yellow blooms but may also have white or pale green flowers. Golden chain trees require sheltered location and attention to a variety of pests and diseases.

8. Eastern Redbud

Eastern redbud is one of the best flowering landscape trees. These trees typically have pink to purple flowers in early spring, before new leaves emerge on the tree. The magenta buds of eastern redbud unfold into an explosion of pink flowers before the leaves appear on the tree. 

Eastern Redbud
Image credit: https://www.gardendesign.com/

Their flowers are not large, but they stand out because the blooms are among the first to appear on bare branches in spring, coating them in a pinkish-purple fuzz. It has a variety of landscape uses as a specimen, street, lawn tree, and naturalized woodland settings.

Eastern redbud only grows 20 feet high and prefers part shade and moist conditions. They also require pruning as they can become lanky with age if not properly maintained. Between the flowers and the unique heart shaped leaves, this plant should never miss in your landscape.

9. Kousa Dogwood

Kousa dogwood is a small tree that blooms with flowers resembling the blossoms of peonies. This small tree is wonderful and will stand out in any landscape, featuring white blossoms in late spring and early summer. This handsome small tree adds year round beauty. 

White flowers in May and June give a Milky Way effect, purple and scarlet fall leaves add intense color. This beautiful tree form with horizontal branching prefers partial shade to full sun. The Satomi Kousa Dogwood has splendid pink to red bracts followed in fall by hanging red fruit. The autumn leaves have red scarlet tints.

10. Crabapples

Crabapple trees are wonderful flowering trees for the yard. They offer a variety of different colors and blooms in spring, growing quickly to fill out that empty spot where nothing else will fit. The crabapples bloom in late winter or early spring, depending on the type you have planted.

Crabapples
Image credit: https://www.gardenia.net/

A few plants can create a visual impact during all four seasons than this flowering tree. When autumn arrives, crabapple foliage and fruit transform to match the vibrant colors of the artist’s palette.

FAQs about Best Flowering Trees for Your Landscape

What flowering tree blooms the longest?

The crape myrtle is the longest blooming tree in existence. Its flowers remain in bloom between 60 and 120 days.

What tree has little yellow flowers?

The laburnum tree is also known as the yellow or golden chain tree that produces little yellow flowers in the spring. The tree grows to over 10 feet high and 15 feet wide, with an average growth rate of 6 inches per year.

Final Thought on Best Flowering Trees for Your Landscape

If you have space in your yard, these flowering trees have a lot of beauty to offer. You can use them for privacy, shade, and color. People who love the outdoors also provide a refreshing environment. Consider planting one in containers on your porch or near your patio if you have a small yard. You can also consider the following shade-loving flowers for your garden, though they might not grow as big as the above trees.


The post 10 Best Flowering Trees for Your Landscape appeared first on Kitchen Infinity.

post

Reasons Why My Refrigerator is Not Cooling

When you open your refrigerator and find it is not cold inside, there must be a problem that requires your immediate attention. This means that it’s not cooling enough. When you witness such, don’t rush to replace the refrigerator, figure out the problem first. Find out if it’s just not cold enough or if it doesn’t have the power to run. 

If your fridge suddenly stops cooling, you need to check several things before replacing it with a new one. This is because some problems are easy to fix yourself without hiring an expert technician or calling for repair services. Here are some of the reasons your refrigerator is not cooling.

Evaporator Fan Motor Not Working

The evaporator fan motor is located at the back of your fridge. If this is not working, it causes insufficient airflow resulting in a warm refrigerator. Without air circulation, you can’t expect things inside your fridge to stay cool for a long period.


Image credit: https://missvickie.com/

If your unit has only one fan, it will be located in the freezer compartment. The evaporator fan motor circulates the cold air from evaporator coils through the compartment. If the fan motor isn’t working, you may have a cold freezer but no cool air in the refrigerator compartment.

Clogged Condenser Coils

The condenser coils are located in the back of your fridge behind the coils. Over time dust and dirt may accumulate on the coils, blocking air flow through them and leading to clogged condenser coils. This pressure creates heat and gas, which cools to absorb heat and turn back into liquid.

If this is happening, you need to pull out the refrigerator and disassemble it. Clean the coils with a brush or shop vac away any debris that’s obstructing airflow.

Damaged Control Boards

The control board is a series of electrical components that relay the proper signals to regulate different parts of your refrigerator. If it’s damaged, you need to replace it as soon as possible.

Damaged Control Boards
Image credit: https://images.ctfassets.net/

A modern refrigerator uses two circuit boards, including the main control board and the temperature control board. These issues are not easy for a novice to diagnose and repair, so contact a service professional if you suspect a control board failure.

Door Not Closing Properly

A malfunctioning door is often the result of an improper installation or a broken hinge. You can correct this problem by adjusting the hinges, readjusting the door, and removing any debris that might be blocking its path. The fridge door must be sealed shut for the food to stay fresh and temperatures and temperatures to remain where they need to be.

Door Not Closing Properly
Image credit: https://i.ytimg.com/

Also, a broken gasket can stop this from happening. The gasket is a rubber strip around the edge of the fridge door. It should be airtight without leaks and not allow warm air inside.

Outdated Defrost System

A refrigerator’s freezer does not cool as well as it should if there is no airflow. Defrost system controls the cooling and defrost cycle. The components of the defrost system include a defrost timer, and a defrost heater. A defrost timer switches the refrigerator between the cooling and defrost mode.

If it goes bad and cooling mode stops, it causes excessive frost to build up on the evaporator coils, reducing the air flow. On the other hand, a defrost heater melts the frost developed over the evaporator coil. If it goes bad, the excessive frost accumulates on coils reducing the cool air flow inside the refrigerator.

Faulty Compressor

A compressor is the main component of the refrigerator cycle. When it starts to malfunction, the entire cooling process doesn’t even start. The main function of the compressor is to compress the refrigerant from a cool, low-pressure vapor into high-pressure hot vapors. 

The compressed refrigerant is hot, high-pressure vapors that flow through the condenser, where it gets condensed into a high-pressure liquid. The liquid flows through the evaporator coil, where it evaporates and cools down to a low-pressure vapor.

Broken Thermostat

The first thing people check when the fridge is feeling warm is the thermostat. The thermostat setting off can also be another issue if your refrigerator isn’t cooling. This can happen, especially if you have children and inconsiderate houseguests messing around with the thermostat.

Broken Thermostat
Image credit: https://denvercontractorsinc.com/

And when the temperature on the thermostat doesn’t match the actual one, then your thermostat could be broken. You can easily replace it if it becomes faulty without involving a professional.

Defective Condenser Fan

In most refrigerators, there is a condenser fan that forces hot air out of the refrigerator. When it becomes faulty, it cannot release hot air into the room. The hot remains inside the refrigerator, making the temperature inside shoot up. Defective fan blades prevent the condenser fan from working correctly.

Dirty Condenser Coils

Household dust and dirt could prevent the condenser fan from picking up enough airflow. This might be a reason why your refrigerator isn’t cooling well. You should clean the condenser coil once per and even more if you have a lot of dust and pet hair in your kitchen. 

Dirty Condenser Coils
Image credit: https://www.achrnews.com/

This is a problem you have to fix yourself because if not attended to immediately, it can even damage other parts of the refrigerator, making it harder to repair. Clean it using a vacuum and a long brush.

Blocked Vents

If you have a fridge and freezer combination, the cold air issue could be coming from the vents that join them. The vents ensure the cold air flows freely from the freezer into the fridge. So, if it gets clogged with ice and other debris, the flow won’t happen, meaning your fridge won’t cool down.

Fortunately, you can easily fix this by turning off the refrigerator and letting the ice inside the clogged vent melt. Make sure you keep these vents open and clear to control internal temperature.

FAQs about Reasons Why My Refrigerator is Not Cooling

What is the first thing to check if your refrigerator stops working?

The first thing to check is the circuit’s breaker serving the fridge because there could be no electricity supplying the machine. If it is not tripped, check for any loose connections of power supply to the unit.

What are the signs of a bad refrigerator compressor?

The obvious sign is that your appliances will start making abnormal noise due to overheating and not providing proper cooling.

Final Thought about Reasons Why My Refrigerator is Not Cooling

Of course, a refrigerator that isn’t cooling is not good for you and your kitchen. The good side is that you can easily rectify these issues without purchasing a brand new fridge.


The post Reasons Why My Refrigerator is Not Cooling appeared first on Kitchen Infinity.

Did you miss our previous article…
https://www.centrecountyfood.org/?p=550

post

10 Best Canister Vacuums of 2021

Cleaning your house isn’t always the most exciting task on your to-do list, especially if your home has a mixture of bare floors, carpeting, and lots of stairs. Using a bulky vacuum cleaner makes the task more unbearable. If this is the case in your household, then a canister vacuum is your best choice. 

Canister vacuums are compact machines that are lightweight, easy to maneuver and take up less storage space than a traditional upright vacuum. ​If you’re looking for an affordable machine that will make cleaning quick and convenient without sacrificing quality and performance, check out our top 10 list below of best canister vacuums:

1. Ovente Bagless Canister Vacuum with HEPA Filter

Ovente is a cheap and lightweight canister vacuum cleaner that works well on bare floors, tiles, and rugs. It features a 12-amp motor, which is powerful enough to easily pick up large and small debris. Ovente’s HEPA filtration system traps 99% of the dirt and allergens found in the household, which is great if you have pet hair or suffer from allergies.


Image credit: https://secure.img1-fg.wfcdn.com/

Besides HEPA filtration, it comes with other useful features that include automatic cord rewind that keeps you from wrapping a cord around the vacuum. It also has a telescopic wand that provides hard-to-reach areas like the tops of windows, ceilings, and corners. 

It doesn’t flake out when it comes to attachments because it comes with a pet brush, floor brush, and a combination crevice nozzle and bristle brush. The entire vacuum weighs 12 pounds, courtesy of its large wheels, making it easy to drag around.

2. ProTeam Backpack Vacuum with Telescoping Wand

If you are looking for a vacuum cleaner that comes with advanced features, then this model by ProTeam is worth checking out. It has an automatic throttle control system that ensures the suction will not be too powerful to harm your floor or ceiling, or furniture.

ProTeam Backpack Vacuum with Telescoping Wand
Image credit: https://m.media-amazon.com/

While it looks large and features a 9.9 amp motor, it only weighs 11 pounds, which is barely noticeable on your back, thanks to its adjustable and padded straps. It comes with several attachments, including a crevice tool, telescoping tool, dusting brush, upholstery tool, and a multi-surfaced floorhead.

3. Miele Complete C3 for Soft Carpet Powerline Canister Vacuum

Cleaning a super soft and plush carpet is always a daunting task because of the dense tufts. However, Miele complete C3 comes with a power nozzle and brush roll that adjust to five different levels to make plowing through plush pile carpets easier. 

Miele Complete C3 for Soft Carpet Powerline Canister Vacuum
Image credit: https://evacuumstore.com/

It also comes with a metal telescoping wand, a dusting brush, an upholstery tool, and a crevice tool are also included in its accessories set since it’s a Pure Suction Floorhead made for use on all smooth flooring.

It uses a high filtration bag and HEPA AirClean filter to retain 99 percent of dust from being released back into the air. This is the best canister vacuum when it comes to picking up and keeping dust and dirt particles inside the vacuum.

4. Bissel Bagless Hardfloor Expert Deluxe Canister Vacuum

Once again, Bissell is proving that they know what makes a canister vacuum worth buying, and the hard floor Expert Deluxe Canister Vacuum is no exception. One of the most convenient features of this vacuum is its OnePass Technology which allows you to clean your flooring quickly and easily by picking up hard-to-reach dirt and debris.

Bissel Bagless Hardfloor Expert Deluxe Canister Vacuum 
Image credit: https://www.thespruce.com/

Thanks to the rotating brush roll, this technology is made possible that will agitate more of your flooring with each pass you make over it. It’s the best canister vacuum for cleaning hardwood floors. Hardwood floors are an investment that you wouldn’t want to scratch and destroy while cleaning. 

This canister vacuum comes equipped with features that protect your hardwood, easing your worries. This bagless vacuum weighs nine pounds and glides on floors on its non-marking rubber wheels that feature felt treads. It won’t scratch your floors as you clean, but it will suction dirt and dust into its one-liter dirt cup, which is emptied from the bottom to avoid messy situations. 

While some vacuums have cleaning brushes that are more abrasive, Bissel models come with a soft-driven bristle brush designed to clean hard floors without scratching them. It has digital fingertip controls that let you reduce or increase suction as needed. It also has a telescopic wand, a perfect tool for lifting debris and dust from curtains and ceiling fans. It also has an automatic cord rewind. So, if you’re wondering how to mop your floors quickly, this is the best vacuum for you.

5. Oreck Compact Canister Vacuum Cleaner

Oreck compact canister upright vacuums are best for cleaning bare floor surfaces. They can’t reach underneath low furniture, and they don’t have the same power as bagless uprights, but if you buy an Oreck vacuum, you’ll never need to buy another vacuum because these things last forever.

Its combination of suction and versatile attachments, including an upholstery tool, dusting brush, crevice tool, and extension wand, allows it to eliminate dust and dirt throughout the room, from ceiling fans to furniture to baseboards to carpet. The HEPA bagged filtration also prevents any dust from getting out once it’s in and seals upon disposal. 

This compact canister vacuum can also function as a blower and a vacuum, which comes in handy if you need to dislodge a mess from tight spaces and sticky spots before sucking it up. If you’re looking for a canister vacuum with the portability of a dustbuster, then this is the right choice.

6. Bissel Zing Bagged Canister Vacuum

If you want a canister vacuum that’s lightweight and mobile, then the Bissell Zing Bagged Canister Vacuum is right for you. The canister weighs about 7.5 pounds when empty and has a 20-foot power cord. The automatic cord rewind allows it to retract neatly when not in use.

This bagged canister vacuum also comes with one flip of a switch that can take you from hardwood floors to carpet and an adjustable knob that lets you lower the suctioning power to enable you clean thin rugs, drapes, and upholstery. This vacuum’s integrated carrying hand and the telescopic wand will help you clean them with ease if you have stairs. You can convert it into a hand-held vacuum for above-floor cleaning and spot cleaning as well.

7. Eureka Lightweight Canister Vacuum Cleaner

This is a pack of two canister vacuums from Eureka, each weighing about 8 pounds when empty. Its 20-foot power cord works well on both hard floors and carpets. The patented anti-allergen complete seal technology traps more dust and pollen than standard vacuum cleaners. 

Eureka Lightweight Canister Vacuum Cleaner
Image credit: https://www.ubuy.ke/productimg

This lightweight canister vacuum cleaner can be hauled all over the house, but the 10-amp motor provides ample suction for picking up messes of all kinds. It is easy to assemble out of the box and has more tools than most other models on our list.

It comes with a 16-foot cord, a combination floorhead, and a wash brush for curtains and furniture. Plus, the HEPA filtration system components are all washable, so you’ll save money on filters and bags.

8. Miele Classic C1 Cat and Dog Canister Vacuum Cleaner

The small design is ideal for stairs and smaller rooms. The wheels are not as sturdy as some, but the pick-up power of this sweeper more than makes up for that fact. This good housekeeping seal star was created for cleaning up dogs and cats. It can easily clean pet hair and any pet odors.

Miele vacuums come equipped with an Active AirClean filter that helps to neutralize any lingering pet hair, making it great for trapping and locking that dreaded dog smell. It also comes with a flexible hand-held mini turbo brush attachment for cleaning upholstery, stairs, and other tight spaces prone to collecting cat hair, dog hair, and other dirt.

9. Craftsman Corded Wet or Dry Canister Vacuum

If you’re looking for a bot that can suck up rocks, Craftsman Corded Wet or Dry Canister Vacuum is the vacuum cleaner you are looking for. The powerful suctioning system of this sweeper, along with its easy-to-use features, makes it one of the best-rated canister vacuum cleaners on Amazon today. 

The powerful suction engine of this vacuum provides you with a durable and reliable cleaning experience. A 5-foot hose is attached to the unit’s base, allowing you to easily clean in hard-to-reach places. The canister weighs less than 9 pounds allowing you to use it without getting too tired after extended usage periods. In addition, two universal wands are included with this vacuum. One is 12-feet long, and the other is 15-feet long for more efficient cleaning.

10. Hoover ONEPWR High Capacity Cordless Wet or Dry Canister Vacuum

The Hoover ONEPWR canister vacuum cleaner is designed to conveniently clean your home while being easy to maneuver. There are several features included with this vacuum that make it one of the best options on this list. First, the Hoover ONEPWR cordless design is convenient for those who need to clean their house quickly between other chores. 

The rechargeable battery included with the vacuum allows you to clean up to 40 minutes worth of space before needing to be recharged. The good thing about this canister vacuum is that you can use it outside your home in places including the garage, basement, deck, and other outdoors that need attention.

You can also clean up leaky pipes and backed-up drains using a wet or dry utility vacuum. This vacuum can pick large and fine leaves and sawdust. It can also pick wet messes and water that can destroy a traditional vacuum cleaner.

Unlike other wet or dry utility vacuums, Hoover’s ONEPWR is cordless and runs off a rechargeable battery, so you’re not tied to an outlet. Your pet might be out of the house most of the time, but their dander and pet hair remain on the furniture. Your new sofa will stink if you don’t do anything about it. Apart from unique large wheels, it also has a low horizontal design for stability and less tipping.

FAQs about Best Canister Vacuums of 2021

re canister vacuums hard to use?

Unlike large upright vacuums, canister vacuum models are much lighter and easier to maneuver around. Plus, the hose attachments make quick work of most vacuuming jobs.

Where is the best place to empty a canister vacuum?

You can empty a canister vacuum straight into your usual trash bin. If so, it releases too much dust into the air; consider emptying it outside into a trash bag.

What are the benefits of using canister vacuums?

There are many benefits of using a canister vacuum. Other than flexible hoses and longer cleaning wands for hard-to-reach spots, canister vacuums are lightweight and easy to carry than upright vacuums. They also have better suction and flow rate, meaning you can clean faster and efficiently.

Final Thought about Best Canister Vacuums of 2021

As you can see, there are many different types of important canister vacuums. The one you pick depends on your budget, the surface you will be cleaning, and the features you want.


The post 10 Best Canister Vacuums of 2021 appeared first on Kitchen Infinity.

post

Best English Cottage Designs

The English Cottage style is a popular home design that many people love. This is because the cozy English cottage design style will make your home feel rustic and closer to nature than ever before. However, it can be difficult to find the right one for you. There are so many different types of English cottage house plans, and they all have unique features. 

It’s hard to know which ones will work best for your needs. We’ve done some research on this topic and put together a list of the most common types of English cottage house plans below. You’ll learn what makes each type special and how you can incorporate them into your home design project.

What is English Cottage Design?

English cottage design blends antique and architecture to recreate the look and feel of a quaint home in the English countryside. English country homes are warm, comfortable, and inviting. The English cottage house plans are characterized by extensive gardens, thatched roofs, and rustic interiors full of wood and character-filled antique furniture.


Image credit: https://www.thespruce.com/

Characteristics of Cottages

Though there are some differences depending on the region of origin, English cottage house plans have a number of things in common. These include:

False-Thatched Roofing

This is the perfect alternative to the traditional thatched roof. False-Thatch is an insulated, fire retardant roofing material with a natural appearance of thatch. False-Thatched Roofing is made in many styles and colors to suit all properties.

False-Thatched Roofing
Image credit: https://images.squarespace-cdn.com/

It didn’t take long for people to realize that False-Thatch was indistinguishable from thatch in appearance, durability and that it could cost up to 40% less. It is made of modern materials such as steamed wood shingles, and composition roofing is rolled around eaves, resembling thatch.

English Country Garden

This English cottage house plans to have a romantic garden and a great atmosphere. The style of the English Country Garden is a long-standing tradition that dates back to the 18th century when they were created for practical reasons in an age when time was precious and labor was expensive. This tradition has continued into the 21st century, albeit with many modern twists.

English Country Garden
Image credit: https://www.britain-magazine.com/

This cottage-like home is like stepping into earlier times in England. Since the English Country Garden style uses natural materials, the look has a rustic feel. This home is perfect for anyone who loves to garden or prefers to eat homegrown vegetables and fruits. The charm of this cottage lies in its simplicity and use of natural resources, which allows it to be low-cost yet very functional.

Older-Looking English Cottage

If you have French antiques and furnishings, English country decorating might cause the room to look cluttered and crowded. The English country style is less formal than other types of interior design and would best fit a bedroom decorated in ornate Victorian antiques, like this one.

Although there is simplicity in the cottage style, it doesn’t mean that you should avoid color. In fact, you can add architectural elements and furnishings to give a newish home character and lots of personal touches.

Bibury Cottage

If you want to stay in the cottage style with English country decor but add more color, go for it. There is no reason why this room has to be painted white. This bedroom with dark wood paneling and bed frame with blue Peacock fabric looks striking with its gold accents. The tall mirror adds height, which is always great in a room.

Colorful patterns are another way to add more color without having to change the overall color scheme. Here, English country decorating styles clash with modern furniture creams and reds, but it is still fun to look at. Also, note the characteristics of front-facing gables and steeply pitched roofs.

dd Cottage Door Windows

Cottage doors are charming. They help create that English countryside looks and feel, such as the door here -with its blue floral design almost like wallpaper. If you don’t want to go with a fully-fledged country style for your cottage bedroom, keep the doors but do something interesting with them. 

The geometric pattern on the left-hand side of this door is both striking and scrumptious. Add a contrasting color for the doors, such as the pastel green, to complete your design. A favorite choice is French windows that are inset into the wall rather than being freestanding in front of it. You can use wooden shutters to close these during the day and then open them at night, perhaps with a candle placed on top of one.

Use Every Nook and Cranny

If your home features angular, tight spaces, don’t be afraid to put them into cozy nooks. Features that are difficult to navigate are easily given purpose with English cottage house plans. English cottage style is known for its cozy, small living spaces used for as many creative purposes as possible. You can highlight your style by using every nook and cranny in the house to create a homemade, rustic feel.

Wiltshire English Cottage House

This cottage is located in a tiny rural village in Wiltshire, England. It has a false thatched roof, leaded, casement windows, and stacked chimneys. This English cottage style is made of stone and timber with red brick. There is a small portico on the front of the home with black supporting columns, giving it a rustic feel. 

This house has mainly all wood interior, including floor plans, staircase, walls, wainscoting, doors, and baseboards. It also has decorative plasterwork throughout the house. This house is about 7,000 square feet. It includes two bedrooms, four bathrooms, and three fireplaces. This cottage-style home has an open plan kitchen with breakfast area that leads to a family room with a stone fireplace.

There are reclaimed beams throughout this home, giving it the rustic feel that the owner was trying to achieve. The dining room is open to the kitchen with an island. The living room has a stone fireplace.

FAQs about English Cottage House Plans

How do you make an English cottage look?

Create an English cottage look by planting lush greenery. Plant bushes, trees, and other greenery native to your area, and creeping plants such as ivy will make your home look like it’s emerging from nature.

Final Thought about English Cottage House Plans

English cottage house plans are very popular home plans because they offer so many different layouts. When building your own house, you can choose one-story English cottages or two-story versions, but be sure to consider the number of bedrooms and bathrooms you must have for your family size. Be sure that you include plenty of storage to keep all of your belongings neat and tidy.


The post Best English Cottage Designs appeared first on Kitchen Infinity.

Did you miss our previous article…
https://www.centrecountyfood.org/?p=539

post

18 Scandinavian Bedroom Decoration Ideas

When it comes to interior design, a bedroom isn’t always for an amateur interior designer. Ranging from the bed, choosing the nightstand, and thinking about storage for your clothes and belongings, there’s so much you have to consider.

You want to create an all-white Nordic style or hotel room but don’t know-how. If you’re looking for clean lines, simplicity, light, and airy while still maintaining a sense of calmness and relaxation in your bedroom, then Scandinavian bedroom decor is perfect for your home.

Along with a common culture and language, the Scandinavian countries of Norway, Sweden, and Denmark share this decorating style that is light, airy, simple, and clean. Let’s take a look at the different ways you can create this relaxing space in your own home.

1. Peaceful Scandinavian Style

Scandinavian bedroom decorating style borrows from the country’s history and sensibility. Since many residents of Scandinavian countries reside in small apartments, they have to find ways to maximize space and light. That’s why this Scandi style is popular worldwide, not just in the chilly north. The peaceful bedroom captures the serenity of real Scandinavian decor.


Image credit: https://www.thespruce.com/

2. Lighting is Key in Scandinavian Interiors

Scandinavian bedrooms might be some of the best-decorated rooms in the house. One reason for this is because of the lighting needs of Scandinavian residents; they need to maximize natural light and add simple lighting fixtures such as bedside lamps or overhead chandeliers. This helps to create a restful atmosphere, which is what Scandinavian designs are all about. 

So, when thinking about your Scandinavian interior, make sure you provide several types of natural lighting. This will not only create a restful atmosphere but will also help with mood-building purposes.

3. Color it White

Many Scandinavian bedrooms start with the color white. White is a reflection of light and also works very well with other colors. If you choose to paint your bedroom walls white, it is best to leave at least one wall in a different color; this will add depth and interest to your room while maintaining an overall feeling of simplicity and relaxation. 

Color it White
Image credit: https://st.hzcdn.com/

The leaning wall ladder is a popular decoration in Scandinavian bedroom design, so when painting your walls, paint the leaning ladder in white color. The ladder can be used in different ways in your bedroom, including storing your robe, a throw blanket, a faux fur rug, and other fabric items.

4. Mid Century Furniture

A great feature of Scandinavian bedroom decorating ideas is Mid-century furniture. This style features clean lines, simplicity, and minimalism. Mid-century furniture can be tricky to pair with other designs or concepts.

Mid Century Furniture
Image credit: https://www.thespruce.com/

The best way to introduce the concept into your home would be by choosing a specific room like your bedroom, where you can easily incorporate this type of furniture without worrying about clashing with other styles.

The sleek look of this furniture can work well with the minimal aesthetics of Scandinavian homes. You can also buy a mid-century nightstand, a mid-century bed, and a mid-century dresser to achieve this look in the bedroom.

5. Canopy Bed in a Scandi Bedroom

A modern canopy bed with a dark wood finish is the perfect piece to use to introduce this design concept into your bedroom. The monochromatic colors of the room and simplicity of the design of the bed will create an interesting contrast and fit right in with Scandinavian bedrooms.

6. Black Walls

A bold design choice like a black bedroom wall can work well in a Scandinavian style bedroom. Since Scandi style appreciates neutral colors such as black, brown, white, and beige, this high-contrast interior is great for the bedroom. 

Black Walls
Image credit: http://cdn.home-designing.com/

Also, people like it as dark as possible when they sleep at night, and the black-painted walls can help you achieve this ideal sleeping situation. Make sure your bed and walls are lighter colors like beige and white to prevent creating an ugly black box.

7. Muted Colors

The ceiling, the floor, and the furniture should be in lighter colors than black if you want to create a Scandinavian bedroom. Most Scandinavian bedrooms are created using muted colors like dark purple, pale pink, and faded blue. There’s also a Scandinavian blue, which is very popular in Scandinavian kitchens.

8. Bring in Natural Light with Large Windows

Bring in natural light with large windows to create a more spacious feel. This is what Scandinavians are known for, their love of nature and the outdoors. Make your bedroom full of life by bringing in natural sunlight. 

Bring in Natural Light with Large Windows
Image credit: https://media.designcafe.com/

To complement this, ditch heavy curtains and use adjustable window treatments such as blinds and shutters instead. If your windows are not large, try to enlarge them with sheer curtains.

9. Consider a Fireplace in the Bedroom

Most Scandinavian bedrooms have a fireplace as it was originally intended as a room for firewood. In this age of gas and electricity, the fireplace is more for aesthetics, with some models even holding candles.

10. Scandinavian Cottage Bedroom

While the Scandinavian decor is generally pared down and minimalist in feel, it doesn’t mean that there’s no room for personality, warmth, and touches of other decorating themes. The Scandinavian bedroom has a cottage vibe while maintaining the limited palette, clean lines, and airiness typical to Scandi style.

Scandinavian Cottage Bedroom
Image credit: https://st.hzcdn.com/

11. Neutral Wood Beds and Headboards

Scandinavian bedrooms often have beds with headboards made of wood. However, other materials can be used for the headboard, including metal or wicker, but wood is most common. But both neutral wood bed and headboard are great Scandinavian bedroom design choices.

It will warm up the bedroom while keeping in line with a minimalist aesthetic. There are no fancy elements with this bed. It’s functional and simple, with two nightstands on either side of the bed that blend well with white walls behind them.

12. Go All Out with Textures

A blend of cozy textures is essential for creating the ultimate Scandinavian bedroom. The room must be warm, inviting, and comfortable so that you can relax better at night. By adding soft cushions and pillows to the bed, you get a cozy reading nook where you can curl up with a book or watch television in comfort after a stressful day at work.

13. Abstract Wall Art

Many Scandinavian interiors feature black and white artwork. There are no representational works in Scandinavian homes. So, stick to abstract shapes and minimalist forms when placing art on your wall. You can opt for drawings, paintings, and sculptures; be sure to keep it minimal and abstract.

While you’ll often find a gallery wall of smaller black and white artwork, it’s always good to big with one large artwork. The larger pieces will add a zing of excitement, while the muted color will keep the overall vibe soothing.

14. Create a Cozy Reading Corner

A beautiful Scandinavian bedroom is often one where you can curl up and read your favorite book while enjoying the comfort of soft pillows, sheepskin throw, fur, cozy blankets, and a steaming cup of homemade tea. This kind of space allows you to get lost in your books while cozying up with loved ones or friends.

15. Go Slightly Bolder with a Colorful Scandi Bedroom Scheme

Now, this doesn’t mean painting the walls bright red or yellow. A Scandinavian bedroom usually sports muted colors like light blue or grey. You can still achieve that light and airy feel of a modern Scandinavian design while adding a playful touch to your decor with traditional folksy prints and rich tones such as mustard and burnt orange.

16. Maintain Open and Airy Spaces

The typical Scandinavian room leaves plenty of open space between pieces of furniture. This gives the room an airy, fresh vibe and prevents any cramped and cluttered feel during the dark winter days.

17. Small Scandinavian Bedrooms

When you’re working with a small space, it’s best to go with simple modern furniture. Twin beds and small side tables can be a great addition when working with a small bedroom design.

18. Add Rustic Touch to Your Modern Bedroom

Love the country charm of large, wooden slatted beds? Pair it with a sleek modern dresser and bedside tables for styling contrast. Choose a stand-out piece of vintage furniture to make your bedroom look more rustic and modern.

FAQs about Scandinavian Bedroom Decorating Ideas

What is a Scandinavian bedroom?

Scandinavian ideas originated from countries such as Sweden, Denmark, and Norway. A Scandinavian bedroom design has many different vibes, depending on the design route you choose.

What makes a Scandinavian bedroom?

Scandinavian bedrooms, just like the rest of their interiors, have a minimal amount of color. These bedrooms feature all dark walls, a dark wall, and richly colored textiles about comfort, coziness, and textures.

Final Thought about Scandinavian Bedroom Decorating Ideas

As you can see, Scandinavian bedroom decorating ideas are very popular not only in the chilly north but worldwide. This decorating style is easy to implement, and the results are very appealing. So, if you’re just learning how to decorate your bedroom, consider the Scandinavian decor and you’ll love it.


The post 18 Scandinavian Bedroom Decoration Ideas appeared first on Kitchen Infinity.

Did you miss our previous article…
https://www.centrecountyfood.org/?p=527

post

How to Grow Oriental Poppy Plants

Growing Oriental poppies is a fun and rewarding experience. However, it can be hard to know what you need to do before planting them in your garden. Oriental poppies are beautiful flowering plants that you can grow indoors or outdoors. 

They are usually planted in the spring and bloom during the summer season. The flowers of these plants come in different colors including red, pink, white, purple, maroon, orange, salmon, and peach. These beautiful flowers attract many butterflies and bees, making them a perfect addition to your flower garden.

What are Oriental Poppies?

Oriental poppies, also known as Papaver Orientale are herbaceous perennial flowers with large, brightly colored blooms featuring petals reminiscent of crepe paper. Oriental poppies are grown mainly for their flowers, although they bear attractive foliage in spring. 


Image credit: https://www.saga.co.uk/

The big, thistle-like leaves of Oriental poppy are downy, deeply lobed, and rich green, offering aesthetic value in their own right. What makes the Oriental poppy a good cut flower is its tightly packed leaves and stiff and hairy flower stems.

Oriental Poppy Plant Care

Indigenous to elevated lands in Western Asia, the Oriental poppy has naturalized in parts of North America that have cold winters. This cold-hardy plant hates high heat and humidity; instead, this perennial needs cold temperatures in the winter and fares poorly for most parts south of planting zone 8.

Oriental Poppy Plant Care
Image credit: http://1.bp.blogspot.com/

Make sure you mulch around oriental poppies for the first couple of years for winter protection because most varieties are clump-forming. Also, propagate them by seed instead of transplanting because the clumps are slow to become established. Oriental poppy has multiple uses, which makes it a valuable garden plant.

Sunlight Requirements

Make sure you plant your oriental poppies in full sun. This will not only promote better flowering but will also encourage a bushy habit. If you want a tall, slender plant, then choose a location with some afternoon shade. Full sun will also reduce the chances of powdery mildew infestation, which is a potential problem with oriental poppies. At least six hours of sun a day will help your plant to thrive.

Soil Requirement

The soil should be fertile and well-drained. The plants need a lot of water in summer but less in winter. They are extremely intolerant to wet soils, so choose your planting site carefully by avoiding low areas that remain damp for long periods. 

Growing your oriental poppy in a well-drained soil enriched with compost will give the best blooms. Oriental poppy also prefers neutral to slightly acidic pH. Root rot can be a problem if the pH is too high so make sure you test the soil pH and ensure it doesn’t exceed the limit. 

Water Requirements

Poppies like moist but well-draining soil throughout the entire growing season and regular watering. Make sure you water when the soil is dry and avoid overwatering, especially during dormancy. Poppies grown in containers will need more frequent watering than those in the ground.

Water regularly and thoroughly so that water runs out of the planting holes at the bottom of pots. Poppies are drought tolerant; however, they will flower less and instead put their energy into developing more leaves and stems, making them greener but not as attractive.

Temperature and Humidity

Poppies don’t like it too hot. As a general rule, if you are comfortable outside, the poppy will be happy. It can tolerate temperatures down to 20°F, but you must protect the flower buds from an early frost that could damage or kill them. This plant doesn’t prefer high heat and humidity. They grow in hardiness zones 3 through 9.

Fertilizer

Poppies require well-draining soil and regular fertilization. They respond very well to all forms of fertilizer, including slow-release fertilizer in the spring. Be careful not to over-fertilize. Too much fertilizer will cause the plant’s energy to be put into producing flowers rather than leaves and stems.

Fertilize in spring just before new growth appears. If you already have fertile soil, use ammonium sulfate instead because it also contains some nitrogen. If it is too late for this application, you can side dress the soil with compost or manure tea. Make your own compost for your plants and you’ll like the outcome.

Propagating Oriental Poppies from Seed

If you have an adult poppy plant, the division is easiest to propagate new poppy plants. There are a couple of ways to do this. The first way is called layering. This takes several weeks and should only be done if you want just one or two new plants.

To layer oriental poppy, bend one of the stalks down to the ground, and bury it in the soil where it touches the ground. Hold the stalk down with a rock or other object. Water frequently while your Oriental poppy is lying on the ground to dry out too much. It’s better to do this late after the blooms have passed.

How to Plant Oriental Poppies

Once you’ve purchased these plants from a garden center, plant them from early spring into early summer. Direct sowing is the standard method for growing oriental poppies. Scatter poppy seeds directly on the surface of the soil in spring or early fall, where they’ll receive the sunlight they need to germinate. 

How to Plant Oriental Poppies
Image credit: https://www.gardeningknowhow.com/

Poppies grown in containers are easy to plant. You gently settle them in the ground at the same depth they were in the pot. Be careful not to disturb the roots when transplanting. For bare root plants, plant them with the top of the tap root about an inch below the soil surface. Make sure you follow all directions that come with your bare root plant.

Pests and Diseases

Poppies rarely suffer from pests and diseases. But the oriental types can be set back by powdery mildew. This fungal disease can affect the whole plant by covering leaves and stems in white mildew in spring and summer. 

Make sure you deadhead spent flowers and cut the plant to the ground level as you also clear fallen leaves to prevent the fungal disease from overwintering in the soil.

Oriental Poppy Varieties

Papaver Orientale Livermere

The most fragrant of all poppy varieties. It has large flowers, is very hardy, and is tolerant of poor soils. It also has a scarlet red flower that is 2 to 3 feet tall.

Papaver orientale Patty’s Plum

Patty’s plum is a variety new to the UK; it has purple petals with white markings. It is very hardy and loves poor soil. It’s heavily textured and plum-colored 2 to 3 feet high.

Papaver orientale Fireball

Fireball is a spectacular poppy with flowers up to 18 inches in diameter with bright scarlet petals, and a golden yellow center. The leaves are dark green and rough-textured, maturing to red-brown tones in autumn. It’s semi-double or double blooms.

Papaver orientale Bolero

Bolero is an amazing poppy containing purple-red flowers with purple eyes. The center of its flower is golden yellow. It’s 2 feet high, and it blooms in mid-summer.

Papaver orientale Princess Victoria Louise

This is another spectacular poppy variety that is 6 to 8 inches large, salmon-pink blooms, and 2 to 3 feet tall.

Companion Plants for Poppy Plants

Plant your oriental poppies in the middle or at the back of the flower bed to let other flowers fill in once they die. Hide the withering poppy foliage with summer bloomers such as Siberian iris, baby’s breath, Russian sage, daylilies, and rudbeckia. Protect the new poppy foliage in fall with bark mulch and pine boughs.

FAQs about How to Grow Oriental Poppy Plants

Do oriental poppies grow back every year?

Oriental poppies are true perennials, meaning the mother plant returns each year and slowly expands overtime to produce a larger plant and more flowers.

Should you deadhead oriental poppies?

Yes, you should cut back and deadhead oriental poppies after flowering. This will stimulate the growth of fresh new foliage and even new blooms.

Final Thought on How to Grow Oriental Poppy Plants

As you can see, growing and caring for oriental poppies is a fairly simple task. If you want to capture the magic of these brilliant blooms, consider planting them near your home or garden as an addition to the landscape.


The post How to Grow Oriental Poppy Plants appeared first on Kitchen Infinity.

Did you miss our previous article…
https://www.centrecountyfood.org/?p=517

post

12 Gorgeous Flower Garden Ideas To Add To Your Home

Flower gardening is a fun and rewarding hobby, especially if you know how to do it right. You can use beautiful flower garden ideas to create an amazing backyard oasis that will impress everyone who sees it. These beautiful flowers help you express yourself in ways you never thought possible. All it takes is a little creativity to show your personality through these amazing flower garden ideas. Here are some ideas that can help you start this amazing hobby.

1. Consider Large Garden Areas

Many flower garden ideas are perfect for smaller spaces, but consider planting something other than flowers if you have a large backyard area. If you’re looking for an easy way to create an impressive look that’s also functional, go with ornamental grasses or evergreen trees. These plants are great year-round and require very little maintenance over time.


Image credit: https://www.gardeningknowhow.com/

Choose two contrasting colors and one color family, such as purple or pink. You can then add perennial flowering plants in groups of three to five, and you’ll have an eye-catching flower. Make sure you carry out regular weeding because today’s weed might be tomorrow’s weed patch.

2. Create an Edible Flower Garden

Create an Edible Flower Garden
Image credit: https://www.gardeningknowhow.com/

If your goal is to create a garden as an outdoor kitchen, consider making a dedicated flower bed for herbs and vegetables. If possible, flower gardens should be beautiful and delicious. Vegetables will get a huge boost in productivity with the flowers available when pollinators are drawn to nectar-rich planting beds.

Edible plants such as tomato, squash, and cucumber will blossom in such flower garden beds. In addition, the beneficial insects that rely on floral nectaries will help control vegetable pests, thus, reducing the use of pesticides.  You can get ideas on types of squash to grow here so you know which one can work for your flower garden.

3. Plant Flowering Plants on Trellis

Trellises and topiary create focal points in the garden, especially when consistent color and style. When creating an edible flower garden, place trellises along walkways and at the edges of beds to lead visitors through the garden and to help keep plants upright as they grow. Make sure you define borders against which to plant flowers of varying heights.

They provide support for climbing vines such as morning glory, cucumber, and sweet potato, and vertical growing flowers such as clematis. Trellises also provide structure for flowering vines that may not need support, like the passion vine. You may also trellis-filling vine in one season from seed with morning glory and moon vine.

The passion vine can climb up an arbor or trellis to create a lush canopy of green leaves. Passion flower blooms are attractive to bees, which adds to the benefit of an edible garden. Gloxinias, petunias, and their foliage can also bring beauty to your trellis.

4. Combination of Bogs and Rain Gardens

Brighten that soggy spot in your backyard with a rain garden or bog garden. And when planning a bog garden, consider plants that love both full sun and wet soil. Flowering plants that thrive in bog gardens include candelabra primrose, cardinal flower, and yellow iris and leopard plants.

You can also introduce fun and funky in your wet by including carnivorous pitcher plants. Make sure your garden rain never dries out. A natural bog garden will be replenished by rainfall, but a dry spell hits; ensure you help it out with a hose. 

If you see frogs, salamanders and turtles, know that a bog environment is present, so use it to plant some rain garden plants. If you don’t have a natural depression that collects water, create your own by sinking a plastic kiddie into the ground. You can use pond liner to create a bog garden as long as you disguise the edges with rocks and fill the bottom with peat moss and sand.

5. Consider Flower Garden Paths

When you think of your garden, do you see only the flowers that need to be planted? A flower garden is perfect for an area where you can walk through and view the various blooms. If your current yard doesn’t have one existing place, design a path with bricks or stones, so everyone has easy access.

Consider Flower Garden Paths
Image credit: https://www.thespruce.com/

But keep in mind that you’ll need to choose flowers that can handle foot traffic. A flower garden path should comfortably accommodate a wheelbarrow and a cart with room to turn around. Make sure you mulch your plant beds as much as possible to keep them flourishing.

6. Butterfly Flower Garden Ideas

The butterfly garden works especially well near a porch or patio area. Butterflies love water, so add a small pond, and you’ll be treated to the sight of not only butterflies but frogs and lizards as well. However, some beautiful flowers may fall flat when it comes to attracting butterflies. 

Butterfly Flower Garden Ideas
Image credit: https://www.loveyourlandscape.org/

Some butterflies are designed to extract nectar from particular flower shapes, meaning that some blooms sound like the dinner bell while others miss the mark. Even though butterflies love bright colors, it’s important to include flowers with rich nectar stores easily accessible in shallow flowers. 

Butterflies and other pollinators will stay in your garden throughout summer as long as you include seasonal blooms in your garden. This is because their food sources are usually most plentiful when the weather is hottest, and most plants bloom during springtime or summer.

Butterflies will truly thrive with a combination of butterfly-friendly flowers, annuals, and perennials, which they can land on for rest periods between nectar-feeding sessions.

7. Combining Tulips with Annuals and Perennials

Create a harmonious arrangement with this amazing flower garden idea. Extend your garden blooms with tulips, annuals, and perennials that will come back each year with less maintenance. Make sure you space out your flowers so that tulips stand taller than your shorter, low-growing annuals and perennials. 

When winters are cold, your tulips will return for several years but won’t survive when grown in warmer, moist climates. A flower garden bed with a blend of red and yellow tulips will make the whole bed look amazing. 

Create that festive effect in a mixed flower bed by planting clear, primary tulips. Daylily, catnap, salvia, and bells of Ireland are some of the great tulip companions, and once you should reconsider when recreating a gorgeous full flower garden bed.

8. Pallet Flower Garden Ideas

Flowers that provide color with the way you want the artwork to appear are a good start for any design. For example, mixed white and yellow flowers will provide interest for your garden whether you want a spring or summer look. The tulips will be particularly appealing in beds where most flowers are filled with one particular shade.

If you have a lot of flowers of the same style, plants with distinctive features will draw attention. Choose something really small tulip for this circumstance. Chives will certainly give you an option to create a variety of patterns by simply including or eliminating plants from your flower bed.

9. Recycled Rubber Tires Flower Garden Ideas

You can never go wrong with turning your old tires into a garden ornament. Rubber tires are tough and long-lasting, making them fantastic materials for your yard or business’s landscape design. This reclaimed rubber tire flower garden idea is a great way to recycle old tires while beautifying the area at the same moment.

Recycled Rubber Tires Flower Garden Ideas
Image credit: https://morningchores.com/

If you have an old bike lying around, make use of its tire as well. If you have some scrap tires lying around, turn them into a flower garden. This will not only make your lawn look good but will also help you avoid worrying about tires taking your space or disposing of them.

10. Potted Flower Garden Ideas

There’s nothing more pleasant than a stunning potted flower garden in the backyard. So take your time and plan it well so you can enjoy it for many years to come. When it comes to convenience, nothing beats flowers planted in clay pots and half buried in a bed of gravel.

Potted Flower Garden Ideas 
Image credit: https://nextluxury.com/

It doesn’t have to be complicated – using a simple pot will also do the trick. You can also bring in some hanging baskets if you have a nice outdoor space for them. To achieve a harmonious and colorful look, choose a different flower for each pot. Round your flower bed with pots.

A circle of purple, white, red, and white striped Bizzy lizzies spread out from the pine ringed by stonecrop, moss, and pots of pink and white Bizzy lizzies. And if you want to enjoy the view from your home or balcony, consider adding some cascading plants, vines, or grasses, which will make it look like an entry from fairy tales. Add in some wooden trellis and little lights too to complete the look.

11. Formal Flower Garden Ideas

Of course, the clean lines and tidy layout of a formal garden will provide a respite from the stresses of modernity. Adding some flowers on top of that grass and well-cut boxwood shrubs will be the finishing touch to the garden’s look. You can stick one or two flower varieties in the formal garden.

Lavender, roses, tulips, hydrangeas, and salvia are a few things that you can use in your formal garden. You can mass the flowers around a central fountain, use them to edge paths, and fill in geometric hedge plantings with blooms.

12. Flowering Cottage Flower Garden Ideas

You can turn your cottage garden into plant beds with the help of perennials, ornamental grasses, and flowering shrubs. Roses, lavender, cosmos flowers, lilies, snapdragons, and hydrangeas are among some of the plants that you might use to make up your cottage flower garden. 

Grasses like colorful ornamental rye can be used as a ground cover to fill in spaces between other flowering plants. Perennials like bleeding heart, lupines, black-eyed Susan, and daylilies are among the many types of flowering perennials that you could use for your cottage garden.

FAQs about Beautiful Flower Garden Ideas

How do you lay out a flower bed plant?

Arrange border plants with plants taller than 2 to 3 feet tall, then place them in the back with the mild-size plants from 10 inches to 2 to 3 feet tall in the middle. After that, layout shorter plants in the front of the bed. It’s also best to use groupings and drifts of plants for a natural feel.

How do you plant a flower garden for a beginner?

First, make sure you remove the weeds and amend the soil. If it’s a new bed, put down a layer of landscape fabric to block weeds and top with six inches or more garden soil and topsoil. If your area doesn’t receive much sun, you can consider growing shade-loving flowers as they blossom in such areas.

Final Thought on Beautiful Flower Garden Ideas

Build your corner of paradise by adding different types of flowers in your backyard. You can enjoy your backyard for gardening, spending time with your loved ones, or just relaxing.


The post 12 Gorgeous Flower Garden Ideas To Add To Your Home appeared first on Kitchen Infinity.

Did you miss our previous article…
https://www.centrecountyfood.org/?p=488

post

How to Use Core Aeration

Maintaining a healthy lawn is hard, but there are a number of steps you can take to achieve this. You need to fertilize your grass, mow it at the right height, and water it regularly. But if nutrients don’t reach the soil underneath your turf, you’re going to have problems with thatch build-up and nutrient loss.

Lawn aeration helps improve drainage by removing plugs from the top layer of soil, allowing air and water in a while, helping reduce soil compaction below ground level. It also brings up minerals that were trapped beneath the soil surface into contact with roots for better absorption.

If you’re looking for ways to achieve and maintain a beautiful lawn, then this article will help you learn more about using core aeration. We’ll discuss why it’s needed and what it involves. Read on!

What is Core Aeration?

Core aeration is one of the best practices for lawn care because it improves overall health and appearance while reducing weed growth potential. The process involves using an aerator machine or core aerating tool which removes plugs from two inches deep or more depending on how long you run the machine over your lawn’s surface. This will help loosen compacted soil and allow water and air to reach the lawn’s roots better.


Image credit: https://www.fairwaygreeninc.com/

What is the Best Time for Core Aeration?

For cool season grasses, core aeration should be performed in early fall or early spring. For the warm season grasses, core aeration should be done in late spring to early summer. When aeration combines with growth, grasses recover quickly and fill in areas where aerator equipment exposes soil.

When Do Lawns Need Aeration?

All lawns can benefit from core aeration, especially when the soil is compacted. Lawns in heavy shade or with thatch build up are great candidates for core aeration. Any time grass has difficulty growing or staying healthy due to compaction or poor drainage, this indicates that core aeration might be needed. Soils high in clay also benefit from core aeration.

Also, note that dethatching and aerating are two different things, although they work in handy. Thatch is the layer of decomposing organic matter that forms at the lawn surface between soil and grass. The thatch works like compaction to block the passage of air, water, and fertilizer to the roots.

Dethatching removes some grass blades while aerating opens up channels in the soil to allow air, water, and nutrients to reach grasses’ root systems. Aggressive spreading grasses like Kentucky bluegrass in northern lawns and Bermuda grass down south form more than any other grass type.

If your grass looks stressed and your soil is hard to the touch, you may have compaction problems. You can confirm that by using a simple screwdriver test. Take your regular screwdriver and stick it into your lawn’s soil by hand.

Why Core Aeration Helps Lawn

Lawns get heavy use, such as acting as neighborhood playgrounds and racetracks. Kids and pets running around the yard can also lead to soil compaction. That said, your grass roots need air, water, and nutrients to grow thick, deep, and strong. When the soil becomes compacted, it will inhibit the flow of essentials that supports thicker, healthier tuff growth.

Excess lawn thatch and heavy organic matter buried under the grass surface can also starve the grass of essential elements. Therefore, the hollow tine core aeration will help alleviate additional compaction so air, water, and nutrients can reach grass roots.

If lawn grasses are deprived of their basic needs by compacted soil, they’ll struggle, especially in stressful situations such as heat and low rainfall, thus losing their healthy, rich color. The grasses will gradually thin and die out completely. If there’s no oxygen, water and nutrients will be inches away.

Other Methods of Aerating Your Lawn

Apart from plug aerators or core aeration, there are other methods of aerating available equipment. They include:

Spike Aeration

Spike aerators have hollow tines that penetrate the soil and remove small cores of soil. Spike aeration is quick, easy to install, and can be used on lawns with little maintenance. The spikes create holes for water and nutrients by pushing soil aside.

Spike Aeration
Image credit: https://cf-images.us-east-1.prod.boltdns.net/

Slicing Aerators

These are blades attached to a wheel, which slice through the lawn’s surface. This method is similar to the spike aerators in that it also removes cores of soil from your lawn. The slices will give rise to new shoots and roots, giving rise to thicker turf.

How to Aerate Your Yard

You can find lawn aerators, power rakes, and other power equipment at your local store, hardware stores, and some big-box retailers. You can also hire lawn service from equipment rental companies and lawn and garden stores. Here’s how to aerate your lawn:

Flag Utilities

Flag utilities or other pipes loosen the soil around those with a shovel. Remove plugs from holes, then drag the aerator behind you across your lawn. With space between each pass, turn over all of the soil that was brought to the surface. Replant grass seed or transplant seedlings as desired

Time Your Aeration Right

For best results, time your aeration to coincide with your lawn’s physiological stage of development. Late summer is the best time for quick relief from compacted soil, while late spring or early fall are ideal times for lawn restoration and strengthening. Aerate when the soil is soft, like after an irrigation cycle or a recent rainfall. 

This will allow the hollow tines to penetrate the soil easily, making it easier to do their job. Hollow and solid-core aerator tines will struggle to penetrate hard, dry soil, making the process less effective.

Be Thorough

Cover your entire lawn at least once and the second time at a cross angle. Pay attention to lawn surfaces with heavy foot traffic, driveways, and sidewalks because these sections will be more compacted. If your lawn is smaller, you may only need to do it once.

Forget the myth that if you apply a pre emergent herbicide on your lawn in the spring, it will destroy your herbicide barrier. This is not always true because aeration won’t affect crabgrass control or weed prevention.

What to Do After Aerating

After aerating, if possible, combine lawn aeration with other lawn care maintenance such as fertilizing, adding soil amendments, and overseeding. Water, fertilizer, and grass seed needs to get through the lawn surface into the soil where they can start growing grass roots. After aerating your lawn, let soil plugs or extra soil dry where they fall.

What to Do After Aerating
Image credit: https://peppershomeandgarden.com/

Core aerating will open the soil to allow water, fertilizer, and seed to move down in the soil for faster root growth. You can also help restore your lawn by application of fertilizer immediately after core aeration. Better yet, make your compost for this purpose.

FAQs on How to Use Core Aeration

When should you core aeration?

Core aeration can happen anytime, but the best time is usually in the spring and early summer or fall. It’s recommended to core aerate when there’s the most root growth.

Should you water before core aeration?

Yes, you should water one to three days before aerating. This is because the soils must be moist to help the machine penetrate through to remove soil plugs. Do not aerate overly soaked and completely dry soil because the aerator will pull out small soil cores from the lawn, which should be left to break down.

Final Thought on How to Use Core Aeration

As you can see, adding aeration to your annual task list will help you maintain your lawn and make it look more beautiful. Plus, you save money in the long run by having a healthy lawn.


The post How to Use Core Aeration appeared first on Kitchen Infinity.

Did you miss our previous article…
https://www.centrecountyfood.org/?p=465