If you’re looking for a beautiful aquatic plant to add to your garden, then water lilies and lotus are a perfect choice. However, if you want these plants to survive, it’s important that they get the right amount of sun and nutrients.
This article will teach you everything you need to know about growing water lilies and lotus in your garden. We’ll walk you through the steps required for growing these beautiful aquatic plants, from seedlings up to full-grown blooms.
By following this guide, you’ll soon enjoy the beauty of a well-kept pond filled with healthy water lilies or lotus flowers. Keep reading!
Types of Water Lilies
There are only two categories of water lilies. Water lilies produce thick green leaves known as lily pads that float on the surface of the water. Water lily flowers vary depending on the species.
Hardy Water Lilies
Hardy water lilies are those that can survive the environmental changes of a pond. They’ll be able to handle colder temperatures and fluctuating water levels as well as drought conditions. This is a key factor for those with an in-ground pond, as it’s almost impossible to keep standing water or a constant water level through hot summers.
Hardy lilies won’t produce flowers in the winter, but they’ll keep producing new pads and flowers each spring as long as their tubers remain below the freezing mark. Hardy water lilies thrive in USDA hardiness zones 3-11 and they come in shades of yellows, reds, pinks, whites, and pastel orange.
Tropical Water Lilies
Tropical water lilies thrive in warmer climates and can produce showy blooms through fall, even when cared for correctly. Tropical water lilies differ from hardy water lilies in many ways. They come in day blooming varieties and night-blooming varieties, while hardy water lilies are only day blooming varieties.

Image credit: https://ourfirstfloor.com/
Tropical water lily plants also have more fragrant and sumptuous blossoms than hardy water lilies. They also have longer stalks that hold the flower higher above the water surface, plus they tend to have larger lily pads than hardy water lily plants. Place them in the center of a container and the crown of the plant rest above the surface of the soil.
Types of Lotus
Nelumbo Nucifera
The Sacred lotus is a water lily that belongs to the genus Nelumbo. It is also called Indian Lotus, Sacred Lotus, and Bean of India. This perennial plant native to Asia grows from thick rhizomes in muddy or sandy shallow water bodies.
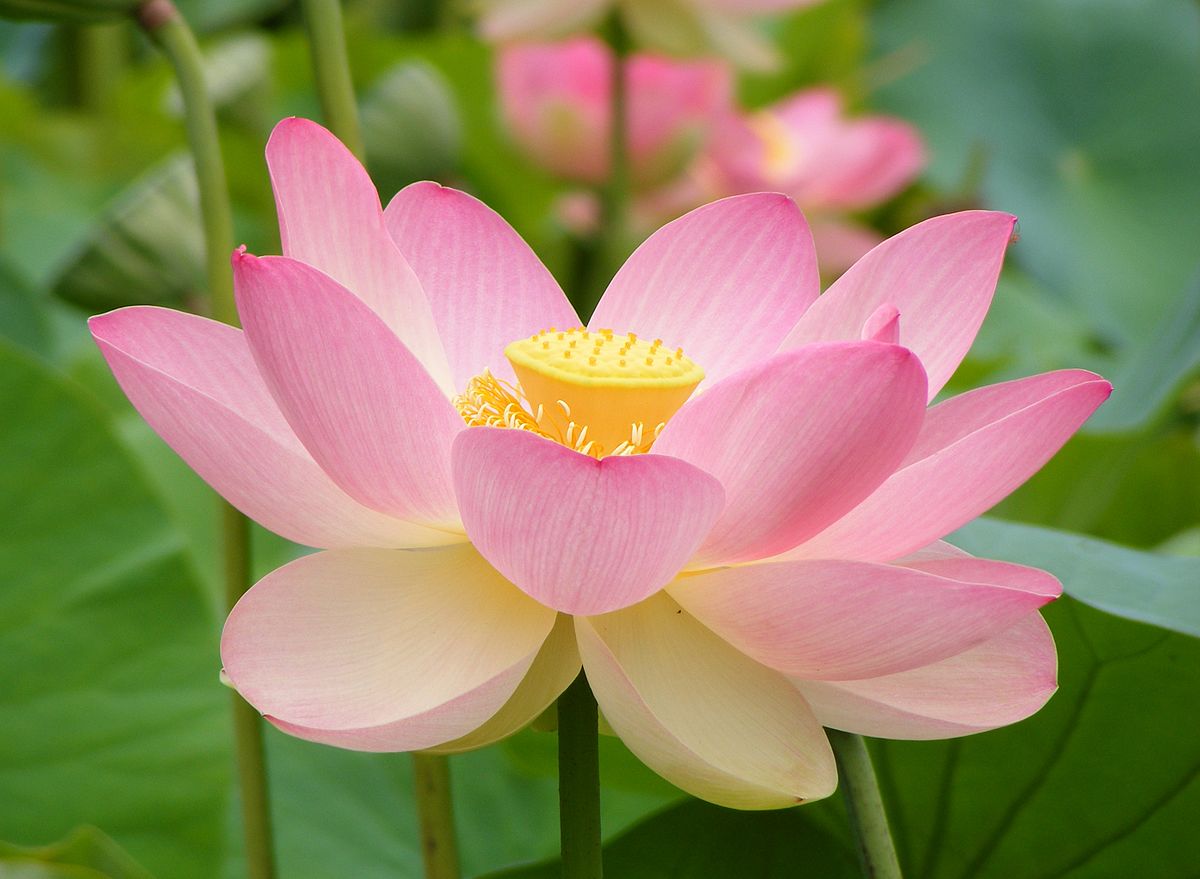
Image credit: https://upload.wikimedia.org/
The leaves are round to heart-shaped with pointed tips that grow up to 1 meter (3 feet) across. It has either pink or white flowers that sit atop long stalks.
Nelumbo lutea
The American lotus is an aquatic plant native to the Eastern United States that also grows in shallow water bodies like creeks, rivers, ponds, and marshes. It has large leaves and yellow flowers that bloom in midsummer.

Image credit: https://upload.wikimedia.org/
Caring for Water Lily and Lotus
Plant water lilies and lotus in a large plastic container or basket filled with garden soil and sand. This container must be large enough to accommodate the mature plant and provide room for roots and leaves to spread out. If possible, line baskets with burlap or landscape fabric to prevent soil from falling through the cracks.
:max_bytes(150000):strip_icc()/the-incomparable-waterlily-and-lotus-1403525-23-d732045142bb46adbc7e144eeb910dc6.jpg)
Image credit: https://www.thespruce.com/
Light
Water lilies and lotus plants tolerate a range of light conditions from full sun to partial shade. But make sure these plants get enough sunlight for at least four hours or six hours or more. Some lotuses won’t flower unless they get six hours of sunlight daily.
Water Lily and Lotus Watering
Both plants need plenty of water but still have good drainage. This allows the roots to absorb oxygen and the leaves to breathe without rotting or being attacked by fungus.
The best way to water? Soak thoroughly until you see water coming out of the pot’s drainage holes. Let it sit for ten minutes or so before draining the excess water. Water them less frequently, but do not allow the plant to dry out completely, or it will go into shock.
Soil Care
For soil requirements, always use topsoil that is made especially for pond plants. Make sure you test the soil pH first. Avoid using potting soil or heavy soil. In addition, do not use garden soil or peat moss, plus too much organic matter because some of these materials may float in the water. Organic matter may also make your newly planted seeds and tubers rot.
Planting your aquatic plants too high can cause hardy plants to freeze in the winter, while planting too low will prevent young plants from getting enough sunlight. Water lilies should be planted not less than 4 inches or more than 18 inches below the water’s surface, and lotus should be between 6 and 18 inches below the surface.
Temperature and Humidity Requirement
Both plants will be hardy if their tuberous rhizomes do not freeze. Plant them in containers so that the soil line is below the freeze line in your pool. Lotus flowers will be late to emerge in the spring because they prefer warm weather and grow once the water temperature rises to 70 degrees Fahrenheit.
Over winter, you can store water lilies by lifting the plant from the container and storing the rhizome in a plastic bag full of damp sand. You can also mix damp sand with peat moss and store it in an airtight container.
Water Lily and Lotus Fertilization
Use a good aquatic plant fertilizer to fertilize your plants. Fertilize plants once a month. Do not fertilize directly into the water because you’ll change the pH of the water and harm both plants and fish. Before applying fertilizers to the plants, follow the planting instructions and warning labels carefully.
Pruning Water Lily and Lotus Plants
Each flower on the water lily lasts three to five days, and they’ll open during the day and close at night. The flower will sink into the water once it’s finished. Seed pods form, and the ripe seeds fall in the soil below. Seed production is very costly to the plant, so make sure you clip off any yellow leaves and spent flowers throughout the growing season.
To ensure many blooms, cut the dying flowers below the surface and follow the stem down as it goes. You can cut it off or snap it with your finger. After that, clean off dead and dying leaves in the same manner. On the other hand, lotus dies at the end of the year, so cut them down to a few inches above the rhizome. If you’re growing lotus root as perennial, report it every three to four years with fresh soil.
Water Lily and Lotus Pests and Diseases Care
These aquatics have fine hairs, meaning insecticides with detergents and oils will harm and even kill them. Insects such as aphids, whiteflies, and spider mites cause problems and require insecticidal soap or other organic controls.
Slugs and snails are also an issue with these plants. You can remedy these insects by relocating plants away from the water’s edge.
Harvesting Water Lily and Lotus Plants
Wait until the flowers fade in the early fall and extract the seeds. Once the seed pods are dried, open them and remove the black or brown colored seeds. Store these seeds in a warm place until spring, when you plant them indoors for six to eight weeks before moving them outdoors once more.
How to Grow Water Lily and Lotus
Find a Sunny Location
Water lilies and lotus do best when they are placed in full sunlight. While placing these plants partially shaded can work, you’ll find that the flowers wilt quickly. Position your aquatic container in a bright location in your garden before planting water lilies.
Prepare Your Container
A wide and shallow container is best. When planting in a container, make sure you fill it with topsoil. Fill up to about an eighth of an inch from the top before adding water lilies or lotus seeds.
Clean Up Your Plants
Before planting your plants, check the tubes and remove the old leaves and thick, freshly old roots. This allows more of the plant’s energy to grow new roots, leaves, stems, and blooms. Also, take your time to learn how to clean your plants so you can apply it on some of your indoor and outdoor plants.
Plant Tubers
Plant the tuber against the side of the pot with the growing tip positioned upward and toward the center of the pot. Cover the base of the tuber with the topsoil and pea gravel to keep the soil in the container.
Submerge the Container
Submerge the container with your freshly planted water lily into the pond while leaving at least four inches of space between the top of the pot and the water’s surface. If the pond is deeper, pile rocks to elevate the container so that the top isn’t deeper than 18 inches beneath the surface of the water.
Water Lily and Lotus FAQs
re these aquatics edible?
Yes, not only the seeds of these plants are edible, but the leaves, flower buds, stalks, and roots are edible. They’re mostly used for decorative purposes and in lotions, sweet-scented perfumes.
How do you care for lotus in the winter season?
Take out the lotus container from the pond and place it in full sun during the spring season. Water the plant over the soil surface and return it to the pond in the early summer or fall season to prevent damage.
Final Thought on Growing and Caring for Water Lily and Lotus
As you can see, water lilies and lotus are easy to care for and grow with minimum effort. But it’s best not to keep them in submerged soil, instead keep the flowers floating on the water surface. Use a wide container of at least 16 inches for lotus and 18 inches or more for lily and enjoy your aquatic garden.
The post How to Grow and Care for Water Lilies and Lotus appeared first on Kitchen Infinity.
Did you miss our previous article…
https://www.centrecountyfood.org/?p=348