post

17 Best Christmas Decorations

Christmas is one of the most wonderful times of the year, but it can also be stressful for many people. It’s a time of year when it’s not always easy to get into the holiday spirit. The stress of getting everything ready for the big day can get in the way, and you might even miss out on some family fun along the way.

Finding the best Christmas decorations doesn’t have to be difficult or expensive. There are loads of great ways that we can help you enjoy your Christmas festivities this year. We’ve put together a list of the best Christmas decorations to ensure your home looks stunningly festive all through December. Read on!

1. Ceramic Christmas Tree Decorations

Finding the best Christmas decorations doesn’t have to be difficult or expensive.   You can opt for a green tree or bring a modern twist on the trend with a rose gold tree. The tree boasts removable and rearrangeable Christmas lights and tree toppers.


Image credit: https://i.pinimg.com/

Inside the ceramic structure, you’ll find a light bulb to provide a Christmassy glow. Kids love this Christmas decoration, and it’s sure to add a soft, warm light to any corner of your house.

2. Kurt Adler Christmas Decoration

The Kurt Adler Christmas decoration provides a bit of glitz and glam without being too over the top. This Christmas tree will become the most festive item in your house, and the perfect tree topper makes all the difference.

This best Christmas decoration won’t break the bank but will provide all the gold glitter needed to shine all season. The intricate die-cut pattern will let the light from your LED lights shine through for an impressive glow that fills the whole room.

3. Inflatable National Lampoon’s Christmas Vacation

This is a great decoration for those of us who work hard all year to enjoy a good time at Christmas. The inflatable presents and the large Griswold family all make this themed decoration one worth having. If you’re looking for interior Christmas decor, then this is the right choice.

4. Plush Christmas Gnome

These plush Christmas gnomes are perfect for kids. With the soft fabrics and cuddly characters, this is an interior decorating set that will make your child happy all season long. The plush isn’t just cozy; it’s also detailed with festive colors and patterns to keep them in a holiday mood from morning until night.

Plush Christmas Gnome
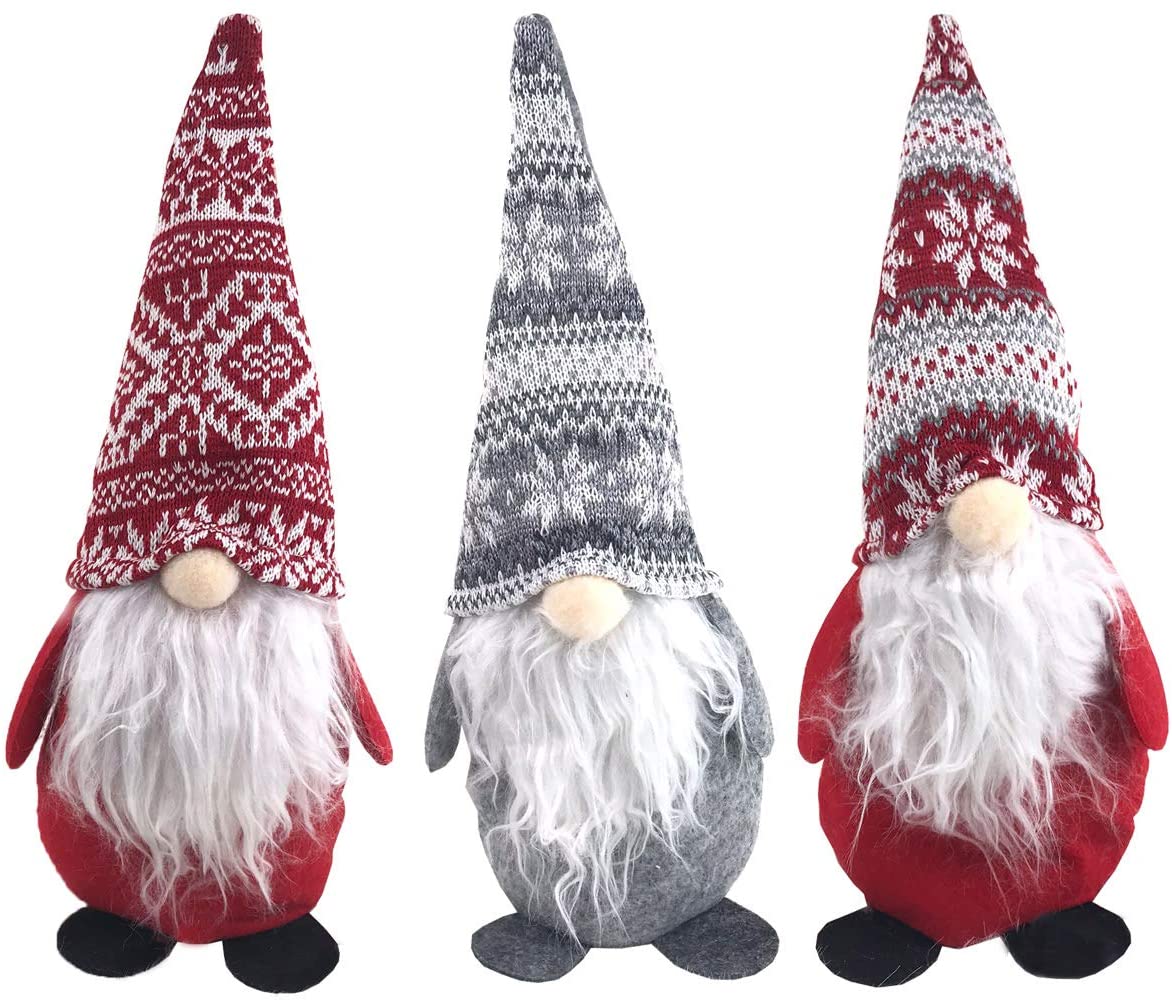
Image credit: https://m.media-amazon.com/

5. Pottery Barn Nottingham Faux Fur Plaid Throw

This is Pottery Barn’s best-selling plaid throw. It’s warm, luxurious, and the design with reindeers will fit in perfectly with your holiday decorating scheme. This faux fur rug can be used during all four seasons of the year to create a cozy atmosphere inside your home.

It’s made of 100 percent polyester, and Oeko-tex certified with faux fur on the other side. It doesn’t have any harmful chemicals and dyes. You can easily clean this festive throw pillow in your washing machine, and the product’s high yarn will retain its color after washing.

6. Advent Calendar

This wooden advent calendar is of notable quality, and it’s also very fun to build. Christmas countdown has never been so exciting before. This product features 24 pieces that you will have to put together to get the final product.

Once you’re done building this ultimate festive decoration, your home will feel like Santa’s workshop with its numerous hanging bells and baubles hanging everywhere. It’s simply not Christmas without an advent calendar counting down the days until Santa’s arrival.

7. Sea Team Christmas Ball Ornament Set

Preserve your holiday memories year after year with this set of 24 round decorations. It features a variety of designs, including reindeer, Santa hats, and snowflakes. Very festive and charming, the Ornament set is a versatile and affordable collection that will make your holiday feel infinitely more special.

Ornaments come in 86 sets, and each ornament set is crafted from eco-friendly shatterproof plastic. The sets come in 10 different colors, and each contains a similar pattern from glitter coated to mirror to design with small snowflakes. They’re great for a completely monochrome tree, and you can also buy a few packs to switch up your color scheme.

If you’re looking for a non-traditional feel, opt for pink or purple instead of the classic, red and green. But if you’re looking to mix up your ornamental bulbs and brighten up your tree, then this is the best Christmas decoration you should consider.

8. West Elm LED Light Bulbs

The best Christmas decoration of the year doesn’t necessarily have to be on top of your tree. If you want something more subtle that can provide some low-level lighting, then West Elm’s LED Light Bulbs is an economical and easy option to do this. They also come in a four-pack, so you can have some on the string or spread out around your house.

West Elm LED Light Bulbs
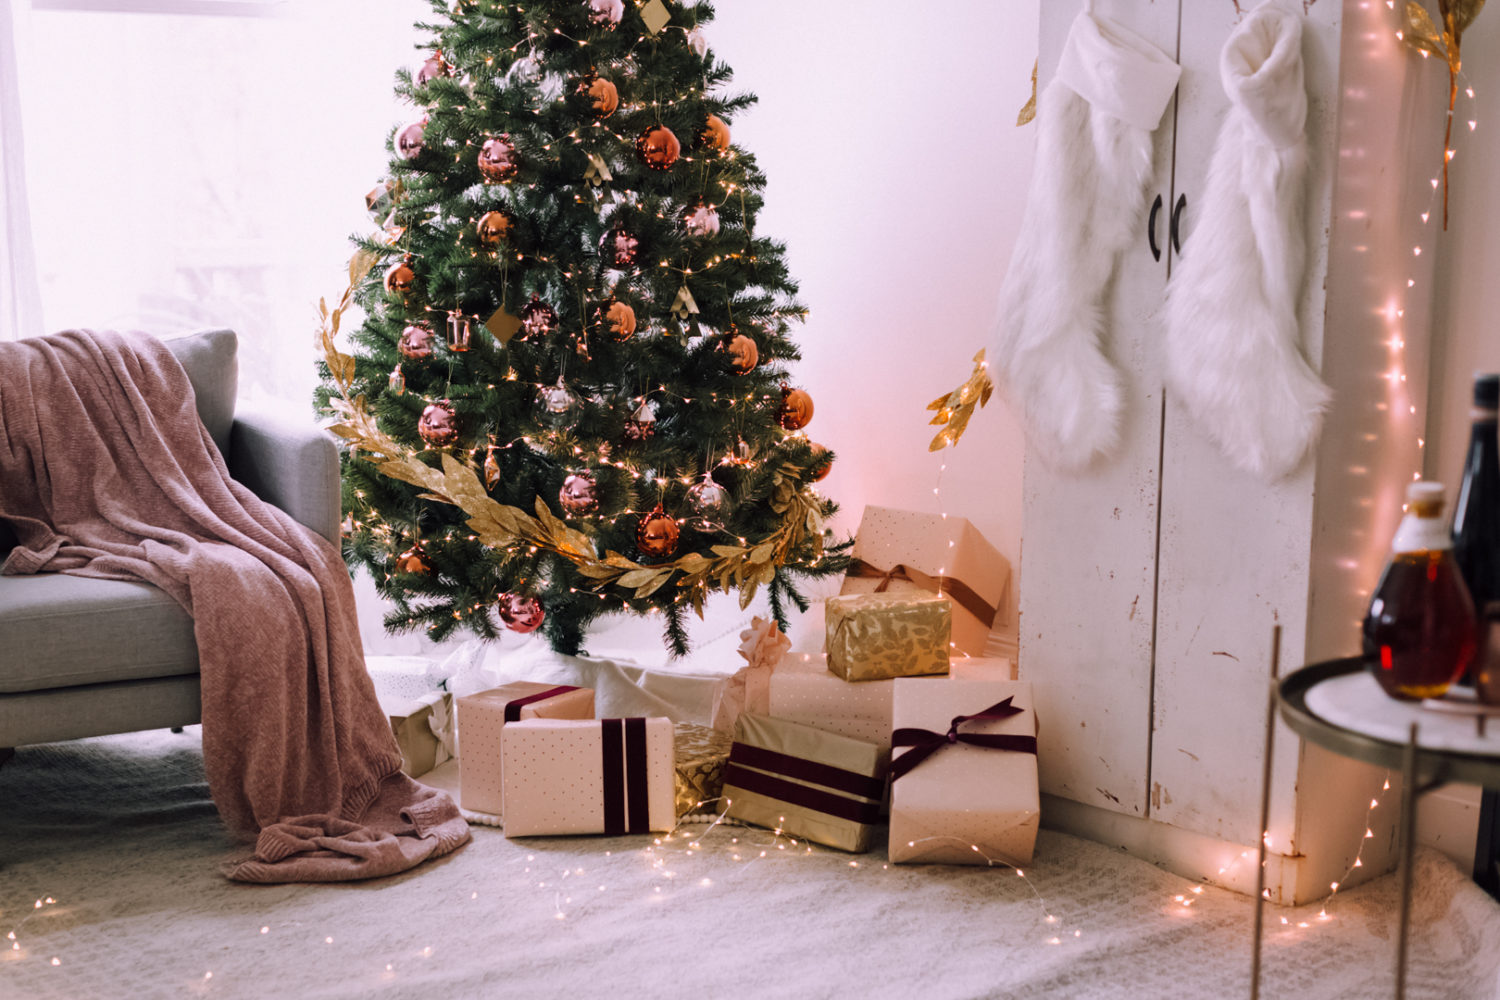
Image credit: https://christiannkoepke.com/

 This Boxwood wreath from West Elm offers the perfect base for ribbons, ornaments, and lights. It’s made from real boxwood leaves and artificially preserved, and it comes in either 16 or 20 inches and should be used indoors to maintain the vibrancy of the green. The charming wreath can add rustic flavor to any home.

If you’re looking for that joyful country feel during the festive season, then place this beautiful Christmas decoration on the brick wall or a window and enjoy the view.

9. Mina Victory Van Holiday Square Throw Pillow

Add a touch of holiday cheer to your home by placing this festive pillow on your couch or chair. Featuring a vintage map design and hand-drawn illustrations of cities, countries, and continents across the globe by New York artist Mina Victory, this throw pillow brings an interesting touch to any space.

It’s a great piece, especially if you’re working on a tight budget. It features a carefully stitched scene of a bright green Christmas tree and cherry red Volkswagen against a cream-colored backdrop. Plus, it’s a hand-hooked throw pillow that will spark joy and holiday cheer in your home.

10. Kunyida Unique Burgundy and Ivory White Knit Christmas Stockings

A set of three handmade knit stockings with burgundy, ivory, and white coloring. This is the perfect addition to your holiday decor this season because it can be used throughout the year to hold odds and ends around the house or even as a delightful accessory for an outfit.

If you’re looking for something stylish to leave for Santa and Christmas Eve, these stockings are the way to go. With the cable pattern and rich colors, these stockings are both affordable and high quality.

11. LTD Commodities Set of 6 Reindeer Tea Light Holders

A set of six reindeer tea light holders. These adorable animal candle holders will be a hit at your next holiday party, and they’ll make any occasion special. Each reindeer is made with care and precision to provide years of quality use. The antlers are removable, so you can easily pull them off for cleaning purposes, although we don’t recommend letting them get too dirty.

These woodland reindeer tea light holders are great for buffet tables, side tables, bookcases, and any place that could use a touch of ambient candlelight. If you’re worried about having an open flame around kids, they can hold any standard tea light, including LED tea lights. Their simplistic design will also fit any aesthetic.

12. Hanging Snowflake Decorations

Try to turn your living space into a winter wonderland with these hanging home decorations. The snowflakes are made of high-grade pearl paper, giving them an enticing shimmer, and are sturdy enough to pack up for next year. You can hang them on a window, entryway, and across the dining room table to create a wintery holiday backdrop.

Hanging Snowflake Decorations
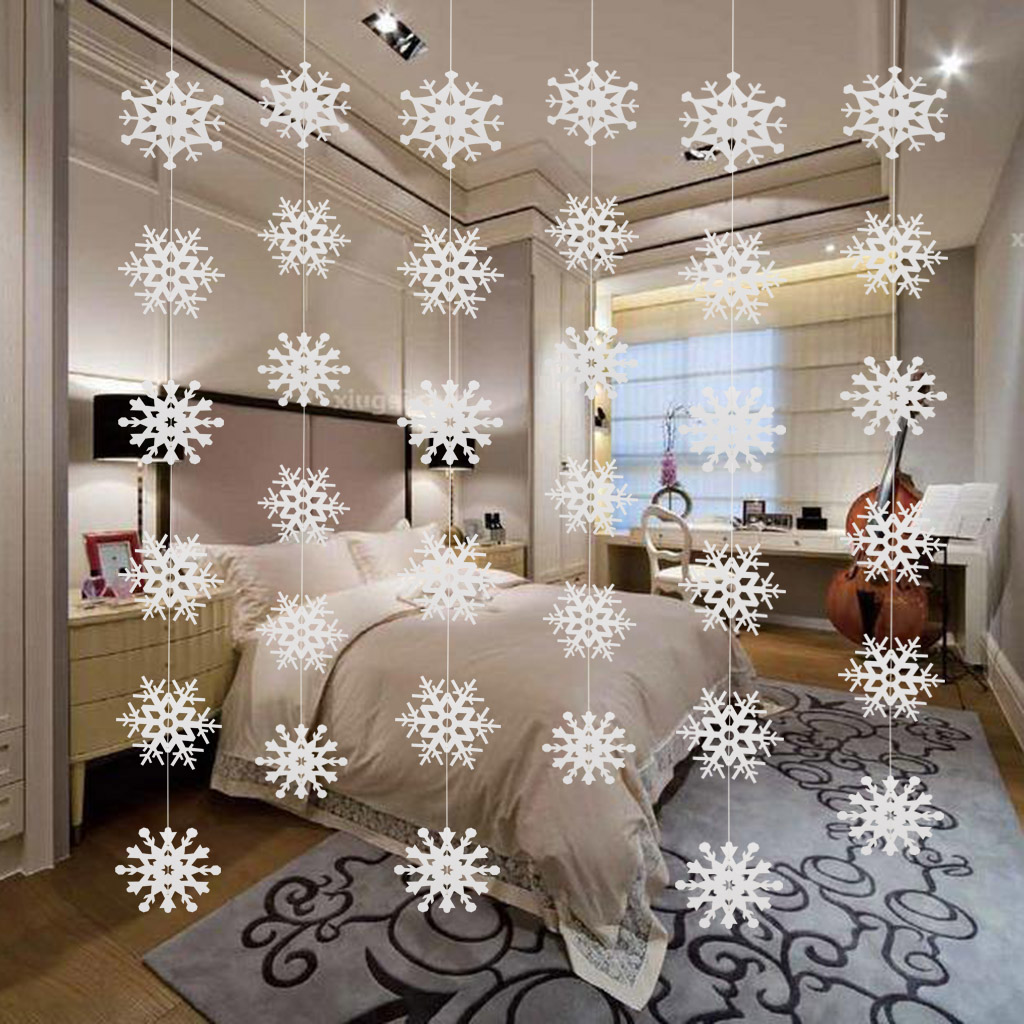
Image credit: https://i5.walmartimages.com/

13. Hashtag Home Snowman Globe with Penguins Inflatable

Add some holiday spirit to your front yard with this inflatable snowman from Hashtag. The large inflatable measures 8 feet tall, making it a great central character for an outdoor holiday scene. The snowman features an unusual but fun snow globe base. At night, switch on the LED light to illuminate the snow globe feature.

14. Outdoor Waterproof Flameless Candles with Timer

These flameless candles feature a realistic flickering flame and come in an elegant jar that can be used to decorate your fireplace for the holidays. With its waterproof exterior, this candle is great for outdoor use as well. Just put it on your covered patio or porch or by the poolside. It also comes with timers so you won’t have to worry about turning it off after the holidays.

These candles are an excellent choice to place on the dining table, credenza, windowsill, and outdoors. For more convenience, they come with a remote control to enable you to light up your Christmas display from across the room.

15. Roman Store Winter Scene Glitterdome

If you’re looking for a high-quality resin that you can use for several years, this is the one for you. With its LED lights, it can last up to 2000 hours without burning out. What’s more, the cardstock it comes on is fade-resistant and waterproof, so you don’t have to worry about inclement weather damaging your Christmas scene.

16. National Tree Company Pre Lit Artificial Mini Christmas Tree

If you’re in a tight space, then a mini Christmas tree can get you in the holiday mood without taking too much of your room. This pre-lit artificial mini Christmas tree from National Tree Company is ideal for bedrooms, dorm rooms, and apartments. This small tree comes ready and features built-in warm LED lighting to add to the holiday charm.

17. Pre Lit Frosted Berry Garland

The best way to add some holiday cheer. This pre-lit Christmas garland is an attractive choice for lining doorways, windowsills, and mantels. This realistic-looking Christmas decor is made from thick faux branches, pine cones, and red berry details to ensure your decor remains sturdy throughout the holiday season. Warm white lights also add a seasonal glow, making it a great addition indoors or outdoors-covered locations.

FAQs on the Best Christmas Decorations

Where should you buy Christmas decorations?

You can buy Christmas decorations from many market sites such as Amazon, Wayfair, and Walmart. Also, during colder months, you can never run short of these Christmas decorations, as many small shops will unveil their inventory once the fall rolls.

Can you make Christmas decorations?

Yes. Homemade Christmas decorations are simply adorable! Many people prefer to go the homemade route to save money and make their designs which is much more than you can ask for.

How long should you keep Christmas decorations up?

This differs just like any other decoration that hangs around your house for many days or weeks. However, it is best to follow your heart. If you do not like having the decorations up, then take them down.

Final Thought on the Best Christmas Decorations

As you can see, there are many best Christmas decorations that can please anyone. It just depends on your taste and your budget. Spice up your festive season with these creative ideas, and have a wonderful time.


The post 17 Best Christmas Decorations appeared first on Kitchen Infinity.

Did you miss our previous article…
https://www.centrecountyfood.org/?p=475

post

Carpet vs Hardwood Flooring Comparison

When it comes to home interior design, there are many options available. However, you’ll need to make the right choice to get the best results.  There are several types of flooring that can be used for your house interior design, but carpeting and hardwood are the most popular ones.

We’ve created this guide on carpeting vs hardwood flooring so that you can learn what factors may affect your decision when choosing between these types of flooring for your home interiors. So, if you’re replacing your floors and wondering how to choose between carpeting vs hardwood flooring, don’t worry. This article is for you.

Sustainability 

Carpets

Modern carpets are created by threading closely spaced loops of synthetic fibers through large sheets of backing material. There are also some natural fiber carpets made out of cotton and wool. Most carpets come in synthetic materials, and they’re manufactured in huge rolls where they can be bought in any quantity.


Image credit: https://modernize.com/

Hardwood Floor

Modern hardwood flooring comes in one of two forms. There is solid hardwood flooring, which boasts of solid wood that is milled from rough lumber from felled hardwood trees. The boards are smoothly sanded on the top surface and are left slightly rough at the bottom. 

Another hardwood flooring form is known as engineered hardwood flooring. This is the most economical type of modern wood flooring. Engineered wood flooring has the same tongue and groove construction and can be installed the same way as solid hardwood floors.

ppearance

Carpet

Appearance is another big difference between hardwood flooring and carpet. Both hardwood and carpet flooring comes in several styles that can meet any interior design, but carpet offers variety in color, texture, and feel. While there’s a substantial difference between hardwood and carpeted floors, carpets are more available in wood-like, making them more decorative. 

The great thing about carpet is that you can choose any color, making it a very versatile flooring choice as you can mix and match colors and shades based on other design choices in your room.

Hardwood

The look of hardwood flooring is easily recognizable, and its main appeal is natural wood tone colors and the appealing pattern of wood’s grain. Hardwood flooring creates a bold statement, and that’s why it’s called the prestige in flooring. When it comes to appearance, your style and the style of your house will determine the best flooring option.

Cleanliness and Care

Hardwood Flooring

Hardwood flooring is easy to care for and maintain with regular cleanups. This flooring type doesn’t require deep cleaning too often. While cleaning hardwood floors, it’s advisable not to use liquid cleaning products as these can warp and damage the natural fibers that make up the floorboards.

Hardwood Flooring
Image credit: https://res.feednews.com/

It’s also easier to spot dirt on hardwood floors than carpet floors, making it easier to notice when your floors need a wipe and a good cleaning. Hardwood floor cleanings include sweeping and vacuuming with a hardwood vac to maintain its appearance and condition. Periodic damp mopping with the wood cleaner will also remove deeper dirt and most stains.

Carpet

Cleaning carpet flooring seems daunting because stains can soak and settle permanently on the surface. To prevent stains, turn your rug over once a week to let the other side be exposed to sunlight and air for a day. Not doing so can create a musty smell forming on dark spots in your carpet, especially if you have pets at home. 

Carpet
Image credit: https://2avk1yzaj801re7g11oaur7q-wpengine.netdna-ssl.com/

Wipe spills immediately using a clean cloth with warm water or a commercially available solution. Regular vacuuming can also help get rid of dust, dirt, pollen, and other allergens. If left without vacuuming, these elements can get stuck in the carpet fibers causing unpleasant odors.

Durability and Maintenance

When considering the durability of your hardwood flooring vs carpet, there are different things that you must consider. Don’t only concentrate on the lifespan of the flooring type, but consider the impact of your daily life on it. Factors such as foot traffic, your habits, visitors, and pets will greatly influence the durability of your flooring.

Hardwood Floors

Hardwood is a durable material that can last 50 to 60 years if properly maintained. But they’re also more expensive in most cases. When evaluating cost, consider the initial price of the wood flooring and its installation and maintenance costs over time. Think about how much it costs to refinish hardwood flooring

Hardwood flooring will also last longer if you care for it properly, both by taking good care of it and making sure that you clean up spills quickly. Hardwood floors can also warp when exposed to too much liquid and can dent and scratch from furniture movement and shoe traffic.

Carpet Flooring

Carpet is a more forgiving floor type. As long as you deal with spills immediately and frequent vacuuming, you won’t have to worry about dents and scratches. However, carpeting still does need occasional professional upkeep, such as cleaning and re-stretching. Occasional professional cleaning service can also extend the life of your carpet. 

The best flooring type for durability and maintenance is hardwood flooring because it is made to last and does not need any professional upkeep. Even if you do manage to inflict some damage, hardwood flooring can be refinished or patched, unlike carpeting which has to be completely replaced when damage is done.

Cost and Installation of Carpet and Hardwood Flooring

Hardwood

Professionals usually do hardwood flooring installation because of its weight and intricacy. You will need to foot the bill for this aspect of the project, too, as well as for upkeep in general. A DIY installation can save you money and time, but it can cause you some additional cost if not properly installed.

Hardwood
Image credit: https://diy.sndimg.com/

Fortunately, solid hardwood flooring and engineered hardwood flooring products are pre-finished in the factory, but you’ll have to pay more to have them pre-finished. Solid hardwood floor costs start at around $4 per square foot and go up from there. And on average, hardwood floors cost about $8 per square installed.

Carpet

Installation of carpeting can be done yourself or by a professional at your request. Carpet padding is about an inch thick, and if you purchase high-quality padding, it will last the life of your carpet. It will cushion your feet from bumps in the floor and keep the carpet fibers uniform and neat-looking. 

Carpet
Image credit: https://www.timberlinehouston.com/

The most convenient flooring for cost and installation is carpet flooring because it can be pulled back to install underlayment for hardwood flooring. It’s also cost-effective compared to hardwood flooring.

For example, perfectly acceptable carpeting may be available for less than $1 per square foot installed. The cost can also run as high as $20 per square foot.On average, most carpets purchased at home centers cost about $3 per square foot, while solid hardwood flooring starts at around $4 to $8 per square foot installed. Also, the cost of professional installation is higher on hardwood floors.

Resale Value

Hardwood

Most homeowners prefer having hard flooring surfaces such as hardwood and ceramic tiles because they’re easy to clean and tend to hide flaws the best. Even estate agents agree that when it comes to carpet or hardwood flooring, hardwood is likely to increase the resale value of your home. Hardwood is a natural material and is much longer-lasting than carpet.

Carpet

Carpeting tends to wear down over time and may show signs such as wrinkles, spots and footprints after a few years of use. All these tend to lower the resale value of the property which you’re trying to sell. Also, new carpet can also lead to home improvement than an old carpet.

They could also be a turn-off for potential homebuyers who’d rather have hardwood that’s clean and in good condition. Therefore, the flooring type with the best resale value is hardwood flooring. Hardwood resale value wins even when you ask real estate agents in the market.

Radiant Flooring

Both carpets and hardwood floors can be installed with radiant heating. And because of the insulating properties, you must be careful when choosing both carpet and radiant heat systems that can work together. In some cases, you may need to set the radiant heat system higher for the carpet to warm sufficiently.

On the other hand, hardwoods work with many radiant heat systems because they transmit heat with little loss. But it’s not recommended to use radiant floor heating under a plank wider than three inches.

Environmental Impact

Carpet

Some natural carpets such as wool have less impact on the environment than synthetic carpeting. Wool and other natural fibers are renewable and biodegradable. Furthermore, most synthetic carpets are made from petroleum which is not renewable and is a non-biodegradable material. 

They can break down unevenly, releasing volatile organic compounds as they age. The downside of natural fibers is that they cannot be recycled, and when disposed of in landfills, they will take a very long time to decompose.

Hardwood Flooring

If you’re concerned about the environment and want renewable flooring, then hardwood flooring is your best option. Hardwood is a renewable material, especially if you ensure responsible harvesting and planting of trees.

Homeowners who are looking for more sustainable flooring material can look to hardwood flooring as their best option. Most hardwoods are also recyclable, which means they won’t sit in landfills for decades.

Water and Heat Resistance

Carpet

The synthetic fiber materials used in most modern carpets make them highly resistant to water damage. It’s also important to prevent water from seeping down into carpet padding, which can cause mold and mildew growth. This is especially important with groundwater damage from flooding or leaky roofs.

Additionally, tile carpets can be damaged by heat, such as burning cigarettes and hot pans. Some carpet materials can also emit toxic gases if a serious home fire ignites.

Hardwood Flooring

Wood flooring is not recommended in any location with constant water and moisture. It’s also not recommended for below-grade installation against a concrete slab because contact with concrete can cause swelling. Wood flooring materials also emit formaldehyde gas over time. However, engineered wood flooring may be stable to water and moisture.

Engineered hardwood flooring has a moisture barrier to stop water from seeping into the subfloor before it ever reaches your main joists below. You can also install engineered hardwood flooring directly against concrete slabs that are dry and free of cracks or joints where water could infiltrate.

Comfort and Sound

Carpet

With its soft fibers and insulating pad, carpeting is more comfortable to walk on than hardwood floors. High-pile carpeting is soft and thick underfoot, while lower-pile carpeting feels more like an even surface. Carpet can be made from various materials, including nylon, wool, cotton or synthetic fibers. 

The sound absorption of carpet comes from the insulating pad underneath the carpet fibers, but that means the carpet is better at trapping sound inside the house.

Hardwood Flooring

Hardwood floors are loud compared to carpet, especially when installed on the upper levels; the people below will hear footsteps and other sounds from above. The hardwood floors amplify the sound of children running on the upper levels because it’s a harder surface with no insulation capabilities.

Hardwood floors are less comfortable underfoot, but they have a timeless elegance that carpeting can’t match. Also, since hardwood floors are laid in strips, any surface imperfections can be covered up with a strip of wood over the problem area or damp mopped to free the particles.

FAQs on Carpet and Hardwood Flooring Comparison

Which type of flooring is suitable in an active environment?

High-quality carpets can sustain high foot traffic if you keep them level and smooth to avoid irregular wear.

Which one is the warmer flooring type?

Carpeting is warmer than wood flooring, but only when the carpet is not glued directly onto concrete. Wood floors, on the other hand, allow cold air to move through between individual boards.

Final Thoughts on Carpet vs Hardwood Flooring Comparison

As you can see, there’re many factors you need to consider when choosing between carpet and hardwood flooring. The answer on which one is better depends heavily on your particular situation, budget, and taste.


The post Carpet vs Hardwood Flooring Comparison appeared first on Kitchen Infinity.

Did you miss our previous article…
https://www.centrecountyfood.org/?p=470

post

How to Use Core Aeration

Maintaining a healthy lawn is hard, but there are a number of steps you can take to achieve this. You need to fertilize your grass, mow it at the right height, and water it regularly. But if nutrients don’t reach the soil underneath your turf, you’re going to have problems with thatch build-up and nutrient loss.

Lawn aeration helps improve drainage by removing plugs from the top layer of soil, allowing air and water in a while, helping reduce soil compaction below ground level. It also brings up minerals that were trapped beneath the soil surface into contact with roots for better absorption.

If you’re looking for ways to achieve and maintain a beautiful lawn, then this article will help you learn more about using core aeration. We’ll discuss why it’s needed and what it involves. Read on!

What is Core Aeration?

Core aeration is one of the best practices for lawn care because it improves overall health and appearance while reducing weed growth potential. The process involves using an aerator machine or core aerating tool which removes plugs from two inches deep or more depending on how long you run the machine over your lawn’s surface. This will help loosen compacted soil and allow water and air to reach the lawn’s roots better.


Image credit: https://www.fairwaygreeninc.com/

What is the Best Time for Core Aeration?

For cool season grasses, core aeration should be performed in early fall or early spring. For the warm season grasses, core aeration should be done in late spring to early summer. When aeration combines with growth, grasses recover quickly and fill in areas where aerator equipment exposes soil.

When Do Lawns Need Aeration?

All lawns can benefit from core aeration, especially when the soil is compacted. Lawns in heavy shade or with thatch build up are great candidates for core aeration. Any time grass has difficulty growing or staying healthy due to compaction or poor drainage, this indicates that core aeration might be needed. Soils high in clay also benefit from core aeration.

Also, note that dethatching and aerating are two different things, although they work in handy. Thatch is the layer of decomposing organic matter that forms at the lawn surface between soil and grass. The thatch works like compaction to block the passage of air, water, and fertilizer to the roots.

Dethatching removes some grass blades while aerating opens up channels in the soil to allow air, water, and nutrients to reach grasses’ root systems. Aggressive spreading grasses like Kentucky bluegrass in northern lawns and Bermuda grass down south form more than any other grass type.

If your grass looks stressed and your soil is hard to the touch, you may have compaction problems. You can confirm that by using a simple screwdriver test. Take your regular screwdriver and stick it into your lawn’s soil by hand.

Why Core Aeration Helps Lawn

Lawns get heavy use, such as acting as neighborhood playgrounds and racetracks. Kids and pets running around the yard can also lead to soil compaction. That said, your grass roots need air, water, and nutrients to grow thick, deep, and strong. When the soil becomes compacted, it will inhibit the flow of essentials that supports thicker, healthier tuff growth.

Excess lawn thatch and heavy organic matter buried under the grass surface can also starve the grass of essential elements. Therefore, the hollow tine core aeration will help alleviate additional compaction so air, water, and nutrients can reach grass roots.

If lawn grasses are deprived of their basic needs by compacted soil, they’ll struggle, especially in stressful situations such as heat and low rainfall, thus losing their healthy, rich color. The grasses will gradually thin and die out completely. If there’s no oxygen, water and nutrients will be inches away.

Other Methods of Aerating Your Lawn

Apart from plug aerators or core aeration, there are other methods of aerating available equipment. They include:

Spike Aeration

Spike aerators have hollow tines that penetrate the soil and remove small cores of soil. Spike aeration is quick, easy to install, and can be used on lawns with little maintenance. The spikes create holes for water and nutrients by pushing soil aside.

Spike Aeration
Image credit: https://cf-images.us-east-1.prod.boltdns.net/

Slicing Aerators

These are blades attached to a wheel, which slice through the lawn’s surface. This method is similar to the spike aerators in that it also removes cores of soil from your lawn. The slices will give rise to new shoots and roots, giving rise to thicker turf.

How to Aerate Your Yard

You can find lawn aerators, power rakes, and other power equipment at your local store, hardware stores, and some big-box retailers. You can also hire lawn service from equipment rental companies and lawn and garden stores. Here’s how to aerate your lawn:

Flag Utilities

Flag utilities or other pipes loosen the soil around those with a shovel. Remove plugs from holes, then drag the aerator behind you across your lawn. With space between each pass, turn over all of the soil that was brought to the surface. Replant grass seed or transplant seedlings as desired

Time Your Aeration Right

For best results, time your aeration to coincide with your lawn’s physiological stage of development. Late summer is the best time for quick relief from compacted soil, while late spring or early fall are ideal times for lawn restoration and strengthening. Aerate when the soil is soft, like after an irrigation cycle or a recent rainfall. 

This will allow the hollow tines to penetrate the soil easily, making it easier to do their job. Hollow and solid-core aerator tines will struggle to penetrate hard, dry soil, making the process less effective.

Be Thorough

Cover your entire lawn at least once and the second time at a cross angle. Pay attention to lawn surfaces with heavy foot traffic, driveways, and sidewalks because these sections will be more compacted. If your lawn is smaller, you may only need to do it once.

Forget the myth that if you apply a pre emergent herbicide on your lawn in the spring, it will destroy your herbicide barrier. This is not always true because aeration won’t affect crabgrass control or weed prevention.

What to Do After Aerating

After aerating, if possible, combine lawn aeration with other lawn care maintenance such as fertilizing, adding soil amendments, and overseeding. Water, fertilizer, and grass seed needs to get through the lawn surface into the soil where they can start growing grass roots. After aerating your lawn, let soil plugs or extra soil dry where they fall.

What to Do After Aerating
Image credit: https://peppershomeandgarden.com/

Core aerating will open the soil to allow water, fertilizer, and seed to move down in the soil for faster root growth. You can also help restore your lawn by application of fertilizer immediately after core aeration. Better yet, make your compost for this purpose.

FAQs on How to Use Core Aeration

When should you core aeration?

Core aeration can happen anytime, but the best time is usually in the spring and early summer or fall. It’s recommended to core aerate when there’s the most root growth.

Should you water before core aeration?

Yes, you should water one to three days before aerating. This is because the soils must be moist to help the machine penetrate through to remove soil plugs. Do not aerate overly soaked and completely dry soil because the aerator will pull out small soil cores from the lawn, which should be left to break down.

Final Thought on How to Use Core Aeration

As you can see, adding aeration to your annual task list will help you maintain your lawn and make it look more beautiful. Plus, you save money in the long run by having a healthy lawn.


The post How to Use Core Aeration appeared first on Kitchen Infinity.

Did you miss our previous article…
https://www.centrecountyfood.org/?p=465

post

Types of Leaf Arrangements

We all know that the arrangement of leaves in a stem is called phyllotaxy, but most people have no idea what this means. Most basic flowering plants have three basic types of arrangements which include alternate, opposite and whorled when it comes to leaf arrangements, but there are also other leaf arrangement types you should know about, but these are the basic ones.

Leaf arrangement is a key characteristic on which plant taxa are classified. Monocots, dicots and gymnosperms have different types of arrangements. This guide is an easy-to-understand explanation of the different types of leaf arrangements and how those affect plant taxonomy.

Structure of a Typical Leaf

Each leaf has a leaf blade called the lamina, which is also the widest part of the leaf. Some leaves are attached to the stem by petiole, while others do not have petiole and are directly attached to the plant are called the sessile leaves. Leaves also have stipules, which are small green appendages found at the base of the petiole. 


Image credit: https://cnx.org/

Most leaves also have a midrib that travels the leaf’s length and branches to each to produce veins of vascular tissue. The vascular tissue forms veins within each leaf. And the edge of the leaf is called the margin. The arrangement of veins in a leaf is called a venation pattern. Monocots and dicots differ in their venation pattern.

Monocots have parallel venation in which veins run in straight lines across the length of the leaf without converging. While the veins in dicots have a net-like appearance, forming a pattern called reticulate venation. One example of a plant with dichotomous venation is the ginkgo biloba tree.

lternate Leaf Arrangement

Alternately arranged leaves produce one leaf per node. The leaves alternate from side to side. For example, your houseplant may have two or three leaves in one spot on the stem, and then in another spot, there are two or three leaves, but they’re opposite each other. 

Alternate Leaf Arrangement
Image credit: https://www.thespruce.com/

In alternate leaf arrangement, there is one leaf per plant node. Examples of trees and plants with this leaf arrangement include blackberry, black walnut, sweetgum, smoke bush, ninebark, and Japanese zelkova. Note that plants with alternate and spiral leaf arrangements have only one leaf per node.

Opposite Leaf Arrangement

The opposite leaf arrangement is when a plant has two leaves growing out of the same node. The two leaves are on either side of each other, and there is no space in between the leaves. For example, your houseplant may have three or four leaves growing out of one spot on the stem and then another group of three or four leaves a little further down the stem. 

The leaves in this example would be opposite each other. Examples of plants with opposite leaf arrangements include maple leaves, Olive trees, fringe trees, ash trees, and viburnums.

Whorled Leaf Arrangement

A whorled or verticillate arrangement is a plant with three or more leaves growing out of each node. In this pattern, there are several leaves coming from one spot on the plant stem. In some cases, it may look like a circle of leaves growing from a single spot on the stem.

Whorled Leaf Arrangement
Image credit: https://qph.fs.quoracdn.net/

Examples of plants with whorled leaves include mountain laurel, Japanese clethra, blackboard trees, redvein enkianthus, panicle hydrangea, and lemonwood. Some can have both opposite and whorled leaves throughout the plant.

Rosette Leaf Arrangement

Rosettes are often referred to as basal rosettes because they are found at the base of the plant, around the stem. The basal leaf arrangement occurs when one central leaf emerges from the ground to form a circular shape. Examples of rosettes occur in acaulescent plants, such as common dandelions in the sunflower or aster family. 

These acaulescent plants have a stem, but the internodes are greatly contracted with spiral alternate arrangement leaves. Biennial plants such as carrots and poison hemlock in the carrot family produce a basal rosette in the first year of growth. It’s then followed by the production of the flowering stem with alternate leaves in the second year.

Other examples of rosette leaf arrangements include liverwort and hens and chicks. Rosette leaf arrangement is the most common type of leaf arrangement in monocots, with grasses being a prime example. This type of arrangement occurs when leaves are produced around the stem at the same point, thus creating what appears to be a single circular leaf structure below ground level.

Perfoliate Leaf Arrangement

In this arrangement, the stem is completely wrapped or buried around its support. Leaves of this type are arranged in a circle with their bases adhering to the petiole and the blade expanding away from the plant center. A good example of perfoliate leaf arrangement is found in Trillium grandiflorum, commonly known as white wake-robin. 

Silphium perfoliatum is also a good example of the basal connate fusion of leaves to achieve perfoliate condition. The upper cauline leaves of henbit in the mint family are called sessile leaves.

Distichous Leaf Arrangement

In this type, the leaves are arranged in two opposite rows on either side of a stem. In other words, they grow along two opposite sides of the shoot axis at right angles to each other. Distichous leaf arrangement is common in monocotyledons, especially grasses and sedges groups. 

The lower side is called adaxial, and the upper side is called abaxial. The adaxial surface of a leaf is the surface closest to the axis, and the abaxial surface of a leaf is furthest from it. This arrangement can also be seen in species such as Agave sisalana, where all leaves grow around the stem in vertical rows.

Basal Leaf Arrangement

All the leaves arise from the base of the plant. Perennial plants are trimmed back to new basal foliage once in a while, which leads them to grow new leaves that can be located at the base. Perennials with basal leaf arrangement include harebell, whorled stonecrop, yarrow, and oxeye daisy.

Coniferous Leaf Arrangement

Coniferous leaves thrive in cold environments. Their leaves are reduced in size and needle-like in appearance. The needle-like leaves have sunken stomata and a smaller surface area to conserve water. 

There are only two major types of coniferous leaf arrangements: Monocephalus (single head) leaves are arranged in spirals around the plant stem, while Flabella (leaf structure) leaves grow in spiral patterns with more than one head. Conifers that follow the monocephalous pattern include white pine, European larch, and Canadian hemlock.

Conifers that follow the flabella pattern include blue spruce, Norway pine, and Japanese red pine. Aquatic plants also have coniferous leaves with wide lamina that can float on the water surface, plus a thick waxy cuticle on the leaf surface to repel water.

FAQs on Types of Leaf Arrangements

What is the leaf arrangement?

This is the arrangement of leaves on an axis.

What are palmate leaves?

A palmately leaf compound has its leaflets radiating outwards from the end of the petiole like fingers off the palm of a hand. Examples of plants with palmately compound leaves include poison ivy, familiar house plant, and umbrella plant.

Final Thought on Types of Leaf Arrangements

As you can see, there are so many types of leaf species, and each species has a characteristic leaf arrangement. The leaf arrangements also vary from one plant to another of the same species. It is important for you to know the common types of leaf arrangements to easily identify and differentiate them without hassles.


The post Types of Leaf Arrangements appeared first on Kitchen Infinity.

Did you miss our previous article…
https://www.centrecountyfood.org/?p=461

post

Reasons Why Orchids Won’t Bloom and How to Fix Them

Orchids are beautiful and exotic, but they can also be frustrating if you’re trying to grow them.  One of the most common problems people have with orchid growing is that their plants won’t bloom. It’s very disappointing when your plant doesn’t produce flowers because it’s such a rare event.

If you love orchids, this guide will help you get the most out of your investment in these stunning plants.  Even if it hasn’t flowered for years, there are still things that can be done to encourage blooming. Orchids are one of those flowers that require very specific care, so they don’t wilt and die on you before they even get a chance to bloom. Below are reasons orchids won’t bloom.

Insufficient Light

If you want your orchid to rebloom, try moving it near a brighter location. Orchids need at least 12 hours of bright light so they can survive and grow. You should learn how to care for your orchids indoors so they can grow well and bloom.


Image credit: https://i1.wp.com/

To ensure they get enough sun, there are different places to put them in the house, but the ideal place is by a window to get good sunlight exposure. It will also help if you rotate them once in a while so that all sides get enough light. Move your orchid to a place where it gets a few hours of direct morning and afternoon sun.

This will ensure the plant gets enough energy to make a spike with lots of flower buds. Dendrobium orchids and cymbidium orchids are also orchid varieties that require bright light and not direct sun. Lack of sufficient light is one of the reasons why orchids fail to bloom, so if you plant indoor orchids, you may try to grow light to achieve flowers.

Getting Too Much Light

If you’re trying to grow your orchid in direct sunlight, it may die. However, too much shade can also be a cause of failure orchid bloom. Indirect light or morning sun is best for most orchids, and if the light is bright where you live, go ahead and put your plant in direct sunlight. Avoid excess sunlight for the best-blooming orchids.

If you also place your orchid in full sun, you’ll see severe symptoms such as sunburned leaves, and an overabundance of artificial light can also suppress blooming. In addition to cooler nighttime temperatures, the shortening days of autumn can signal an orchid to form buds.

If you’re keeping an orchid indoors, in a room where the light stays 24 hours a day, then your orchid is missing an important natural cue. If you’re using artificial light, then use a timer to simulate the cycle of natural daylight and darkness.

Overwatering

Overwatering is most often the cause of orchids’ failure to bloom. Just like humans, orchids need oxygen to survive. Excess water displaces oxygen in the potting media, starving roots and suppressing blooms. Most orchids need to dry out between watering, and you should allow them to have wet feet by allowing water to saturate in the root zone.

Overwatering
Image credit: https://imagesvc.meredithcorp.io/

Orchids growing in the right kind of potting mix will rarely suffer from overwatering. Signs of overwatering include roots turning brown, while wrinkled leaves can be a sign of too little water or too much water. Don’t wait to see a pot of muddy mix and a dying orchid; instead, give your orchid adequate care while it’s in bloom and out of orchid bloom.

Varying Temperature

Orchids like to be warm and relatively dry during the day, but they require a drop in temperature at night. Orchid flowers need bud building overnight temperatures (under 10 degrees Celsius). For example, Paphiopedilum orchids need temperatures of 70 to 80 degrees during the day and 50 to 60 degrees at night. Warm temperatures between 20 and 25 degrees Celsius will encourage buds to form on your orchid flower spikes.

Cooler conditions can prevent your plant from forming buds. It is possible to have too much of a good thing if the temperature stays above 25 degrees Celsius during the day and night, as your plant will stop flowering. Try to expose your orchids to nighttime temperatures 10 degrees cooler than daytime temperatures for two weeks at the start of the orchid’s growing season.

Orchids Need Proper Nutrition

If you fertilize your plant too much, the excess nutrients can build up in the potting media and cause your orchid to bloom. You also need to feed your orchid well during its flowering season. Give it a regular fertilizer that has trace elements, which will help promote bud formation. But also be careful because too much fertilizer can stop your plant from blooming.

Of course, orchids are not heavy feeders, but an orchid living in the sterile inorganic potting mix may need a nutrient boost for its best performance. The best fertilizer to use is a urea-free fertilizer that provides nitrogen even in the absence of microorganism activity common in rich garden soils.

Moth orchids, in particular, initiate blooming spikes in response to a month and cool nighttime temperatures. At home, you have two options to encourage blooming. These options include keeping your orchid near a bright window at night in the early fall, keeping air-conditioning low during the day, and turning it up at night.

Roots Need Attention

Most orchid growers find it tricky when it comes to repotting orchids. When your orchid media begins to break down, the orchid roots can suffocate from lack of oxygen. In addition, some orchids will resent having their root zone disturbed, and they’ll refuse to bloom for six months to a year after repotting.

Roots Need Attention
Image credit: https://i2.wp.com/

In order to determine whether your orchid needs to be repotted, evaluate the root system and not foliage. If you see the orchid roots turning brown and the planting material resembling garden soil in its density.

Also, if you see more than two roots creeping over the edge of the pot, it may be time to repot. You can also divide your orchid plant to maintain blooming vigor.

Know Each Season of Your Orchid Variety

Each orchid type has a time of the year when it will naturally bloom. It may not be the same season that the orchid was blooming when purchased since nurseries can force orchids to bloom off-cycle. Many orchids bloom in the fall, winter, and spring.

Knowing the season that your orchid bloom will save you the frustrations of waiting for it to bloom. For example, Phalaenopsis orchid grows new leaves in the summer and early fall and sets a bloom spike in the late fall. Most Phalaenopsis orchids are known for blooming off-season for many reasons, but many will follow this pattern.

After you’ve identified your orchid, make sure you learn about its blooming cycle. Vanda orchids, for example, bloom two to three times a year, with each bloom cycle lasting up to six weeks. On the other hand, popular cattleya and cymbidium orchids only bloom once a year, but they’re very easy to maintain, making them popular choices for novice growers.

Underwatering

Underwatering is one of the most common reasons orchid plants won’t bloom. The best way to avoid this problem is to water your orchid regularly, but don’t over-water it. Water generously during spring and summer season but taper off as fall starts to set in. Stop watering altogether when winter begins because this will help your orchid properly rest.

You can test the moisture of your orchid’s medium by pushing your finger into it. If you feel any moisture, hold off on watering until the surface is dry. Remember not to water again until the top layer is dry because this will cause overwatering and root rot.

To prevent underwatering, mix water with some water-soluble fertilizer at the same strength you’d normally use when feeding your orchid. Water generously, but ensure that excess water drains away from the plant’s roots before drying up.

Cut Spent Flower Spikes for a Stronger lant

After your moth orchid has finished blooming, snip off the flower spike. An orchid needs to rest after flowering to build up its energy, so don’t fertilize your orchid for at least a month after it blooms.

Cut Spent Flower Spikes for a Stronger plant
Image credit: https://images.saymedia-content.com/

After this waiting period, you can feed your orchid with a balanced 20-20-20 fertilizer once every three weeks to keep it happy and healthy. Note that some orchid species and hybrids rebloom on old spikes. You can also contact the American orchid society or contact your seller to get a replacement or refund.

FAQS on Reasons Why Orchids Won’t Bloom and How to Fix Them

How long does it take an orchid to rebloom?

Phalaenopsis orchids take a month or several months to rebloom, while most varieties bloom annually.

Why is the orchid not flowering?

If your orchid is not flowering, improper light exposure, incorrect potting media, and overwatering are the most common reasons.

Why did my Phalaenopsis stop blooming?

Phalaenopsis stopped blooming because of root rot which can be caused by too much water or cold conditions.

Final Thought on Reasons on Why Orchids Won’t Bloom and How to Fix Them

If you perform all these steps religiously, your orchid might begin blooming again in no time and you’ll love your gardening skills. Orchids are blooming plants, and as such, they require a lot of attention. However, by following the basic care tips above, you should have no trouble keeping your orchid blooming.


The post Reasons Why Orchids Won’t Bloom and How to Fix Them appeared first on Kitchen Infinity.

Did you miss our previous article…
https://www.centrecountyfood.org/?p=456

post

What Are Safflower Seeds?

Birds are essential to the natural ecosystem, but they need food and water. They’re also a great addition to any garden, as they help in pollination and seed dispersal. However, it can be hard to attract specific birds to your farm if you don’t know their dietary needs. 

There’s no need for you to worry anymore. Safflower seeds have everything that birds need. Often confused with sunflower seed, safflower is more unique and is a rarer type of bird food offered at bird feeders.

Thanks to their great nutrition, they’re a useful and uncommon type of bird seed that birds eat, making them popular among backyard birders. If you want to ensure that your garden is filled with beautiful songbirds every season of the year, why not try using safflower seeds?

What is Safflower Seed?

Safflower seed is the seed of the annual safflower plant known as Carthamus tinctorius. This herbaceous annual is in the same family as sunflowers and thistles—safflower seed blooms in red, orange, and yellow with some scruffy foliage.


Image credit: https://www.thespruce.com/

Safflower seeds prefer arid climates with seasonal rainfall, and the safflower crops are mostly grown for the oil of the seeds and the dyes of the plant. With its growing cultivation, backyard birders are discovering the value and usefulness of this seed.

These seeds are slightly smaller than sunflower seeds as birdseed, but they’re similar in their tapered shape. It has white seeds and is high in protein, fat, and fiber. These nutritional properties make safflower seed a great addition to any bird feeding station.

Birds that Eat Safflower Seeds

Many of the smaller-eating birds feed on safflower. Also, birds with stronger bills familiar with black oil sunflower seed will happily eat safflower seed. They include:

Blue jaysDowny woodpeckersIndigo buntingsNorthern cardinalsCarolina chickadeesMourning dovesBlack-headed grosbeaksHouse finchesEvening grosbeaksPurple finchesBlack-capped chickadees

Some birds may break open the hulls immediately to enjoy the seed meat, while others may cache safflower seeds. Safflower seeds have a bitter taste and different shape than any other birdseed. Birds such as grackles, European starlings, and blackbirds will not eat safflower seed.

This bitter flavor makes them an ideal addition to feeding stations where the bully birds might dominate. It discourages these birds from emptying the tray feeders. Many squirrels will also leave these bird feeders alone. Baffles and other squirrel-proof bird feeders are still wise precautions as fast-footed squirrels may leap onto the tray feeder and scarf down the safflower seed.

How to Feed Safflower Seeds

It can be challenging to offer safflower seeds to backyard birds. At first, the bird may be hesitant to take the seeds, especially if sunflowers are available. Alternatively, you can offer safflower seeds in the larger hopper, tube, and platform feeders. Tossing seed on the ground near shrubby, sheltered areas is also a good way to provide it to the ground feeding birds such as doves and quail.

How to Feed Safflower Seeds
Image credit: https://www.thespruce.com/

Mixing two seeds is also a good way to offer safflower, such as mixing it with black oil sunflower and gradually increasing the ratio of safflower to sunflower seeds. This way, some birds will not notice that they are receiving a new type of seed.

How to Introduce a New Feeder to Backyard Birds

As with most other bird seed types, there are many ways you can offer safflower to birds. These include a finch feeder, squirrel-proof bird feeders, or other hanging tube feeders. Since safflower comes in a clear shell, birds can see the seed from above, which will entice them to take it from the feeder. 

When purchasing safflower seeds, purchase a larger amount of seed than what you usually give to the birds, as they will take some time to get used to it. Introducing safflower gradually is the key to success.

Where to Purchase Seeds

Safflower is available in most garden centers, but it is also available online. These seeds are not often available in the bird feeding sections in grocery stores and large retailers, but you can also get them in pet and wild bird stores.

How to Plant the Perfect Birdseed Garden

It’s possible to grow safflowers as part of a birdseed garden and allow these seed-bearing flowers to go to seed before harvesting them. Plant safflower seeds in sunny, well-drained areas and use minimal water since they perform best in arid climates and dry conditions. These are great alternatives to backyard feeders, especially if bully birds often overrun your feeders.

How to Plant the Perfect Birdseed Garden
Image credit: https://www.asiafarming.com/

How to Store Safflower Seeds

Safflower seeds can be stored for up to five years if kept in a cool, dry place. The best storage container is one that’s airtight and able to keep moisture out. Airtight bags or jars work well for this, as does an old coffee can with a sealed lid. Safflower seeds also freeze well, so you can double bag the seeds and keep them in your freezer for later.

dvantages of Offering Safflower Seeds at Your Bird Feeder

They offer a good level of fat and protein These seed types are relatively cheap and are sold cheaply in bulkYou can easily grow them in your gardenThey’re ideal to use when you want to eliminate those bully birds from your gardenIt can be bought in several ways, including the entire safflower seed bags, in a bird’s seed mix bag, and a safflower seed cylinder

Disadvantages of Safflower Seeds

They can leave behind some when the white shells are crackedNot all birds will appreciate these seeds, so you may need to offer other seed types besides safflower seeds

FAQs on Safflower Seeds

What is the importance of safflower seed?

Safflower seed oil can be used to prevent heart diseases, including hardening of arteries and stroke. It can treat various conditions such as fever, tumor, cough, breathing problems, chest pain, and traumatic injuries.

Final Thought on Safflower Seeds

As nutritional as these seeds are, it is important that you shop for the best safflower seeds. And the more you understand this seed, the more easily you’ll help your birds adapt to new food while minimizing the seed lost to over-aggressive species and feeder pests. While you feed the precious birds with safflower seeds, also remember to learn how to care for the baby birds so they can grow healthy and happy.


The post What Are Safflower Seeds? appeared first on Kitchen Infinity.

Did you miss our previous article…
https://www.centrecountyfood.org/?p=450

post

How to Clean the Burners on a Gas Stove

Cleaning gas stove burners can be difficult to do by yourself, especially if you don’t have the right tools. There are many different kinds of cleaning products available in your local store, but not all of them will work for all types of stoves. If you’re looking for a quick and easy way to clean your burners on a gas stove, then look no further. 

This article will help you eliminate any build-up of grime from inside your stove’s ports as well as its burners within minutes. If you follow these tips, you’ll understand why you should not ditch your gas stove as it will be as clean as new. Let’s get started!

How Gas Burner Works

The burners on your gas stovetop consist of a burner assembly attached to a small gas intake valve on the front or at the top of the stove. Gas stove burners operate by receiving an air-gas mixture that is sent through the main gas line. Gas stoves have a gas valve that attaches the main gas line to the stove and sends the air-gas mixture to each burner. 


Image credit: https://engineer.decorexpro.com/

When the burner control knob opens the intake valve, it allows gas to flow through the venturi tube. The gas then enters the venturi tube through one of the wide ends, increasing in pressure as it passes into the narrow section of the tube. The burner head is a hollow metal disk with holes and slots in the outside edge.

The burner head sits atop and directs flames emerging from the burner head. The older burners have a pilot light, while the newer gas stove burners have a small spark pilot located on the side of each burner. A light pilot or electric spark pilot controls the airflow, allowing you to generate more or less flames as possible.

How Often Should You Clean Your Stove’s Gas Burners?

Gas stoves are simple and trouble-free. Typically, you can clean the burner once a year. But, it’s important to clean it when the flow of gas becomes hindered due to food residue that may spill on the pots and pans. Food residue can clog the ports around the burner heads.

If left unattended, this food residue can be quite hard to remove. Clean your burners whenever the burner becomes irregular and exhibits a yellow color. Below are the steps you need to take to clean your gas stove burner properly. Take time and refer to your owner’s manual if necessary:

What You’ll Need

Old toothbrushNon-abrasive scrubbing padDish soapDry towelBaking SodaPaper clipDamp cloth

Read Manufacturer’s Instructions

Before you start cleaning, it’s always a good idea to refer to your owner’s manual. This can serve as a safety reminder, and it may reveal some tips on the best way to clean your burners.

If your cooktop didn’t come with the manual, you could always download a manual online via the manufacturer’s site. The manual will recommend tools and cleaning products, saving you from many hassles.

Turn Off Gas Supply Valve

Clean gas stove burners before turning them off. Make sure you shut off the valve before doing anything else. Before removing the burner caps, ensure your gas is off. Look under the burner caps and access the burner heads. 

Proper gas flow is dependent on clean burner heads, so ensure you clean stove burners first. A valve will be nearby, connecting your stove to the main gas line. Make sure you turn off the valve before cleaning. Also, ensure the stovetop and burners are completely cooled before you begin cleaning.

Remove Burner Caps

Remove the burner caps and set them aside. Once a sturdy grip is established, twist each cap counter-clockwise to remove it from the stovetop. The order of the caps does not matter because you will reattach them later on during the cleaning process.

Remove Burner Caps
Image credit: https://www.thespruce.com/

Many gas burners have a removable ceramic disc that sits atop the burner to diffuse flame. If you have this kind of burner, lift the disc off the burner, making sure that the burner is completely cool before doing so.

Remove Burner Heads

Use a flathead screwdriver or other suitable tool to loosen and remove the burner heads and caps. Take care not to damage the gas line connected to the burner because you will be reinstalling them later on during the cleaning process. Set aside and inspect each burner head as you remove it from the stovetop.

Look for built-up debris inside the gas jets, at the edge of the burner head, where it sits on top of the stovetop surface. Be careful not to damage the venturi tube beneath when lifting the burner head.

Soak and Scrub the Removed Parts

Place the burner heads and caps into a bowl or other suitable container. Fill this with warm water and liquid dish soap and let it soak for 30 minutes. If you find that there is still residue on the parts, try soaking them overnight instead.

Once they’ve soaked, pull them out and scrub them with an old toothbrush to remove debris. If the toothbrush can’t remove some debris, use a straightened paper clip to unclog the head and cap holes. Make sure you don’t damage the metal of the burner head as you clean. 

You can also use one part water and one part baking soda to remove stuck-on debris. You can also make your cleaning paste with one cup of baking soda and half a cup of vinegar. Apply a paste on the surface of your stove using a clean cloth or sponge.

Rinse the Parts

Use whatever you used to make the paste and rinse it off with running water. Make sure the area is dry before replacing the parts. Shake to remove excess water, then dry with a damp cloth.

Rinse the Parts
Image credit: https://www.thespruce.com/

Allow all the parts to air dry completely before reassembling the burners. As the parts are drying, turn your attention to cleaning other parts of your stove. Make sure you learn how to clean drip pans and grills. soak and scrub all these parts well.

Reassemble and Test Your Burners

After you’ve washed and rinsed your burners, pat them dry with a towel and set them aside. Let them air dry until they’re entirely free of water. Once the burners are dry, reassemble them. Reassemble the drip pans, grills, burner heads, and caps. 

Reassemble and Test Your Burners
Image credit: https://www.forkandspoonkitchen.org/

Before turning on your stove, inspect all of them to make sure they aren’t dripping water. On electronic ignition stoves, take care not to bend or damage the ignition electrode as you install the heads.

Relight the Pilot Lights

After you’ve reassembled your burners, relight the pilot lights by pressing down gently on each knob. Open each gas valve slowly and light the burners. If there’s no flame, ensure that the knobs are turned to the pilot setting. 

As you do this, make sure you follow the manufacturer’s instructions for relighting the pilot flames. Test the burners to ensure they operate correctly as unusual flame color and shape may indicate that the burner heads are not completely dry.

FAQs on How to Clean the Burners on a Gas Stove

How do you clean the grates and burners on a gas stove?

If the grates contain dirt, grime, or grease, mix three parts of baking soda into one part of water. Coat the grates in the mixture and wait for 20 minutes. Wipe down the burners with a soft cloth and if you have burners coated in baking soda paste, rinse first to avoid damaging the finish.

How do you deep clean a gas stovetop?

You can use a soft bristle brush and a mixture of vinegar and water in a spray bottle with baking soda paste when deep cleaning your gas stove top. If you notice sputtering, shut off the burner and clean out any food build-up left in the gas line before turning the gas back on.

Final Thought on How to Clean the Burners on a Gas Stove

Cleaning your gas stove burner shouldn’t be an uphill task. Take your time and be thorough with your cleaning process. Make sure everything is properly rinsed before drying. This way, you’ll have clean stove top burners that are ready to fire up your next meal. 


The post How to Clean the Burners on a Gas Stove appeared first on Kitchen Infinity.

Did you miss our previous article…
https://www.centrecountyfood.org/?p=444

post

Feng Shui Tips for a Bed Aligned with the Door

You’ve just moved into a new home, and you’re looking for some Feng Shui tips to help improve your health. The first thing you’re probably learning is how to feng shui your bedroom and the bed becomes the first priority in this. The bed is a very important piece of furniture in your home because it represents you. A bed aligned with the door is one of those bedroom Feng shui mistakes that can affect your energy flow.

This mistake may cause illness, bad luck, or even relationship problems. Therefore, your bed placement affects you in your conscious and unconscious states. This article will give you some tips on how to handle a bed aligned with the door based on good Feng Shui principles so that your bedroom would be a more peaceful and healthier place to stay in every day.

Commanding Position

In Feng Shui, you need to place the bed using the principle of commanding position. Your bed should be located where you can see the door to the bedroom when lying. Your bed shouldn’t be directly in line with the door. According to the command position principle, place your bed diagonal from the door.


Image credit: https://redlotusletter.com/

If you can’t be in the commanding position, don’t worry. You can correct the bed by using a mirror. Place the mirror in a place where you can see the reflection of the door when you’re in bed.

Place the Bed in Relationship to Doors and Windows

A door and a window facing each other in a bedroom can drain its energy. Avoid sleeping with your bed located between two doors or windows. If your room size is limited, make sure the windows are towards the side of the building rather than front or back, where you get more sun exposure, especially sunrise and sunset rays. The best position for your bed is facing the door.

Place the Bed in Relationship to Doors and Windows
Image credit: https://cf.ltkcdn.net/feng-shui

Avoid having your feet pointing straight out the door. This is known as coffin position. You can also call it the bed-facing door superstition. If the only place for your bed is in line with your door, that is the coffin position, you can still correct it. You can hang a faceted Feng Shui crystal ball halfway between the door and the bed.

Place Headboard Against a Solid Wall

Make sure the headboard of your bed is against a solid wall rather than an open space. This means that you should be supported from the back. Avoid placing your bed with the headboard in the middle of the room. Do not also let the whole bed float in the middle of the room. A headboard facing away from the main door can create a placement problem with different consequences of chi.

The wall behind you is very important because you’ll need it to support yourself. Additionally, avoid windows behind the head of the bed, especially if you’re on the ground floor or have eye issues. Make sure you have a solid bed behind you and not a window.

Consider Beams, Soffits and Sloped Ceilings

For the best bed placement, make sure your roof beams are above you or do not block them. If there are beams, they should be short and fluffy so as not to cause a problem. It is best if they’re just below the ceiling because it can still be a distraction when lying down.

The area above your bed should be free of beams, soffits, and sloped ceilings. These architectural features above your bed can create unnecessary pressure. If you can’t avoid these features, use the drape fabric to conceal the ceiling feature. If it is not a large beam and soffit, blend the feature into the ceiling by painting it the same color. This will make the dropped ceiling areas less oppressive.

Locate Your Bed Away from the Toilet Wall

Toilet walls are not usually the best place to sit on your bed. The vibration and flow of chi energy are much too powerful. This can cause lots of problems with sleeping if you have your head against the toilet wall, so be sure to position your bed away from this area.

Locate Your Bed Away from the Toilet Wall
Image credit: https://fengshuinexus.com/

Consider the Space on Both Sides of the Bed

If it’s an adult bedroom, you should have open space on the left and right sides of the bed. A good chi recommends not to place your bed with one side up against the wall.

Bed and Bathroom Door Placement

The main bedroom door is a primary concern when placing your bed in the room but don’t overlook other doors. The placement of your bed and the location of your master bedroom’s bathroom door can create very uncomfortable chi problems. Generally, it is not good to place a bed in such a way that the headboard is next to or placed directly in front of the doorway unless you plan on doing some yoga stretching exercises every morning upon waking.

In Feng Shui, bathrooms are a place from which energy leaves the house. If your bed must face the bathroom door, make you close both the bathroom door and bedroom door. You can hang a mirror on the inside of the door facing the bathroom. The mirror will reflect any negative energy leaving the bathroom back into it.

void Electromagnetics in Your Bedroom

Avoid placing your bed next to any electrical sockets or cables, especially those connected directly to the wall. If you tend to watch television in bed, it is best not to have an electrical socket located behind the television. Also, keep electronic devices such as alarm clocks, wireless phones, and printers at least one foot away from where your head will lie every night.

If you must have that TV set in your room, cover it before you sleep. The same goes for laptops and phones. For you to have a good night’s sleep, these electronic devices should not emit radiation near your body.

The congested electrical wires all over the house is also another bad feng shui in the bedroom. Try to put them away or at least cover them up. You shouldn’t also have a desk in your bedroom to optimize the space for good chi.

Choose Restful Art

The artwork in your bedroom will speak a lot about your private life. If you’re looking to attract your partner and still keep things in line with your taste, the artwork you place in your room shouldn’t depict solo persons or objects.

When practicing Feng Shui with artwork in your room, there should be an element of a pair of pieces. Save family photos for other rooms and not your bedroom. Keep the artwork up at eye level. You can also take it higher to increase life force energy. Also, consider perfect colors that match your feng shui bedroom. You can choose the perfect feng shui front door color and make sure you don’t go wrong with anything.

Detoxify and Declutter Your Bedroom Feng Shui

Detoxifying your bedroom is very important because it will help get rid of chemicals and toxic elements from your bedroom and replace them with organic ones. A good start is to use green products and non-toxic cleaning products. Infusing your room with some sweet orange oil can bring good energy and make the room smell a little bit nicer.

Detoxify and Declutter Your Bedroom Feng Shui
Image credit: https://www.thespruce.com/

Start with the clutter under the bed because it may affect you while sleeping by causing subconscious blocks in your life. A good Feng Shui is to clear the space under the bed so that the energy can flow freely.

FAQs on Feng Shui Tips for Handling a Bed Aligned with the Door

How can you protect yourself if the bed faces the door?

If you find yourself sleeping directly opposite the bedroom door, you can use a floatboard. If you feel trapped by the floatboard, you can create a shield by placing your chest at the end of your bed filled with heavy blankets or a low screen between the bed and the door.

Which way should your bed face Feng Shui?

According to Feng Shui, you can position your bed in different positions and still enjoy it. Your bed can face East, South East, West, North West, and South West. If your bed faces west, you can create the best condition for a good night’s sleep.

Final Thought on Feng Shui Tips for Handling a Bed Aligned with the Door

As you can see, Feng Shui is an ancient practice designed to enhance your well-being and life based on the alignment of particular arrangements and objects around your house or workplace. Try to implement Feng Shui to manage your room’s energy and transform your well-being and life for the better.


The post Feng Shui Tips for a Bed Aligned with the Door appeared first on Kitchen Infinity.

Did you miss our previous article…
https://www.centrecountyfood.org/?p=438

post

14 Bad Cleaning Habits You Need to Break

Cleaning is a never-ending task. It’s something everyone has to do, and no one wants to do, especially when we think about the time it takes and how much effort it requires. We all have bad habits when it comes to cleaning our homes, but these mistakes can cause damage not only to your home but also to your health. 

You need proper tools and methods to get the job done right. With this guide, you will learn about bad cleaning habits to stop doing to live in a cleaner environment.

1. Using Dirty Cleaning Tools

When it comes to bad cleaning habits, cleaning tools are the first culprit. How can you expect the best results when using dirty cleaning tools to clean your home? If your washing machine has some odor from built-up bacteria from some detergent residue, it will make your clothes stink. 

If your vacuum bag is filled with dust, it won’t do a good job sucking up anymore. A dirty mop and a dirty sponge will push around more soil and bacteria. So, take your time to thoroughly clean tools by emptying completely and washing them in hot water after every use. Also, use enough disinfectant to kill the germs. Replacing new tools is also a good idea.

2. Leaving Wet Towels and Shower Curtains Bunched Up

If you’re tired of spending too much time in your laundry room scrubbing mold and mildew on your bathroom surfaces, don’t worry. You can easily break these bad habits and have more time to focus on other tasks. Avoid leaving wet shower curtains bunched up and wet tower curtains in a heap on the floor.


Image credit: https://www.enchantehome.com/

Always hang up your non-slip shower mat after each use. By hanging the shower curtain, it will dry more quickly and discourage mold and mildew growth. By hanging wet towels to dry, you’ll be able to re-use them without having to wash out the mildew smell.

3. Leaving Dirty Dishes on the Sink

Your dirty dishes are a breeding ground for bacteria and germs that you don’t want in your kitchen. Leaving dirty dishes in the sink is a jackpot for hungry insects. Rinse off your plates before stacking them in the sink. Load the dishwasher every time it’s full, so you won’t have to worry about leaving food scraps from last night’s dinner sitting out on the counter overnight. 

You can also break this bad cleaning habit by training everyone in your household to either put the dishes in the dishwasher or wash them immediately. After washing your dishes, wash out your sink with hot soapy water, spray with Vital Oxide, and let it dry.

4. Using Disinfectant Wipes

Don’t use disinfectant wipes on surfaces that food touches. This includes countertops and cutting boards. Wipes are less harsh, but they don’t do a great job of killing bacteria. 

Using Disinfectant Wipes
Image credit: https://www.lysol.com/

If you want to keep your kitchen clean with disinfecting wipes, it’s important to understand that you can’t swipe on everything and expect your home to be germ-free. Make sure you buy wipes that can kill viruses and bacteria. Also, ensure that you’re using these disinfectant wipes the right way; otherwise, you risk cross-contamination. For better hygiene learn how to make disinfectant wipes for home use.

5. Allowing Paper Clutter to Accumulate

Even with the emerging technology, including online billing and banking, there’s still a mountain of papers that ends up in our homes. These include magazines, newspapers, flyers, school papers, and projects. These papers tend to pile up. However, this is one of the easiest bad cleaning habits to break.

Instead of letting the paper pile up, designate a place in your kitchen for all this paper clutter. Also, keep a shredder and recycling bin nearby and sort it at least once a week. For children’s school papers and projects, opt for a designated storage bin, select a few to save space, frame a few, and hang them up. Learn how to declutter your room properly and you’ll never have trouble with cleaning.

6. Ignoring Product Directions

This is especially true for general cleaning supplies like dishwashing soap, general cleaners, and fabric softeners. Product directions are there for a reason. Ignoring it is a surefire way to make cleaning fail. Also, not following product directions might render the product useless if the solution is wrong. 

The manufacturers will have recommendations on using the product, how much you need, and where it should be used. Application methods are also different, so it’s always important to read the label. This also applies to cleaning tools; follow the manufacturer’s instructions to prevent injuries.

7. Wearing Outside Shoes in the House

This is especially important when you have wooden flooring because this can cause scratches on the surface. It’s highly recommended to remove your footwear before entering the house. This way, you can keep your floors looking new longer. 

If needed, apply an environmentally friendly wood polish to clean and protect the wood from damage caused by extreme weather elements. Whether your entryway is through the mudroom or the front door, make this cleaning habit simple by providing a bench and a chair for shoe removal. Get a shoe tray closed for wet or muddy shoes. Plus, provide a bin to collect each family member’s footwear.

8. Using Harsh Cleaners

Using too much cleaner can be a bad cleaning habit; using a harsh cleaner can damage your floors. Using harsh chemicals can strip the finish of wood floors, leaving them dull looking and requiring you to refinish them. For example, chlorine bleach is good in disinfecting, but that doesn’t mean it’s good on all surfaces.

Using Harsh Cleaners
Image credit: https://4.bp.blogspot.com/

Chlorine bleach is not a good dirt and grime remover, and the fumes can be toxic. It’s important to use gentle cleaning products to produce the best results. One of the safest and widely used home cleaning products is cleaning vinegar

9. Not Completing Tasks

Yes, we all get distracted while cleaning, but always try to finish a task once you’ve started it. For example, if you’re dusting the living room, don’t stop for a social media break until you’ve dusted the entire room.

If you have a few minutes to clean, start by removing the clutter and putting items in their proper place. Then if you’re interrupted, you can come back later to do the deeper cleaning.

10. Waiting Until the Cleaning Task is Overwhelming

If you have a huge cleanup job ahead of you, don’t try to bite off more than you can chew. Break the task into small pieces that are easier to manage. Don’t wait for the task to become overwhelming. Putting off cleaning and waiting until the task becomes overwhelming is one of the worst cleaning habits to break.

But if you do a bit of cleaning each day, like load, empty the dishwasher before the dishes pile, vacuum one or two rooms, and complete your load of laundry, then cleaning the entire house will not be as overwhelming.

11. Relying too Much on Bleach

Of course, bleach has been a household staple long cleaning and disinfecting agent. But it turns out that bleach isn’t as good a cleaner as once thought. Bleach is intensely harsh and can irritate the eyes, lungs, and skin. 

Relying too Much on Bleach
Image credit: https://cominguprosestheblog.com/

The fumes are also toxic. A better alternative is baking soda or vinegar. If you still doubt how harmful bleach is, these reasons should motivate you to skip the bleach next time you begin your spring clean.

12. Leaving Your Bed Unmade

This might not be a big deal in the colder months when you’re bundling up under your covers and keeping your home well heated. But in the summertime, leaving bed linen unwashed can pose a real threat to your health. Experts recommend changing sheets every two weeks for best cleaning results.

Even if the rest of your bedroom looks neat and clean, the unmade bed can make it look messy. Making your bed each morning will keep the rest of the room and the entire house organized. You can as well make this task simple by selecting bedding that is easy to spread up neatly.

13. Storing Cleaning Products Incorrectly

Do you spend a lot of time trying to find your cleaners and tools? Well, this bad cleaning habit is quite easy to break. Gather all the cleaning supplies you’ll need for each area of your home and store them close to that area. Place them in a plastic carryall for bathroom cleaners and stash them on a shelf or under the sink. 

You can also create two baskets of supplies if you have upstairs and downstairs bathrooms. Keep your dusting and furniture cleaning products in the kitchen. And all your laundry products should be kept in the laundry room. Make it easy to get started, and this will likely lead you to clean more often.

14. Hoarding Food in the Refrigerator

It’s a common bad habit to keep too much food in the fridge. Resist this temptation as your refrigerator does not have an infinite capacity and cannot store half-empty containers of milk, cream cheese, cottage cheese, or yogurt that will not be used up within a few days.

Hoarding Food in the Refrigerator
Image credit: https://lh5.googleusercontent.com/

If you and your family hate leftovers, then don’t stash them in the refrigerator. Go ahead and toss it instead of storing it because improperly stored food promotes mold and bacteria growth, making cleaning the refrigerator daunting. 

FAQs on Bad Cleaning Habits You Need to Break

Can cleaning make you sick?

Yes and no. Cleaning will not make you sick, but it can make you sick if you use improper cleaning methods. Plus, using harsh chemicals that can cause mild irritation and affect your health negatively.

Is it ok to clean regularly?

If you maintain a cleaning routine, it will be easier to break these bad habits. Cleaning should not harm your health or make you feel worse.

Final Thought on Bad Cleaning Habits You Need to Break

Whether it’s the cleaning and our lives in general, we all have these bad habits. We like cutting corners when cleaning. Everyone wants to make their chores easier and get them done faster. However, taking these shortcuts can have a lot of negative impacts on your life. 

That’s why it’s important to break bad cleaning habits. They might be tolerable or even bring some benefits, but they shouldn’t be part of your life if you want to live a healthy and cleaner lifestyle.


The post 14 Bad Cleaning Habits You Need to Break appeared first on Kitchen Infinity.

Did you miss our previous article…
https://www.centrecountyfood.org/?p=432

post

How to Remove 6 Different Kinds of Drain Stoppers

The tub stopper is a small part of your bathroom, but it can cause a lot of stress when it’s not functioning correctly. The drain pipe can be blocked by a build-up of hair and grime, meaning that you have to remove and drain it. Removing a bathtub stopper is easy to do, but first, you need to find out what kind of stopper is installed in your tub. 

This guide will show you exactly how to remove six different bathtub drains with step-by-step instructions and pictures for each type. You’ll also find out what tools you’ll need, how long it takes to complete this task.

What You’ll Need

ScrewdriverPliersReplacement drain stopperBathroom cleaner

How to Remove a Lift and Turn Drain Stopper

You can easily identify the lift and tub turn drain stopper by its small, threaded knob on top of the stopper. It’s similar to a push and pull stopper except for the knob of push and pull, which is fixed for the user to push the stopper down and pull it up.


Image credit: https://i.ytimg.com/

Remove the Drain Stopper Knob

To remove the lift and turn the drain stopper, ensure the water is off to prevent getting wet. Find the round knob on top of the drain stopper, which should be either at the side or center of the drain. Turn the stopper counter clockwise until it comes loose.

Pull up on the knob while turning it counterclockwise to remove it. To remove the metal insert drain stopper, there will be a screw directly in the center underneath the water. Turn counterclockwise to unscrew the screw and pull up on it. Normally there is another plate or cover underneath, so make sure you don’t scratch your sink when removing it.

Unscrew the Drain Stopper Bolt

To do this, you will need a flathead screwdriver and Allan wrench to unscrew the drain stopper bolt from the threaded hole. It may take a bit of force to get it off. Use the flathead screwdriver and Allen wrench to remove the screw from the center, and don’t remove the entire screw to remove the stopper. The stopper can fall down the drain if you use the entire screw.

Inspect, Clean, and Replace the Drain Stopper

After successfully removing the drain stopper and slowly rotating it counterclockwise, it is time to inspect what might need replacing or cleaning. If there are any cracks, corrosion, scratches, or other damage on the metal pieces of your drain stopper, make sure to replace them with new metal parts.

How to Remove Push Pull Stopper

Push pull stoppers are easy to identify because they have a simple operating mechanism. Push the plug down to close the drain and pull the knob up to open the drain.

How to Remove Push Pull Stopper
Image credit: https://i.pinimg.com/

Unscrew the Drain Stopper Knob

The first step on how to remove the bathtub drain stopper is to unscrew the knob. To do this, twist the slip nut counterclockwise as you hold it tightly with one hand. Make sure you grip the drain stopper knob tightly and turn it to the right to unthread the stopper lid and reveal the fastening bolt.

Remove the Drain Stopper Bolt

The second step is to remove the drain stopper bolt. To do this, you should place a standard flathead screwdriver on the lip of the washer and twist it off counter-clockwise with your hand. You can also use set pliers to unthread the bolt from the drain crossbar and lift the stopper out of the drain.

Inspect, Clean, and Replace the Drain Stopper

Once the stopper is removed, inspect it for silt or mineral deposits. Check closely around the center hole where the drain tube makes an L-shaped bend. Remove any debris with a damp rag and give it a gentle brush before replacing it in the same position. Apply some liquid detergent in the hole to make sure it’s clean.

How to Remove Toe Touch Tub Stopper

Toe touch stopper opens and closes with the touch of your toe. It’s circular at the top with no tabs and knobs. Here’s how to replace a toe touch tub stopper:

How to Remove Toe Touch Tub Stopper
Image credit: https://i.stack.imgur.com/

Open the Drain Stopper

Turn the stopper counterclockwise with a pair of pliers to open it if it’s not in an open position. If you don’t have any pliers, wrap the jaws in electrical or duct tape for better grip. You can also use channel locks or slip joint pliers for this job, but always make sure they are covered with tape so they won’t scratch them.

Twist the Drain Stopper Lid

For some toe, touch stoppers holding the shaft cylinder and turning the top cap will allow you to unscrew the top finished cap portion of the stopper. If this is the case, twist it to the right and apply a small vertical force to unthread the lid to access the fastening screw.

Unscrew the Fastening Screw

With the stopper in this state, you can now use a set of pliers to unscrew the fastening screw. Keep track of where and how it’s placed so that when you’re finished with the job, you’ll know how they go back together.

Inspect, Clean, and Replace

With the stopper in the “open” state, remove any debris or build-up from within with a lint-free cloth or cotton swab. If your sink isn’t draining properly, this would be a good time to clean it out and ensure that there’s nothing blocking your drain lines.

How to Remove a Trip Lever or Plunger Style Stopper

This drain stopper may look easy to remove, but that’s the opposite. It’s one of the types of bathtub drain stoppers that proves to be difficult to remove. Trip lever drain stoppers have levers located on the overflow faceplate. If you trip the lever, the plunger will move up and down. 

How to Remove a Trip Lever or Plunger Style Stopper
Image credit: https://diy.sndimg.com/

When the plunger is up, water will flow into the drainage system, but when the plunger is down, it will form a seal inside the drainpipe to stop the water flow. These drain stoppers are prone to clogging and can be troublesome to remove and replace because of their compact assembly. Here’s how to remove a trip lever drain stopper:

Open the Drain

If the lever is not in an open position, water will not flow through the system. To turn off the water valve, look for a stem in and around the overflow faceplate and twist it clockwise until it stops. If you cannot locate the shutoff, open up your wall until you find the source of water to prevent flooding. Removing the trip-lever drain stopper while in the closed position can cause the bathtub drain stopper to get stuck.

Remove the Overflow Grate

Remove the screws holding down your overflow grate with a screwdriver and remove it from the overflow faceplate. Ensure you put the screws in a safe location for reinstallation.

Pull Out Trip-Lever Drain Stopper Assembly

If your overflow faceplate has a trip-lever to show the water level, you must first remove this assembly. Turn off the water supply at either the main shutoff for all appliances or the individual faucet. You may need to flush out your drain lines to completely stop any residual water flow. 

Use an adjustable wrench to remove the nut holding this assembly. Without breaking any pieces, pull out the entire assembly, including the trip lever, rods, and the plunger. You can as well spray the assembly with a lubricant to free a stuck plunger.

Inspect, Clean, and Replace the Trip Lever

If you note a loose trip lever or corroded in place, replace or tighten it. Make sure that the rubber gasket is undamaged and in good condition before replacing it. A worn-out gasket will allow water to leak through the overflow faceplate. Wipe off any corrosion on the rods with a piece of steel wool, and spray the rods with rust preventative.

How to Remove a Flip-It Stopper

This bathtub drain stopper uses a flip lever to expand and contract a gasket that sits inside the drain. The gasket contracts when the flip lever is open, allowing water to flow into the drain. But when you close the flip lever, the gasket will expand to create a seal in the tub and sink. These drain stoppers are only secured by an O ring and suction cup that sits inside the drain at the device’s base.

How to Remove a Flip-It Stopper
Image credit: http://behindtheshower.com/

Open and Remove the Stopper

Remove the ring from beneath the flip-it stopper by sliding it up and off the drain. Wipe away any corrosion on the rods with steel wool, and spray them down with rust preventative.

Inspect, Clean, and Replace the Check Ring

Remove the check ring by finding a spot where you can pry underneath it with a screwdriver. Lift on this edge, then pull out any dirt or corrosion that may be inside it. Once clean, reinstall the ring into its original position. Inspect the O-ring for cracks or hardening, and replace it if necessary.

How to Remove a Pop-Up Drain Stopper

Pop up stopper drain also has a lever on the overflow faceplate connected to the rod assembly and drop-down vertically through the overflow pipe. The rod assembly doesn’t connect to the plunger but connects to the spring on top of a horizontal rocker arm. 

How to Remove a Pop-Up Drain Stopper
Image credit: https://docs.landmarkhw.com/

When the lever is in an open position, the spring is compressed, pushing down on the rocker arm and popping up the plug. While in a closed position, allowing the rocker arm to pivot up, causing the plug to be pulled down, and hence sealing the drain. Here’s how to remove a pop-up tub stopper:

Open the Drain and Remove the Pop-Up Drain Rod

First, make sure that you have turned off the water to the sink and have drained it completely. Next, remove your strainer, usually a round piece with a removable handle attached directly to the bottom of the drain opening in your sink. Then open up the pop-up drain rod.

Remove the Drain Stopper Plug and Rocker Arm

Open the drain stopper by removing the round rubber piece at the bottom of the stopper plug. Then you’ll be able to remove it from your drain. Once you’ve removed that, you will be able to see a plastic rocker arm attached to one side of the pop-up rod. Turn it around so that it’s facing upward, and then pull it straight up. This will remove your pop-up drain, but you still need to remove the stopper plug.

Unscrew the Overflow Plate Screws

Once you remove the rocker arm from the drain, you’ll be able to see two screws that are holding the overflow plate onto your sink. Use a screwdriver to get these out and then set them aside for later.

Remove the Rod Assembly

Now, the last thing that you need to remove is the stopper rod. You can do this by removing the screws that are holding it into place underneath the sink lip. Use a wrench for this if possible, but be careful when removing them because they’ll come out with some force and could do damage if they hit your hand or face.

Inspect, Clean, and Replace

Once you’ve removed all of the parts from under your sink, you should clean them with water and air pressure to ensure they’re ready for installation. Put them back in place to make sure everything fits correctly.

If not, take a file or a grinder and shave off very small amounts until the rod fits into its hole properly. Once the rod fits in, add some plumber’s grease to its end and slide it back into its proper position under the sink.

FAQs on How to Remove Six Different Types Bathtub Drain Stoppers

re bathtub drain stoppers removable?

Yes, drain stoppers are removable using different techniques depending on the type of stopper. For instance, a drain plug is removable by turning it with an adjustable wrench or channel lock pliers, while a compression ring is removed easily by pulling it out.

Final Thought on How to Remove Six Different Types of Bathtub Drain Stoppers

Bathroom drain stoppers are very important elements to have in your bathroom space because they can help prevent messy floors. Just ensure you choose a model that fits the diameter of your drain opening. Removing these stoppers can also be a daunting task, but having simple tools and basic skills is enough to remove bathtub drain stoppers.


The post How to Remove 6 Different Kinds of Drain Stoppers appeared first on Kitchen Infinity.

Did you miss our previous article…
https://www.centrecountyfood.org/?p=425