Growing your vegetables is a great way to save money and get healthy farm produce. But finding the time or space for a large vegetable garden can be hard. A small veggie garden doesn’t have to be boring. You can create an amazing-looking vegetable garden in just about any size yard or patio area with some creativity, plus rich, fertile soil and adequate water.
By growing your food in a small space garden all year long, you’ll save money while getting some exercise and enjoying nature. This article will show how to grow veggies even if you live in an apartment or condo with limited garden space. It includes information on what types of plants do well in small spaces and techniques for maximizing the available area so that more crops can be grown there.
Grow Vegetables in Containers
A great way to grow vegetables in a limited space is by using containers that can be moved around as needed. Try growing them in containers filled with potting soil if you don’t have a patio, porch, balcony, yard, or driveway area for garden beds and rows of crops. It’s important to use a good quality potting mix, not dirt from the yard.
Image credit: https://www.backyardgardenlover.com/
The potting soil mix will make sure the plants get enough air circulation and drainage, so they don’t get root rot or other fungal diseases. If growing on the ground is not an option due to poor soil, lack of sun, and space limitations, containers are the best alternative. When growing edibles in these containers, choose patio or dwarf varieties and shallow-rooted plants such as lettuce, garlic, radishes, and leeks.
In containers, you use anything that holds soil, from fabric grow bags to old metal wash buckets, as long as you provide good drainage. Container plants also need good water, so do not leave them dry out completely. Fertilize your containers during the growing season by using organic fertilizer such as liquid kelp. Grow your tomatoes, peppers, and basil from seed using your large container.
Choose Compact Varieties
If you must have giant vegetables like beefsteak tomatoes or a row of sweet corn, then the space for growing other vegetables in your small vegetable garden will be limited. Fortunately, you can choose varieties that are bred to grow in small spaces.
Any plant with the name patio, pixie, tiny, compact, and baby and dwarf in the name is a good bet. If a plant is bred to be small, it doesn’t mean that the fruits will be small or less yield. The labeling of seeds and seedlings will indicate the mature size of the plant varieties.
There is an area set aside for growing vegetables, fruits, and herbs in the traditional approach, but in small gardens, this isn’t possible. So, try growing edible and ornamental plants together. Planting flowers and vegetables together will make it harder for pests to hone in on specific crops.
An abundance of blooms will also ensure there are always beneficial insects on hand to pollinate flowering vegetables and all types of fruit. Also, include edible flowers such as borage, nasturtiums, lavender, calendula, chives, and thyme.
Don’t forget to create a pollinator-friendly garden by planting ground cover. Try growing fennel or dill with your vegetables. The scents of these plants will attract bees or butterflies, which are also beneficial for pollination purposes.
Use Vertical Space
A small garden doesn’t have to mean a lack of vegetables. Try growing vegetables vertically on walls, fences, or railings. The tying string between two sturdy stakes is an effective way of growing runner beans or peas. Plant climbing varieties of cucumbers, tomato plants, and different types of squash are at the base of fixed support for them to grow up along.
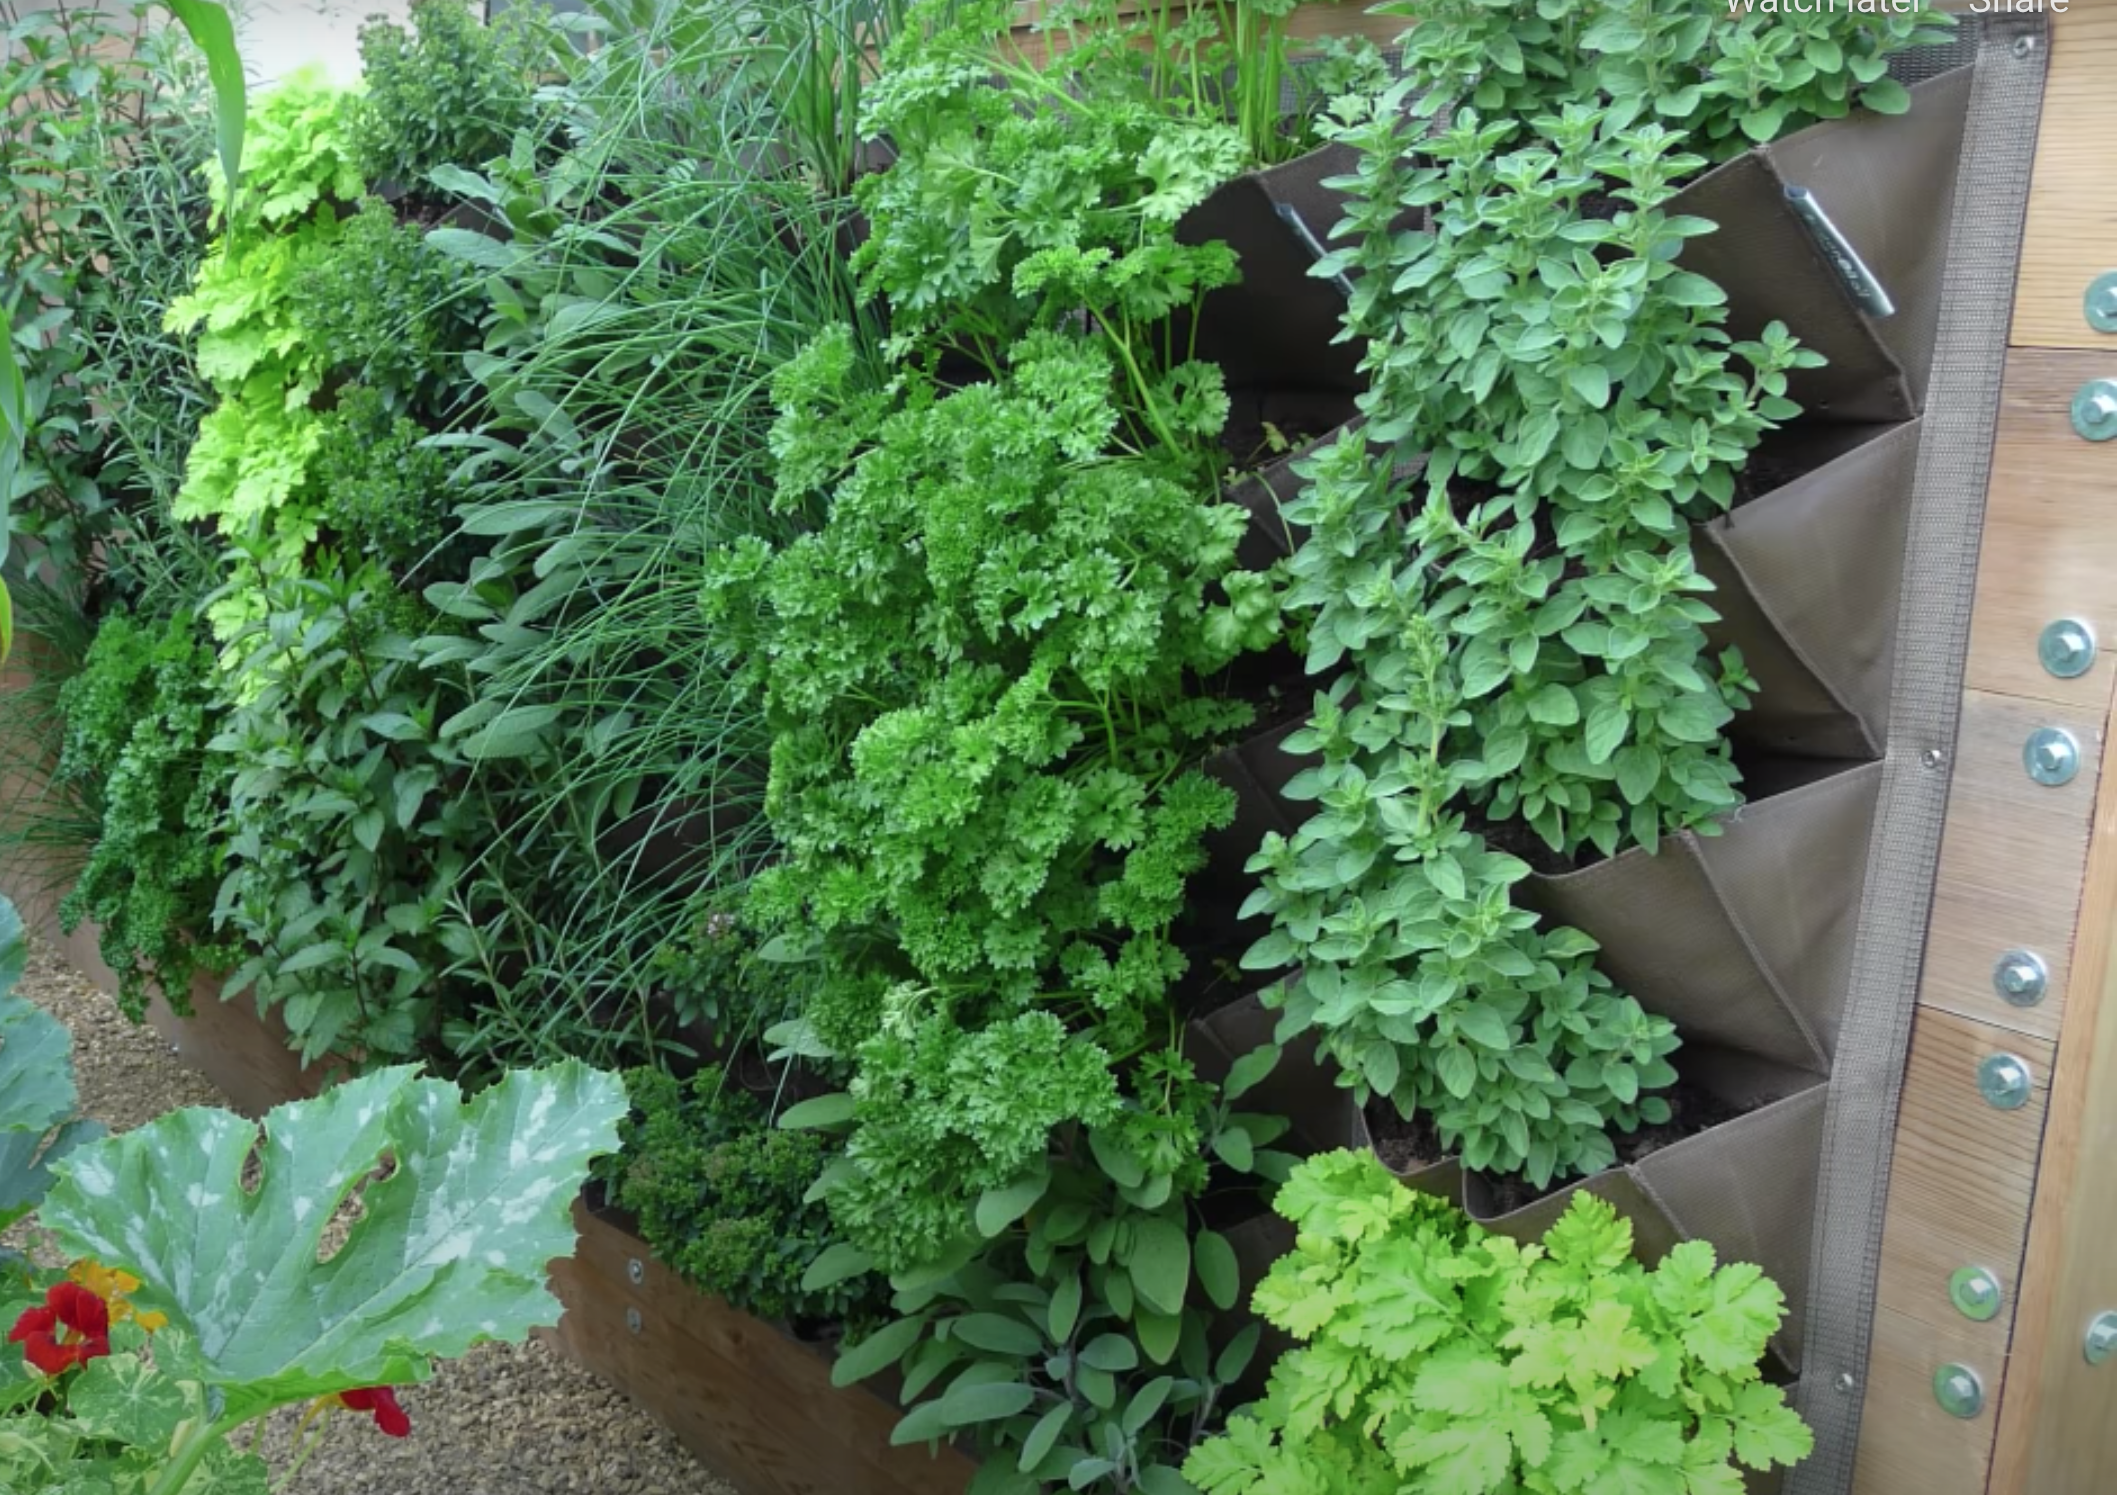
Image credit: https://www.almanac.com/
A rose arbor, trellis, or even a clothesline can be put to good use in the garden by growing beans up it. This frees up ground space and will save you money on buying plant supports. So if you don’t want to grow a variety of vegetables in your small garden, look for compact varieties and vining crops that you can grow vertically on support structures.
You can also opt for pole beans instead of bush beans. Vining cucumbers can also take up less space despite their nature. Growing your vegetables vertically won’t only save space but will also create structure and visual interest.
Grow High-Value Crops Vertically
If you only have a small space to grow in, you want to make sure that the vegetables you plant are of high value. Try growing more expensive crops like heirloom tomatoes or leafy greens instead of radishes or onions. By doing this, you can fit more plants into the same amount of space and increase your profits.
Make sure you maximize your small space by growing small amounts of different crops that offer big rewards like salad leaves, leafy greens, fresh herbs, and chili plants. Give your crops some space to enable them to get high density by using a high nutrient moisture-retentive soil mixture.
Make sure that you choose vegetables that are suitable for your climate and grow well in containers. You can use different pots such as rectangular plastic tubs, large buckets, or circular half barrels to place plants on top of each other and maximize space and yield.
Choose compact varieties that are suitable for growing this way and arrange them to maximize your visual impact. You can also use hanging baskets to catch that valuable sunlight.
Position Your Small Vegetable Garden Near the Kitchen
It is important to consider the best place to put your small vegetable garden. The most convenient location for harvesting would be near the kitchen entrance, so you don’t have to carry them far when it’s time to store them in the fridge. Select vegetables suitable for growing indoors, such as cherry tomatoes and baby carrots, which can fit nicely in small spaces.
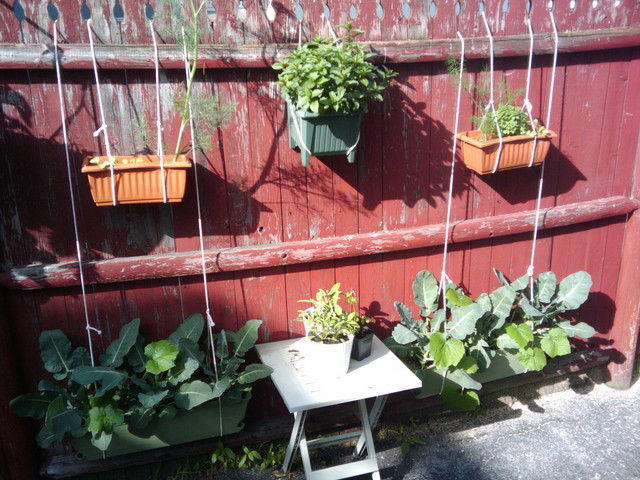
Image credit: https://st.hzcdn.com/
Most small vegetable crops are annuals. They have a very short timescale and need to grow rapidly. And to enhance their performance, they need a lot of help and plenty of food to fuel their growing process, and that’s only possible in full sun. This small vegetable garden idea allows you to place your crops near the kitchen for ease of use, and you can also pay close attention to pests and diseases.
Plant Your Vegetables in Pots
To have a successful vegetable patch indoors, you need to install it in containers. There are different kinds of pots that you can use for this purpose, such as flower pots and barrels. You should find a wide variety in your local garden store or supermarket, one that has good drainage holes in the bottom.
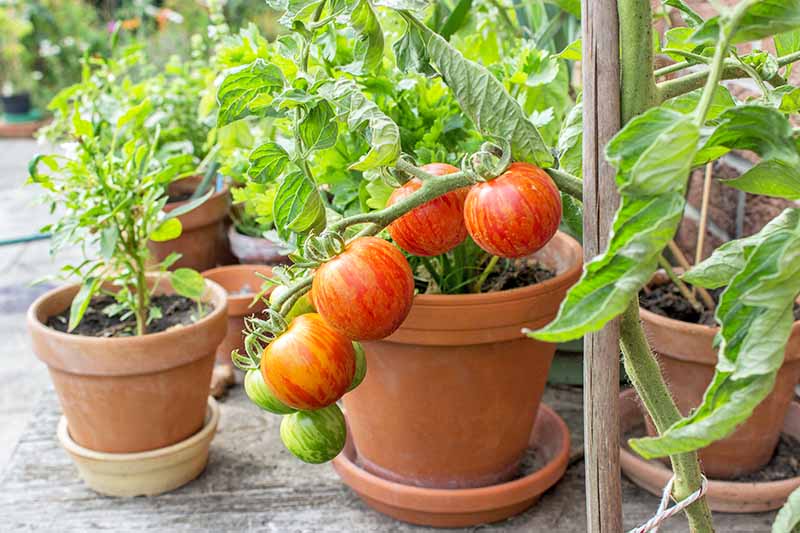
Image credit: https://gardenerspath.com/
Organic soil is the best option because regular soil or compost can get dirty quickly. If you use a regular potting mix, your containers will need to be turned over regularly so that all of the dirt is mixed up with the new material being added each time.
Use tubs, pots, hanging baskets, and troughs to grow vegetables and herbs. Potted edibles and other container gardening ideas are convenient for small vegetable gardens using a patio and a court space. You can use your large container to plant flowers and a range of crops, including salad leaves and chilies, which are decorative and practical.
Regular harvesting of your plant leaves, such as lettuce and chard, will help prevent crowding. Both your crops and containers should be compatible with the growth of the plants.
Consider Companion Planting
There are some vegetables that work well together. For instance, basil can help control tomato plant pests and fertilize with its nitrogen content. Dill attracts the predators of aphids, ladybirds, and hoverflies to your small garden.
Companion touted plants not only prevent pest infestation but also help conserve space. Shade-loving flowers and plants can also benefit when planted next to taller plants. Other leafy greens and basil hate hot afternoons and will thrive when grown next to tomatoes.
Lettuce will also keep on producing all summer when taller plants shade them. You can plant early harvested vegetables such as spinach, radishes, and peas with slow-growing crops such as broccoli, root vegetables, and peppers.
Build a Raised Bed Vegetable Garden
Raised beds are a very popular way of growing edibles in a small vegetable garden. You can also design your raised beds using various companion planting techniques.
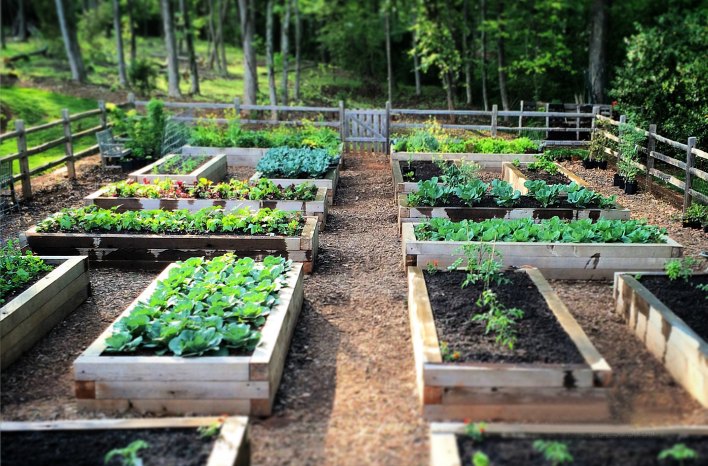
Image credit: https://site.extension.uga.edu/
Plant garlic, leeks, and onions together with beans snap peas, and corn for a high-yielding low maintenance combo of vegetables. You can use brick, wood, and sleepers to frame your bed. Make sure you fill your beds with good quality soil and then add your vegetables or fruits.
Plant a Small Vegetable Garden amongst Flowers
Growing vegetables in a small vegetable garden require creative thinking. If you don’t have much room for a full-sized vegetable garden, grow veggies among flowers. Vegetable and fruit plants can blend attractively beside other plants. Some flower bed winners would do well with most vegetables like carrots, spinach, tomatoes, and beans.
Transplant your young seedlings of cauliflowers into the bed prepared to plant flowers. Once they mature, the heads of the cauliflower are protected from sunlight due to the foliage of the surrounding flowers. With its pretty daisy-like flower blooms, this plant will shade your vegetables very well, which makes it perfect for carrots and spinach.
Grow Vegetables in Window Boxes
You can also grow vegetables in window boxes that you’ve hung near your windows. Vegetables like lettuce, peas, and beans will yield a bountiful harvest provided they get enough sunlight and water. Tomatoes and peppers do well when placed next to the kitchen window for this reason; you’ll always see them when inside the house and be reminded to care for them.
If you grow vegetables in boxes, you will find that they need more frequent watering than vegetables planted outside the house. The reason for this is that soil in boxes heats up faster and dries out quicker. You can try covering the bottom of your window box with enough bags of brown peat moss to allow the soil in your box to retain more moisture.
An advantage of growing vegetables in boxes is that you can move them around, placing them where they will get full sun and thus ripen faster. A disadvantage of raising your vegetables indoors is that they produce a smaller yield than those grown outside the house. For this reason, it is best to start your plants in the house and transplant them outdoors once they are large enough.
Succession Planting
Succession planting is useful for any planting technique, whether it is a large or small vegetable garden. But it is most valuable when you have limited garden space. It means reseeding quick-growing garden crops from two to three weeks during the growing season. It’s useful for plants such as zucchini, beans, and lettuce.
Small-Space Vegetable that Grows and Produce Well
Pole Beans and Peas
Start your peas on trellis in early spring, and they’ll provide you with fresh peas as well as a nice crop of fertilizer for early-season flowers and vegetables. In the fall, plant your pole beans in large clumps or groups instead of rows. This will allow them to take advantage of any heat retained from the summer; they will produce a crop before the cold weather sets in again.
Tomatoes
Tomatoes are very popular in gardens, but they require a lot of room that the average gardener may not have. Cherry tomatoes are often grown on plants that can be planted alongside regular vegetable crops. Smaller varieties work very well for container gardening; some good choices are determinate tomatoes, beefsteak, and green tomatoes. Make sure you learn how to prune tomatoes for better yields.
Salad Greens
These are among the easiest vegetables to grow. You can even grow them indoors in your kitchen. The key is finding a good fertilizer that will not be too strong for your baby greens and giving them enough nutrition to mature into full-size heads of lettuce, spinach, or other salad crops.
FAQs on Vegetable Gardening in a Small Space
What kinds of vegetables can be grown indoors?
Certain kinds can be grown indoors, such as carrots and tomatoes, though you should first research to see if they will grow well in a container. Also, mint is easy to grow and can help cleanse any containers you use for your indoor garden.
What do you need to learn before starting a vegetable garden?
You should investigate the needs and requirements of your chosen veggies and decide on your space and what equipment you need beforehand.
How much water is required per day for growing vegetables in pots?
Vegetables grown in pots will require more frequent watering than those grown in the ground. Be prepared to water your plants at least twice a day if they are grown in pots, and make sure you allow them to drain.
Final Thought on Small Space Vegetable Garden
Growing vegetables in a small space is possible, but you need to be more creative than planting in a large yard. If you’re growing your vegetables, it is important that you know what works best for the type of vegetables that you want to grow and pay attention to their sunlight and water needs. Your site location should also have adequate sunlight, access to water sources, and has rich, fertile soil.
The post Vegetable Gardening in a Small Space appeared first on Kitchen Infinity.
Did you miss our previous article…
https://www.centrecountyfood.org/?p=395


:max_bytes(150000):strip_icc()/cleaning-gas-burners-1900625_05-d1a51f015ed84764b127fc8cfd7ff128.jpg)
/cleaning-gas-burners-1900625_09-f0f9bf93e4d44ef690d8930f548c1fb0.jpg)