post

Transitional Style: Between Traditional and Contemporary

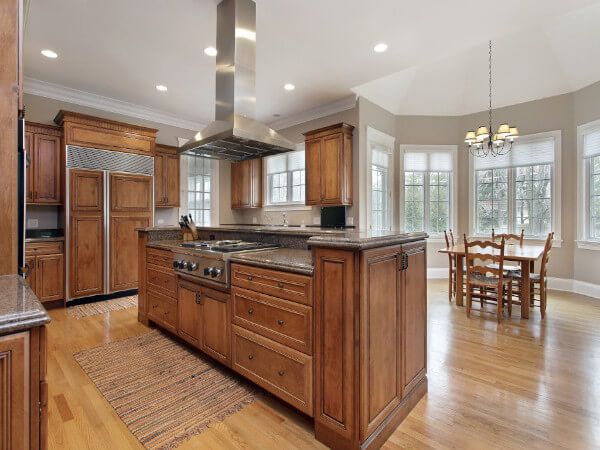
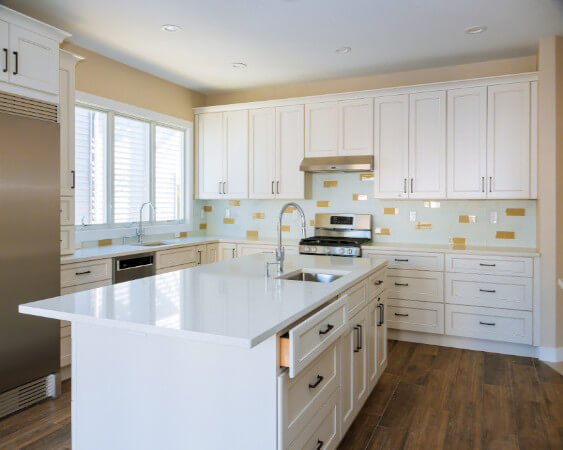
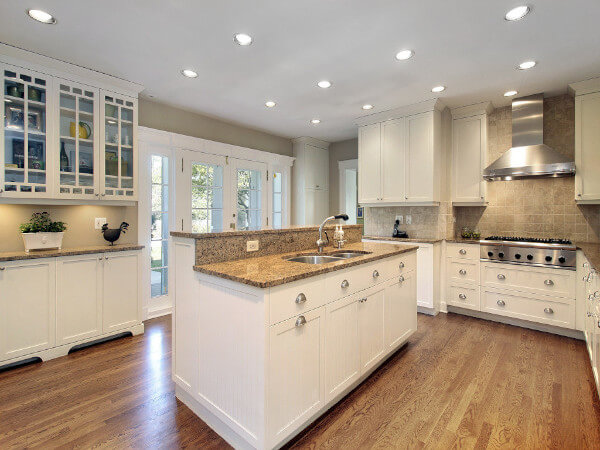
Are you looking for a kitchen design that is fresh and unique, but has a comfortable, familiar feel? It sounds like transitional style may be for you. This hard-to-define concept inhabits a vast space between traditional style and contemporary, and offers a perfect canvas for personal statements.

Perhaps your style is clean and simple, bordering on contemporary. But you want a place for Great-Grandma’s flowered china cocoa pot. Establish the tone of the room with Shaker cabinets in a painted finish. Then modify one or two cabinets to display heirlooms and art through clear glass doors. Voila! A transitional space that, with one foot in each century, tells worlds about you and what you care about.

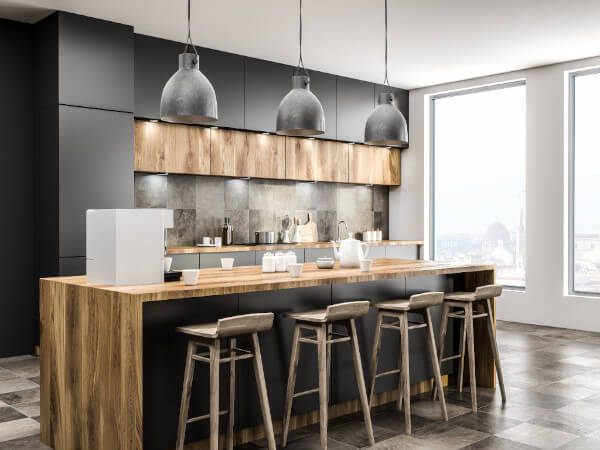
Modern Twists on Traditional Features

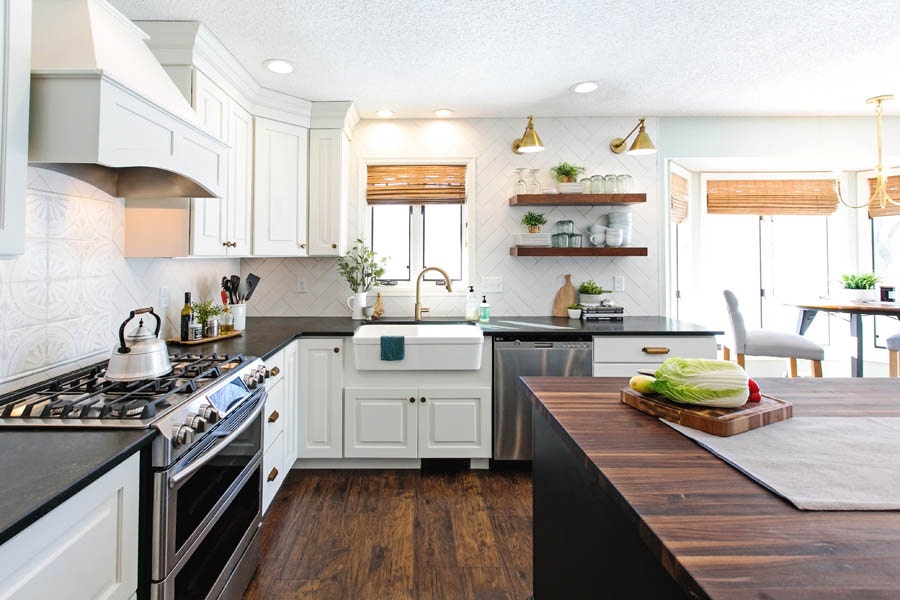
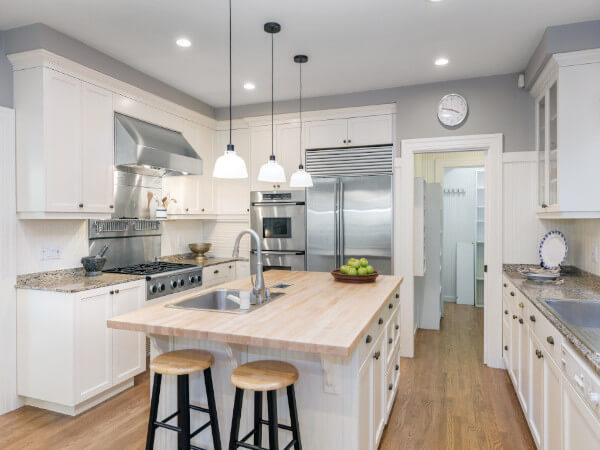
In the kitchen pictured above, the farmhouse sink, a very traditional style, rockets to the 21st century when fashioned out of stainless steel. In itself, the sink is an example of transitional design. It is comfortably flanked by Shaker cabinets adorned with traditional cup pulls. Crossing the room, you find ornate pendant lights followed by a stainless range hood and glass-door wine cabinet. The repetition between traditional and modern styles creates a balance throughout the space.

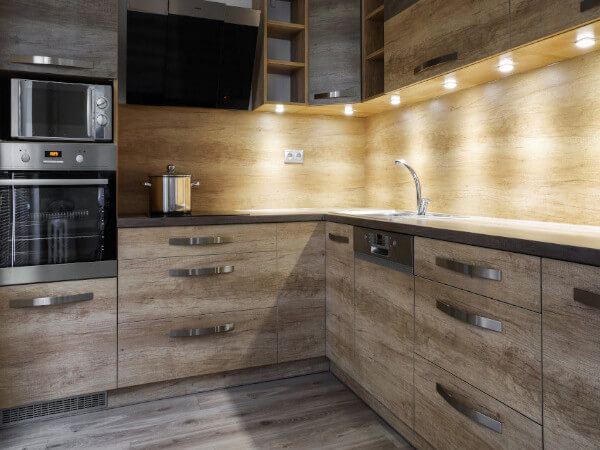
Combining Different Surfaces

Open kitchen design in modern transitional style has large black island cabinets, black crown molding on white Shaker perimeter cabinets, and distressed hardwood flooring.

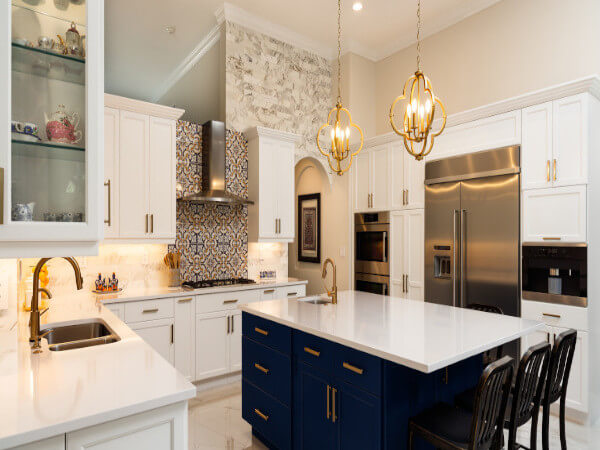
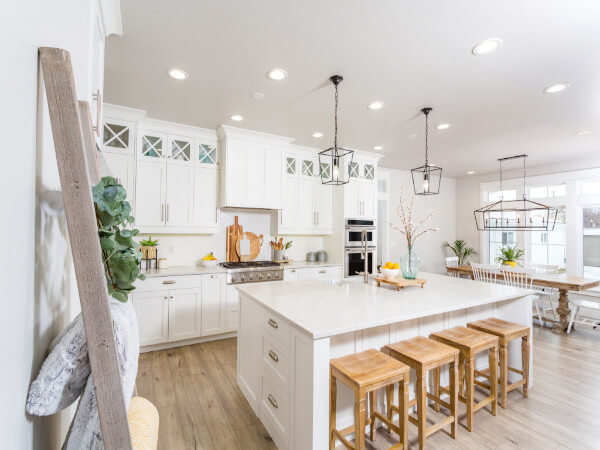
In the photo above, the blend of contemporary and traditional is achieved by combining manufactured and natural surfaces in the same space. The sleek black and white Shaker cabinets stand out against the distressed hardwood floors. Additionally, black crown molding on the white perimeter cabinets help to tie the kitchen together. The cabinet hardware, simple stainless bar pulls,  help add a dramatic touch without straying from the established pattern.

Do you have any questions on how to create a graceful transitional design? Have you successfully mixed old and new in your kitchen? Share your experience by commenting below.

The post Transitional Style: Between Traditional and Contemporary appeared first on CliqStudios.

Did you miss our previous article…
https://www.centrecountyfood.org/?p=235

post

6 Tips for Color Mixing New Neutrals


ccentuate the Positive

Use color selections in CliqStudios’ Signature line to draw attention to the most interesting features of your space. For example, ordering cabinetry for an island or a tall pantry area in a contrasting color. Navy or carbon finishes create the look of custom built in furniture, in addition to adding visual interest. This contrast also shines a light on your favorite parts of the room.

In the Zone

Your kitchen has natural zones for cooking, storage, dining and often, an open family room for conversation. Cabinetry finish choices interplay with paint, flooring, tile and upholstery choices to define those zones. Therefore, consider soft, Cloud White for the kitchen perimeter, then complement with Classic Gray in a built-in beverage center.

A kitchen using CliqStudios Dayton and Mendota cabinets in white around the perimeter and black for the island.

Keep Your Balance

When mixing finishes, you’ll see the best results if you place darker colors lower, such as for base cabinets. Allow lighter colors to float toward the ceiling on wall or glass front cabinets. The inverse, light colors on the bottom and darker colors on top, rarely works and often makes a space feel off-balance. For example, tall cabinets, like pantries and shelving units will work well finished in either a dark or a light choice.

Take Your Temperature

Be sure to place color samples side by side for comparison. Colors that appear to have blue undertones are considered cool colors. Colors that have yellow or red undertones are warm colors. Therefore, as you mix and match colors, stick to either a warm palette or cool palette for cabinetry, paint, window coverings and other materials.

Experiment

There’s no need to limit yourself to mixing only colors, ask your designer to create a 3D rendering to see two door styles. Consider a white Shaker door paired with a wood raised panel door. It’s your kitchen and the final project should reflect your own taste and style.

Test Drive

As you consider the possibilities for mixing and matching colors, order samples to see the colors in person. Computer monitors and even printed brochures can’t represent finishes precisely. But looking at an actual wood finish sample will help you picture the color in morning light, evening light and everything in between. We’ll even send two 5×7-inch samples absolutely free.

The post 6 Tips for Color Mixing New Neutrals appeared first on CliqStudios.

Did you miss our previous article…
https://www.centrecountyfood.org/?p=231

post

Personalize Your Kitchen for a Soft and Inviting Space

Everyone wants a kitchen straight from a magazine. But magazine kitchens can sometimes seem to be missing something: people who actually live in them. Once you have your beautiful, magazine worthy kitchen, remember to personalize your kitchen to make the space yours. Take a look at these beautiful kitchens that feel anything but empty.

Warm and Inviting

In the kitchen pictured below, white painted cabinets, stainless steel appliances, and an accent color on the island establish an a polished updated style. Open shelving on the island provides useful and decorative storage. Far from boring, sterile, or crowded, this beautifully decorated space says much about the owner.


Signature Austin Shaker cabinets in Cloud White and Studio Gray

Transitional with a Twist


This kitchen uses CliqStudios Dayton style doors in the painted finish Urban Stone. It’s painted doors and bar handles make the space feel modern, but the natural hardwood floors don’t allow it to feel stark. Instead, it feels warm and inviting, with plants and a teapot set out.

California Cozy

This California kitchen uses a blue island to create a furniture like feel. Using two-toned cabinetry helps to create visual appeal, and separates the island from the rest of the kitchen as an area that can double as seating. The greenery scattered through the two rooms and the cool blue-grey walls add more color without being too much.

Minimalist and Playful

In this kitchen, CliqStudios style 31 doors in the finish Harbor paired with pink walls, wooden counters, and mixed pendant lighting creates an entirely unique room. The many varying colors, textures, patterns, and art pieces feel stylized and personal.  Different bowls and baskets throughout the kitchen hold different types of plants, all tying into the greenery outside the massive window over the sink.

Are you looking for a quick and easy way to personalize and soften your kitchen? Try the shelves at Goodwill or your local flea market. For a few dollars you can completely change the nature of the space.

The post Personalize Your Kitchen for a Soft and Inviting Space appeared first on CliqStudios.

Did you miss our previous article…
https://www.centrecountyfood.org/?p=228

post

Decisions to Make Before Interviewing Remodeling Contractors

For the best kitchen remodel experience, do some research before interviewing remodeling contractors and asking for bids. You will minimize misunderstandings, expensive change orders and be better able to compare bids with the same specifications. Be well-informed on the following topics before talking to any kitchen contractors.

Your Budget

Decide how much you want to spend on the project, then develop a realistic budget and stick to it. You may need to do an overall expense review and research payment options. To fill in the total budget amount for each item below start with a design and quote from a professional designer.

Project Scope

Are you are simply replacing cabinets, countertops, flooring and appliances? Moving a sink or range? Or moving walls? The more extensive your kitchen remodel is, the more important it is to develop a detailed plan and stick to it.  When you renovate a property there are certain things that need to be updated to meet code. There may also be delayed maintenance that has to be done before the remodeling. Be sure you are interviewing remodeling contractors with experience and skills that match your needs.

Must-Haves Versus Wants

List everything you hope for in a kitchen (specialty storage, glass door cabinets, type of appliances, etc.). Prioritize, classifying each item as: Must Have, Can Compromise, or Can Wait.

Your Style

CliqStudios designers do a virtual walkthrough using Zoom or MS Teams with each customer.  To prepare for your virtual walkthrough, be ready with your phone or tablet to show the designer around your current kitchen. Our designers recommend that you also prepare an idea file with pictures, notes, and links to web pages. Our photo gallery, Pinterest and Houzz are good sources of inspiration.

ppliances

Consult with your designer before buying appliances, asking for suggestions on the best fit for your space. Visit an appliance showroom and look at models, check out Consumer Reports for quality reviews, then check multiple stores and websites to find the best prices. If you are on a tight timeline, be cautious about the lead time on special order items. When you are interviewing contractors also check with them about discounts they might extend to you. 

Cabinets

Cabinets represent a major share of your remodel budget and must stand up to years of use, so quality is as important as style. How to compare cabinets  will help you evaluate quality across brands, and your designer can provide advice on style. Cabinets need to be on site early in the remodel process, so be sure the company you buy from can deliver accordingly.

Countertops, Flooring and Backsplash

The type of countertop and flooring you choose (quartz or laminate countertop, hardwood or tile flooring, etc.) will affect your contractor’s timeline and budget. While you can wait to discuss specific styles and colors, it’s important to share your preferences with each of the contractors you interview. When interviewing contractors check with them on whether they work with particular materials that they are familiar with and if they can get a better price.  

Once you have all this information, you are ready to start interviewing remodeling contractors. Look for a licensed, experienced, reputable and insured company. Personal recommendations from friends and family combined with research on professional websites will give you the best overall view of contractors to interview and accept bids.


The post Decisions to Make Before Interviewing Remodeling Contractors appeared first on CliqStudios.

Did you miss our previous article…
https://www.centrecountyfood.org/?p=225

post

4 Must-haves For Creating A Cook’s Dream Kitchen

Do your family and friends insist on hosting events at your home because they know you make amazing meals? Cooking can be a chore for some, but for others, cooking is a lifestyle. If you fit into this category, one of the best ways to accommodate your passion is to renovate and create a more effective workspace. Here are a few ways you can create your dream cook’s kitchen:

1. Improved Layout & Storage

Renovating your kitchen can maximize the layout and storage of your space making it easier to cook. Every kitchen is broken down into 4 work zones to help with various activities across the kitchen. As an avid cook, consider tools, ingredients, and processes used in each of these zones to discover the best work flow.

Pantry Storage Zone

This section of your kitchen is great for storing dry goods, soups, canned foods, and non-consumable items like pots and pans or crock pots. Locating these items in pantries will help you stay more organized and keep the rest of your kitchen free from clutter. It is often found near the refrigerator so that all food can be easily accessed within the same zone.

Tall pantry cabinet with upper shelves and bottom roll-out trays, shown in a Shaker style and White paint.

Sink Storage Zone

Cleaning up dishes and clearing away messes is essential in keeping your kitchen organized. Since a lot of cleaning in the kitchen involves using the sink, it’s best to keep cleaning supplies nearby. Using a super sink base or a pull-out trash cabinet are prime examples of effective storage. You can store away all of your supplies in the pull-out baskets and tilt-out of the sink, or keep your trash and recycling off of the floor by filing them away in a cabinet.

Food Prep Zone

Frequently used items like eating utensils, cutting boards, and cookie sheets need to be stored close to your workspace where you prepare your food. If they are across the kitchen from where you work, you will find yourself walking around more than cooking. Try adding a tray divider cabinet near your oven to make baking more efficient. You can also add a cutlery divider near your plates and bowls so serving meals is more convenient.

Cooking Storage Zone

When you’re ingredients are prepared, you probably don’t want to search high and low for pots and pans. We recommend that these items are generally placed around the cooktop and oven for ease of cooking. Having ample countertop space in this zone will also give you enough room to set out your ingredients and cookware. This pots and pans organizer is essentially a roll-out tray made specifically for your pots. Another great option is the pull-out drawer cabinet with deep drawers.

2. Kitchen Work Triangle

If you’re in the middle of cooking your great grandma’s classic chicken alfredo, the last thing you want is to run across the room to the refrigerator. The NKBA (National Kitchen & Bath Association) recommends using a work triangle. It’s a straight line that runs from the center of your sink, to your cooktop, to your refrigerator. Since these are primary work stations in the kitchen, it’s crucial that they are close together. To create your cook’s dream kitchen, each leg should be between 4 and 9 feet long, and the total should be no more than 26 feet.

3. Open Countertop Space

Having plenty of countertop space is critical to the flow of cooking. This might mean adding an island or peninsula to serve as your prep area. You can also put appliances in locations that don’t reduce counter space. A microwave cabinet tucks your appliance neatly out of the way while staying accessible. Adding some tall pantries and drawers are also great options to consider when opening up space.

4. Quality Cabinet Selection

Search for high-quality cabinet construction to prolong the life of your kitchen remodel. CliqStudios cabinets are incredibly durable and are factory finished. They’re also easy to clean, have many storage solutions, and make it easy to incorporate the things you need for a cook’s dream kitchen.

Get started with a designer today!

The post 4 Must-haves For Creating A Cook’s Dream Kitchen appeared first on CliqStudios.

Did you miss our previous article…
https://www.centrecountyfood.org/?p=222

post

How Do You Hire a Contractor?

Why Do You Need a Contractor?

Before setting out to hire a contractor, know who and why you are hiring them. Do you need a general contractor or are you able to do some of the work yourself and will hire skilled subcontractors? In your search for a contractor, be sure to check reviews in professional service websites.  Houzz, Angi and Home Advisor are popular sites. Also check professional organizations such as NARI (The National Association of Remodeling Industry) Better Business Bureau and other local agencies.


ll Costs Need to Be Set in the Contract

Once your budget is established and the bid is accepted, it needs to be followed by both parties. When you hire a contractor make sure everything is agreed upon in writing.  Change orders and add-ons can be endless because of the “while we are at it” syndrome. Be sure to research thoroughly the contractor’s history of completing projects. Watch for reviews that reference overcharges.

Do You Need the Contractor You Hire to Be Licensed, Insured and/or Bonded?

Licensing Not all cities, counties or state governments require education, certification and licensing in the building industry. If you live in an area that doesn’t, you will need to do more research on the builder’s experience and reputation. Insurance and bonds There are three different insurance types that good contractors carry. They carry insurance on the work they perform, which allows them to offer a warranty. They carry workers’ compensation insurance, as required by law, to cover themselves and their employees in the event of an on-the-job injury. The third type of insurance good contractors carry is actually a bond that protects them and you in the event that the contract is not fulfilled or that there is damage to your home while they are working on it.

How to Compare Bids?

To compare bids, make sure all materials are of the same quality if not the same exact item. You will want to be sure each bid has both materials and labor listed separately, so you can make a good comparison on what you are purchasing. Especially in today’s busy remodeling market timeline may need to be very flexible. At this time all good contractors are busy. If you can, make allowances in your timeline to get quality materials and workmanship.

When You Hire a Contractor Make Sure You Are Hiring a Professional

When you hire a contractor, compatibility is a good thing to have. More importantly, you want someone who is trustworthy and dependable. General contractors should be stopping by often to check on the progress of the work. A good contractor complies with all building codes, permit and inspection requirements. How and why you hire a contractor will make a big difference in the success of your project. Knowing the language spoken by the industry will help you to understand the process and set your expectations for the outcome. Your home and your project are valuable and worth the extra time it takes to research contractors before you sign on the dotted line.


The post How Do You Hire a Contractor? appeared first on CliqStudios.

post

Bathroom Remodeling With CliqStudios

Planning a bath remodeling project? Whether you’re trying to get more storage, update the style and quality of your bathroom vanity, or design a more efficient space, a designer can help you to succeed.

Renovating homeowners often work on several projects in a row. They enjoy the convenience of getting bathroom cabinets that come fully assembled and equipped with the same timeless styles, construction quality, and design services that CliqStudios is known for. CliqStudios designers provide complimentary design consultation, and with just a few measurements, will  help you lay out a custom-fit plan for your bathroom cabinets.

A bathroom project is a great way to  introduce yourself to CliqStudios! Previous clients find that bathroom projects are a great way to try out our unique process. Please be aware that free shipping is only available on purchases of $3,500 or greater.

Single Vanity Bathrooms

If you’re updating a powder room, a single vanity is all you’ll typically need. For most transitional or modern designs, a shaker or recessed-panel door style is versatile and timeless. CliqStudios vanities are available in all of our finishes and stains. The standard vanity cabinet box depth is 21”, and the standard height is 34 ½”. Furthermore, a designer can help you determine the proper cabinet widths for your space.

CliqStudios bath cabinets shown in Austin White door style and finish


This master bathroom vanity matches the kitchen island. Style: Dayton, Finish: Carbon

Double Vanity Master Bathrooms

For master baths, a double vanity is typical, and supports two sink bases cabinets. Additionally, it supports a combination drawer and door combinations. Available in 42” and 48” widths. Custom features include central vanity towers, tall linen closets, knee drawers, wall cabinet shelving, and more. 

double vanity with white Shaker cabinets, gray countertop with two black beveled mirrors above
A double vanity provides ample storage in this master bathroom.

Photo gallery of remodeled bath features CliqStudios Austin Painted White cabinets
Remodeled inset-style bathroom featuring two double vanities and a 1-door, 1-drawer single vanity, and a tall linen cabinet. Style: Austin-CH. Finish: Painted White.
Beautifully designed new construction home features master bathroom including CliqStudios.com Austin inset-style cabinets in painted White to create furniture-style double vanity.
Master bathroom featuring two 6-drawer sink base vanities, a 3-drawer vanity, and a vanity tower stacked on a furniture drawer.
Bath remodeling project features shaker-style cabinetry by CliqStudios.com, shown in Dayton style in Birch Sable finish.
Modern bath design includes double vanity built with dark shaker cabinets. The custom-cut mirror creates a central focal point, making the space feel extra spacious. Style: Dayton. Finish: Birch Sable
double vanity in white bath is built of semi-custom shaker cabinets topped with white marble
Beautiful master bath with a double vanity topped with white marble. Style: Rockford; Finish: Painted White
bath has generous cabinetry, including double vanity, open shelves and ceiling-high stacked cabinets in white shaker style with brushed nickel trim
Stacked cabinetry and a base corner cabinet provide this master bathroom with plenty of storage. Style: Dayton; Finish: Painted White
Owners ensuite (master bath) in new home includes custom vanity featuring inset cabinets, glass display case stacked on counter and gray marble vanity to with undermount sinks and vintage-look light fixtures.
Owners ensuite (master bath) in new home includes custom vanity featuring inset cabinets, glass display case stacked on counter and gray marble vanity to with undermount sinks and vintage-look light fixtures. Style: Austin-CH. Finish: Painted White
double vanity features low counter between sink units and stacked cabinets on ends, built of white shaker semi-custom cabinets with furniture detailing
Master bathroom featuring shaker style 3-drawer sink base vanities with stacked storage towers, a floating furniture drawer, and ogee base molding. Style: Dayton. Finish: Painted White
CliqStudios bath cabinets shown in Cambridge Studio Gray door style and finish


Remodeled master bathroom featuring abundant storage. Style: Dayton. Finish: Painted White
3d rendering of cliqstudios kitchen design with white shaker cabinets and tea leaf kitchen island with seating

Ready to start your free design?

Send us a sketch with your room measurements

and we’ll connect you with your personal designer.

GET STARTED

The post Bathroom Remodeling With CliqStudios appeared first on CliqStudios.

post

The Decorative Style Cabinet Door

The History of the Decorative Door Style

The decorative cabinet door styles ebb and flow in popularity. Both the seventies era and then the nineties saw the popularity of solid wood, stained, decorative style, cabinet doors. In the seventies the focus was earthy and natural, so the stained wood doors were the height of popularity. In the nineties the decorative door style, in stained wood, was once again very popular. This time it was with lighter more natural stains combined most often with white.  The focus was the warmth and coziness this created, with a country feel.

What Defines the Decorative Door Style?

The decorative style, sometimes with a raised panel, gives the door an extra level of detail. These cabinets provide a canvas to display the craftsmanship of the cabinetmaker and the beauty of the wood product. It provides a dynamic design element of depth and dimension to the cabinetry. Decorative style are cabinet doors that have extra trim details. A raised panel style is when the center portion of the panel is flush with the door framing. Decorative style doors call attention to themselves and elevate the look of the cabinetry, contributing an upscale look to the kitchen design.

CliqStudios offers several beautiful, raised panel or decorative style cabinet doors. Each line has styles in both stained wood and painted surfaces. Many of today’s styles have a more subtle design than doors of the past, but they reflect the dimension and depth of design that this style is known for.

Craftsman Line

Mason Style

 Traditional styling with a farmhouse flair. The 1 1/4 overlay adds visual interest while the back bevel profile on all four edges, adds  dimension and a feeling of sturdiness.

Signature Plus Line

Fairfield Style

Tailored details like the stepped interior profiling and eased outside edge provide simple and fresh styling.

Lenox Style

Elegant, mitered applied molding offers a sophisticated style in a flat panel door.

Signature Line

Carlton Style

A raised panel style featuring mitered corners, crisp stepped inside waterfall profile and a slab drawer front.

Mendota Style

A raised panel door and slab drawer front with gracefully stepped outside edges and beveled center panel provides a clean, crisp profile.

Lyndale Style

Scalloped raised panel, 5-piece doors and drawer fronts with eased-waterfall edges blends beautifully with traditional home décor.

Cambridge Style

A raised panel door and 5-piece drawer front with gracefully stepped outside edges and beveled center panel provides a clean, crisp profile.

Bayport Style

Scalloped raised panel, 5-piece doors and slab drawer fronts with eased-waterfall edges blends beautifully with traditional home décor.

For complete information on all of the decorative door styles available at CliqStudios, please visit us here . Or if you would like assistance connect with our  team of designers .

The post The Decorative Style Cabinet Door appeared first on CliqStudios.

Did you miss our previous article…
https://www.centrecountyfood.org/?p=210

post

How To Create Your Temporary Kitchen During a Remodel

During the course of a major remodel, the kitchen is often out of use for nearly two months. Your family will still need to eat. Restaurants will quickly grow old (and expensive), so you will want to plan an area to create quick meals. If your home doesn’t have a second, smaller kitchen, you will want to create a temporary kitchen to use during the remodel.


Temporary kitchens may not be very glamorous, but will suffice for a few months while the new kitchen is being built.

There are seven steps to creating a temporary kitchen:

Find a location in the home with a sink and faucet. A low-traffic bathroom or utility room generally works.Designate the countertop as a food preparation area. A small card table can also be moved into the area for additional work space.Move your microwave into this location as well. You’ll want it out of the real kitchen, and close to where the food is.If you can, move your refrigerator near the temporary kitchen area too. If your full-size refrigerator won’t fit, consider buying or borrowing one that will. An under-counter, college dorm room fridge to store the necessities is an easy fix.Don’t pack away all of your small appliances. Crock pots, hot plates, toasters, etc. are great to keep around for a variety of meals.Store silverware, dishes, kitchen utensils, and napkins nearby in large storage containers. If they are breakable, make sure to keep them far from ledges and out of reach from pets and small childrenKeep cleaning products, paper towels, and oven mitts readily available.

Having a space to eat and prepare food while undergoing a kitchen renovation can make a huge difference. While you might not want to host a dinner party in a temporary kitchen, it gets the job done for the few weeks you’ll be using it.

The post How To Create Your Temporary Kitchen During a Remodel appeared first on CliqStudios.

Did you miss our previous article…
https://www.centrecountyfood.org/?p=207

post

How to Design Mudroom Cabinets: A Step-by-Step


Mudroom cabinets designed for the MinnePHit House.

With three small children, our clients, the Brazelton’s, needed a mudroom that could stand the test of time. To create this space we needed to answer an important question: What are the most important features in a laundry room?

1) What do you need to store there? Create a checklist.

Here are some examples: jackets, boots, shoes, scarves, mittens, flashlight, dog leash, keys, briefcases, totes, reusable grocery bags, outdoor toys, towels for muddy feet, etc.

2) Then determine the best type of storage for each of these items.

Is it drawer or cubby storage? Do you need open shelves or shelves with bins or baskets? If you have a hard time visualizing, go to your current closet and pull out what you’d need to store. This will help determine the type of storage you need.

3) How many people need to have their space for storage?

For example, the Brazelton’s need at least three bays for storage, and if there can be five, that would be even better. They have two dogs, too. So there will need to be some space for their toys and leashes.

4) Think about doors and determine how much you want to see.

Are you okay with seeing hanging jackets and baskets in cubbies? Or do you need everything out of sight?

The Brazelton’s don’t mind jackets and coats hanging in the open for easier access for their kids, and they opted for some drawers and hidden storage behind doors.

If children need to use the space, keep their dedicated storage closer to the floor so that they can reach. If you are going to use baskets inside the cubbies, be sure to source those before you size your cabinetry to make sure they will fit. As we’ve found in the past, basket sizes are not standardized.

5) Determine if you’d like a bench or a seat built into the cabinetry.

In the case of the Brazelton’s, we built in a bench so that all three children can sit and put their shoes or boots on at the same time. Consider your morning routine and how much space you might need.

6) Measure the space that you need to fit into.

Don’t forget about trim, crown molding, and where the cabinetry meets the door or other architectural details in your home.

7) Now draw up your ideal storage.

If you don’t have room for everything, prioritize your spaces. Can you store some of the seasonal items elsewhere? If you need more help, contact CliqStudios for a complete plan and more guidance on your project.

The post How to Design Mudroom Cabinets: A Step-by-Step appeared first on CliqStudios.

Did you miss our previous article…
https://www.centrecountyfood.org/?p=204