Succulents and cacti are popular houseplants, but it can be hard to know their differences as they almost look the same. Unfortunately, most people use the terms interchangeably when talking about these two types of plants. This can be confusing to those new to both of these plants.
Even though cacti and succulents may appear similar, they are actually different. While cacti fall in the category of succulents, there are many succulents that are not cacti. To help clear some confusion regarding cactus vs. succulents, we’ve put together a list of their top differences below. Keep reading!
What Are Succulents?
Succulents are a variety of plants that store water in their roots, leaves, and stems. This characteristic leads to increased drought tolerance. Succulent plants are very popular in home gardening because they require very low maintenance compared to other houseplants.

Image credit: https://succulentplantcare.com/
Succulents are available in more than 60 varieties. Some succulent varieties include aloe, haworthia, sedum, sempervivum, and cacti. So, as you can see, most succulents don’t belong to the same plant family. They differ in their visual, genetic, and geographical features.
Characteristics of Succulents
They have an evolved leaf texture surface that quickly prevents the plant from losing water. Succulent plants exhibit growth patterns consistent with water preservation. They have slow and compact growth consistency with energy preservation, spherical and columnar growth with limited surface area to avoid exposure and evaporation.They have ribs and grooves that allow them to shrink during droughts and swell with water when there’s precipitation.The plant also has Crassulacean acid metabolism photosynthesis, which allows it to open its pores at night to reduce moisture loss and take in carbon dioxide needed for photosynthesis during the day. In some succulents, photosynthesis is conducted by their green stems.They have a shallow root system to allow the plant to absorb moisture at the surface of the soil during drought periods.Some succulents such as the leaves of purslane are edible and can be used in salads and the juice of aloe vera plants, which has several health benefits.The agave plant is also another non-cactus succulent that is edible and is used to make agave syrup and tequila. Other non-cactus succulents include the moss rose, purple ice plant, Angelina stonecrop, Flaming Katy, and Chocolate Drop stonecrop.Another feature distinguishing cacti and succulents is that non-cactus succulents are native to multiple regions of the world, while most cacti are native arid climates.Succulents enjoy the warmth and bright light, but you shouldn’t leave them in prolonged direct sun exposure and excess warmth. Despite their drought tolerance, they can get leaf burn from too much sun exposure.Overwatering a succulent is also a sure-fire way of seeing your plant die because of root rot. But that doesn’t mean that you should never water them. They need water but in excess as this will hurt the plant.
What Are Cacti?
Cacti display the same characteristics as succulents, such as water storage, shallow roots, fleshy stems, and waxy leaves. If you want rock garden plants that can survive all the hardship, try cacti. But there’s always something that sets them apart from other succulents. Maybe it can be their spines or something else.
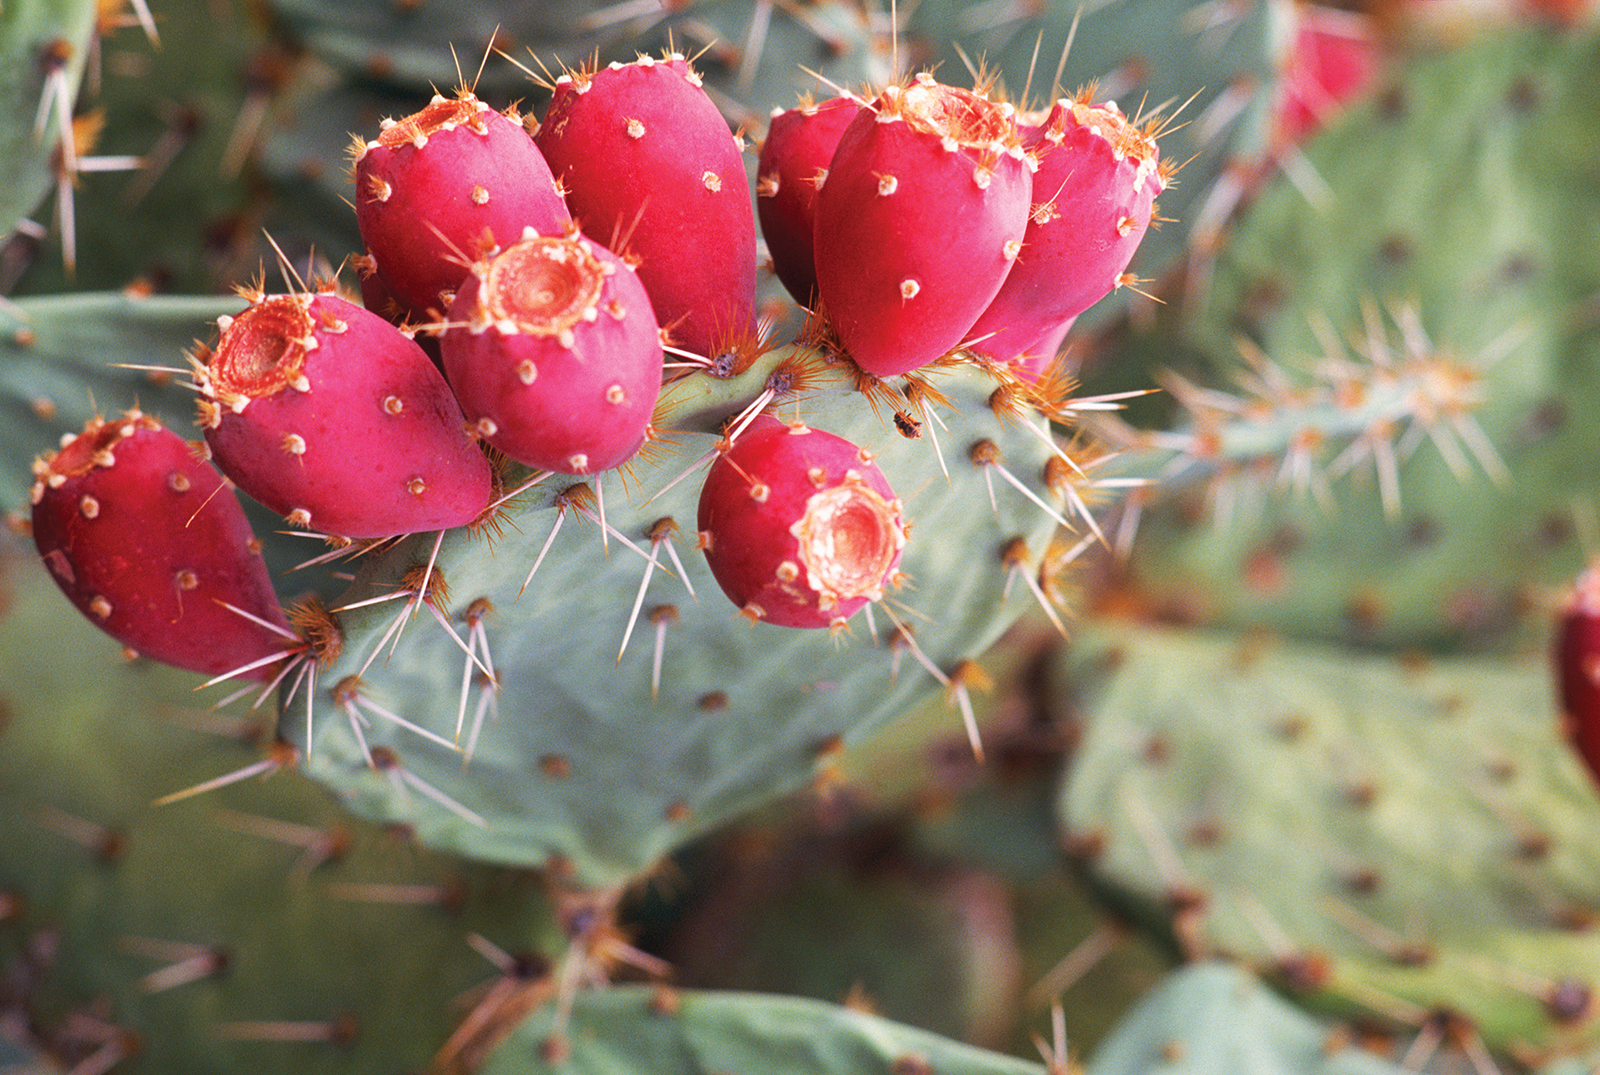
Image credit: https://cdn.britannica.com/
Features of Cactus
The big difference is that they don’t have leaves and branches but are full of spines. You can also find some cacti without spines. Spines are some of their important adaptation features to survive in arid deserts.Another distinguishing feature is the areoles. An areole is a small bump on the surface of a cactus. It can be light or dark and serves as the site where flowers, spines, and hair grow out. An areole is the most defining feature of the cactus. Therefore, if the plant has spines but no areoles, that’s not a cactus.They don’t have leaves and branches but a succulent stem that photosynthesizes and stores water. Some cacti stem look like pads and flattened segments. They include prickly pears and Christmas cacti. Their large, colorful flowers produce fruit.They also have a water preservation feature, including a shallow root system, grooved stems, slow-growth, and column-like or spherical columns. Most cacti are native to the arid desert, but a few varieties like prickly pear cactus have better tolerance to cold.
Major Differences Between Cacti and Succulents
Cactus Spines
Most cactus varieties produce spines that may be needle-like, bristly, hairy, and woolly. These spines perform several functions. They protect the water-rich flesh of cactus from thirsting animals. They also disrupt the airflow around the cactus stems to prevent excessive water loss, especially in drying desert winds. Each spine also provides a small shade for the plant.
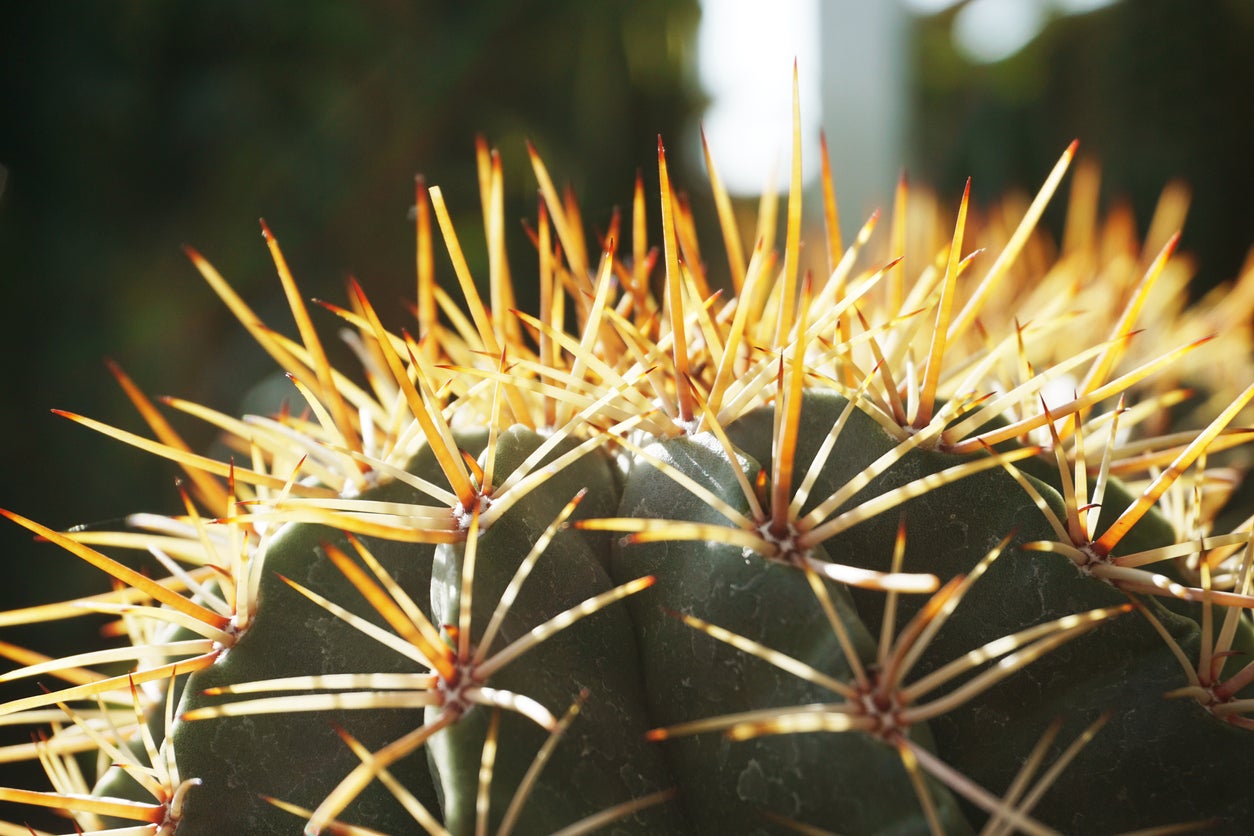
Image credit: https://www.gardeningknowhow.com/
Cactus Areoles
Cactus areoles are the small, raised areas of a cactus’ skin from which spines and sometimes hairs grow. These areoles also produce new buds, flowers, and fruits. The arrangement of the areoles on a cactus helps to identify different species. Areole is the defining feature of cacti, which is not found in succulents.
Cactus Flowers
Cactus and succulents all bloom. However, cactus flowers are far larger, showy, and more complex than succulents. Cactus flowers resemble other flowers and are normally pink, yellow, orange, blue, or red. They may be produced singly or in clusters.
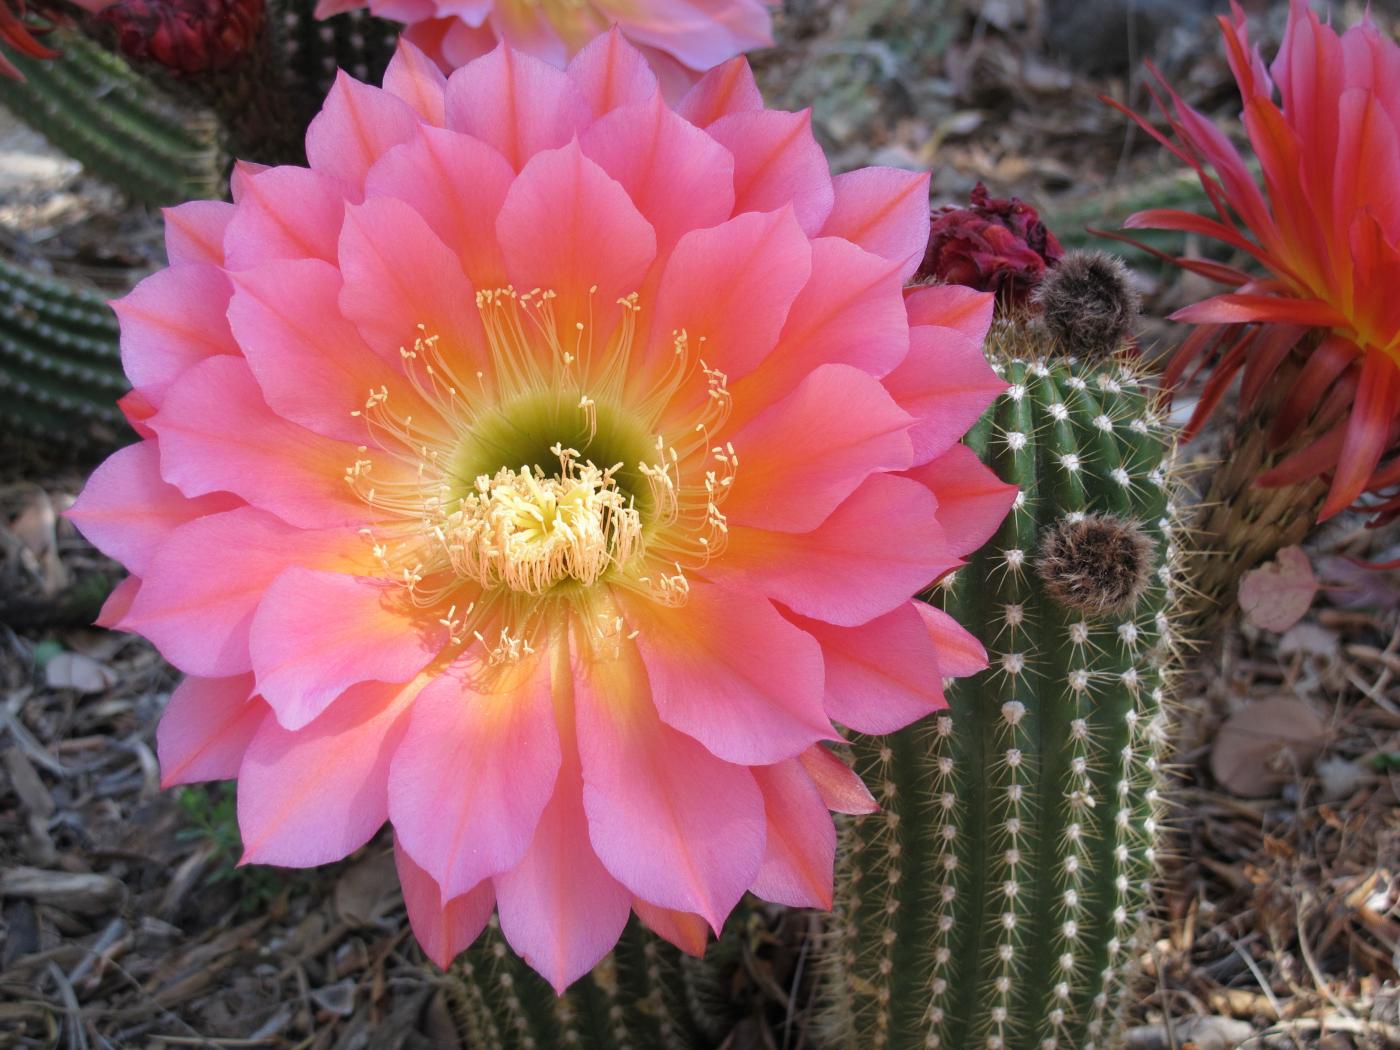
Image credit: https://knpr.org/
Cactus Fruits
Even though both cactus and succulents flower, only cactus produce fruits. Cactus fruit is typically hard and dry or fleshy and juicy. Prickly pear fruit and dragon fruit are the most known fleshy cactus fruits edible to humans.
Cactus Flutes, Ribs, and Pleats
Cactus stems are usually cylindrical or spherical but may be flattened. The ribs of cacti provide an efficient means of water storage and help reduce the plant’s weight. Cactus stems contain many pleats that expand and contract easily as they absorb or release water.
Cacti and Succulent Similarities
Although people often use the terms succulents and cacti interchangeably, these houseplants have a slight similarity. All cacti are succulents, but not all succulents are cacti. You need to look into these similarities to understand how these plants are related.
They both have spine presence and cylindrical shape. For example, some succulents also produce spiky thorns like euphorbia, a genus of succulents that is often confused with cactus due to these many thorns. Both plants can survive in both arid and semi-arid areas, thanks to their drought-tolerant features.
FAQs about the Difference Between Cacti and Succulents
Why do you need to differentiate between cactus and succulents?
Knowing how to identify a cactus vs. succulent can help you in keeping these plants’ requirements. Also, it’s good to know what you’re getting to avoid being tricked into buying something that’s not worth it. The blooming should also be a matter of concern.
Can you plant cacti and succulents together?
Yes, whether you want to plant a giant cactus or a small succulent, the way they’re potted means difference in failure and success. They’re both native to dry, low moisture environments.
They both require bright light, well-drained garden sites, and container potting soils. If you decide to plant them together, note that cacti need to be watered less often than other succulents.
Final Thought about the Difference Between Cacti and Succulents
There you have it! Apart from the differences in tolerance of direct sunlight and water requirements, keeping requirements for cacti and succulents are the same. Be sure to learn more about each of them before you get started. Make sure you familiarize yourself with the requirements specification of your variety to ensure you meet their requirements.
The post What is the Difference Between Cacti and Succulents? appeared first on Kitchen Infinity.
Did you miss our previous article…
https://www.centrecountyfood.org/?p=627


/man-in-a-kitchen-repairing-a-washing-machine-dv1449029-5a99a644875db900377b5e93.jpg)


:max_bytes(150000):strip_icc()/GettyImages-1221959730-4cb74c926be64caf8115a5a1eb2922e5.jpg)