Are you looking for plants to brighten your dark spaces? Well, white flowering shrubs may be the perfect solution for you. Not only do they look great in your garden, but also produce a wonderful fragrance.
As an element design, these white flowering shrubs convey purity and they’re often used as the foundation for moon gardens, designed to be enjoyed in the evening. Some flowering shrubs are even valued for the spring color they bring to the garden.
Here are 10 common shrubs with white flowers:
1. Japanese Andromeda
Japanese Andromeda is a flowering shrub that can grow up to 5 feet tall, with white flowers. It’s very fragrant and looks great when combined with other plants. The plant can also be shaped into a hedge or it can be grown as a single specimen.

Image credit: https://www.gardenia.net/
This is a white flowering shrub with drooping clusters of small bell-shaped flowers. The early spring blooming shrub white clusters look like lily of the valley flowers. The benefits of growing this plant include evergreen foliage offering winter interest, leaves that offer attractive red color and an early bloom period.
Also known as Japanese Pieris, this evergreen flowering shrub grows between 9 and 12 feet tall and up to 8 feet wide. To enjoy the attractive white flowering shrubs, grow Japanese Andromeda in full sun to partial shade. With the right care, this shrub will indeed form part of your gorgeous flower garden
2. Rose of Sharon
Also known as Althea, this is a large shrub or small tree that typically grows 8 to 12 feet tall but takes pruning well. It blooms from mid-summer to frost, with clusters of trumpet-shaped white flowers.
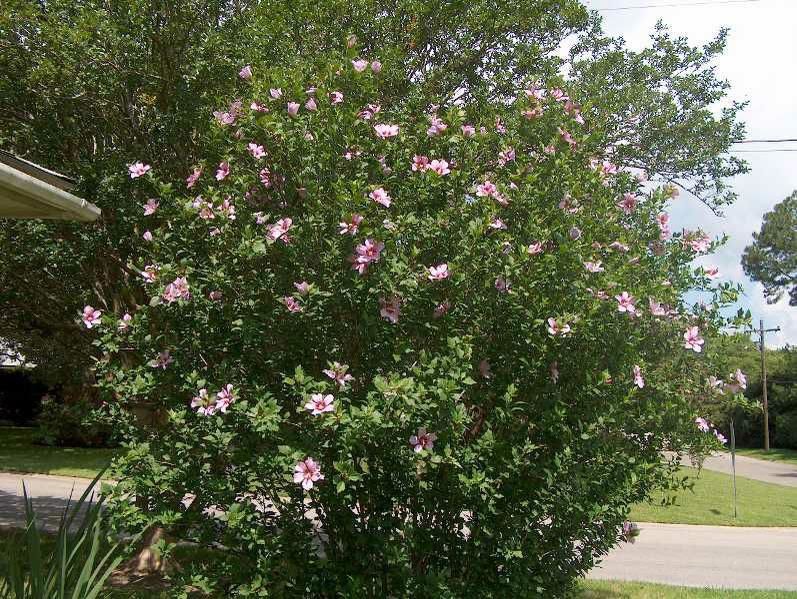
Image credit: https://bloximages.newyork1.vip.townnews.com/
This is a hibiscus to grow if others fail you. And if you want an earlier show, try one of the cultivars with variegated foliage. This upright shrub brings late-season color to the yard, making it a darling to many gardeners. Honeybees also love their big flowers.
3. Annabelle Hydrangea
Annabelle hydrangea is a summer bloomer that will flourish with dozens of large, bushy bloomers comprising a multitude of smaller, delicate blooms of any hydrangea. Annabelle hydrangea is loved by gardeners because its blooms are quite large and last from early summer through autumn. It prefers full sun to part shade and blooms well in zones 3 to 7.
4. Mock Orange
The mock orange (Philadelphus coronarius) is an easy to grow shrub that is perfect for novice gardeners. This shrub grows in zones 4 through 8 and blooms heavily in early to midsummer with clusters of sweetly fragrant white flowers. It does best in full sun but can tolerate light shade.

Image credit: https://www.gardeningknowhow.com/
Smooth mock orange can become overgrown quickly, so a rejuvenation pruning and hard pruning that cuts the bush back low to the ground is a good idea every few years. Soil needs include well drained and loamy soil while it thrives in full sun to part shade.
5. White Lilac Bushes
Lilacs (Syringa) are popular shrub choices for the garden due to their beautiful, long-lasting flowers and strong fragrance. They are an early flowering shrub that offers up large blooms in spring.
Lilacs flower in shades of white, pink and purple depending on the variety, with both single and double blooms available. White lilac flowers grow up to 8 feet long.
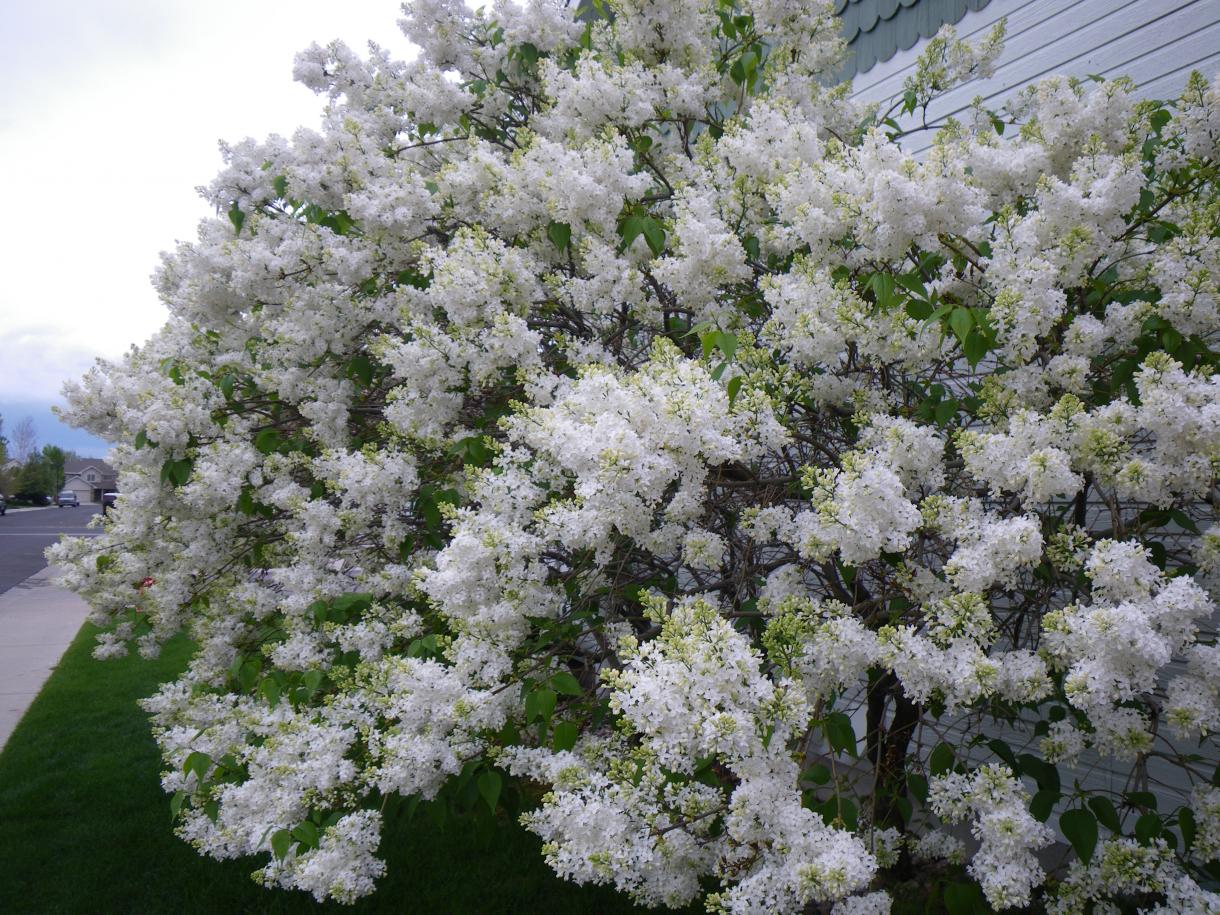
Image credit: https://www.pahls.com/
The white flowering lilac shrubs grow between 8 and 15 feet tall and up to 12 feet wide. Large lilac shrubs are ideal for summer privacy screens or hedges. If you have a small garden or container garden, opt for beautiful white blossoms of various dwarf varieties of lilac.
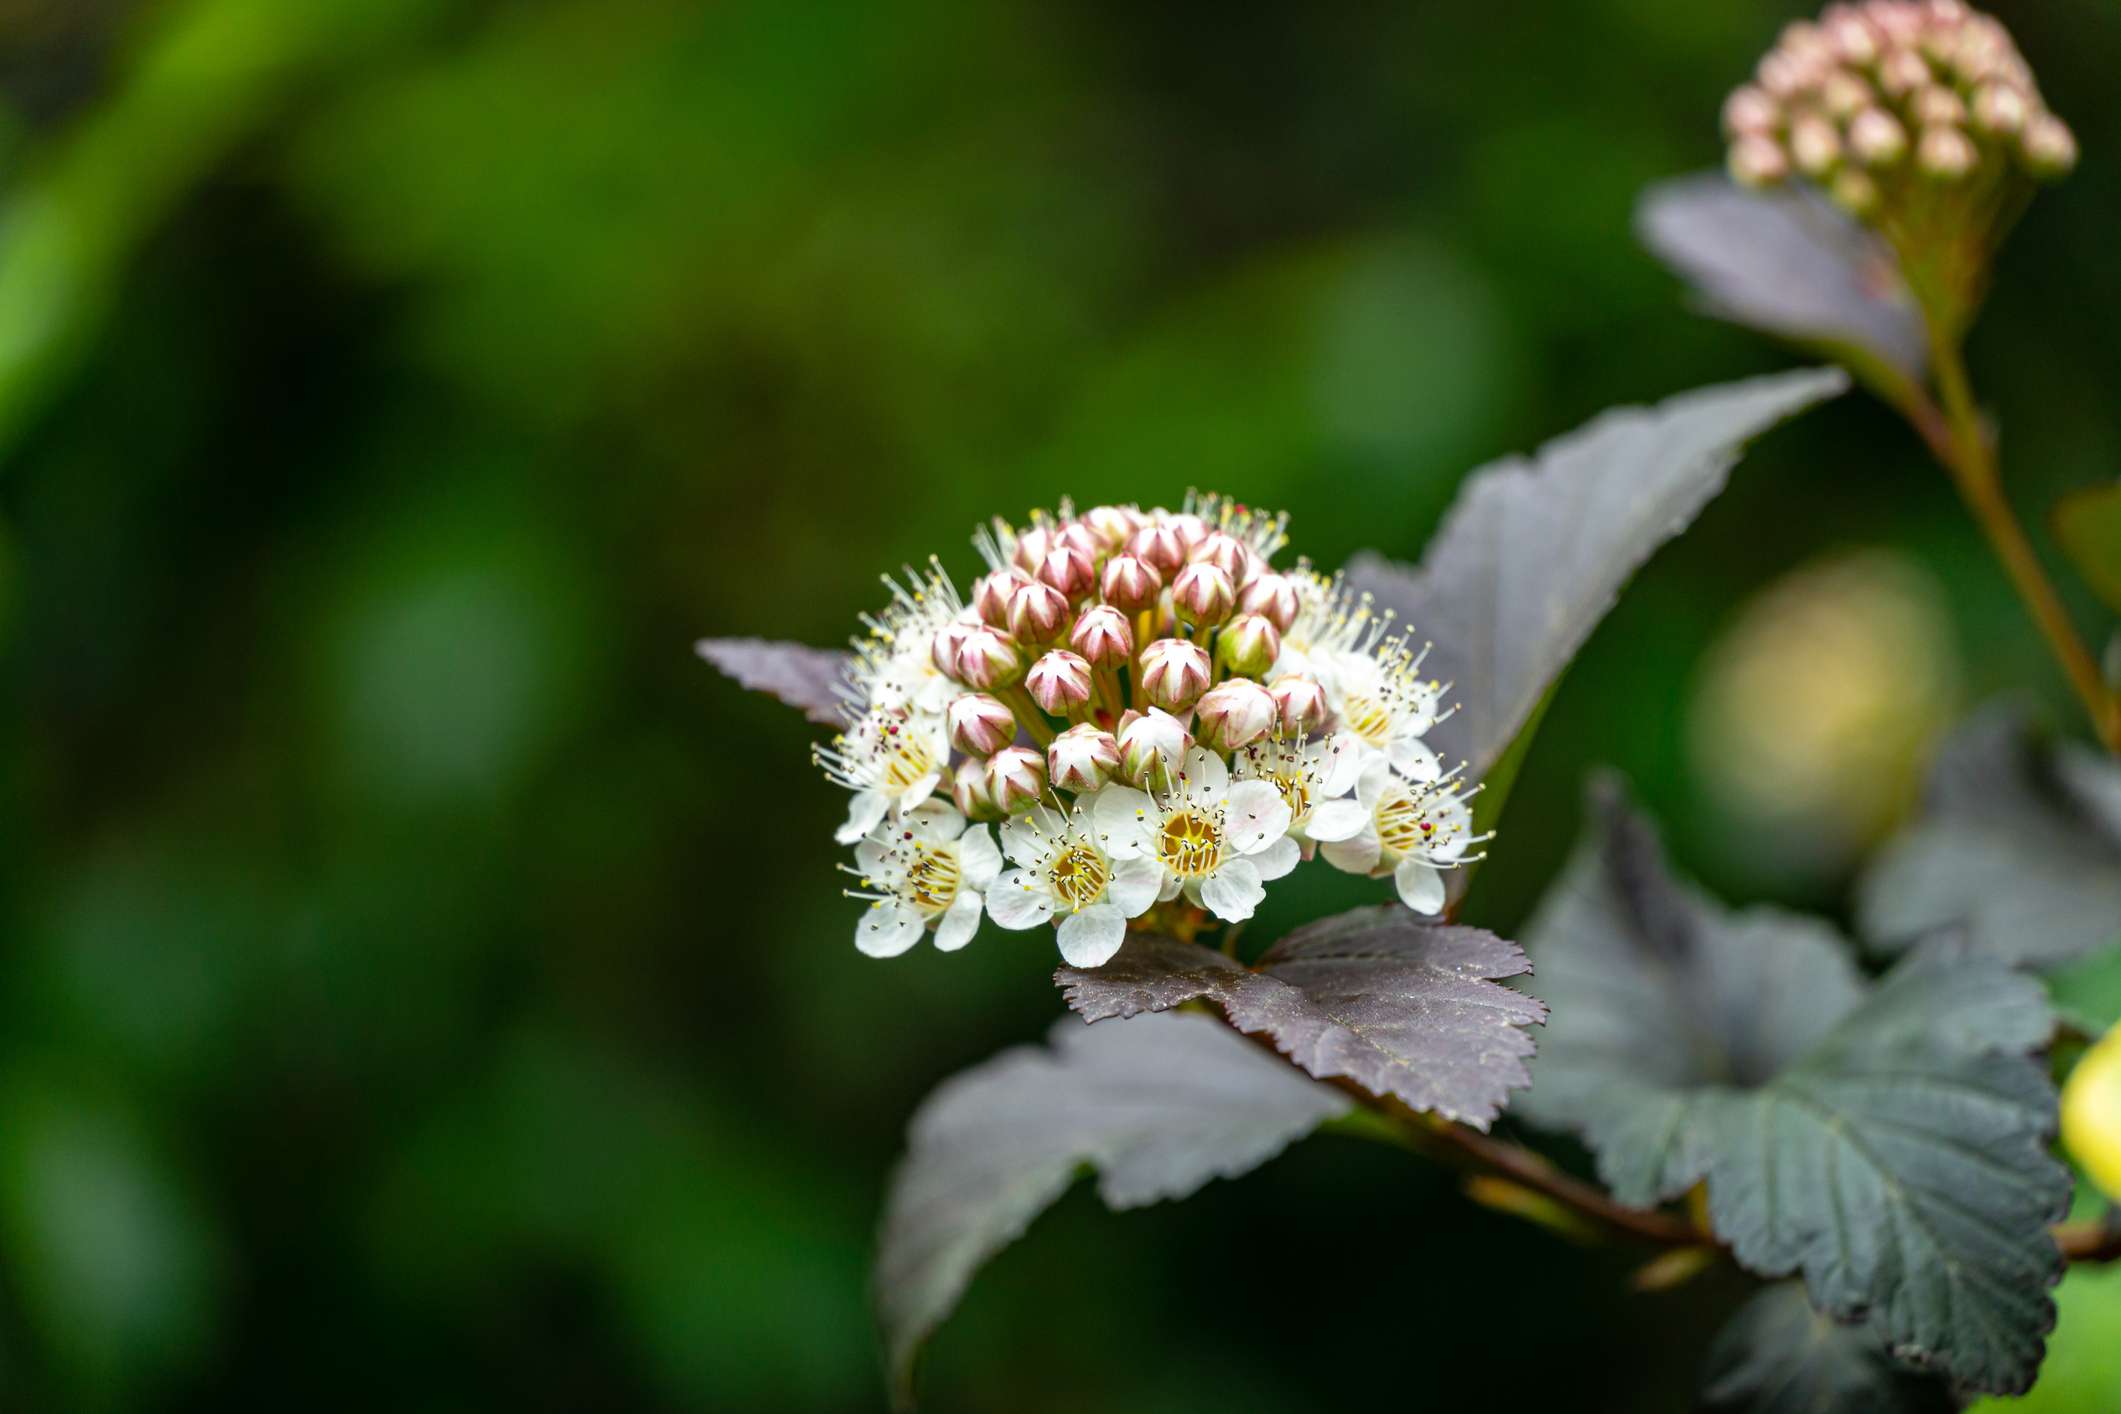
6. Korean Spice Viburnum
Korean spice viburnum is an example of a shrub that boasts of early spring flowers and fall colors. It has pink buds that open to become clusters of white flowers. It’s named after its fragrance, which contains a combination of sweetness and sharpness.
You can opt to grow doublefile viburnum if you don’t like the touch of pink that its white flowers retain. The doublefile type has white pure flowers but lacks the scent of Korean spice.
Yearly feeding with an acid-enhanced fertilizer will help improve its flowering if your soil lacks the acidity preferred by Korean spice viburnum. Mulching the base of the shrub with pine needles can also improve soil acidity. USDA growing zones 4 to 7 and prefers average, moist soil, acidic and well draining soil.
7. White Spirea Shrubs
White spirea shrubs are deciduous shrubs that typically have a height and spread of 3 to 4 feet. They have arching branches with white flowers in late spring to early summer. The flowers are followed by fruit which is attractive to birds.
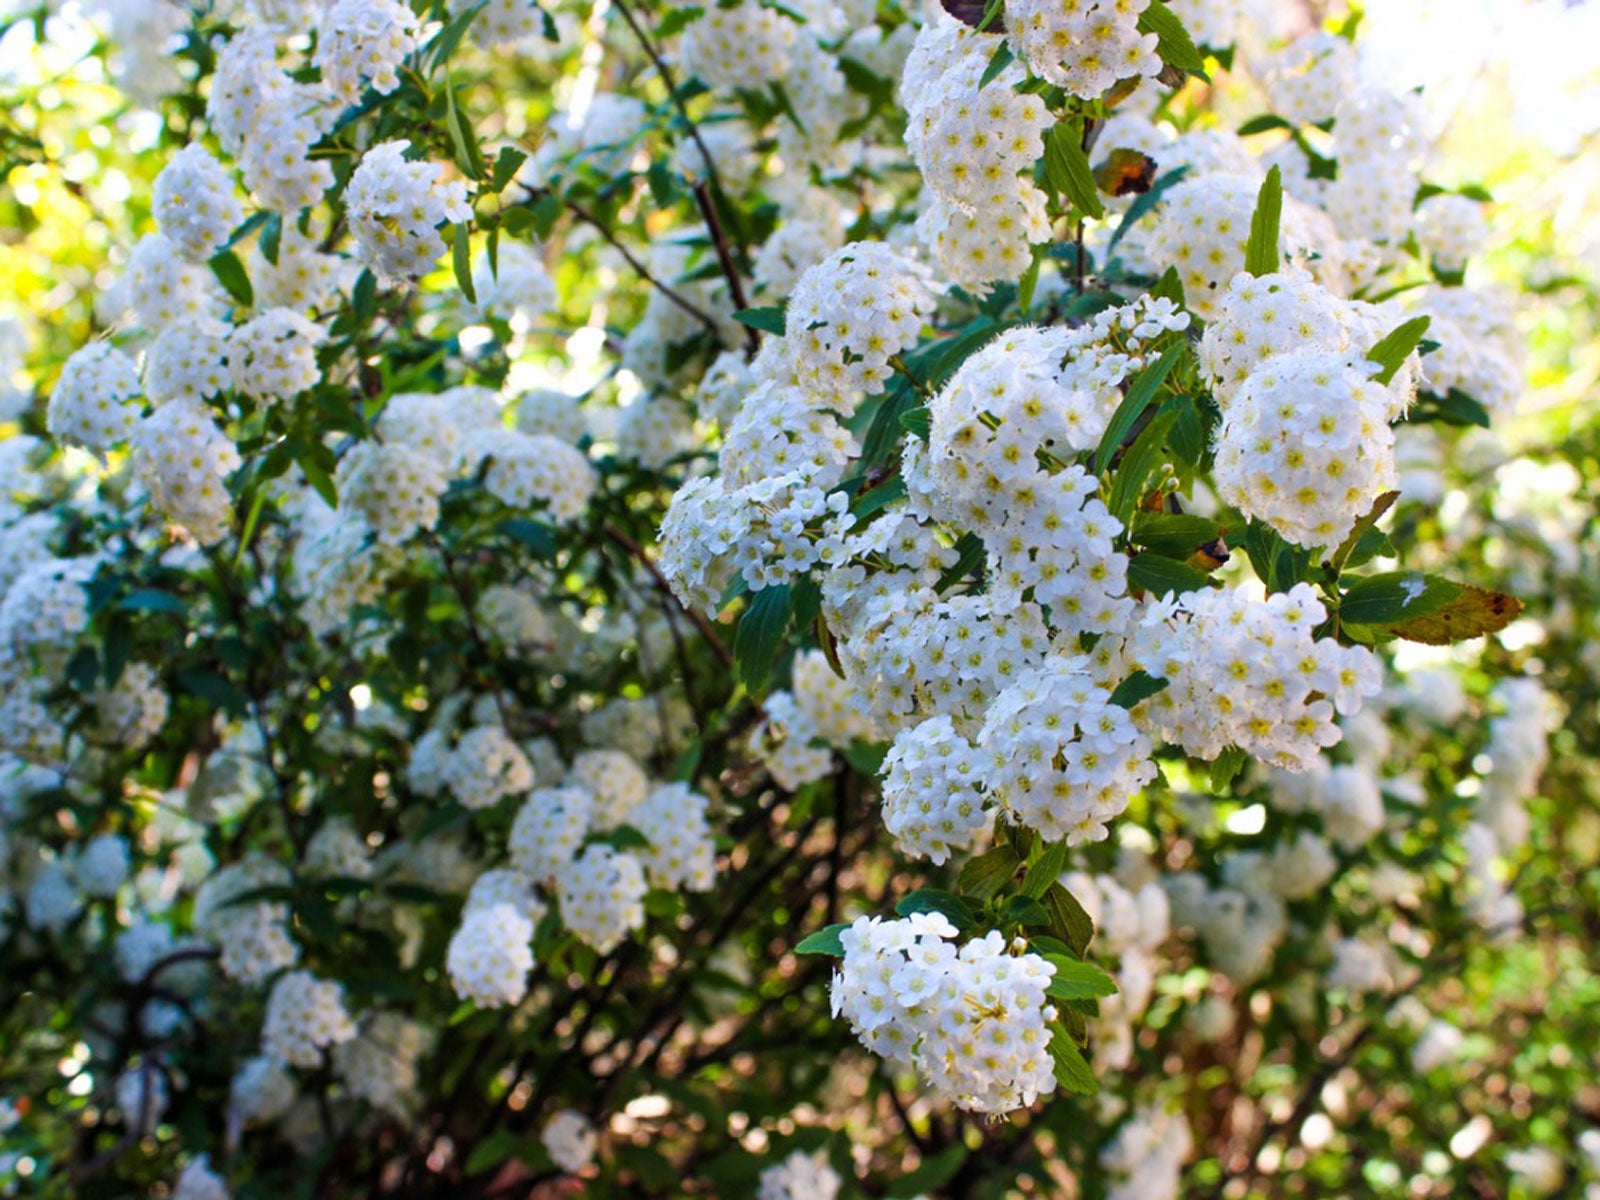
Image credit: https://www.gardeningknowhow.com/
Some outstanding white blooming spirea varieties include garland spirea, bridal wreath spirea and Korean spirea. With their abundant white flower clusters, they brighten up spring and summer gardens.
The upright, rounded shrubs grow between 3 and 9 feet tall, depending on the variety. If you’re growing in containers, consider varieties such as spirea thunbergia, birchleaf spirea and white meadowsweet spirea. Their soil requirements range from medium moisture soil to well draining soil and do well in full sun.
8. Camellia Shrubs with White Flowers
The Japanese camellia is a broadleaf evergreen with showy white flowers that bloom from late until early spring. The early blooming double flowers grow 3 feet to 6 feet wide and consist of up to 2o tightly growing petals in a peony flower like shape. Their stunning flowers complement the lush foliage.
Species of the white flowering shrubs grow various sizes of showy flowers with some being as small as 1.5 feet. The shrubs with their white flowers grow well in containers and shrub borders create beautiful fragrant flowers.
9. Azaleas
Azaleas are another class of abundant white blooming shrubs that are ideal for garden borders or hedges. They bloom in early spring or late spring, depending on the variety. The great white varieties include Northern hi lights, Pleasant White, Delaware Valley White, Cascade White and Bloom a Thon White.
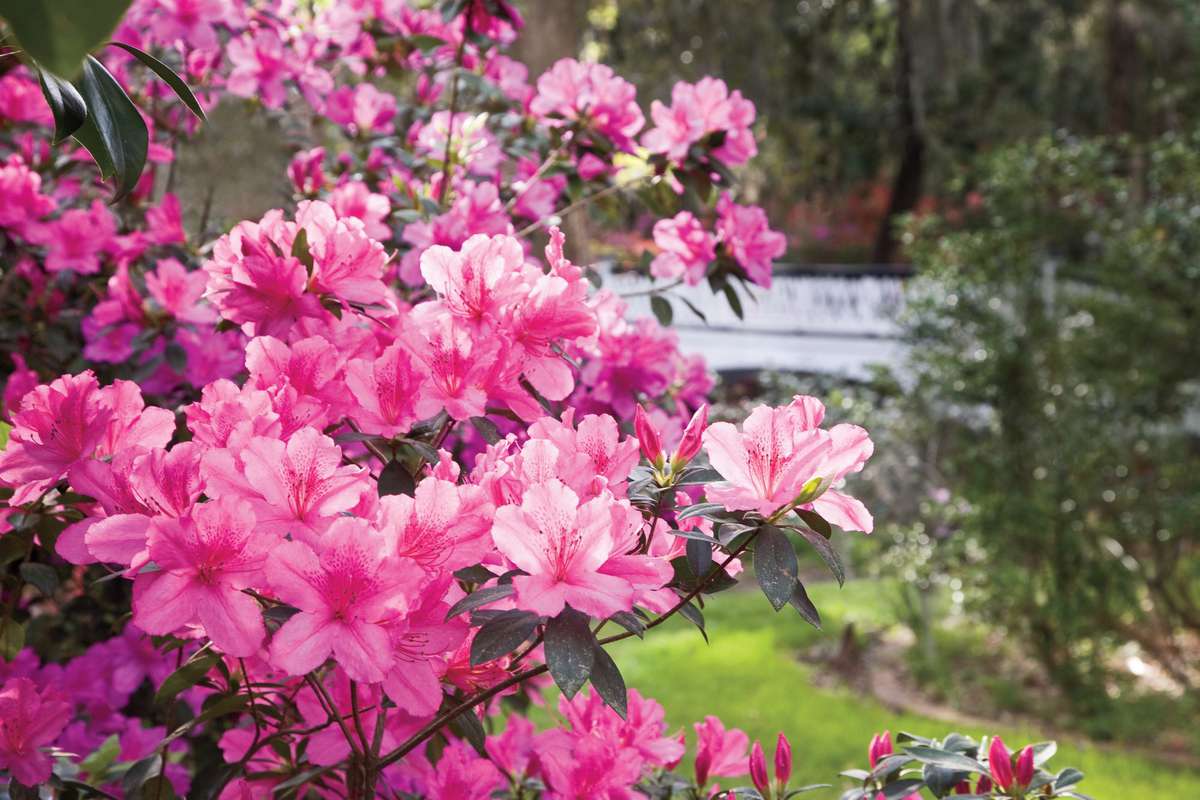
Image credit: https://imagesvc.meredithcorp.io/
Hardiness zones and sizes depend on variety as some are suitable for most climates from zones 3 to 9 and from sizes ranging from 2 to 3 feet to 15 feet. Azaleas are excellent in woodland settings.
Their foliage is unremarkable after the flowers have faded, although some varieties have pleasing fall colors. Unless your soil has the natural acidity preferred by azaleas, feed them with an acid-enhanced fertilizer formulated for acid-loving plants such as rhododendrons, camellias and azaleas.
Their color varieties range from white, lavender, purple, orange, peach, pink and red. Grow this plant in full sun to part shade and soil needs include rich, medium moisture and well drained soil. It also prefers acidic soil.
10. Hibiscus Syriacus
This plant is a deciduous shrub that typically grows 6 to 10 feet tall and as wide. It has an upright growth habit with arching branches. White flowering shrubs with yellow centers appear in late summer to early fall. Plant in partial sun to part shade and soil that is moist, well-drained, and has some organic matter.
11. Snows of Kilimanjaro
This plant is a large tropical shrub that typically grows 6 to 10 feet tall and 4 to 16feet wide. It has an upright growth habit with arching branches. White flowers with yellow centers appear in late summer to early fall.
As a member of the Euphorbia genus, it’s related to that Christmas favorite. Its alternate common name is known as little Christmas flower. As with poinsettias, flowering comes into bloom as days shorten. When the fragrant white flowers emerge, the bush reminds of a giant snowball.
To promote that snowball look, give the plant a severe pruning back in early spring, then another in early summer. When pruning, make sure you wear gloves because you may be allergic to its milky sap. It Grows in zones 10 to 13 and prefers full sun to part shade. Soil needs include medium moisture to well drained soil.
12. Dwarf Deutzia
This plant also has a great look for the winter months. Its leaves are smaller and more along those of perennials. The flowers will emerge in spring as do those from the shrub form.
:max_bytes(150000):strip_icc()/dwarf-deutzia-ground-cover-4125668-01-c0e6dad059c840a48ebb5add35198609.JPG)
Image credit: https://www.thespruce.com/
What makes it special despite being a shrub is that it can function as a ground cover because it stays so short and is wider than it is tall, approximately 2 feet tall with a spread of 5 feet. It’s a late spring bloomer with small but fragrant bell-shaped flowers.
The foliage on the dwarf variety turns an attractive burgundy in the fall. It needs regular pruning because their branches are fairly short-lived. Soil needs include medium moisture soil and good tolerance for clay soil. Grows in hardiness zones 5 to 8 and thrives in full sun to part shade.
FAQs about Recommended White Flowering Shrubs
What is a shrub with white flowers?
Pieris Japonica, also known as the Japanese Andromeda, is another evergreen, spring-blooming shrub with white flowers and a beautiful scent. It’s easy to grow and has the added benefit of being deer resistant.
Why do these shrubs have white flowers?
The shrubs with white flowers have this color because they contain a lot of anthocyanins. This is a type of pigment that is responsible for the red, purple, and blue colors found in many flowers and fruits. These white flowers enable them to light up a garden in the springtime.
Final Thought on Recommended Shrubs with White Flowers
As you can see, there are several shrubs that can help brighten your garden in the springtime. If you’re looking for plants that will bloom white flowers, then be sure to consider these options. Not only are they beautiful, but they’re also easy to grow and maintain. So, what are you waiting for? Start planting today!
The post 12 Shrubs with White Flowers appeared first on Kitchen Infinity.